KDPV. Based on the.
The post was written based on this comment. I was especially inspired by the picture in the replies to this comment. Initially I wanted to write here about the UI and the basics of modeling in Blender, but it turns out to be too much (I’m wordy). Therefore, about modeling - later (if the public wants). And here - about UI Blender from a layman's point of view.
Introduction/preface/disclaimer.
I’m not a real welder and I do 3D modeling just for fun and quite sporadically (as can be seen from my results in KDPV).
And I really want to emphasize this. Not a single model of mine went further than my computer and I gave my assessment to myself. I started, like many others, with 3Ds Max Studio Autodesk (I still don’t know the correct name for Tridemax). What is a stack of operations, how to texture, make translucent material and render - I have mastered it. How to make a boat using NURBS - no. After reinstalling the system again and trying to figure out why “Autodesk 3ds Max 2009” is better than “Discreet 3dsmax 7” and, based on this data, giving the selected version of the package time to download and gigabytes of the system partition for installation (with the accompanying contamination of the system with all sorts of additional programs), I gave up . My hobby is modeling, not rendering giga-high, hour-and-a-half-hour cartoons for the next version of Warcraft. By that time, I had already had a good look at the Max interface (mainly to solve another problem like “how can I return the display of rotation/zoom arrows”) to decide for myself that Max is like Word, almost everyone uses 5% of the functionality, the remaining 95% are needed by professionals, of whom there are only 5%. To Caesar - Caesar's.
Overall, I was willing to accept the loss of the ability to assign hair to a ball in exchange for a more manageable modeling program. After studying the market, discarding other processors like Maya and LightWave, and not accepting SketchUp, I installed Blender. I’ll say right away that I was lucky, and by the time of my search the guys from the Blender Foundation had moved away from their old interface:
Figure 0. Interface of version 2.4, which, fortunately, I did not find.
The program turned out to be:
- Free - no comments.
- Lightweight: Blender-2.76b-windows64.msi: 79.8 Mb
- Autodesk 3ds Max 2020 x64 (I’m even afraid to imagine what the installer looks like): 7000 Mb (according to the rutracker)
- .fbx (these are your Unity ones with these animations of yours)
In general, I began to get used to it and then use it. The process has been going on for several years. The process is episodic, and, I repeat, in the form of a hobby. Below, in fact, are my results of mastering it.
Video for Blender 3D
Blender 3D Tutorials for Beginners
A useful, interesting course consisting of 28 video lessons with a total duration of 6 hours 30 minutes. During this time, the author will talk in detail about the program interface and teach you how to create 3D models of varying complexity. From the course you will learn how to take 3D photography and learn how to work with camera tracking. The clarity of the video format greatly facilitates the learning process and quickly transforms beginners into confident users. {banner_lesson} Lesson 1 - Interface Overview
Lesson 2 - Customizing the interface Lesson 3 - Creating a simple object
Lesson 4 - Modeling a vase
Lesson 5 - Making Rings
Lesson 6 - Creating Rings (Materials, Lighting, Post-Processing)
Lesson 7 - Creating a world of boxes
Lesson 8 - World of Boxes (Post-Processing, Materials, Lighting)
Lesson 9 - Modeling a stool Lesson 10 - Modeling a stool (Texture, light, rendering)
Course content:
Lesson 1 - Interface Overview Lesson 2 - Interface Setup Lesson 3 - Creating a Simple Object Lesson 4 - Modeling a Vase Lesson 5 - Creating Rings Lesson 6 - Creating Rings (Materials, Lights, Post-Processing) Lesson 7 - Creating a Box World Lesson 8 - A Box World ( Post-processing, materials, light) Lesson 9 - Modeling a stool Lesson 10 - Modeling a stool (Texture, light, rendering) Lesson 11 - Modeling tires Lesson 12 - Creating a 3D photo Lesson 13 - 3D photo (Advanced) Lesson 14 - 3D photo (Wind effect) Lesson 15 - 3D photo (Night) Lesson 16 - Creating a 3D room from a 3D photograph Lesson 17 - Creating a 3D building from a 2D photograph Lesson 18 - Facial expressions and gestures in photos Lesson 19 - Composition nodes Lesson 20 - Chroma key and combination with 3D. Lesson 21 - Cartoon Render Lesson 22 - Romantic Filter Lesson 23 - Camera Tracking (Basics) Lesson 24 - Camera Tracking (Hands-on #1) Lesson 25 - Camera Tracking (Hands-on #2) Lesson 26 - Camera Tracking (Hands-on #3) )
Default window
Figure 1. Default window for versions 2.6+ after startup.
Pay attention to the buttons circled in red squares. It doesn’t look super simple, but, IMHO, that’s because the guys from BF believe in “showing the product with your face.”
As can be seen from the inscriptions in the picture, the situation when starting with the default settings is as follows:
- A cube, a lamp and a camera have been added to the stage. Which, theoretically, gives us the opportunity to instantly start rendering the scene (F12 to start, Esc to exit) and get a non-black screen.
- The control panels for the 3D scene area are open, which, again, theoretically, makes it possible to immediately tune the displayed scene.
- A timeline area has been added in case we again immediately want to animate the cube.
In my opinion, the decision is controversial. But, on the other hand, it immediately shows the ability to open several areas, how modeled objects look, and talks about customization panels.
What is the price?
Maya is expensive software. The software is sold by subscription for a month, a year and three years with automatic renewal. By August 2020, you can subscribe on the official website at the following prices:
On August 7, 2020, Autodesk released an indie Maya license for independent developers. According to it, annual use of the software will cost you only 12,000 rubles.
But there is also a student, free, version of the program for a year with a possible extension. You cannot create commercial projects under this license, but you have the opportunity to master all the functionality of the software. The official website has a training catalog divided into categories.
Blender is a free program with low system requirements. The software is popular both among students and freelancers, as well as among major industry players.
In addition to official documentation and support, you can find dozens of training materials online from the users themselves. The program has a very dense community all over the world. All social networks and chats are located on the official Blender website.
In fact
Anyway, what you actually see is this:
Figure 2. Blender window structure.
I would like to draw your attention to the absence of serial numbers next to the words “Area”. In fact, the blender window itself is a desktop with a manageable set of areas (in the program they are called Area). The menu (at the very top) is also an area. They can be resized (as usual, with the mouse over the edge of the area), split/glued (again, with the mouse over the edge of the area, right click, select the desired option), change the type (the menu is also an area type).
Figure 3. On the left is the menu for splitting/merging areas, on the right is the button for changing the area (see also Figure 1).
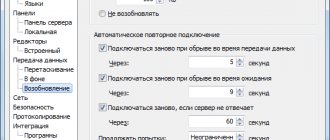
You can make a nostalgic layout (I used this at first, then I learned the buttons for changing views in the 3D area (NumPad 1,3,7 - front, right, top. If together with Ctrl - then the opposite ones - back, left, bottom. NumPad 5 - switch between orthogonality and perspective)):
Figure 4. 3DS Max - similar interface.
The developers also added a layout switch (the ability to add or remove), with pre-configured layouts. IMHO, this is for later stages of the learning curve. At first I didn't need it:
Figure 5. On the left is a button for selecting an existing layout, on the right are buttons for adding and deleting the current layout.
It is important to note that Blender has a function for saving UI settings (File->Save Startup File).
As a result, I removed the pre-created lamp, camera and cube from the scene, and also glued the animation area to the 3D scene area, thus killing the entire idea of the guys from BF. Then I used the specified function. Now at the start I have a window like this:
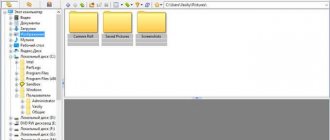
Figure 6. 4 areas - menu, outliner (scene content), setup and, in fact, 3D scene.
When I start a new model, this is the bare minimum. Further, knowing the above, you can do anything in terms of display.
To summarize.
It's not Blender that's scary, it's the default settings that are controversial.
Retreat
As mentioned earlier, the program can do a lot, and at the same time it looks digestible from the start.
Conceptually speaking, all these dances with layouts, in my opinion, serve one purpose - to allow the user to focus on a certain type of task, at the cost of discarding features that are unnecessary at this stage (compare predefined layouts, for example, scripting and motion tracking). That is, the program looks different at different stages and, in general, requires different knowledge (which personally allows me not to overload my brain with video editing, for example).
Returning to Max - I once read that the first versions were written for DOS and, accordingly, had a limit of 640 KB (you can look at the prototype in general vimeo.com/9652184). Hence the solution - a set of programs instead of one program. That is, to render a three-dimensional letter, you had to:
- Open a 2D line drawing program that allowed you to make splines, for example, and draw a letter. Save the file, close the program.
- Open a 3D modeling program with Bevel support, draw out the letter in 3D, save, close.
- Open the texture program, stretch the texture, save, close.
- Open the render program, render.
I see similar mechanics here, with the only difference being that switching between types of tasks is instantaneous. The task, in this case, is determined by you yourself. And, what is important for me, the interface remains clean.
[edit] Features
Interface
When describing Blender, the first thing you will hear is its small size. When installed, Blender takes up about 10MB. In the distribution you will not find extensive documentation and a large number of demo scenes. Once installed, Blender provides you with a working environment with a range of high-end 3D modeling features.
Among them:
- Supports a variety of geometric primitives, including polygon models, subdivision surface fast modeling, Bezier curves, NURBS surfaces, metaballs, polygon clipping, and vector fonts.
- Universal built-in rendering engines and integration with YafRay.
- Animation tools, including inverse kinematics, reinforcement (skeletal) and mesh deformation, key frames, non-linear animation, timeline, vertex weighting, constraints, soft body dynamics including detection of collisions of object shapes during interaction, fluid dynamics, Bullet rigid body dynamics, hair system Particle-based and particle system when detecting object collisions.
- Python is used as a tool for creating tools and prototypes, logic systems in games, as a means of importing/exporting files (for example COLLADA), and automating tasks.
- The basis of a non-linear video editing and music editing system.
- Game Blender is a sub-project of Blender that provides interactive features such as collision detection, a dynamics engine, and programmable logic. * It also allows you to create separate real-time applications ranging from architectural visualization to video games.
[edit] Advanced features
In Blender, an Object (which is an entity that interacts with the world around it) and its Data (the specific form/function of an object) are separated. An Object-Data relationship is represented by an m:n relationship (a database theory term that refers to the ability of multiple objects to share the same data) and is dynamically linked, allowing for some of the fast modeling processes unique to Blender. An internal file system that allows you to store multiple scenes in a single file (called a .blend file). All ".blend" files are compatible with both older and newer versions of Blender. Also, they are all portable from one platform to another. And they can be used as a means of transferring previously created content. Blender makes backup copies of projects while the program is running, allowing you to save data in case of unforeseen circumstances. All scenes, objects, materials, textures (only your own, not imported), sounds, images, post-production effects can be saved into a single “.blend” file. Workspace settings can be saved to a “.blend” file, so when you download the file you will get exactly what you saved in it. The file can be saved as a “user default”, and every time you launch Blender you will receive the necessary set of objects and an interface ready for use.
However, the internal contents of a ".blend" file are less like a structured description of objects and their relationships, and more like a direct dump of a program's memory area. This makes it nearly impossible to convert ".blend" files to other formats. It should be noted that there is a very advanced mechanism for exporting to various formats, such as obj, dxf, stl, 3ds and others (the list is gradually growing).
[edit] User interface
Blender had a reputation for being difficult to learn. Almost every function has a corresponding shortcut, and given the number of options Blender provides, every key is included in more than one shortcut. Since Blender became an open source project, full context menus have been added to all functions, and the use of tools has been made more logical and flexible. Let's add here further improvements to the user interface with the introduction of color schemes, transparent floating elements, a new object tree viewing system and various minor changes.
Blender's user interface follows the following distinctive concepts:
- Editing modes. The two main modes are Object mode and Edit mode, which can be toggled with the Tab key. Object mode is primarily used for manipulating individual objects, while edit mode is primarily used for manipulating actual object data. For example, for a polygon model in object mode we can move, resize and rotate the entire model, while edit mode is used to manipulate individual vertices of a particular model. There are also several other modes such as Vertex Paint and UV Face select.
- Widespread use of hotkeys. Most commands are executed from the keyboard. Before 2.x and especially 2.3x, this was the only way to execute commands, and this was the biggest reason Blender had a reputation for being difficult to learn. The new version has a more complete graphical menu.
- Workspace management. Blender's graphical interface consists of one or more screens, each of which can be divided into sections and subsections, which can be any part of the Blender interface. The graphical elements of each section can be controlled with the same tools used for manipulation in 3D space; for example, you can zoom in and out on the tool buttons in the same way as in the 3D view. The user has full control over the layout and organization of the graphical interface, this makes it possible to customize the interface for specific tasks, such as video editing, UV mapping and texturing, and hide interface elements that are not needed for a given task. This GUI style is very similar to the style used in the UnrealEd map editor for the game Unreal Tournament.
Although Blender (as of version 2.41) still lacks the capabilities of proprietary software (such as N-gon modeling), Blender's workspace is considered to be among the most innovative GUI concepts for graphical tools and is inspired by the GUI design of proprietary programs such as Luxology's Modo.