When creating the new operating system, Microsoft developers made significant changes to the interface design. During the development of Windows 10, all the icons of the system were carefully worked out, and several options for their graphic design were created. This gives the user the opportunity to choose the appearance of the icons according to their preferences. And desktop icons are no exception.
Most users are already accustomed to the appearance of icons in Windows 7. In the “top ten,” the design has changed dramatically, but not everyone wants to accept them. But the developers took care of all users and thought through an algorithm for replacing the icons with the usual “seven” icons.
In this article we will tell you how to change the appearance of icons on the desktop, as well as how to change icons to your own icons or to those that are already in the system.
Changing the appearance of the main desktop icons
See also: “The Start button does not work in Windows 10: how to fix it”
Basic desktop icons are those icons that appear on the desktop by default, immediately after installing Windows. In order to change the appearance of any of them, you need to follow the steps described below:
- Press the Win + I key combination to open the “Options” menu.
- In the window that opens, go to the “Personalization” section.
- Click on the “Themes” item.
We would like to draw your attention to the fact that the three points listed above can be replaced with another action. Right-click on any free area of the desktop and select the “Personalization” section from the menu list that opens.
- Next, scroll down the right side of the window, select “Desktop icon settings” and click on it.
- Select the name of the icon you want to replace from the list. Then click on the “Change icon...” button.
- Now you can select the icon you like from the list proposed by the system and click the “OK” button.
Note: Or you can upload your own image in “dll” or “ico” format. To download your icon, the archive with icons must be unpacked. Then click on the “Browse” button and specify the location of the required file.
- Having changed all the desired icons, confirm the changes by clicking the “Apply” button to view them, or immediately click “OK” to apply and exit this window.
Many ready-made desktop icons can be downloaded absolutely free on the Internet.
Using the registry archive
If you have problems with the normal opening of .exe executable files, .cpl managed applications, .msi installers, shortcuts and folders, you can restore them by downloading the special Windows ResetFileAssociations.zip archive. Each version of the operating system has its own archive, that is, an application downloaded for Vista will not work for Windows 7, etc.
The resuscitation procedure will be as follows:
- Download and unzip the archive using the WinRar or 7-Zip utility.
- Run the association file.
- The system will ask you to confirm your actions. Click “Ok”. After this, all associations that should be by default will be restored in the registry.
To change data in the registry, you must have administrator rights.
Another way out of this situation is to download a backup copy of the Windows registry saved on your computer (backup document). Saving the registry is a very useful feature that allows you to get rid of many problems associated with system failures and virus attacks.
To create a registry backup, you must:
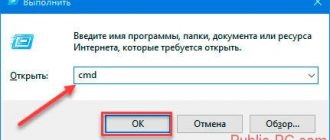
- In the Start menu, in the Run field, enter the regedit command.
- Once in the registry, we export its contents. To do this, click “Export” in the “File” menu.
- We indicate the location for copying the data, enter any document name and select which branch you want to save. If you need to copy all the information, Fr.
If you need to make any changes to the registry (for example, restore default file associations), you should enter the folder where you saved the backup copy and run the executable file.
Can all desktop icons be changed?
Of course, you can change the appearance of any icon. Only files related to the current user account located in the “Desktop” directory cannot be changed.
Let's change the appearance of the application icon and take the popular Google Chrome browser as an example.
- Right-click on the icon you want to change. In the list that opens, select “Properties”. Or, to open the “Properties” window, use the Alt+Enter key combination.
- Click on the “Shortcut” section, and then click on the desired button “Change icon...”.
- We select the icon appearance that suits us from the proposed list and confirm the changes by clicking the “OK” button.
- The system will return us to the previous window with properties, but with a new icon. Here we click on the “OK” button again to finally commit the changes made.
It is also possible to choose your own picture for the icon. To do this, you need to click on the “Browse” button and specify the path to the desired file in the “ico” format.
Restoring associations using the command line
This method allows you to restore the association of files in Windows with any extension. To do this you need:
- When restarting the PC, press F8 and select the appropriate item in the boot method selection window.
- Once in command line mode, run the association command for the damaged file type (assos.bat=batfile, assos.exe=exefile, etc.).
Changing the appearance of the catalog icon
In principle, there are no significant differences in changing the appearance of an application or folder shortcut.
- Right-click on the folder and select the “Properties” option.
- In the list that appears, select “Settings” and here, in the “Folder icons” item, click on the “Change icon...” button.
- Select the desired image and, similar to the steps described above, confirm the changes.
File associations in Windows 10
Well, finally, we have come to the latest operating system at the moment, let's figure out how to restore the default file associations of Windows 10.
Let me remind you, Dear Reader, that the methods described above for Windows 7 will also work here.
As you know from the history of Windows 10, it evolved from the eight, and that means this is how the combination should work
Win+I, press
The Settings window will open, in it you need to open the System item.
In the System item, go to the Default Applications tab, it is responsible for matching file associations with programs on your computer. On the right side, you need to scroll the slider to the very bottom.
There are 4 useful points here:
- This Reset > button is necessary to return to the default values recommended by Microsoft, in Russian this is to restore file associations to those that were present when the system was installed. Useful when, after some virus, all or a large number of file types are lost.
- Select default apps for file types
- Selecting Standard Applications for Protocols
- Set Defaults by Application
Let's figure out what is responsible for what. The first thing we'll click on is Select default applications for file types. You will see a complete list of all formats, for example, I chose the .avi format, these are video files, by default it opens with the Movie and TV application, I click on it and you will see a more expanded list of available applications, if something is missing, then click Find application in the Store, this is a manual file association mapping in Windows 10.
Now select the Select standard applications for protocols item. Let me remind you that protocols are simple rules and standards by which all programs operate. Let's say I want the http protocol, which is responsible for viewing web pages, to open not Microsoft Edge, click on the icon and we see the same familiar list with a choice of utilities.
And the last item is Set default values by application. It will open a window where the entire list of programs installed in Windows 10 will be presented, and you will be able to set the one you need as the default program. A simple example, the default browser in Windows 10 is Edge, but for example I want Internet Explore, for this I select it and click use as default.
Or I can say that Edge will be the default, but the https format will be opened by Internet Explore, this is done in the Select default values for this program item.
As you can see, setting up file associations in Windows 10 is no more difficult than older OSes. But these are not the latest methods; there are also special utilities that allow you to do the same.
Another option is to open the search and enter programs in the search bar, and then select Default programs from the list of found ones
And you observe all the same points that you have already seen.
If, say, yesterday you had the correct file association in Windows, then try restoring the Windows 10 system.
Association of Windows files using utilities
Above, we looked at what a file association is and how to restore it in different operating systems; we looked at the built-in tools, but for the lazy, there are also third-party utilities that allow you to solve the same problems; I’ll give two as examples.
You can download both utilities from the Yandex disk at the end of the article.
Unassociate File Types utility
Unassociate File Types helps restore associations of .exe and .lnk files. Download it and launch it. I’ll tell you right away the program for Windows 7, for 8 and 10 just below. The program itself is similar to the registry method, select the desired format and press Delete file type, after which the association with this format will be deleted, then you open the desired program and simply drag the file you need into it.
Ready-made reg files for Windows 10
There are comrades from tenforums.com who have already prepared ready-made launchable registry files, you need to download and apply them. Download below.
We reset file associations in Windows 10, download the archive file, unpack it.
Specify the folder destination.
As a result, you will have a folder with a large list. Select the one you need and launch it. You will see a message from Registry Editor stating that entering information may cause values to be changed or deleted unintentionally - agree and
After the message about the successful addition of data to the registry, close the registry editor and restart the computer, everything should work as before.
After logging in, the Windows file association will remain the same.
To summarize, we figured out what a file association is, how to restore it if it suddenly goes wrong, if you have questions, write in the comments.
Creating an icon yourself
If you don't want to use ready-made icons, you can create your own original icons. To work, you will need a special program; it is best to download the IcoFX utility from the official website.
- Launch the downloaded program and open a raster image (square) in it. This picture will become the basis for our author's icon.
- Click on the “Create a Windows icon from the image” option.
- As a result, the picture is converted into a pixelated image with different sizes.
- We save the image in the “ico” format and now it can be loaded through the “Browse” button in the icon change window.
Using additional software
In addition to the methods built into the Windows system for restoring associations, there is also additional software that allows you to solve this problem. One such program is File Association Fixer, which is capable of reviving 18 of the most popular associations. It does not require installation. Just open the file with the .exe extension, select the required associations and click Fix Selected.
Also a good resource is the CleanAutoRun application, which, after launch, restores all associations automatically.
If you have problems with .exe executable files, then in order to run the above programs you need to additionally change the default .exe value to .com.


