Adjusting screen brightness is one of the most important operations that every PC user should be able to perform. Thanks to the correct level of brightness, you can protect yourself from fatigue and dry eyes, as well as prevent a sharp deterioration in vision. Also, properly setting up your screen will help reduce battery consumption, and you won’t have to worry about sudden computer shutdowns.
How to increase screen brightness on Windows 10
The Windows 10 operating system offers many different ways to adjust screen brightness. In this article I will try to tell you in as much detail as possible about each of them.
Method 1: Adjusting screen brightness through Settings
To solve various everyday tasks, Windows 10 has a specialized application - “Settings”. With it, you can adjust the brightness level in just a couple of clicks.
Step 1: Open the Settings app. This can be done by simultaneously pressing the Win+I keys. You can also enter the corresponding name in the search bar.
Open the Settings application
Or find the gear icon in the Start menu and click on it.
In the Start menu, click on the gear icon
Step 2. Next, select the “System” line.
Select the line “System”
And then select “Display”.
Select "Display"
Step 3: Adjust the screen brightness to the desired level by moving the slider to the desired position.
We use the “Action Center” to adjust the screen brightness level in Windows 10
Thanks to the action center, you can change the light level of the monitor.
You just need to perform a few sequential steps:
- On the taskbar you need to find the “Action Center” icon and LMB click on it;
- In the window that opens, look for the “Expand” item and click on it;
- Find the brightness change button in the “Quick Actions” section.
- There you can reduce or increase the screen light value.
In this case, the display lighting switches “by levels”. Let's say if the value was 50%, then clicking once on the brightness area will increase it to 75%.
Method 3: Battery indicator to adjust brightness
There is another easy way to adjust the screen brightness for easy use.
Step 1: At the bottom right of the screen, find the battery indicator and tap on it.
At the bottom of the screen, on the right, look for the battery charge indicator and click on it
Step 2. Next, click on the brightness adjustment icon. It is located below the “Battery Settings” line.
Click on the brightness adjustment icon
Fn keys for adjusting brightness on a laptop do not work
If you find that the brightness adjustment in Windows 10 settings works fine, but the function keys (Fn) for brightness control on your laptop keyboard do not work, most likely you need to install additional software from the laptop manufacturer.
Each manufacturer calls utilities differently. Please note that you only need to download utilities for your laptop from the manufacturer’s official website, or from the installation CD/DVD that came with the device. Below are the names of utilities for popular laptop models:
- ASUS - ATK Hotkey Utility
- Sony Vaio - Sony Notebook Utilities
- Dell - QuickSet
- HP - HP Software Framework and/or HP Hotkey Support
- Lenovo - Hotkey Features Integration for Windows 10 or AIO Hotkey Utility Driver
Method 4. Adjusting the brightness level through the Action Center
All personal computers based on Windows 10 are equipped with an Action Center panel. With its help, you can quickly resolve problems that suddenly arise, as well as solve everyday PC problems.
Step 1. In the lower right corner, click on the “Action Center” icon. It looks like this:
In the lower right corner, click on the “Action Center” icon
Step 2. In the window that appears, click on the “Expand” line.
In the window that appears, click on the “Expand” line
Step 3. Next, you will see the Quick Actions panel, in which you need to select the “Brightness” icon. Click on it to select the desired screen backlight level.
Click on the “Brightness” icon to select the desired screen backlight level
Helpful advice! This method is only suitable for cases when you need to quickly change the brightness settings. There are only 5 main levels: 0%, 25%, 50%, 75% and 100%. For more precise settings, use other methods.
Windows Mobility Center
You can increase the brightness on a laptop with Windows 10 using another system application - Mobility Center . To launch it, right-click on the battery icon in the system tray, and then select the desired item from the menu that appears.
Another option is to open the quick links menu ( Win + X ) and find the Mobility Center there.
In the utility window, use the “Screen Brightness” to adjust the backlight to a comfortable value.
We have presented the simplest ways to increase brightness on a laptop with Windows 10. If the operating system is working correctly, there should be no problems with adjusting screen settings.
- 0shared
- 0Facebook
- 0Twitter
- 0VKontakte
- 0Odnoklassniki
Method 5. Selecting the optimal brightness level through power settings
Step 1: Open Control Panel. To do this, enter the appropriate name in the search menu.
Open the “Control Panel”
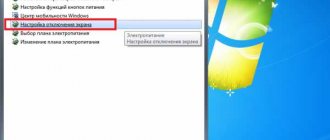
Step 2. Next, select “Hardware and Sound”.
Select “Hardware and Sound”
Then "Power Options".
Select “Power Options”
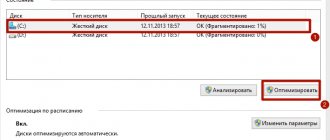
Step 3. At the bottom of the window that opens, adjust the screen brightness scale to the level you need.
Adjust the screen brightness scale to the level you need
Helpful advice! You can calibrate the screen as accurately as possible under battery and mains power conditions in the “Setting the power supply circuit” section. There is a wide range of settings for a specific case.
Method 6: Mobility Center to customize your screen
Mobility Center is a useful application that allows you to work with parameters such as multimedia, sound and power. You can also use it to adjust the brightness level.
Step 1. To open this application, use the “Win + X” button combination.
Step 2. Next, click on the line “Mobility Center”.
Click on the line “Mobility Center”
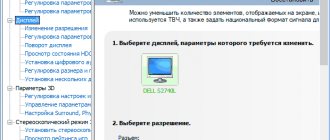
Step 3. In the “Screen Brightness” window, select the level you need by changing the position of the slider.
In the “Screen Brightness” window, select the level by changing the position of the slider
Restore brightness on a Windows 10 laptop with an Intel HD Graphics card.
If your laptop has an Intel graphics card, use the following steps to edit the registry:
- Open Registry Editor.
- Go to the following path in the registry:
HKEY_LOCAL_MACHINE\SYSTEM\ControlSet001\Control\Class\{4d36e968-e325-11ce-bfc1-08002be10318}\0000
- Find the FeatureTestControl and change its value from f000 to f008.
You can create a reg file with the following content:
Windows Registry Editor Version 5.00 [HKEY_LOCAL_MACHINE\SYSTEM\ControlSet001\Control\Class\{4d36e968-e325-11ce-bfc1-08002be10318}\0000] “FeatureTestControl”=dword:0000ffff [HKEY_LOCAL_MACHINE\SYSTEM\Contro lSet001\Control\Class\{4d36e968 -e325-11ce-bfc1-08002be10318}\0001] "FeatureTestControl"=dword:0000ffff [HKEY_LOCAL_MACHINE\SYSTEM\ControlSet001\Control\Class\{4d36e968-e325-11ce-bfc1-08002be10318}\000 2] "FeatureTestControl"=dword: 0000ffff [HKEY_LOCAL_MACHINE\SYSTEM\ControlSet001\Services\intelkmd] "FeatureTestControl"=dword:0000ffff
To save your time, I have prepared a ready-made .reg file . Download the archive and extract and run the intel-yrkost.reg file. Click "Yes" in the User Account Control window and again to add the information to the registry.
- Restart your computer.
All. Is the problem resolved?
Method 7: Changing Screen Brightness Using “PowerShell”
PowerShell is an automation tool that provides access to more flexible computer management. Thanks to it, the user can fine-tune the parameters of interest to him, including brightness. You can do it like this:
Step 1: Open “PowerShell” by entering the appropriate name in the search bar. There is also another way to do this. Simultaneously hold down the “Win+X” keys and then, in the window that opens, select Windows PowerShell (administrator).
Open “PowerShell”, enter the corresponding name in the search bar
Step 2. Copy and paste this combination into the window that appears:
(Get-WmiObject -Namespace root/WMI -ClassWmiMonitorBrightnessMethods).WmiSetBrightness(1,BRIGHTNESS_LEVEL)
Helpful advice! To decrease or increase the brightness level, you need to delete the BRIGHTNESS_LEVEL line, and then put in its place the percentage you need.
Below is an example of what the command should look like if you need a brightness of 75%
Command for screen brightness at 75%
Step 3: Press Enter.
PowerShell
A tool for automating computer management and maintenance, introduced in Windows 7.
1. Launch it through the search bar, a shortcut in Start or Win + X.
2. Insert the cmdlet into the text line: (Get-WmiObject-root root przestrzeni nazw / WMI -Class WmiMonitorBrightnessMethods).WmiSetBrightness (1, 70).
Here, instead of the number 1 and 70 at the end of the line, enter your value.
Method 8. Specialized application Brightness Slider
It’s much more convenient when all the most necessary settings are on the control panel, isn’t it? Thanks to the Brightness Slider application, you can also adjust the brightness there. In this case, you no longer have to look for sophisticated ways to adjust the screen brightness to suit you. This can be done as simply as changing the language or changing the volume level.
To download this application, follow the link: https://github.com/blackholeearth/Win10_BrightnessSlider/#win10_brightnessslider.
After installation, a brightness calibration icon will appear on the taskbar. Click on it and adjust the screen backlight to your desired level.
Brightness calibration icon
Reducing screen brightness on desktop PCs
The list of ways to reduce the screen brightness of external monitors is not as long as for laptops. In fact, there is only one method - using a special menu.
Monitor settings
There are special buttons on the monitor to control all the monitor settings. Their location depends on the device model and its manufacturer. They can often be found on the side or bottom. Much less often they are located on the back side. The list of actions to reduce brightness will look approximately as follows:
- Press the main "Menu" button on the monitor. Sometimes it is signed as "Enter".
- Next, using the buttons nearby on the device, go to the menu, which is responsible for setting up the picture. It can be called differently. Look for one that has the line “Brightness” or “Brightness”.
- Then simply use the same keys to change the value of the brightness bar. When finished, press the special button on the monitor that closes the entire menu. Again, it is called differently on different devices.
If you are unable to complete the necessary steps yourself, write your monitor model in the comments - we will definitely give more precise instructions on how to reduce brightness.
Thus, from this article you learned about the main methods of reducing screen brightness on devices running Windows 10. Let us recall that this indicator is only one of the parameters that affects the comfort of working on a PC. To change other settings, follow the link below and read our dedicated guide.
Read more: Customizing the screen in Windows 10
We are glad that we were able to help you solve the problem. Add the Lumpics.ru website to your bookmarks and we will be useful to you. Thank the author and share the article on social networks.
Describe what didn't work for you. Our specialists will try to answer as quickly as possible.
Problems with adjusting brightness levels
Even something as simple as screen calibration doesn't always go smoothly. Many PC users ask the question: “Why doesn’t the brightness setting work?” Some may not have this function at all. If you are on the list of such people, do not rush to get upset and contact the service center for help. Most often, this problem can be solved on your own. Most likely you simply have the Universal PnP Monitor . In order to fix this, follow these instructions:
Step 1: Using the search bar, search for Device Manager.
Using the search bar, find “Device Manager”
Step 2. In the window that opens, find the “Monitors” section and expand it.
Open the “Monitors” section
Step 3. Take a close look at the line Universal PnP Monitor (maybe another name). If the icon has a down arrow (shown in the picture), it means it is disabled. This needs to be fixed. Step 4. Right-click on this line and select “Engage”.
Select the item “Engage”
Step 5 : Restart your computer.
In most cases, the steps taken will help you solve the problem of lack of brightness settings.
I hope this article helped you understand this situation and solve the screen calibration problem. If you have any questions, I recommend watching this video.
Disabled Generic Pnp Monitor
If your system does not have the ability to adjust the brightness in the notification panel and in the screen settings, check whether the Generic PnP Monitor is disabled in your equipment. This is the most common problem on Lenovo and HP Pavilion laptops.
Open Device Manager ( devmgmt.msc ) and under Monitors, check that the Generic Pnp Monitor device is enabled . If this is not the case, right-click on it and turn it on ( Enable ) .
Restart your computer and check if you can adjust the brightness.