Magnets-magnets-magnets. The tablet is all stuffed with magnets! This is unusual and cool, but you have to be very careful not to render, for example, bank cards unusable.
Yes, we can say that the idea of Smart Cover is obvious, that it was on the surface, that there is nothing unusual in it, and that it is just a cover. That's right. But, alas, there are no other covers like this.
The only drawback of Smart Cover is its width. Being wrapped behind the “back” of the tablet, the cover protrudes slightly beyond its edges. If you hold the iPad 2 upright and try to type something on the on-screen keyboard with your thumbs, the cover will fold and make it difficult to hold the device firmly.
Screen
Shortly before the release of the iPad 2, the Internet was filled with rumors that the new tablet would have a screen with double the resolution, thereby rising almost to the level of Retina Display. And even in beta versions of the new firmware there was confirmation of this. But a miracle did not happen - the iPad 2 has a screen with the same resolution: 1024x768 pixels with a diagonal of 9.7 inches. And still the same S-IPS matrix, which before the release of the iPad was not mentioned at all in the context of mobile devices, but was the lot of professional monitors.
However, the external displays of the old and new tablets are still different. The iPad 2 produces images in cooler tones. The brightness of the backlight is adjusted within approximately the same limits, but in equal ambient lighting conditions, the iPad 2's automatic brightness adjustment system prefers to turn up the heat more.
The first iPad also had an oleophobic coating that protects the screen from greasy fingerprints. Surely the material has been changed, modified, improved - in a word, they have not been left out of place - but in practice this is not noticeable, the surface gets dirty in about the same way.
When purchasing a tablet, it is worth checking the quality of the screen of a particular copy - there are reports on the Internet about a fairly common defect: yellow spots and flare near the edge of the display.
How to build an Apple 1 and write a game for it
How to build an Apple 1 and write a game for it

40 years have passed since the release of the Apple computer 1. Today, its capabilities do not even reach simple microprocessor devices or microcontrollers.
But in 1976, this new product caused a lot of noise, there was even talk of a revolution in the world of computers. I invite the reader to assemble Apple 1 with me to find out what was interesting about it, and write some kind of program. I’ll say right away that I didn’t assemble it in one go. It took three years to find components, assemble and debug in my free time, then about the same amount of time to debug, and to finally get together and write this article.
Apple 1 Specifications
Type: Personal computer Years of production: July 1976 - March 1977 Processor: MOS 6502 Clock frequency: 1 MHz Memory: ROM 256 Bytes, RAM 4 kB, expandable up to 8 kB Video: 40x24 characters Manufactured: about 200 pieces
A little history
The creator of Apple 1 is Stephen Wozniak.
Actually, at the time of its creation, it was not yet called Apple 1. And the Apple company itself did not yet exist. Steve was interested in electronic design from an early age. His first computer was the “Cream Soda,” designed on integrated circuits without the use of a central processor, and capable of performing simple mathematical operations. Unfortunately, I could not find any photos or any descriptions of this computer, only rather meager information from Steve himself, described in his book. The fate of “cream soda” is also sad - it burned down, and there were no attempts to restore it. Later, while Steve was working on calculators at HP, his acquaintance, Allen Baum, invited him to a meeting of the Computer Club in Palo Alto, California. Steve was informed that this meeting was about terminals and video technology. At that time, he had already created his own terminal to work in ARPANET, and had an idea about terminal technology, that’s why he agreed to go. Steve was a modest guy, and if he had known that the talk would be about computers, he said, he would not have gone there. At the meeting, he felt out of place, as those present discussed some strange microprocessors and the Altair 8800 computer.
After the meeting, he was given a piece of paper with a description of the i8080A microprocessor. He decided to study it at his leisure, and realized that this was exactly what he had done in his first Cream Soda PC, and how he could make it simpler. On the same day, the architecture of the future Apple 1 was born. But it only took a few months to assemble it, which was spent studying the specifications of new chips and searching for components. The fact is that in the 70s microprocessors and memory were very expensive and in short supply. The problem with the processor was solved when MOS Technology released the budget processor 6500, and soon the 6502, similar to the 6500, but with greater capabilities, and costing only $25. It was the legendary 6502 that first fell into Steve’s hands.
The next problem at that time was preparing the computer for startup. In those years, the boot program, as a rule, was entered into computers manually or from a tape; this took up to half an hour, and only after that it was possible to do something on them. A video of the launch of BASIC and a game program written in it on the Altair 8800 is available at the second link at the end of the article. Steve solved this problem by installing read-only memory (ROM) chips into his PC, with a control program recorded in them, which he called “Monitor”. The name reflected the purpose - most of the time it monitored keystrokes and transmitted them to the terminal, and also allowed you to display values in memory cells and run a program from a certain location. Wozniak's monitor fit into 253 bytes. But he still didn't have enough RAM to run the computer. The first version of his PC was built on slow static memory. Later he replaced it with a dynamic one, which reduced the number of chips on the board and had a positive effect on the speed of operation. Steve showed his PC to the public, and his friend, Steve Jobs, who helped carry the monitor to the club, suggested that they start producing printed circuit boards for this PC and organize their own company, which was called Apple.
You can read about this and much more in more detail in the iWoz book.
Apple main board 1
PC architecture
A PC consists of several nodes.

(Source site)
Image formation and output unit (terminal)
Actually, this is Steve’s terminal for ARPANET. At its input is a seven-bit bus through which data is received for display on the TV screen.
It does not have circuits for direct access to video memory (VRAM), but uses cyclic memory updates of 1024 7-bit cells (and 64 cells are not used). Due to the lack of DDP, this terminal works like a typewriter - a character is input, it displays it on the screen, moves the cursor to the next character, and no graphics. Due to the constant updating of this memory, the terminal is quite slow. All characters are displayed sequentially; you cannot simply go back and correct an incorrectly entered character. To edit, you need to enter a Monitor command, which will change the contents of the memory cell where the error was made, and then, using another command, display the byte value from the changed memory cell.
If in our program we want to clear the screen, we need to move the carriage to a new line 24 times. By the way, when you press Return (modern designation is Enter), the generator starts, which prints the Space character to the end of the line.
There is no graphics mode, and the set of characters is limited to the standard set of ASCII codes, with values from 1 to 127 (only characters from the interval 32-126 are displayed on the screen, some others are used as controls, for example 13 - line feed), therefore the bus is seven-bit, and the highest digit is always set to one.
The layouts of all displayed characters are stored in read-only memory (ROM). After a character arrives at the terminal input, it is first written into a small memory (analogous to modern video memory), and then, through a counter system, addresses in the character generator ROM are selected, containing the layout of the output character, and through shift registers, this data, mixed with the generated video clock pulses, is sent to monitor input (or low-frequency TV input).
To adjust the brightness of the image, there is a trimming resistor on the board. I replaced it with a simple halving factor.
It should also be noted that due to errors in the image formation circuit, it cannot be displayed correctly on most modern digital TVs or monitors; analog TVs forgive these errors. At the end of the article there is a three-minute video with my torment on such a monitor.
Microprocessor unit
Contains a 6502 microprocessor, ROM, input/output port (PIA), buffer amplifiers, device address decoder, RAM and some small logic chips.
I/O block and work with external devices
The input/output controller (PIA) 6520 is responsible for polling the keyboard and transferring the entered character to the data bus. Instead, I installed 6821. And it works great.
Working with external devices occurs as with memory cells. Each device has its own memory area. A port decoder is responsible for enabling I/O from a specific device. Its input lines are connected to the address lines of the microprocessor, so when the desired address is set, the device we need is connected to the data bus. What and how you can do with it is determined by the program and the device itself. Since this PC does not implement interrupts, the processing of the entire data flow (keyboard input, symbol output, data exchange with external devices, etc.) is handled by the central processor.
To connect an external device, there is one connector on the main board. The only device known to me created for this PC in the 70s is an interface board for working with external data storage - a tape recorder.

power unit
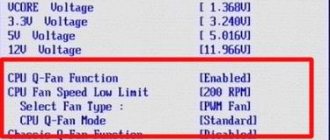
Everything is simple here. Four voltages are needed to power a computer. +5V, -5V, +12V and -12V. The power supply was manufactured by the buyer independently. To do this, it was necessary to separately purchase two step-down transformers and connect them to the main board, which already contained rectifiers and stabilizers. There is a +5V stabilizer on the radiator, and it gets noticeably hot, so many users installed a fan on it, I didn’t reinvent the wheel and did the same.
Of course, it was possible to install a modern switching power supply, but I wanted a warm tube hum at 50 Hertz.
Search for components, assembly and commissioning
As I wrote above, it took almost 3 years to find the components, albeit with interruptions.
The first thing I bought was a printed circuit board; after lying on the shelf for about a year, it gradually began to acquire components. First, I soldered sockets for microcircuits and connectors for connecting power and a monitor. Then all the passive elements - resistors, capacitors and diodes. True, it was not possible to get original Sprague capacitors right away, and instead of them for the first half of the year there were ordinary modern electrolytes. Most of the microcircuits were immediately purchased; moreover, most of them have Soviet analogues of the 155th series. I had to run around for the following microcircuits:
Video ROM - a certain firmware must be recorded in it, otherwise there will not be an adequate picture. 2504V - seven registers that store the image displayed on the screen. 2519B is a counter used for imaging, which has no analogues. 8T97 - data bus buffers that prevent overload of the microprocessor data bus; in other respects, they later found a Soviet replacement - K155LP11. ROM with the “Monitor” control program.
After all the components were found, soldered, or installed into the main board, the interesting part began - debugging.
The first switch on - click the power switch, 5 seconds, turn it off - no smoke, no traffic jams in the apartment, nothing caught fire - everything is fine. I turn it on, look at the picture - there is garbage on the screen made up of random symbols. I press RESET and then CLEAR SCREEN (yes, yes, there is such a button - users back then were not spoiled by fashionable things, and the designers thought that the user should clear the screen when he needs to), nothing happens - the same random garbage. On top of everything else, the +5V stabilizer is already starting to burn, and a warm lamp-like aroma of freshly burnt roofing felt varnish or paint from this stabilizer began to fill the room. I turn it off, wait 5 minutes until it cools down completely, and in such short series I try to debug further throughout the debugging, so this fact is not indicated further.
If everything worked, then after turning on the computer, a welcome screen should have appeared on the screen in the form of alternating, flashing “@_” symbols across the entire workspace of the monitor, and after pressing RESET and CS the screen should have cleared, and only the cursor for entering a command would remain control program "Monitor".
Visual inspection and continuity testing of the image formation and power supply circuits yielded nothing. And after several days of torment, I discovered that the seller sent me the wrong analogs of video memory chips. I had 1403A, although the analogues are 1404A. I pulled these registers out of the panels, and nothing changed on the screen. The seller admitted his mistake and asked to send these registers back to him, but since they were not expensive, I did not bother with it. The original registers cost me about $80. They had to wait three weeks.
After replacing the registers, the long-awaited blinking dogs (or apples, whichever you prefer) finally appeared, which means the video memory and with it the entire video unit started working.
I press RESET, CS, the screen clears, but the cursor does not appear. This means that the microprocessor unit does not work. There are not many sources of problems here - either the processor, or the ROM, or the small logic in their wiring.
The first component to come under investigation was the ROM with the “Monitor”, since one of the microcircuits was noticeably heated.
Let me digress a little and say that the control program is written in two memory chips, each of which has 255 memory cells, and each chip has only 4 bits as an output. To control an eight-bit processor, Wozniak installed 2 such microcircuits in parallel, obtaining the required 8 bits of data at the output. And its entire control program fit into 253 bytes (2 bytes remained free).
To read the contents of this memory, I assembled an Arduino-based device on a breadboard.
The controller sequentially sorted through the addresses of these ROMs, merged 4-bit data into 8-bit data and output it in hexadecimal form to the monitor of the communication channel on the computer. After checking the contents of the ROM, I found no errors in it.
Replacing the small logic also did not produce results, so suspicions fell on the advanced age of the main processor and its retirement.
I don’t have another 6502-based computer, so I installed it on a breadboard, supplied it with power from the Arduino, 1 MHz generator clock pulses (from the future Specialist PC), set the NOP command on the data bus with jumpers to +5V or to ground, and I expected that, while performing an empty action, he would increase the value of the address counter. But this did not happen. Nothing happened at all. It looks like the stone is now just a stone. I ordered another one, as it should be made by MOS. While he was driving, I managed to go on vacation and swim in the sea.

Testing the 6502 processor. Yes, it was possible to get 1 MHz from Mega timers, yes, it was possible to do without it altogether, I can do all this, but then I wanted to do just that.
After installing a new processor, turn on - hello dogs - RESET - CS - hello command line! The processor unit started working in less than six months!
The next problem was that I had nothing to enter commands and code into it with, there was no keyboard.
Keyboard
The keyboard of this PC is a grid of conductors, the nodes of which have buttons. This case is connected to a decoder of pressed keys, which outputs the code of the pressed key via a seven-bit ASCII line, and a short-term strobe pulse via a separate line. As soon as this pulse passes to the control bus, the processor begins processing the entered character.
In general, getting such a keyboard is still a solvable matter, but it is usually a number with two zeros, and not in domestic rubles. So I started thinking about how to connect my existing PS/2 keyboard to the computer.
Nothing more interesting than Arduino Nano came to mind. Over the course of the evening, I soldered an adapter between the PS/2 and ASCII port using a surface-mounted installation and wrote firmware for it. Since Apple 1 doesn't have PgUp and PgDown keys, I used them as RESET and CLEAR SCREEN buttons. From that day on, I didn’t have to hand-to-hand short the legs on the board with tweezers, which was very pleasing.
The characters being typed were neatly printed on the screen, and even the test program from the documentation for this computer was running. All it does is display in a loop all the characters displayed on this computer.
View from above
Bottom view
A funny story happened with the keyboard. Initially, the Return key only worked halfway - it correctly entered commands into memory and gave instructions for their execution, but the translation to a new line did not occur. In general, due to the peculiarities of the terminal’s operation, this did not create any major problems. But I decided to fix this matter. I started by studying the circuit diagram of a PC; the user Mdesk, from zx-pk.ru, provided great assistance in this. When I studied the circuit, I didn’t have a single question about the operation of the carriage transfer hardware unit, I sat down with a tester and an oscilloscope. Checking the conductors didn't yield anything - they were all intact. Then the oscilloscope came into use. I rang the input signals from the PIA - they were normal, the signal was lost somewhere on the 7451N, I tried changing it to the 7450, and the Soviet analogues (155LR1 and 155LR11), this had no effect. Unraveling the circuits further, I got to the 74123 monovibrator; I needed to check the delays it generated. But my adapter physically closes it, which makes dialing inconvenient.
Then I wrote a test program 280: A9 8D 20 EF FF A9 31 20 EF FF 4C 80 02 All it does is display the sequence Return-1-Return-1 (units with scrolling down).
I launched it, the units, as expected, went in line. Then I took the adapter out of the socket, the units immediately ran down. So the reason is in the adapter. After that I solved the problem quickly. I use the PgUp and PgDown buttons to reset and clear the screen. Screen clearing (CLR) hung on one of the legs of the Arduina, at the time of clearing I supplied a unit there, after releasing it I reset it to 0. And this same 0 extinguished the entire CLR line, and in fact it is also used by the line feed unit. The solution is simple - I put a diode between the Arduino and the CLR, and it worked!
Since typing kilobyte programs hand-to-hand would be a tedious and not always accurate task, I came up with the idea of connecting an SD card to the same Arduino, from which I could enter programs. It works like this - I drop a file called dump.hex into the root, and when I press the TAB key, the controller reads the contents of the file and presses the appropriate keys.
Software
There are not many programs written for Apple 1, I attribute this to the imminent appearance of a more advanced computer - Apple 2. And yet there are several games and system programs for it.
On the 30th anniversary of Apple 1, enthusiasts even wrote a rather large demo (link below). I launched and looked at all this, but I wanted to write something of my own.
I decided to write a game 2048 for it. It took 2 evenings to write the algorithm, coding (I had never written for 6502 before) and debugging. The size of the resulting program was 1679 bytes. You can run it both on original hardware and in emulators. Program
280: 4C F8 08 20 20 20 20 20 288:20 20 32 20 20 20 34 20 290:20 20 38 20 20 31 36 20 298:20 33 32 20 20 36 34 20 2A0:31 32 38 20 32 35 36 20 2A8:35 31 32 31 30 32 34 32 2B0:30 34 38 01 00 00 00 00 2B8:00 00 00 00 00 00 00 00 2C0:00 00 00 2B 2D 2D 2D 2D 2C8:2D 2 D 2B 2D 2D 2D 2D 2D 2D0:2D 2B 2D 2D 2D 2D 2D 2D 2D8:2B 2D 2D 2D 2D 2D 2D 2B 2E0:8D 00 A2 00 A9 8D E8 20 2E8:EF FF E0 24 F0 03 4C E6 2F0:02 60 A9 2B 2 0 EF FF A9 2F8: 20 20 EF FF 60 A9 8D 20 300: EF FF 60 0A 2A A8 A9 00 308: 79 83 02 20 EF FF C8 A9 310: 00 79 83 02 20 EF FF C8 318: A9 00 79 83 02 20 EF FF 320:C8 A9 00 79 83 02 20 EF 328:FF A9 20 20 EF FF 20 F2 330:02 60 20 FD 02 A2 00 BD 338:C3 02 20 EF FF E8 E0 1E 340:F0 03 4C 37 03 60 2 0 32 348:03 20 F2 02 AD B3 02 20 350:03 03 AD B4 02 20 03 03 358:AD B5 02 20 03 03 AD B6 360:02 20 03 03 20 32 03 20 368:F2 02 AD B7 02 20 0 3 03 370:AD B8 02 20 03 03 AD B9 378:02 20 03 03 AD BA 02 20 380:03 03 20 32 03 20 F2 02 388:AD BB 02 20 03 03 AD BC 390:02 20 03 03 AD BD 02 20 398: 03 03 AD BE 02 20 03 3A0: 20 32 03 20 F2 02 AD BF 3A8: 02 20 03 AD C0 02 20 3B0: 03 AD C1 02 20 03 3B8: AD C2 02 20 03 03 20 20 32 3C0:03 60 32 30 34 38 8D 8D 3C8:57 2D 55 50 8D 41 2D 4C 3D0:45 46 54 8D 44 2D 52 49 3D8:47 48 54 8D 53 2D 44 4F 3E0:57 4 E 8D 8D 43 4F 44 45 3E8:3A 20 44 45 4E 49 53 20 3F0:50 41 52 59 53 48 45 56 3F8:8D 8D 50 52 45 53 53 20 400:41 4E 59 20 4B 45 59 A2 408:00 BD C 2 03 20 EF FF E8 410:E0 45 F0 03 4C 09 04 AD 418:11 D0 10 FB AD 10 D0 8D 420:E1 02 60 47 41 4D 45 20 428:4F 56 45 52 59 4F 55 20 430:57 49 4E 20 E2 02 A2 00 438:BD 23 04 20 EF FF E8 E0 440:09 F0 03 4C 38 04 A2 34 448:BD C2 03 20 EF FF E8 E0 450:43 F0 03 4C 48 04 AD 11 458:D0 10 FB AD 10 D0 4C F8 460:08 A0 00 AD E1 02 29 0F 468:AA C8 C0 11 F0 C5 BD B3 470:02 C9 00 F0 0A E8 E0 10 478:D0 EF A2 00 4C 69 04 A9 480:01 9D B3 02 8E E1 02 60 488:A2 00 A9 00 9D B3 02 E8 490:E0 10 D0 F8 A9 01 8D B3 498:02 60 00 00 00 00 00 00 4A0:AE 9F 04 BD 9A 04 C9 00 4A8:D0 14 AE 9E 04 BD 9A 04 4B0:AE 9F 04 9D 9A 04 A9 00 4B8:AE 9E 04 9D 9A 04 60 A9 4C0:03 8D 9F 04 A9 02 8D 9E 4C8:04 20 A0 04 A9 02 8D 9F 4D0:04 A9 01 8 D 9E 04 20 A0 4D8:04 A9 01 8D 9F 04 A9 00 4E0:8D 9E 04 20 A0 04 A9 03 4E8:8D 9F 04 A9 02 8D 9E 04 4F0:20 A0 04 A9 02 8D 9F 04 4F8:A9 01 8D 9E 04 20 A0 04 500:A9 03 8D 9F 04 A9 02 8D 508:9E 04 20 A0 04 60 20 E2 510:02 A2 00 BD 2C 04 20 EF 518:FF E8 E0 07 F0 03 4C 13 520:05 A2 34 BD C2 03 20 EF 528:FF E8 E0 43 F0 03 4C 23 530:05 AD 11 D0 10 FB AD 10 538:D0 4C F8 08 AE 9E 04 BD 540:9A 04 C9 00 F0 1D AE 9F 548:04 DD 9A 04 D0 15 A8 C8 550:98 AE 9F 04 9D 9A 04 C9 558:0B F0 B3 A9 00 AE 9E 04 560:9D 9A 04 60 A9 02 8D 9E 568:04 A9 03 8D 9F 04 20 3C 570:05 A9 01 8D 9E 04 A9 02 578:8D 9F 04 20 3C 05 A9 00 580:8D 9E 04 A9 01 8D 9F 04 588:20 3C 05 60 20 BF 04 20 590:64 05 20 BF 04 60 AD B3 598:02 8D 9D 04 AD B7 02 8D 5A0: 9C 04 AD BB 02 8D 9B 04 5A8: AD BF 02 8D 9A 04 8C 5B0: 05 AD 9A 04 8D BF 02 AD 5B8: 9B 04 8D BB 02 AD 9C 04 5C0: 8D B7 02 AD 04 8D 04 8D 04 8D 04 8D 04 8D 04 8D 04 8D 04 8D 04 8D 04 8D 04 8D 04 8D 04 8D 04 8D 04 8D 04 8D 04 8D 04 8D B3 5C8:02 AD B4 02 8D 9D 04 AD 5D0:B8 02 8D 9C 04 AD BC 02 5D8:8D 9B 04 AD C0 02 8D 9A 5E0:04 20 8C 05 AD 9A 04 8D 5E8:C0 02 AD 9B 04 8D BC 02 5F0: AD 9C 04 8D B8 02 AD 9D 5F8: 04 8D B4 02 AD B5 02 8D 600: 9D 04 AD B9 02 8D 9C 04 608: AD BD 02 8D 9B 04 AD C1 610: 02 8D 9A 04 8C 05 AD 618:9A 04 8D C1 02 AD 9B 04 620:8D BD 02 AD 9C 04 8D B9 628:02 AD 9D 04 8D B5 02 AD 630:B6 02 8D 9D 04 AD BA 02 638:8D 9C 04 AD BE 02 8D 9B 640:04 AD C2 02 8D 9A 04 20 648:8C 05 AD 9A 04 8D C2 02 650:AD 9B 04 8D BE 02 AD 9C 658:04 8D BA 02 AD 9D 04 8D 660:B6 02 60 AD B3 02 8D 9A 668:04 AD B7 02 8D 9B 04 AD 670:BB 02 8D 9C 04 AD BF 02 678:8D 9D 04 20 8C 05 AD 9D 680:04 8D BF 02 AD 9C 04 8D 688:BB 02 AD 9B 04 8D B7 02 690: AD 9A 04 8D B3 02 AD B4 698: 02 8D 9A 04 AD B8 02 8D 6A0: 9b 04 AD BC 02 8D 9C 04 6A8: AD C0 02 8D 9D 20 8C 6B0: 05 AD 9D 04 8D C0 02 02 02 AD 6B8:9C 04 8D BC 02 AD 9B 04 6C0:8D B8 02 AD 9A 04 8D B4 6C8:02 AD B5 02 8D 9A 04 AD 6D0:B9 02 8D 9B 04 AD BD 02 6D8:8D 9C 04 AD C1 02 8D 9D 6E0: 04 20 8C 05 AD 9D 04 8D 6E8: C1 02 AD 9C 04 8D BD 02 6F0: AD 9B 04 8D B9 02 AD 9A 6F8: 04 8D B5 02 AD B6 8D 700: 9A 04 AD BA 02 8D 9B 9B 9B 9B 9B 9B 9B 02 8D 9B 9B 02 8D 9B 02 8D 9B 02 8D 9B 02 8D 9B 04 708:AD BE 02 8D 9C 04 AD C2 710:02 8D 9D 04 20 8C 05 AD 718:9D 04 8D C2 02 AD 9C 04 720:8D BE 02 AD 9B 04 8D BA 728:02 AD 9A 04 8D B6 02 60 730:AD B6 02 8D 9A 04 AD B5 738:02 8D 9B 04 AD B4 02 8D 740:9C 04 AD B3 02 8D 9D 04 748:20 8C 05 AD 9D 04 8D B3 750:02 AD 9C 04 8D B4 02 AD 758:9B 04 8D B5 02 AD 9A 04 760:8D B6 02 AD BA 02 8D 9A 768:04 AD B9 02 8D 9B 04 AD 770:B8 02 8D 9C 04 AD B7 02 778:8D 9D 04 20 8C 05 AD 9D 780:04 8D B7 02 AD 9C 04 8D 788:B8 02 AD 9B 04 8D B9 02 790:AD 9A 04 8D BA 02 AD BE 798:02 8D 9A 04 AD BD 02 8D 7A0:9B 04 AD BC 02 8D 9C 04 7A8:AD BB 02 8D 9D 04 20 8C 7B0:05 AD 9D 04 8D BB 02 AD 7B8:9C 04 8D BC 02 AD 9B 04 7C0:8D BD 02 AD 9A 04 8D BE 7C8:02 AD C2 02 8D 9A 04 AD 7D0:C1 02 8D 9B 04 AD C0 02 7D8:8D 9C 04 AD BF 02 8D 9D 7E0:04 20 8C 05 AD 9D 04 8D 7E8:BF 02 AD 9C 04 8D C0 02 7F0:AD 9B 04 8D C1 02 AD 9A 7F8: 04 8D C2 02 60 AD B6 02 800: 8D 9D 04 AD B5 02 8D 9C 808: 04 AD B4 02 8D 9B 04 AD 810: B3 02 8D 9A 20 8C 05 818: AD 9A 04 8D B3 02 AD AD AD AD 9B 820:04 8D B4 02 AD 9C 04 8D 828:B5 02 AD 9D 04 8D B6 02 830:AD BA 02 8D 9D 04 AD B9 838:02 8D 9C 04 AD B8 02 8D 840:9B 04 AD B7 02 8D 9A 04 848:20 8C 05 AD 9A 04 8D B7 850:02 AD 9B 04 8D B8 02 AD 858:9C 04 8D B9 02 AD 9D 04 860:8D BA 02 AD BE 02 8D 9D 868:04 AD BD 02 8D 9C 04 AD 870:BC 02 8D 9B 04 AD BB 02 878:8D 9A 04 20 8C 05 AD 9A 880:04 8D BB 02 AD 9B 04 8D 888:BC 02 AD 9C 04 8D BD 02 890:AD 9D 04 8D BE 02 AD C2 898:02 8D 9D 04 AD C1 02 8D 8A0:9C 04 AD C0 02 8D 9B 04 8A8:AD BF 02 8D 9A 04 20 8C 8B0:05 AD 9A 04 8D BF 02 AD 8B8:9B 04 8D C0 02 AD 9C 04 8C0:8D C1 02 AD 9D 04 8D C2 8C8:02 60 AD 11 D0 10 FB AD 8D0:10 D0 8D E1 02 C9 D7 D0 8D8:04 20 96 05 60 C9 D3 D0 8E0:04 20 63 06 60 C9 C1 D0 8E8:04 20 30 07 60 C9 C4 D0 8F0:04 20 FD 07 60 4C CA 08 8F8:20 88 04 20 E2 02 20 07 900:04 20 E2 02 20 61 04 20 908:46 03 20 CA 08 4C 01 09
Video of work on YouTube.
What's next?
First of all, the body, I want to make it beautiful.
Adapter for keyboard and SD card. We need to get rid of surface mounting; I plan to develop and order a printed circuit board for it in China.
Working with multiple files. I plan to write a file manager for Arduino that will allow you to select a file from the card and run it.
I also purchased a connector for expansion cards. I want to solder an audio board for it using K580VI53 (simply because this particular timer is lying around at home) and draw a small demo with sound. All this will probably be discussed in the next article.
Conclusion
To say that I had great pleasure from assembling, debugging and writing programs for Apple 1 is almost an understatement.
Many thanks to the user Mdesk, and all the guys from zx-pk.ru for their help in explaining the intricacies of the architecture, and for useful advice in setting up this PC.
Well, the biggest thanks to Steve Wozniak for this wonderful personal computer!!!
useful links
Apple 1 on wiki Downloading BASIC on Altair 8800 Apple 1 and a modern monitor (three and a half minutes of pain and suffering) 30 years of Apple 1 (demo) Online Apple 1 emulator Online assembler/disassembler/debugger 6502
Russian-language sites dedicated to Apple 1: mdesk. ru zx-pk.ru
Iron
The first iPad wasn't slow, but it still needed an update. If only in order to overtake (and this is due to the status of a tablet) the iPhone 4 smartphone. And competitors are not asleep, they are preparing tablets with dual-core processors.
The second generation Apple tablet received a good firmware update: a dual-core Apple A5 processor with a frequency of 900 MHz and double the amount of memory.
Realizing that iPad users do not need benchmark parrots, but a real increase in speed, I conducted several simple tests: