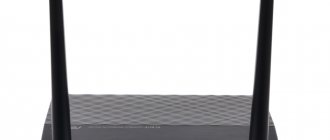
The compact Yota router is an ideal choice for home Internet. Such a device, developed and introduced into the telecommunications market, will allow even the most inexperienced personal computer user to correctly connect, configure and use high-speed Internet. The appearance of the device is truly pleasing to the eye: it has a minimalistic design that fits into any interior.
By purchasing such a device, the user receives a standard package, which includes an instruction manual, a charging and power cable, an official technical data sheet for the device itself, and the modem itself. In addition, the main feature of Iota is its ease of use. In order to gain access to the Internet after completing the complete setup and connection procedure, you just need to hold down the power button for a few seconds until the corresponding light comes on.
How to connect a Yota modem to a laptop
Before purchasing this device that supports the innovative 4-G standard, you need to familiarize yourself with a detailed coverage map to understand whether the Internet will work in the place where the user needs it.
How to open ports
In order to be able to fully exchange files and ensure the correct operation of network applications, it is necessary to carry out the procedure of “opening ports” if they are “closed”. To do this you will need:
- Open any browser and enter “status.yota.ru/advanced” in the address bar.
- We move from the main interface to “Ports”.
- In the “Public” field you must enter a numeric value for the external port.
- “Private” is filled with information about the internal port.
- We set the required protocol and IP address of the device for which the port is being created.
Set the required protocol and IP address of the device for which the port is being created
- Click “Add” to complete the installation.
After carrying out this procedure, problems with access to online games, file sharing services and many other programs may be resolved.
Login to settings
To open the settings interface for the Yota modem, you need to enter in the modem account in the address bar of the browser: 10.0.0.1 or status yota.ru. The user will see the 10.0 0.1 “Personal Account” web interface. Here is all the information about connecting to the Internet:
- IP address.
- Identifier.
- Signal level.
- Traffic volume and connection speed.
Expert opinion
Julia
Employee of the Yota retail outlet.
It is not always possible to immediately access the Internet settings for the Yota modem; after installing the modem, you should restart the computer. This action helps in most cases. In the settings you can also update the firmware, reset to factory settings and much more. The modem interface allows this.
How to set up a modem connection to a router
In order for the connection to be successful, you will need to have a special router at your disposal that supports connection to Yota 4G modems. So, to correctly perform the connection, you need:
- We connect the modem to the required router using “USB”.
- Go to the web interface of the router you are using and activate the “USB” menu.
In the web interface of the router you are using, activate the “USB” menu
- Open “Modem” and fill in the required fields to enter data.
Open “Modem” and fill in the required fields to enter data - In the “APN” column we write “yota.ru”. In the dialing number you will need to enter “*99#”, and leave the areas for entering the username and password blank.
Filling out the fields
- We save the changes and restart the router.
Instructions for connecting Yota to a computer
Connecting the Yota modem to a laptop or computer running Windows 10 is quite simple. You need to install the Yota Access program. The instructions are as follows:
- Initially, you need to connect the equipment to the PC via a USB port, after inserting the SIM card into the modem.
- The installation wizard will then automatically launch.
- Next, you need to give an agreement for the provider to use your data.
Installation on laptops and modern computers occurs in hidden mode. When it is completed, a notification will appear on the screen. No additional manipulations are required. If you encounter problems connecting the Yota 4g LTE modem to your PC, you should contact your provider’s technical support service. Operator number Yota –. Experts will always help you figure everything out and give you a detailed guide, explaining everything step by step.
What to do if your device is not working properly
There are a large number of problems that can arise with the device. The main ones are:
- No signal.
- Driver problem.
To solve problems with signal loss, you need to reconnect the device to the computer and try moving it to another location. Perhaps for some reason there is no coverage in the place where the modem was previously located.
The best coverage in the apartment
If the problem is with the drivers, then you need to download the required software package from the official website and install it. After which you will need to reconnect the device you are using.
The device described above provides its owner with access to almost limitless possibilities. Firstly, the modem will allow you to use the connected Internet in almost any place convenient for you. Secondly, the tariff plans of the telecommunications company will allow you to save money without any loss in the quality of the services received.
The entire process of connecting and setting up the device takes a minimum amount of time and does not require much effort. Therefore, thanks to step-by-step instructions, any user, regardless of their own experience of interacting with a PC, will be able to correctly connect and configure the device.
Advanced settings
To get significantly more options for setting up a modem from the Yota provider, you need to visit the page: status.yota.ru/advanced or 10.0.0.1/advanced. You don't have to be an expert to understand them. The following advanced settings are available here:
- DMZ – allowing or denying connections from outside.
- Local IP address - it can be replaced with another one.
- Port forwarding – you can configure port forwarding for games and file-sharing clients.
- Changing the DHCP range - registering the mask, IP, router.
These are all the advanced settings for Yota modems, with the help of which you can control them.
Review of Mobile LTE router from Yota
Hi all!
For a long, long time I was looking for at least some information about the router produced by the Chinese company Quanta, which they give as a replacement for Yota Egg and Yota Many. I couldn't find anything other than photos, so I'll briefly describe it here.
Beware of traffic! 
Appearance and comparison with Yota Many
This is what the router looks like (it's white):
As you can see from the photographs, it is slightly larger than the Yota Many in all respects.
Battery 1430 mAh There is no Yota logo on the SIM card. But there is a seal on top of it.
What is in the box?
Unfortunately, I threw the box away immediately; there will be no photos.
- Router with SIM card
- Stickers
- Cable 2xUSB - micro-USB
- Battery (if I had not turned on the router before throwing out the box, the battery would have flown into the tank along with it. Located at the bottom of the box in the intermediate compartment)
Functional elements
Left side:
- Power button
- WPS button
Front side:
- Power indicator
- 4G indicator
- Wi-Fi indicator
Feelings from the router
Immediately about the disadvantages:
- As soon as you press the body a little, you can hear a crunch from all sides. They cheapened the materials; the Yota Many has a much nicer body to the touch.
- The micro-USB port is attached anyhow, the hole in the case is noticeably larger than the port. It's not scary, but it's not very pleasant.
- There is no button to switch Wi-Fi to open mode. It would be better if they did it instead of WPS, it would be more useful.
- It takes a long time to start. I didn’t measure it specifically, but exactly 15-20 seconds
- At the Yota stand they said that the approximate battery life is 4 hours versus 24 for Yota Many. This was very upsetting.
- As it was written on the box, simultaneous connection of up to 5 devices
.
It was also upsetting. UPD: I connected 7 devices, everything worked! - There is no function to turn off Wi-Fi when there is no LTE connection.
- The instructions say that a short press puts the device into standby mode. Nothing like this. Either use it or turn it off, there is no third option.
- It starts to get very hot after 5-10 minutes of operation. So that you can feel it even through your bag.
Pros:
- Removable SIM card. (probably not even a plus, but some kind of neutral feature)
- Software stuffing (more about it below).
Software stuffing
Although this router was “offended” by its battery life and materials, the software stuffing here is like that of a full-fledged router. Castrated from all sides, Yota Many smokes quietly on the sidelines.
Screenshots:
Login to the admin panel (PS the operating instructions were not included in the kit, I found the admin-admin
)
Internals:
“Managing power supply modes” - how pathetically said. In fact, there is the time to go into standby mode in minutes.
I can’t measure speed, operating time, etc. I am not in coverage area during testing.
Total
It's a pretty good router with its pros and cons. The pocket does not weigh down and does not take up half the bag. Personally, I didn’t have time to get used to Many, because... I've only used it for 3 days so the transition will be painless for me. I think I described everything to the maximum. If you have any questions, I will be happy to answer. Thank you for your attention!
PS I didn’t have enough karma to post to the “Iron” hub. If possible, move it there.
UPD: Yota sent me instructions. UPD: The speed does not slow down, everything is fine in this regard.
How to connect a YotaMany modem?
YotaMany is a portable device that allows you to use the Internet autonomously. It only takes 2 hours to charge it to 100%. After reaching the maximum charge, the power switch on the case must be switched to the left side. Installing YotaMoney is simple, follow the algorithm:
- Connect your device to your computer.
- Wait 10-20 seconds, after which “Yota” will appear on the screen.
- Enter your personal information in the window.
- Open any browser and enter 10.0.0.1.
- Enter admin in the login and password field.
In the window that opens, you get personal access to the wireless network settings. In the “Network name” field, enter its name, then select WPA2 security type and set any 8-digit password. Don’t forget to save the settings, now you can use the Internet not only from your laptop, but also distribute it to other devices.
Connecting and setting up the Yota modem
How to connect a Yota modem to a computer? To do this, you need to find a free USB port, rotate the USB mechanism and install the modem in the specified port . This applies to both a regular modem and a Wi-Fi modem. As for the Yota Many modem, it connects via a USB port or via Wi-Fi. As soon as we connect the modem to the USB port, the computer will begin automatically installing drivers. A control program for the Yota modem is not needed - all presented modems work without third-party drivers and software.
How to set up a Yota modem? There is no need to configure anything here - as soon as the modem completes the automatic installation of drivers, we will see a new network in the active state in the Network and Sharing Center.
After this, we will need to launch the browser and open any site - a redirect will work, which will redirect us to the profile registration page. After registering, we can top up our account and start surfing by selecting the desired access speed.