Outpost installation
VERY IMPORTANT! Before installing Outpost, close all other firewall applications running on your computer. If you install a firewall on top of other firewall applications, it will cause the system to freeze. Imagine a car with two drivers: each will try to take control and the result will be an accident!
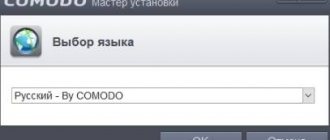
Once you are sure that no other firewall programs are running on your computer, install Outpost. If you are not an experienced user, it is recommended to use the default Outpost settings offered during installation.
Starting and closing a program
At the end of the installation process, Outpost Firewall will be optimally configured to protect your computer. This mode will suit most users, so simply close the main program window and let Outpost perform its functions.
One of the features of Outpost Firewall is that it automatically starts with Windows. This ensures the system is always protected. However, if you wish, you can cancel the firewall from starting automatically. Then during each work session you will need to launch it manually.
Basic settings
Operating modes
Outpost can apply different levels of filtering - from completely blocking Internet access for applications to allowing all network activity. Therefore, Outpost allows 5 operating modes so that you can set the level of data protection you need:
- Deny—all remote connections are blocked.
- Block - all remote connections are blocked, except those that you specifically specify.
- Training - You allow or disable applications the first time you launch them.
- Allow—all remote connections are allowed except those specifically specified.
- Disable - All remote connections are allowed.
By default, Outpost runs in Training mode. The Outpost icon on the taskbar symbolizes this mode.
To change the firewall operating mode:
- Right-click the Outpost tray icon
- A context menu will open. Go to Policies and select the desired operating mode.
Training mode
Learn mode allows you to decide which applications will access the Internet. Outpost will ask you this whenever the application makes a connection request for the first time. Training mode is the default mode and is recommended for most users.
You may want to create a rule for an application. If it is not created, Outpost in Learn mode will again ask you what to do when the application tries to receive or send data.
Creating rules is easy. Application rules can always be changed or deleted.
Below is the Training mode window:
The window shows the name of the application (for example, Internet Explorer), the type of connection (incoming/outgoing), the type of service that the application is trying to provide, and the remote address for communication.
You need to select one of the filtering options:
- Allow this application to perform any actions - for applications that you completely trust. The application will be added to the “Trusted” (See Options , Applications )
- Prevent this application from performing any actions - These applications are denied network access. The application will be added to the “Banned” (See Options , Applications )
- Create a rule based on a standard one - Outpost Firewall allows you to create rules based on standard settings for well-known applications or apply settings that are better suited to a given application (for example, Internet Explorer). Outpost will offer you the best filtering option. The application will be added to the “Custom Level” (See Options , Applications ). It is recommended to use the option suggested by Outpost, however advanced users can select other settings from the drop-down menu or even create their own rule by clicking the Other button.
- Allow once - for applications that you doubt. The next time this application requests a connection, the dialog box will appear again. No rule is created for this application.
- Block once - for applications that you do not trust. The next time this application requests a connection, the dialog box will appear again. No rule is created for this application.
Automatic update
Outpost can be updated automatically via the Agnitum website. This feature provides maximum protection against new threats on the Internet. Every day Outpost checks for updates on the site and compares them with the version installed on your computer. When the program displays a verification message, you can confirm or cancel the operation.
If for any reason you need to disable the automatic update function, select the Tools of the Outpost main window and uncheck the box next to Automatic update
You can check for updates yourself by selecting Update... from the Tools . The following dialog box will appear:
Click Next to continue downloading and installing all new modules. If there are updates available on the network, you will see the following dialog box:
The program will then ask for confirmation to restart the computer:
If there are no updates available on the network or they are not needed, the following window will appear:
Main Products
- Outpost Security Suite Pro - includes the necessary security tools: firewall, antivirus + antispyware, spam filter, proactive protection (behavioral blocker), web control, personal data protection.
- Outpost Security Suite Free - a full-featured free security suite
- Outpost Firewall Pro - includes a firewall, anti-spyware, proactive protection (behavioral blocker), web control (blocking ads, unwanted elements of web pages and malicious sites), personal data protection.
- Outpost Firewall Free is a free version of Outpost Firewall.
- Outpost Antivirus Pro is a separate antivirus solution that includes antivirus + antispyware, behavioral blocker, blocking of unwanted sites, personal data protection.
- Outpost Network Security is a product based on Outpost Firewall Pro in the field of network protection.
- Outpost AV Service is a product-service for protecting users of Internet providers in the form of a subscription to Outpost Antivirus Pro or Outpost Security Suite Pro updates.
- Agnitum Spam Terrier is a free spam filter for Microsoft Outlook and Outlook Express.
Additional settings
Protecting your system
Trojan horses are one of the most dangerous threats to your files and confidential information (passwords, credit card information, personal correspondence). A Trojan is a program installed on your computer that gives hackers full network access. The same Trojan can be used by different hackers, i.e. More than one person gets access.
The Trojan allows a hacker to view, copy or erase any folders and files on your computer in the same way as you do it yourself. Any file can be sent over the Internet.
There are many ways to introduce a Trojan into a system, since it is different from a virus. This is a self-replicating software segment that is not always detected by antivirus programs. Outpost was created in order to block the actions of Trojans.
Below are the Outpost settings for maximum protection:
- The Training mode informs the user about any program that tries to send data from the computer over the network.
- Deny Mode effectively interrupts your computer's connection to the Internet, which can be easily restored when you are offline.
- Make your computer invisible to hackers. Select the Settings , then the System Check Stealth mode in the Operating mode
- Make sure the level NetBIOS disabled (unchecked) unless your computer is on a local network and uses shared files. If you need a level NetBIOS, press the button Options in field LAN Settings and check the appropriate box:
To add a remote computer or network to the NetBIOS list of allowed connections, click the Add . A dialog box will appear: To add an individual computer to the list, you need to know its IP address. Enter the domain name, IP address or range of IP addresses in the appropriate field. Each option shows an example of a specific address format that should be entered. We recommend that you pay special attention to this option, since allowing unrestricted access at the NetBIOS connection level can lead to a significant reduction in the level of system security.
- From the Options select Plug-ins , highlight the Attack Detector . Click the Options and set the desired settings:
Note: You can view the Internet address from which the attack on your computer is carried out in Event Log . To open the history of an individual filter, select it in the view panel, then click the Show History in the information panel.
Hidden interactive elements of websites
Website creators use various software tools to make their web pages more interesting and useful. These are animations, calendars, special calculators and auxiliary menus. Such programs embedded in web pages have mainly practical and aesthetic significance.
However, in the hands of some hackers, these programs can have harmful effects. Therefore, Outpost allows the user to block every dubious component.
You can do the following:
- Open the main Outpost window by double-clicking on the program's tray icon
- Select the Interactive Elements by right-clicking the mouse to open the context menu:
Click Properties . A window will open in which the active elements found in web documents will be ordered:
The figure shows a window with settings that apply to all viewed Web sites. If you want to change these settings for individual sites, click Exceptions , then Add and enter the address of the required site.
After you click OK , a dialog box appears with options for the selected site.
Beware of email attachments
Active elements can be embedded in both web pages and emails. They are blocked in the manner described in the previous chapter.
Another threat that emails can pose are seemingly harmless programs that arrive as email attachments. This is a very common way for worms and Trojans to enter a system. They operate under the guise of seemingly useful programs and are capable of causing a crash and/or giving a hacker direct access to the system. To protect your computer, specify how Outpost handles different types of attachments. Right-click the Mail Attachment Filtering and click Options :
The following dialog box will appear
Create button allows you to add file types for filtering to the list:
After adding the entry, tell Outpost what to do with the file when it appears in your inbox as an email attachment. Rename option and thus neutralize the file. Then you can safely save it on your hard drive, check it with an anti-virus program and only then open it.
Ad blocking
Advertisers pay the costs of many websites, which allows them to provide information and software for free. However, advertisements often slow down your connection, are intrusive, and sometimes just plain annoying.
To have Outpost block specific advertisements on web pages, right-click the filter in the view pane. Select the Options command, bringing up the following dialog box:
Make sure the Block HTML strings is checked.
If you want to add an address to the block list, enter its name in the input field and click the Add . To change the address, you need to select it in the list, and after making changes, click the Change button. To delete an address, use the Delete .
Using the Default , the block list can be returned to its original state.
To block ads of a specific size, select the Image Sizes . The following dialog box will appear:
This window is designed in the same way as the previous one.
Note: Image size blocking involves removing all images of the specified sizes that are linked (i.e. within <a> tags), regardless of whether they are linked to another site or another page on the same site.
Banners can be replaced with either a text message [AD] or a transparent image . To configure this setting, click the Miscellaneous tab:
Note. Some banners cannot be replaced with a transparent image, so even if you select this option they will still be replaced with text.
Please note that Outpost Firewall blocks advertising banners according to the parameters you enter. Some desired ads may be blocked if you set filtering conditions that are too strict (for example, enter the word “image” in the blocking list).
If ad blocking prevents you from viewing certain sites, you can add them to the Trusted . Outpost does not block advertising banners from Trusted Sites . To add a site to this list, simply click Edit , enter the site address in the dialog that appears and click Add .
Outpost can also block advertisements that are interactive (such as animated Flash objects). Select the Block ... to enable blocking of interactive advertisements and thus reduce the load on the system and network traffic.
Blocking by content
Outpost allows you to block any website or web page that contains a specific word or phrase.
To block unwanted content, right-click the Content in the view pane of the Outpost main window and select Options :
You will see a window containing options similar to the filter options. You can manage the list of sites inside the At :
The actions in the window are the same as those that apply to advertisements.
On the Miscellaneous , you can set a message that will be displayed instead of pages with inappropriate content.
Click Edit and enter the desired message text, then click OK to save it.
Outpost Firewall Components
The Outpost Firewall Pro distribution includes the following modules:
- Web control
- allows you to block online advertising by keywords and typical sizes of advertising banners. You can control the following elements: ActiveX, Java applications, Java and Visual Basic script programs, cookies, pop-ups, ActiveX scripts, external interactive elements, referrers, hidden frames, GIF and Flash animations. Lists of dangerous sites are updated as part of the ImproveNet program. - Attack Detector
- detects and blocks network attack attempts - Email Attachment Filtering
- Detects and renames potentially dangerous email attachments - Anti-Leak
- prevents dangerous programs from acting and completely protects against Trojans, spyware and other threats using Component Control, Anti-Leak Control and System Guard technologies. Anti-Leak provides the first line of defense against malware by proactively monitoring the behavior and interaction of applications on a personal computer.