Home / Lifehacks / How to set up all mouse buttons - step-by-step instructions in pictures [Analysis from a gamer]
Lifehacks
August 12, 2020
We explain in detail how to configure mouse buttons.
In order to set up standard and additional ones, you may need instructions - most users did not change either the functions of the buttons or the double-click parameters.
Sometimes the tools already built into the operating system can help with the settings; in other cases, you will need to install special utilities.
The most popular program that allows you to set several “sets” of mouse button functions is X-Mouse Button Control.
Configuring Basic Buttons and Other Settings
To go to the settings of two standard mouse keys, follow these steps:
- Go to the Start menu.
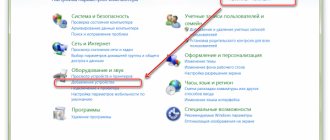
- Open the devices and printers section.
Rice. 2. Go to the list of connected devices.
- Open a list of peripheral devices connected to the computer.
- Select mouse in the list , right-click to open the menu and go to the settings section.
Rice. 3. Select device parameters.
In the menu that opens, you can change some settings. There are few of them here - and to completely change the functionality you will still have to download additional software.
Button settings for left-handers
The first tab in the properties allows you to change the configuration of the mouse keys.
By checking the corresponding box, you can swap the right and left buttons.
This makes work more comfortable for a person who primarily uses his left hand.
Rice. 4. Turn on the “left-handed” mode.
After making changes, the menu will be called up by pressing the left button, and you will have to open folders and follow links by pressing the right one.
According to statistics, by swapping keys, you can increase the productivity of a left-handed user by 20-30%.
Setting Sticky and Double Click
In the mouse settings menu, you can also change the speed of the system's response to double-clicking the main button (by default, the left one).
To enable sticky behavior on the mouse buttons tab, check the box next to the item with the corresponding name.
In the options menu, you can adjust the speed at which the flood mode turns on.
Enabled, the feature allows you to quickly highlight texts or drag and drop files, files, folders and other items without having to constantly hold down the left button.
The mode is turned on by holding the key for a few seconds and turned off by pressing it again.
Rice. 5. Change the speed of double click and sticky main key.
Here you can also change the double-click speed.
It allows you to select the appropriate time between two presses.
Although usually the already set default value is sufficient for most users, changing this speed too much is not recommended.
Wireless mouse repair
Wireless devices often fail due to dead batteries. If the mouse stops responding to movement or responds poorly to manipulation, then most likely the batteries should be replaced. Most wireless models have an operating indicator light, so the health of the batteries can be checked by the indicator glowing red.
Discharged batteries are easily removed. On the “sole” of the mouse you need to open the compartment cover and remove the batteries. It also wouldn’t hurt to check the contacts in the device and on the battery terminals. Over time they oxidize. The resulting deposits are removed with a rag soaked in alcohol. It is not recommended to use sandpaper - you can remove the protective galvanic film.
Device wheel
In the parameters there is a tab for adjusting the characteristics of the wheel installed on most modern models of computer mice.
There are few settings here - just changing the number of lines and characters by which the text on the screen scrolls when you press or tilt this element.
Rice. 6. Wheel settings.
One of the functions of the mouse wheel is the ability to move an entire page at once with one turn.
It will be useful when working with multi-page documents.
Useful tips
As practice shows, disassembling a computer mouse is not difficult. It is enough to follow the basic rules:
- perform all actions carefully so as not to inadvertently damage the fragile elements of the device;
- make sure that none of the parts are lost;
- if there are legs, be sure to install them in place, otherwise it will be difficult to work with the manipulator;
- If there are latches, please note that there should be a click when they are secured.
Before disassembling a wireless mouse or device with a cord, evaluate your own strengths and skills. Perhaps the best option would be to take the device to a repair shop, where it can be repaired by experienced specialists.
Considering the widespread use of computers that is observed today, the instructions “How to disassemble a mouse” will be useful in various situations.
Left key
The functionality of the left mouse button in normal mode is minimal.
As a rule, one click of it performs some action, selects a file or folder, and two clicks lead to their opening.
In browsers, games and most programs, double-clicking the mouse is practically not used.
All that can be done with the left button without using additional programs is to change the speed of its double press and swap places with the right key.
To perform other tasks, you cannot do without special utilities.
Key points for those who have just started using a mouse
1) The computer has no eyes or hands. Therefore, the computer needs to indicate what exactly you are going to work with. Don't forget to select the desired object.
If the object is not previously selected, then it is useless to press, for example, the Ctrl+C hotkeys to copy. If nothing is selected, then what should the computer copy?!
2) When moving the mouse, do not lift it from the table (or other surface).
3) If the mouse pointer disappears from the screen (or the screen goes dark), you just need to move the mouse and the mouse pointer will immediately appear on the screen.
4) Clicking with the left mouse button is performed very often, so usually everywhere they write simply “clicking the mouse button” without the adjective “left”.
This phenomenon is called "default". This means that if the mouse settings are not changed, then the expression “click the mouse” always means clicking the left mouse button.
The right mouse button is indicated explicitly, that is, they write “click (click) with the right mouse button.”
5) Beginner users have difficulties with double click. You need to do it quickly, confidently, without a pause between the first and second click of the mouse. In this case, you cannot move the mouse.
Otherwise, the Windows operating system perceives such actions as two separate mouse clicks, and not as a double mouse click.
About using the wheel
The wheel is located between the left and right mouse buttons. Typically, the wheel is used for vertical scrolling, for example, to move text while reading.
In some programs, the wheel allows you to change the viewing scale on the screen. It's comfortable. Press and hold the Ctrl key while moving the mouse wheel. At the same time, moving the wheel forward, the viewing scale will increase. By moving the wheel back, while pressing the Ctrl key, the scale will decrease.
You can also click on the wheel like a third mouse button. In browsers and some other programs, this allows you to move the image up, down, right, or left by simply moving the mouse in a specified direction. Also, in some applications, a click on this third mouse button can be programmed to perform some action.
On MAC computers, the wheel must be rotated in the opposite direction than on conventional PC computers. I don’t know what this is connected with, perhaps computer and software manufacturers patent their developments.
How to make it easier for a novice user to master a mouse?
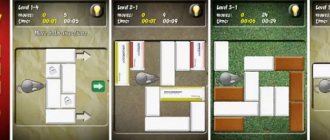
To learn how to use a mouse, you can play a game, for example, try playing Klondike solitaire.
When was the computer mouse invented?
The first computer mouse
The mouse's birthday is December 9, 1968. On this day, the Unified Autumn Computer Conference took place in San Francisco, at which American researcher Douglas Engelbart presented his invention, the mouse. The device he proposed consisted of a wooden body with two metal wheels and a button. There was a cord coming out of the back of the box, so it was called the “mouse.”
This invention was not used until 1984-1990, when graphics programs and operating systems with graphical control techniques became popular.
Enough theory, let's move on to practice.
Right key
The button located on the right usually has only one function - calling the context menu.
With it, you can perform various actions - from archiving files to copying and cutting information.
The list of menu commands can be changed, but for this they no longer use the mouse parameters, but the registry editor.
To proceed to change settings, perform the following steps:
- Open the “ Run ” line ( Win + R ).
- Enter the regedit command to go to the editor.
Rice. 7. Go to the registry editor.
- Open the HKEY_CLASSES_ROOT .
- Go to the subsection with the name «*».
- shellex ” and “ ContextMenuHandlers subdirectories in turn .
Rice. 8. Context menu elements.
In the list that opens, you can see some of the menu items that open when you right-click.
Naturally, not all functions are here - it is impossible to remove the “copy” or “paste” commands from the list.
But the items that trigger scanning with an antivirus, unpacking or archiving can be easily removed.
For more precise settings, you will have to use special programs.
For example, the Easy Context Menu , which allows you to make changes to any Windows context menu, including the shutdown form.
Rice. 9. A program for changing any context menus.
Setting up additional keys
Unlike office computer mice, gaming models are equipped with at least two additional keys.
Sometimes the number of side buttons can reach 6, 8 or even 20.
To configure such models, special software is used, which is usually included.
Rice. 10. Computer mouse with 20 buttons.
Logitech gaming mouse models come with the official SetPoint utility, which allows you to easily configure the functions of all additional keys.
To configure, the user must perform the following steps:
- Launch the SetPoint Settings program from the Start .
- Go to the tab with mouse models and select the desired option.
- Mark the desired button in the “ Select Button ” field and the appropriate function in the “ Select Task ”.
- Click on Apply to save the settings.
Rice. 11. Setting up a Logitech mouse.
Some manufacturers provide more settings in their utilities.
However, the principle of operation is almost always the same.
And sometimes the installed gaming mouse driver is automatically built into the settings menu and does not even require launching a special utility.
Updating the Settings window in Windows
Some manufacturers include drivers for their devices, including keyboards and mice, that can change the default settings window.
After installing such software, when you go to the settings of the manipulator, additional functions appear on the standard tabs.
They make it easier to customize individual buttons.
Rice. 12. Computer mouse settings through the usual settings window.
Sometimes additional tabs appear in the menu where you can set functions for the side keys.
However, this method is rarely used for the most functional, gaming mice.
If the total number of keys is at least 5 or 6, you will have to configure them through the X-Mouse Button Control program, suitable for any manipulator with original drivers.
Analysis of a wireless mouse: A4tech Bloody
The use of a high-quality laser sensor in a manipulator is an undeniable advantage. This is exactly what A4tech mice with the Bloody brand are ready to boast of. They belong to the gaming class.
How to disassemble the A4tech Bloody mouse? More on this in the instructions below:
- Unscrew the two screws that are on the case and remove the top part. To do this, pry it slightly, being careful not to damage anything.
- Turning the mouse frame over, you can see a metal plate. Unscrew it.
- Remove the mouse wheel. If there is dirt or hair, clean it. If you take the Bloody mouse apart, you will see that the wheel consists of two parts.
- To remove the board, carefully unscrew the screw.
Now it’s clear how to disassemble the A4tech mouse. To assemble it, follow the same steps, only in reverse order.
Installation and configuration
During the installation process, the program prompts you to choose where the configuration files will be saved - by default, the user profile folder is automatically installed.
Here you can erase all previous settings for mouse buttons if the utility has already been installed on your computer before.
To do this, check the box “ Delete (reset) any existing X-Mouse Button Control settings ”.
Rice. 14. Program installation process.
After installation, the program appears as a tray icon - while it is running, the mouse keys can work in accordance with the configured settings.
By going to the main window of the utility, you can see the English interface.
For more convenient work with X-Mouse Button Control, the user should change the settings and select Russian.
Rice. 15. Setting the utility interface language.
To change, click on the Settings button located in the lower left corner, open the Language and select “ Russian ” from the drop-down list.
The change translates most of the inscriptions into Russian, although sometimes the translation may not be entirely correct.
Rice. 16. The main program window when switching to Russian.
How to disassemble a mouse
Even the best, high-quality mice tend to get clogged. There are a lot of small crevices in them that even a needle can barely fit through, but dust and hair are placed there comfortably. And occasionally, coffee spills inappropriately on this small device. What to do when the mouse is clogged and the buttons and wheel do not respond as expected? There is only one way out, or rather two: you can easily throw out the mouse, and if this was not part of your plans, then you will have to disassemble the mouse . You will need
- Small Phillips screwdriver, container for storing screws
Instructions
1. Prepare the mouse for disassembly. To do this, disconnect it from the computer and place it on the table, upside down. Locate the mounting screw on the bottom surface of the mouse. The screws are sometimes not immediately visible, because they are often hidden under stickers. In this case, first remove all stickers from the base of the mouse. 2. Carefully unscrew the mounting screws. The screw heads on mice are traditionally cross-shaped, and therefore the same type of screwdriver is required. The screws are located in recesses; it will be easier to remove them with a magnetic screwdriver. It is important that after unscrewing, put the screws in a prepared container, otherwise they will get lost.
3. Open the case. To do this, hold the mouse with both hands on the bottom and top surfaces and pull the cover towards you. Calculate the force so as not to break off the lid latch near the cord. The best thing to do is to pull the lid up and a little to the left. Now you can blow out and clean the insides of the mouse from accumulated debris and dust.
4. Remove the scroll wheel from the base of the mouse. There are various designs for mounting scrollers. Most often, just pull up and the wheel will come out together with its mount or latch. There is often a lot of hair wrapped around the scroller axis. Remove this hair with a suitable tool.
5. Remove the board or mouse chip. The board is secured with latches or screwed. Gently bend the latches with your fingers. Unscrew the screws and put them with the rest of the parts. Lightly pull the board up to separate it from the mouse body. That's it, the mouse parsing is complete.
Occasionally, a computer mouse suddenly loses its functionality. This is due to chafing of the cable near the case itself. In such a situation, you have two options: buy a new mouse or try to repair the old one.
Instructions
1. Disconnect the mouse from the PC. Take a small Phillips screwdriver to disassemble the computer mouse. Find the mounting screws on its bottom surface. Unscrew them using a screwdriver. 2. After this, try to remove the top cover of the case. Pry it with a thin sharp object from the side opposite the cable entrance to the mouse. If the case does not budge, it means there are hidden screws. As usual, they are located under the rubber feet of the mouse. Remove the rubber bands from the holes. Using a Phillips screwdriver, remove the remaining screws. 3. Look under the stickers. There may also be mounting screws hidden there. Please note that damaging the sticker is only allowed if the warranty repair period has expired. Otherwise, it will no longer be possible to repair your computer mouse at a service center. 4. You will save rubber feet from the fact that without them it will be very inconvenient for you to use the mouse. It turns out that in order to disassemble the mouse, remove the upper part of the case. Remove the scroller. Usually it is equipped with a shaft, fixed on one side in a detachable hinge. The other end of the shaft should be attached to the encoder hole. 5. Lift the shaft over the joint and remove it from the hole. Remove all screws holding the board in place. After this, remove the latches. Later, remove the optical cover and lens from the board. Leave the multi-pin connector in its original place. Take wire cutters and cut the wire until it enters the housing. 6. Cut the damaged piece of cable to repair the mouse. After this, clean the contacts. Take a soldering iron. According to the colors of the pins, solder them to the multi-pin connector inside the mouse body. Later, connect it to your computer. See if the LED lights up and if there is a reaction to the rotation of the scroller. 7. After this, you can return the lens to its former place and check if there is a reaction to the movements. If the mouse works properly, reassemble it. If not, check the positive solder connections on the multi-pin connector. It is possible that you left a jumper between the contacts.
If you have ever organized a meal at a laptop or the process of cooking near a laptop (there are some), most likely, after these events, your laptop refused to work. Maybe it works, but something from food got under the key. In order to pull out a particle of your previous food from under the key, you need to disassemble the keyboard or remove only the key.
You will need
- Laptop keyboard, tool for removing keys (anything thin and not sharp).
Instructions
1. In order to begin cleaning the keyboard buttons, you need to remove the keyboard. Many laptop keyboards come apart from the keys. In order to avoid mistakes during assembly, it’s best to take a photo of your keyboard or a photocopy. Any key on a laptop keyboard consists of several parts: - key pad; - key lift; - spring element (not present in all keyboards). 2. To quickly complete the process of removing the keys, any thin and non-sharp object can be used: a watch screwdriver, a thin awl, a dental hook. The keyboard button pad is connected to the elevator via latches. Connections can be either movable or non-movable. With support for static connections, the key is detached from the keyboard body. As usual, this connection is located at the bottom of the keyboard button. You need to insert the hook between the static connections, making sure that it goes between the elevator and the landing. 3. So you took one off button . If you need to do the same with multiple keys, be mindful of their placement. Use your photo or a photocopy of the keyboard when reassembling the keyboard buttons. 4. The keys are placed in their former place by completely snapping into place. Put button to its intended place and press it. Video on the topic
Personal computers have long been impossible to imagine without a keyboard and mouse, which are the main intermediaries in the “communication” between the user and technology. Unfortunately, mice break and start acting up quite often. The computer mouse can be disassembled and cleaned.
Instructions
1. Dirt and dust penetrate the ball mice better than anyone, getting under the roller. The cursor begins to twitch when moving, or may not move at all in any direction. Therefore, it is very important to use a rug and make sure that dust does not accumulate on it. 2. Disconnect the manipulator from the PC, but only when the system unit is turned off. The mouse body can be cleaned with a traditional damp cloth and a small amount of liquid soap. But don’t even think about washing your mouse under running water. True, after disassembling the optical (precisely optical) mouse, the case itself can be thoroughly rinsed. Primitively, mechanical mice also have a microcircuit that cannot always be removed from the case. 3. Take a small Phillips screwdriver and unscrew the small screw, the one located in the recess at the bottom of the manipulator body. Typically the body consists of 2 parts. There may also be a small latch on the side of the screw. Carefully divide the body without using any special force. 4. If the mouse is optical, you need to carefully wipe the glowing scarlet “eye” in its lower part using a match with cotton wool or an ear stick. You can also use a can of compressed air. Carefully remove the huge chip from the optical mouse body and free its plastic parts from dust, dirt and hair (fur). Remove the rubber-covered ball from a ball mouse and wash it with soap or wipe with alcohol. Pay special attention to the mouse wheel and its mountings. Dirt often accumulates there too. 5. To mechanically remove dirt, it is better not to use a knife or razor, but to take a small plastic scraper. Carefully scrape off dirt from its support where possible. 6. Having dealt with dust and adhering dirt, remove grease from the rotating parts of the manipulator. This can be done with a soft, lint-free cloth soaked in alcohol. Also wipe all the insides of the mouse with alcohol to prevent dust from accumulating for longer. 7. Now you can collect the mouse . Put the chip (wheel) back and close the case. Be careful not to pinch the wire. Tighten the screw and consider the mouse cleaned.
If, while working at the computer, your hand with which you are holding the mouse , the pain intensifies and does not go away, then you can be “congratulated.” This is a manifestation of tunnel syndrome, following the disease of civilization. Severe pain and the impossibility of continuing to sit at the computer may conceal swelling of the tendons and damage to the nerve of the wrist. A chronic form of joint disease may even develop. on how correctly you hold the computer mouse .
Instructions
1. Check how you usually hold mouse PC. In order to hold mouse positively, the hand should be straightened and located as far as possible from the edge of the table. 2. Stop using the retractable keyboard and mouse tray. Better yet, pick them up and place them on the table in front of the monitor. The angle of the arm in this case will be closer to 90 degrees, which will be more convenient for you. 3. The furniture on which you sit - a chair or an armchair - must have armrests that will provide the necessary support for your arms and wrists. 4. Mouse pads are not a relic at all, only if there is a special anatomical convexity for the wrist. Using such a mouse is very comfortable and reliable. Therefore, be sure to purchase such a positive rug. 5. Do exercises for your arms for the whole hour or even two hours. It doesn’t matter which one: from the well-known “We wrote, we wrote, our fingers are tired” to snapping fingers – as long as it lasts longer. 6. If you don’t feel comfortable using a mouse, use a special hard medical bandage that also supports your wrist. It can be purchased at an orthopedic salon or at a pharmacy. 7. You need to move the mouse with just your fingers, and not with each hand, especially with the support of your shoulder. Hold mouse hold the edges with your thumb and little finger, place your index finger on the left button, your middle finger on the wheel, and your ring finger on the right button. Video on the topic
Note! If carpal tunnel syndrome is no longer making itself felt, but is really worrying, go to the doctor immediately and do not delay treatment. Helpful advice Learn to use the mouse with both hands. Changing the position will help avoid pain. In addition, it is suitable for developing coordination and posture. You can easily change the functions of the left and right mouse buttons in the settings on the control panel.
Sometimes it is necessary not only to assemble cabinet furniture, but also to disassemble it in order to transport it to another place. You can disassemble the table if you have the necessary tools and carefully study its design.
You will need
- – flat screwdriver;
- - a huge Phillips screwdriver.
Instructions
1. When starting work, find all the attachment points for the tabletop and legs. The normal fixing elements are located under the tabletop. It is attached to the legs, which can be connected to each other by transverse strips. 2. If the table is combined with another table or with a “corner”, first unscrew the screws (or screws) that hold the ties. Ties have the form of brackets or rectangular plates. 3. Remove the ties that connect the tables. This way you will separate the table from consoles or other furniture. 4. Loosen the tabletop fastening elements. When it is no longer secured, proceed to remove it from the table legs. 5. Next you need to loosen the screws securing one leg in the place where it is combined with the cross board that holds them together. Remove one table leg. Then remove the second one as well. 6. Place all fasteners (accessories) in a bag and tie them to the boards of the disassembled table, so that if you move, the polished furniture will not be scratched. 7. Take a flathead screwdriver or a large Phillips screwdriver to remove the tabletop. With the help of these tools, turn the drums counterclockwise (four extravagant ties). Maintain a rotation angle of about 180 degrees (approximately half a cycle, no more). The eccentrics are located on the inside of the legs closer to the tabletop itself. 8. Usually there is an arrow pointer on such screeds. Therefore, when turning the drum counterclockwise, make sure that this arrow points sternly upward. This location indicates that the ties are loose. Using this method, unlock all four ties that are located on the table legs. 9. One leg can have two attachment points, which can be hidden under a decorative overlay to match the color of the table. Therefore, before turning the tie, remove the small plastic circle (decorative element). 10. In order to separate the table legs from the connecting transverse board, point the arrows on the eccentrics directly towards the table legs, bring them into a horizontal position. Turn the ties counterclockwise. Helpful advice: On a piece of paper, draw up a diagram of how to disassemble the table to make it easier to assemble it in a new place.
Wireless devices are becoming more and more popular among users, and most definitely wireless mice. Most often they can be seen among owners of laptops, although in some cases also among users of desktop computers. After unpacking, many customers of wireless mice wonder: where to put the batteries?
Instructions
1. First of all, unpack the contents of the box and take out the mouse . Please note whether the kit includes brochures or instructions. It turns out, take the mouse in your hands and look attentively. Usually the manufacturer makes a battery compartment at the bottom of the mouse, but in rare cases it is located primitively in the middle. If the compartment is located at the bottom, then pry it with something sharp or, if there is a “tongue,” press it. Insert the batteries and close the cap. 2. To gain access to the compartment, you need to click on the upper part of the mouse body, and then slowly pull it towards you. Don't worry: the mouse will not break, only the moving part will be removed. Insert the batteries and close the lid, the main thing is not to break the teeth that are inserted into the grooves on the case. The main locations of battery compartments in mice are discussed. If your wireless mouse does not have a compartment in the 2 indicated places, then read the instructions that come with it. The instructions can also always be downloaded on the manufacturer’s official website. 3. When using a wireless mouse, it is occasionally necessary to completely disassemble its case - for example, to clean it from dust or to troubleshoot problems. Start with the screws. Look carefully at the bottom of the mouse: remove the stickers and legs, since the largest number of screws are hidden under them. Unscrew them and carefully remove the upper part of the housing. On some “sophisticated” mice, the upper and lower parts of the case are connected by a special cable, and if it is torn off, you will have to take it for repairs. There is no point in unscrewing all the insides, since every dust will already be clearly visible. The screws can be pre-numbered so as not to get confused when assembling the mouse. The legs can be glued back with double-sided tape or cleaned in advance and glued with silicone glue. Helpful advice: Assembling the mouse is done in the reverse order. The board, scroller and cover are put in place. If there are latches, make sure that they all click into place.
Mouse Button Settings
The main utility window is divided into 2 halves.
On the left side there are profiles, on the right side there is a list of layers.
For each of them, you can choose your own functions for the keys and wheel, including scrolling and tilting.
Rice. 17. List of functions that can be set to any mouse key.
When you first launch the program, you can see the standard Default option among the profiles.
For further customization, it is worth creating an additional list element, giving it a suitable name - for example, “ For work ” or “ Game ”.
The setup process requires the following steps.
First you need to create and name a new layer, then move on to binding certain actions to mouse buttons.
By pressing the key whose functions will change (it is highlighted in yellow), the user selects the appropriate option from the drop-down list.
In the list you can find dozens of functions, which are conventionally divided into several categories:
- emulation of pressing any keyboard key, including “ Enter ” or “ Escape ”;
- pressing multiple key combinations – for example, “ Ctrl ” + “ C ” to copy or “ Ctrl ” + “ V ” to paste;
- system actions, including changing volume settings, calling a screensaver, and even turning off the computer (although setting such an action to a mouse button is not recommended due to the risk of accidental clicking);
- functions for working in the browser - for example, opening bookmarks, creating and refreshing a page;
- calling Windows utility tools to the screen;
- internal actions of the utility - switching between layers, enabling modifier keys;
- performing complex actions, including simulating pressing multiple buttons on the keyboard.
In addition to standard features, the program allows you to create your own functions that are not provided by default.
To configure them, use the “ Simulated keys ” item. In the window that opens, enter the codes for the required buttons or actions.
Once you've set presets for one layer, you can move on to the next by selecting.
Individual functions are selected for different games, for Internet surfing and working with documents or computer-aided design systems.
A suitable program can be found in the list by clicking on the “ Add ” button in the lower left corner.
Rice. 19. Adding a game to the list of application layers.
Additional settings
For most users, the utility's basic settings are sufficient to effectively use the mouse.
However, the program also offers additional options, including changing scrolling characteristics.
On the tab with the same name you can find almost the same options as in the mouse settings in Windows - but with much more functionality.
If necessary, the user can force page scrolling even if the application does not respond to other commands.
Here the scrolling direction changes and the ability to scroll the window horizontally rather than vertically is established.
Rice. 20. Scrolling settings using the mouse wheel.
Continuing to consider the program's capabilities, it is worth noting the presence of hot keys and modifier keys.
You can configure them on tabs with appropriate names.
In each list, you can set combinations of keyboard button presses that will launch certain utility actions - first of all, switching to the desired layer.
Important : Users who plan to work with 3 or more layers simultaneously should use hotkeys. If there are only two layers, modifier keys are sufficient.
Rice. 21. Assignment of hot keys.
The differences between “hot keys” and modifiers are that the former allow you to immediately switch to the selected mode, while the latter only act as long as you remain pressed.
When released, the mouse keys return to their default functionality.
Hello dear Hackers, Kharchatas and Kharchikhas! In principle, this material is not intended for you - you know how to masterly use a mouse (if necessary, you can hack it without much effort, and if by chance you happen to have a real, live mouse in your hands, then you won’t get confused here either) - this material is intended for users who have seen the mouse only a few times, and some may have touched it.
How to hold the mouse:
According to my observations, “dummies” actually touch the mouse with the tips of their clumsy fingers. They also use them to move the mouse, which causes involuntary activation of the contacts of the object being moved. The mouse should be held in your hand like the breast of a girl over 20 years old (for girls it’s not worth giving an example - especially if it really is worth it). So, the hand fits tightly around the chest... that is, the mouse - the palm presses it comfortably to the mat, the fingers hang over the entire structure (if the palm is small, then perhaps the pads of the fingers will fall directly on the mouse buttons). You should hold the mouse by its sides with your thumb and little finger so that it cannot escape from us when moving.
Mouse movement:
Initial state: the palm presses the mouse (the mouse rests on the center of the palm), the fingers are spread out to the sides.
Movement: move your palm in any direction in the plane of the structure’s location - the mouse will move due to friction with the palm (if it’s not clear, read more about friction from the physics course).
Pressing buttons located on the mouse:
There are 2 to 3 buttons on a mouse (mice with all sorts of distortions are not subject to consideration). Pressing the mouse button occurs through the muscular force of the finger located above the button in the direction of it (an association can be the action of the hand to squeeze a girl’s breast in a passionate outburst, but only one finger is used). You should not press several mouse buttons at the same time - the consequences of the operating system can be unpredictable. Also, you should not hold the mouse button down for a long time unless absolutely necessary.
Types of mouse button clicks: “Simple Click” and “Double Click” (For professionals, “Click” and “Double Click”, respectively).
“Simple press”: pressed and released, where the gap between pressing and releasing is a fraction of a second (in extreme cases, half a second).
“Double tap”: pressed - released - pressed - released, where the gap between pressing, releasing, pressing and releasing is a fraction of a second (at most half a second).
Using a mouse-type manipulator for its intended purpose:
The mouse is used to poke at different places. This sentence should not be taken literally! Poking should be understood as pointing a virtual cursor (it is located on the monitor screen, usually in the form of an arrow at an angle of 120 degrees), programmatically attached to the mouse roller, at the required virtual object (it should also be searched for on the monitor screen) and performing the “Simple” action Click" or "Double Click" above the desired mouse button. In this case, the mouse body (you hold the mouse by it) should be held in a static, not a dynamic state. Simply put, when you press a mouse button, your hand, and therefore the mouse, should not move. Simultaneously pressing/holding a button and moving the mouse refers to virtuoso mouse control and is not considered in this manual.
FAQ on mice:
Q: Why do I need a mouse?
A: Then, to perform some actions faster and without the help of the keyboard, for example, drawing on the virtual canvas of the monitor screen.
Q: Why move the mouse?
A: To move the virtual cursor on the monitor screen.
Q: Why do I need to click on the mouse buttons?
A: To select an object or perform some program action.
Q: What should I do if the cursor is not visible on the monitor screen?
A:
- Turn on the monitor.
- When the monitor warms up and feels warm, move the mouse in different directions, pressing the mouse roller to a surface like a mat (for the mouse, but not for the feet, etc.).
- If the cursor is not found, try turning the monitor with the glass surface facing you and repeat the steps from step 2.
- If the cursor is not found, make sure that you are currently looking for the cursor on the monitor that is connected to the system unit from which the tail of the above rat comes..., i.e. mouse and repeat steps from step 2.
Q: What should I do if the cursor is visible on the monitor screen, but when moving the body of a mouse-type manipulator, it does not move with it?
A: The software connection between the mouse cursor and the roller of the manipulator itself is lost. Specialist intervention is required.
Q: What should I do if suddenly a black background appears on the screen and there is nothing else except the virtual cursor?
A: Press the key combination “Ctrl+Alt+Del” on the keyboard twice in a row and press the “RESET” button on the system unit once.
conclusions
Having become familiar with different ways of reassigning functions for mouse keys, you can customize the operation of the manipulator for games, text formatting, or Internet surfing.
The easiest configuration option is to use special utilities.
Gaming mice are easily configured using the X-Mouse Button Control program; to select functions for models with a large number of keys, it is worth installing proprietary software from the manufacturer.
4.7 / 5 ( 3 voices)