The hard drive is the most fragile element of a computer. It is he who is responsible for storing all information and it is clear why its damage leads to panic. Sooner or later, every person asks the question of how to fix a hard drive. Exception: very prudent people who constantly monitor the condition of the drive and regularly make backup copies of all information stored on it. But since such people are rare, information about DIY HDD repair is very popular.
Where to start repairing a hard drive yourself
A hard drive can fail for various reasons: due to physical damage or software failures. It happens that a hard drive breaks without external intervention. Simply due to time and mechanical wear of parts. The normal service life of a hard drive is up to 8 years. During active use, it breaks down faster even with very careful handling. You need to keep this in mind and try to back up your files as often as possible. Such actions will help you avoid spending money on recovering data from a damaged HDD.
If you still need to repair your hard drive, you first need to understand your priorities. Hard drive repair and data recovery are two different procedures that are often mutually exclusive. Therefore, before repairing your hard drive, it is better to try to restore existing files. If you cannot do this yourself, you will have to contact a workshop. In many cases, it is possible to ask the technicians to return the existing information and then install a new hard drive into the computer.
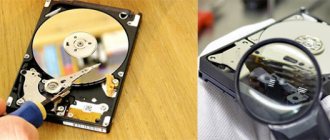
And one more piece of advice: do not try to disassemble the HDD. After such an intervention, dust, dirt, and moisture will get inside the part, which will completely destroy it. Then no laboratory will undertake restoration and repair.
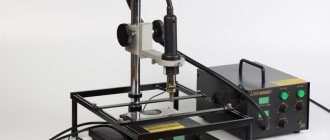
How to disassemble a seagate hard drive
Perhaps every computer user has encountered one or another problem during his time working with a PC. Perhaps these were software errors, perhaps problems associated with the operation of the equipment. One of the most common and yet unwanted problems is hard drive (hdd) failures. Despite the fact that the average service life of a hard drive ranges from 5-10 years, due to unforeseen situations, problems in the operation of the hdd are possible even at an earlier period of operation. One of the possible solutions to problems with the hard drive may be to disassemble it and further clean or repair it. It should be noted that at the moment one of the most well-known manufacturers of hard drives is the American company Seagate, and it is on the example of one of these drives that we will consider disassembling the hdd.
How to disassemble hdd seagate?
So, how do you disassemble a Seagate hard drive?
First of all, it should be noted that it is not recommended to disassemble the computer hard drive yourself, since there is an extremely high probability of causing irreparable damage to the hard drive and breaking it through unprofessional actions. It is also recommended (if possible) to back up important data from the disk to another third-party media before disassembling.
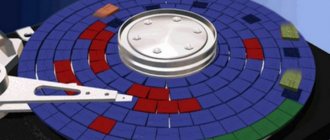
First, let's characterize the main elements that make up Seagate hard drives:
- integrated circuit (controls the operation of the hdd and synchronizes with the operation of the PC) - spindle (electric motor responsible for rotating the disk) - rocker arm (responsible for reading / writing data) - the hard drive itself, the storage medium
- a housing in which all other elements are assembled and responsible for their protection from the external environment
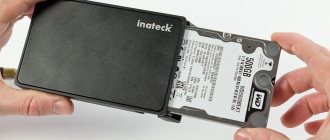
Also, for external hard drives that are popular today, it is typical to use an additional case (the so-called “pocket”) in which the hard drive itself is stored. The pocket is designed for more reliable protection, ease of carrying and operating an external hard drive, and may also have additional connectors or cords.
In terms of assembly or disassembly, an external hdd is not much different from an ordinary internal hard drive. In fact, if the question arises “how to disassemble a Seagate external hard drive?”, the procedure will be similar to disassembling the internal hdd, the only difference is that you must first disassemble and remove the pocket of the portable hard drive. However, this is usually not difficult, since most often the outer case is secured with several small screws or latches.
Instructions on how to disassemble a hdd in Russian
When starting to disassemble a Seagate hard drive (or, indeed, any other manufacturer), you first need to remove the cover. Typically, this is as easy as loosening a few screws or loosening latches. However, if after such actions the cover does not come off, you need to additionally check all the stickers on the case; perhaps the manufacturer has hidden additional fasteners under them.
After removing the housing, you need to disconnect the integrated circuit (controller). As a rule, it is also attached with screws and can be easily removed. There is a thin foam pad underneath the controller that provides additional protection for the circuitry. This gasket can be removed using a knife (to slightly pry up the foam).
The next step in solving the problem of “how to disassemble a Seagate hdd” is to remove the top cover from the hard drive. This cover is also held on by several screws that are easily accessible. After removing the top cover, the “internal” elements of the hdd become accessible - the hard drive itself, the spindle, the magnetic head unit and the rocker arm. These elements are also attached to the case with screws, which can be unscrewed one by one to remove all parts of the hard drive.
Thus, when disassembling a Seagate hard drive, no particularly complex manipulations or tools are required; most often, only a suitable screwdriver is sufficient to remove the mounting screws. A knife can also be useful if you need to remove the controller gasket or it is not clear how to disassemble a Seagate portable hard drive, the outer case of which does not have screws visible.
Similar articles
ruinfocomp.ru
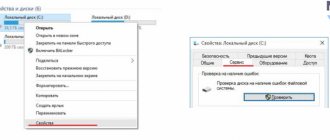
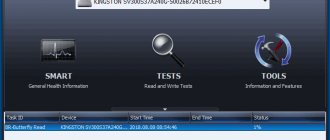
Checking the ability to repair a hard drive via SMART
To determine whether a hard drive can be repaired at home, it must be tested. Manufacturers have prepared in advance for such a test: all carriers are equipped with a SMART system that allows you to test the part. The system allows:
- check the degree of wear of the drive,
- see operating parameters and compare with critical ones,
- evaluate electronics performance.
To check, you need to download the utility for SMART, run it, wait for the results to appear and evaluate the parameters shown. If the situation is critical, it is better to immediately transfer the data to another storage and install a new hard drive in the PC.
Checking the hard drive via BIOS
Another way to check is through the BIOS. This step will help you understand whether it is possible to recover the data and the drive itself at home. Turn on the BIOS, see if the PC sees the hard drive in the list of drives that opens. If the hard drive is there, you can test the effects of recovery utilities without removing the part from the computer case.
If the BIOS does not see the hard drive, there are several options:
- Bad sectors appeared on the media. We'll tell you how to fix it below;
- mechanical malfunction. This is the most unpleasant case, since nothing can be corrected here. To extract information, the device will have to be taken to the workshop. This outcome can be predicted by the uncharacteristic sounds heard from inside the device when turned on: squeaking, clicking, rustling. All this shows that the media cannot spin normally;
- oxidation of contacts connecting the storage to the motherboard. You can clean them with a regular eraser and pure alcohol (not vodka!);
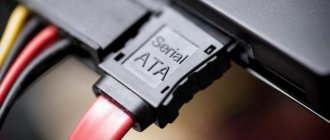
- port damage. To fix it, just connect the drive to a different port;
- cable damage. When replacing the connector the problem disappears.
The BIOS will not even recognize a working hard drive if it is connected incorrectly or the contacts are loose. In order to eliminate this possibility, the following steps must be taken:
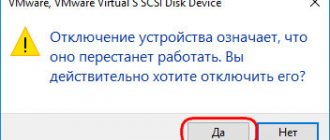
- disconnect the PC from the network, press the power button on the case (remove the battery on the laptop);
- remove the hard drive, carefully disconnecting it from the motherboard and power supply;
- clean the storage from dust and dirt (only from the outside, the HDD cannot be disassembled!);
- check the cables from the motherboard and power supply, the power cable, eliminating damage;
- return the media to its place (it should fit tightly into the slot), connect the cables and cables;
- connect the PC to the network, click the “Start” button, go to the BIOS. A working hard drive should appear in the list.
If the computer does not see the drive even after this, it means the device is damaged. In order to repair your hard drive, it is better to contact a professional.
How to disassemble a laptop hard drive - tools and simple techniques
Sometimes a user needs to disassemble the HDD of his laptop: for example, for repairs, “donating” spare parts, or in order to turn a non-working device into some kind of decorative element. We will now tell you more about the analysis process in an accessible way and in Russian. Before you disassemble the hard drive from your laptop, you need to remove it. To do this, you need to remove the back cover of the portable personal computer, unscrew the screws holding the device at the ends, and carefully pull out the drive so as to disconnect the connectors. Only after completing these operations can you remove the HDD.
What tools should you stock up on before disassembling your hard drive?
Before disassembling a laptop hard drive, you need to acquire the appropriate set of tools. To determine its composition, you need to carefully examine the drive itself. Different HDD manufacturers use screws with different slot shapes on the head, so there is no universal solution. As a rule, to disassemble a laptop hard drive, you need a small (“clockwise”) Phillips screwdriver and a key, the cross-section of which has the shape of a 6-pointed star (the so-called Torx). The dimensions of the screwdriver and key, however, must be selected individually for a specific drive model. The design of some HDDs does not contain fasteners with a slot for Phillips screwdrivers - in this case, only a key will be enough. It is also useful to have special flat levers that can be easily replaced with a regular stationery knife.
Preparing the hard drive for disassembly
Also, before disassembling the hard drive, you need to determine where the screws are located. The difficulty is that very often manufacturers place them under various stickers. In addition, stickers also act as seals: the product warranty becomes void if they are removed. Therefore, it is not recommended to disassemble the laptop hard drive yourself before the warranty period expires.
Disassembling a laptop hard drive
So, you have removed the drive from the computer, acquired the necessary tools, and located all the screws. How to disassemble a laptop hard drive? This operation must begin by removing the controller. A controller is an element in a drive that controls the drive and transfers data. Technically, the controller is implemented in the form of a printed circuit board, which is connected via a cable to the mechanical part of the HDD. Unscrew the screws holding the controller to the case, then carefully - so as not to damage the cable - turn it over. After this, you can disconnect the cable from the board. On modern devices, very often the cable is adjacent to the board using contact pads, i.e. not attached to it. However, it is not recommended to abruptly remove the controller to avoid damage to the cable.
The next step is to disassemble the mechanical part of the laptop HDD itself. It should begin by unscrewing the screws holding the cover. Sometimes, in addition to them, manufacturers resort to various latches - this is where a utility knife may be needed.
After removing the casing, you gain access to the internal mechanisms of the drive. The next step is to unscrew the screw that holds the plates (“pancakes”) on the spindle. By removing them, you can also easily remove other structural elements: magnets, a parking space for the head, a block that moves the reading head. All these elements are secured with screws. It is worth noting that the magnets of the linear motor, which ensure the movement of the head, have extremely high induction - because of this, they are extremely difficult to separate from the body, even in the absence of any additional fasteners.
Disassembling a laptop drive should not cause any difficulties, provided that you have the appropriate tools and are careful when disassembling it. The main rule when working with such equipment is attentiveness. Do not make sudden movements or use excessive force: if you cannot detach a part, make sure that you have unscrewed all the screws, that the element is not held in place by a latch, and so on.
Similar articles
ruinfocomp.ru
Automatic detection of bad hard drive sectors
Often a hard drive fails due to bad sectors. When you try to write something to such an area or read existing information, the device slows down or an error message appears on the screen. Damaged sectors are:
- logical – software errors resulting from a failure. For example, while working on a PC, the power suddenly went out. In this case, the sector in which the operation was performed may be damaged. Fixing such an error is not difficult;
- physical – device breakdowns due to natural wear and tear or mechanical damage. For example, if the computer was dropped, hit or shaken. Result: damaged controller. The problem is often accompanied by sound signals: tapping or squeaking. In such a situation, the question of how to fix a hard drive at home has no answer. You will have to seek help from a workshop where there is special equipment.
It is impossible to guess why bad problems appeared without diagnostics. You can test your chances of repairing your hard drive using special utilities that are freely available on the Internet.
Disassembling the HP pd500a external hard drive
Disassembling an external hard drive, the process in most cases is not complicated and quick. But as it turned out, this does not happen with all disks. Once I got my hands on the HP pd500a external hard drive, everything was a little more complicated. After the fall, the disk did not want to be detected through the USB port and nothing could be reached. Having decided to disassemble and try a direct connection to the computer via a SATA cable, to extract at least some files.
With most drives, you simply pull out the top and we get to the hard drive itself. In this case, it was not so simple. After several attempts, the case did not give in and in order not to break anything, I looked for information on how to disassemble an external hard drive on the Internet, but apart from instructions for connecting to a computer, I did not find anything else. Therefore, I decided to write a small guide, maybe someone will find it useful. Looking ahead, I want to say that the hard drive does not have the ability to connect standard SATA, USB is soldered onto the board itself.
It was immediately clear that the case is held on by plastic latches. Having taken the pick for disassembly, I began to look for where to hook in order to disconnect the body.
How to fix a hard drive yourself if it is not detected by Windows
Sometimes hard drive problems arise due to a conflict with the operating system. Windows may not see the drive for the following reasons:
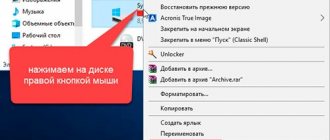
- The hard drive does not have a letter. The name may not contain the letter by which the system defines it (B, C, D). In this case, you need to format the hard drive by giving it a new letter. Please note: formatting will erase all data on the media. It is possible to restore them. There are special utilities for this;
- RAW file system type is specified. The main type of hard storage system is NTFS. Formatting, in which a new abbreviation is indicated, will help return the type. But all recorded files will be deleted;
- The OS does not see the new drive. This often occurs when installing a new hard drive into a PC. To fix the problem, just initialize it.
In any case, if the source of the problem with the hard drive lies in the OS, you can cope with the situation and repair the hard drive without the help of specialists and at home.
How to repair a hard drive if it is not readable correctly
Errors of this kind can be detected using special diagnostic software. The reasons for a hard drive failure on a laptop may be the following:
- channels transmitting data do not work well;
- the disk surface has failed;
- control components are not working correctly.
In this case, it is better to entrust the recovery of the hard drive on a laptop to professionals. You will not be able to carry out repairs on your own.
Read more
As you know, a hard drive, or in other words a hard drive, is one of the main components [. ]
The hard drive is the main data storage on a laptop, and if [. ]
The situation when you need to connect a laptop hard drive to a computer usually occurs in [. ]
Many computer users, especially laptops and tablets, purchase external storage media [. ]
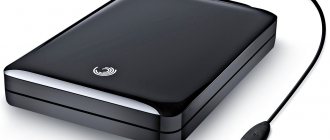
Is it possible to repair a computer hard drive yourself if it is external?
Repairing external media is basically the same as with regular media. There are only a few nuances:
- If problems arise with external storage, first of all you need to check the functionality of the USB cable. If it is damaged, the hard drive is disconnected from the PC;
- The second “weak link” of the external drive is the socket through which it is connected to the device. There is an adapter inside the socket. Over time it becomes loose. Solution to the problem: replacing the adapter. You can buy the part at any electronics store;
- Windows may not notice the external device due to outdated drivers. Exit: update drivers and restart the computer.
The remaining steps for restoring a remote hard drive are completely identical to the operations performed with stationary media.
What should you not do with a hard drive when doing DIY repairs?
In some cases, repairing a device with your own hands leads to the fact that no workshop undertakes restoration. There are a number of actions after which it is impossible to restore life to the media, just as it is impossible to remove existing files:
- hard drive disassembly. Sometimes users, deciding to act on their own, remove the device from the case and completely disassemble it. You can't do this. The drive housing is sealed. If this parameter is violated, dust from the air and small particles of dirt immediately enter inside. During disassembly, scratches or chips may appear on the internal parts. Bottom line: you can simply throw away the HDD;
- hits on the HDD - advice from the Internet. Allegedly, blows to the HDD case put all the parts in place, and it begins to work as it should again. But shocks and impacts will only make the situation worse. Restoration and repair become impossible;
- storage freeze. Placing a disk in the freezer is a way to retrieve information at home. It may work if, when you immediately connect the hard drive to the PC, the computer recognizes it and allows you to pull out the files. But this is where the work of the carrier ends. After this, the hard drive cannot be restored.
Experts advise: if all the standard measures for repairing a hard drive with your own hands do not lead to positive dynamics, it is better not to try to do something extraordinary, but to take the device to the laboratory. The sooner the drive falls into the hands of professionals, the greater the chance that it will be repaired or at least it will be possible to extract existing information from it.
Hard drive not visible in BIOS
A fairly common problem is when the BIOS refuses to recognize an old drive. And there are several reasons:
- Availability of bad sectors. We'll talk about this below.
- Damage to the mechanical part. If the mechanics are damaged, unfortunately, nothing can be done. The main symptoms are strange sounds (clicks, crackles, squeaks), which clearly indicate a problem on the read head side.
- Oxide on the connection contacts or on the board itself. You can use an eraser or acetone to clean the contacts.
- Malfunction of the motherboard or SATA port. All that can be done at home is to reconnect the hard drive to another port or reset the BIOS settings by removing the battery. If this does not help, then more detailed diagnostics and professional repairs by specialists will be required.
- Broken SATA/IDE cable. In this case, you just need to replace it.
As a rule, after eliminating these faults in 90% of cases, the HDD begins to appear in the BIOS, which opens up the possibility of further work on it.
If the media is under warranty, it is not recommended to access it yourself, otherwise you may violate the terms of the warranty. The best solution would be to return it to the store.