08/08/2018 windows | programs
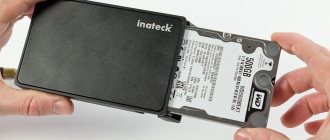
If you suspect that there are some problems with the hard drive (or SSD) of your computer or laptop, the hard drive is making strange sounds, or you just want to know what condition it is in - this can be done using various HDD checking programs and SSD.
This article contains a description of the most popular free programs for checking a hard drive, a brief description of their capabilities and additional information that will be useful if you decide to check your hard drive. If you do not want to install such programs, then first you can use the instructions How to check your hard drive through the command line and other built-in Windows tools - perhaps this method will help solve some problems with HDD errors and bad sectors.
Despite the fact that when it comes to checking HDDs, people most often remember the free Victoria HDD program, I still won’t start with it (about Victoria - at the end of the instructions, first about options more suitable for novice users). Separately, I note that other methods should be used to check the SSD, see How to check errors and status of the SSD.
Checking your hard drive or SSD in the free HDDScan program
HDDScan is an excellent and completely free program for checking hard drives. Using it, you can check HDD sectors, obtain SMART information, and perform various hard drive tests.
HDDScan does not correct errors and bad blocks, but only allows you to find out that there are problems with the disk. This can be a minus, but sometimes, when it comes to a novice user, it’s a positive thing (it’s difficult to mess something up).
The program supports not only IDE, SATA and SCSI drives, but also USB flash drives, external hard drives, RAID, SSD.
Details about the program, its use and where to download: Using HDDScan to check your hard drive or SSD.
Checking disk health
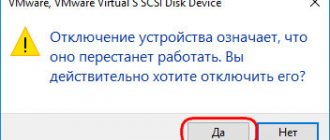
Connect the HDD to your computer and check if it is detected by the system. The following error messages may occur:
- No access.
- Reading is impossible.
- Format the media.
There is no need to format the HDD - information deleted after deep formatting is difficult to return, and the error will not be corrected. Another sign that the hard drive is not in order is incorrect display of volume. To see what state the HDD is in, let’s go a little further into the depths of the system:
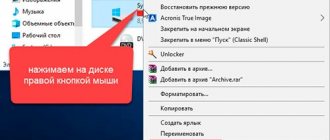
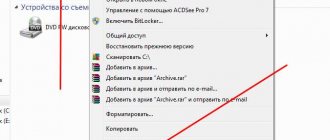
- Right-click on the “Computer” icon and select the “Management” section.
- Open the Disk Management tab. Locate the connected external hard drive.
The HDD displays the correct capacity, but the file system is defined as RAW. This is the reason why the hard drive does not open. To get rid of RAW, you need to format the disk in a different file system. However, we don't want to lose important data, so we need to remove all useful information from the disk before fixing the failure.
Seagate SeaTools
The free Seagate SeaTools program (the only one presented in Russian) allows you to check hard drives of various brands (not only Seagate) for errors and, if necessary, fix bad sectors (works with external hard drives as well). You can download the program from the official website of the developer https://www.seagate.com/ru/ru/support/downloads/seatools/, where it is available in several versions.
- SeaTools for Windows is a utility for checking your hard drive in the Windows interface.
- Seagate for DOS is an iso image from which you can make a bootable USB flash drive or disk and, after booting from it, check your hard drive and fix errors.
Using the DOS version allows you to avoid various problems that may arise when scanning in Windows (since the operating system itself also constantly accesses the hard drive, and this can affect the scan).
After launching SeaTools, you will see a list of hard drives installed in the system and will be able to perform the necessary tests, obtain SMART information, and also perform automatic recovery of bad sectors. You will find all this in the “Basic tests” menu item. In addition, the program includes a detailed manual in Russian, which you can find in the “Help” section.
Other Seagate HDD recovery tools
In addition to SeaTools, there are many other universal programs that serve this purpose. Let's look at some of them.
Recuva
Recuva is a powerful and simple utility from the creators of such a popular product as CCleaner.
Let's start working with it:
R-Studio
Another popular program for operations with damaged files.
Working with it looks like this:
Important! The scanning and recovery process may take a long time.
Raise Data Recovery
A utility similar to the previous ones, with a wide range of tools. With its help, you can find damaged partitions that are not detected automatically, scan, restore and save the necessary data.
If your choice fell on her, then:
PhotoRec 7
Despite its name, PhotoRec 7 is used to recover not only photos, but any data in general. It works with both hard drives and other media.
Let's start working with it:
In general, returning information lost for one reason or another on Seagate hard drives is no different from working with hard drives from other manufacturers. To do this, you can use both the specialized SeaTools utility package and other universal programs. The process itself is not particularly complicated and is quite doable for the average user. We hope our instructions helped you with this.
>
If your Seagate external hard drive is no longer detected when connected to a computer, then the first thing you need to do is eliminate interface errors. Try connecting the removable HDD (hard drive) to another computer or replace the cable - sometimes this helps resolve the problem.
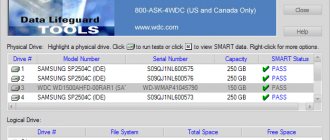
Western Digital Data Lifeguard Diagnostic Hard Drive Tester
This free utility, unlike the previous one, is intended only for Western Digital hard drives. And many Russian users have just such hard drives.
Just like the previous program, Western Digital Data Lifeguard Diagnostic is available in a Windows version and as a bootable ISO image.
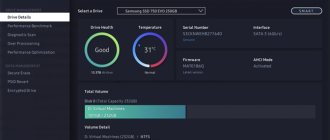
Using the program, you can view SMART information, check hard disk sectors, overwrite the disk with zeros (erase everything permanently), and view the test results.
You can download the program on the Western Digital support website: https://support.wdc.com/downloads.aspx?lang=ru
How to return the disk to working condition
The information has been saved, but it is also advisable to return the hard drive to a working state. This can be done using the SeaTools utility, which is designed specifically for restoring Seagate drives. You can download the program on the company's official website.
If the disk fails the test, try restoring it using additional tests:
- Select the damaged HDD.
- Open the “Basic tests” section and select “Additional tests”.
- In response to the warning that appears, press F8. An “Additional tests” button will appear on the top panel. Click on it and select “Full erase (SATA)”.
- A warning will appear indicating that the files will be completely erased. To launch it, press F8 again.
Since all the information was previously extracted from the hard drive, you can safely format it if this corrects the errors. After erasing, run a long test to check that the HDD is now detected correctly.
How to check your hard drive using built-in Windows tools
In Windows 10, 8, 7 and XP, you can check your hard drive, including a surface check and fix errors without using additional programs; the system itself provides several options for checking the disk for errors.
Checking the hard drive in Windows
The simplest method: open Explorer or “My Computer”, right-click on the hard drive you want to check, select “Properties”. Go to the “Service” tab and click “Check”. After this, all you have to do is wait for the verification to complete. This method is not very effective, but it would be nice to know about its availability. Additional methods - How to check your hard drive for errors in Windows.
Unconventional method for treating Seagate drives
Greetings to all readers. This is my first article and it is dedicated to Seagate hard drives, namely the 40 and 80 GB Barracuda ATA IV models. The reason for writing this article is the problems that arose during their operation, the appearance of bad blocks. The first thing that surprised me was the 80 GB hard drive. I have it divided into 6 logical drives: the first 4 are 5 GB each, and the remaining two are 30 GB each, respectively. I have several systems installed: the first logical drive has windows 98, the second has windows XP, and the third has ASP Linux. The problems started on the second logical drive with XP; Windows began to automatically reboot when accessing bad sectors. Moreover, I didn’t immediately see the culprit in the screw, I blamed it on the “unstable” system, a possible cause was overclocking.
My system:
- Processor – Pentium 4 [email protected] MHz
- Motherboard – Asus P4B533
- Memory – 256Mb Samsung 266MHz DDR
- Hard drive – Seagate Barracuda ATA IV 80 and 40 GB
- Video – MSI GeForce4 Ti 4600
The system worked in this mode (it still works): the processor operates at a frequency of 2379.4 MHz with a system bus frequency of 132 MHz, the processor voltage in the BIOS is set to AUTO and is 1.552 V., the memory operates at a frequency of 352.5 MHz (the multiplier is 3:4).
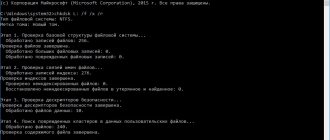
Overclocking was removed, but, unfortunately, the reboots did not stop. Windows XP was removed, and the disk was formatted in FAT32 (previously it was NTFS). A scandisk check showed that there are bad blocks on this logical disk. This greatly disappointed me, because... The disk was new and had been in use for no more than 2 months. The first thing I thought about was overheating, but this point was ruled out because... The propeller had fans installed that blew it from below, and there was also a fan that blew air from above. The temperature did not rise above 43 degrees at maximum load.
The second thing that came to mind was to find a utility for working with Seagate disks. And this one was found on the official website and it’s called Seagate SeaTools. The utility disappointed me, as it can only diagnose disks. A full check showed that there were no mechanical or electronic problems, but there was physical damage to the disk. The utility gave me an error code and advised me to contact the service center.
Formatting the partition did nothing. For all subsequent manipulations with the disk, the Partition Magic 7.0 program was used. The following action plan was developed: the logical disk containing the bads is split into two disks, a check is carried out, it is found out which of these two disks contains the bads, the disk with the bads is again split into two disks, etc. As a result, I end up with a small logical disk with bad blocks, which I delete into an unallocated area and do not use. So it was decided to do so.
When the size of the disk with the troubles became small enough (about 80Mb), after the next partition the check did not find anything (a full scan with scandisk was used). Thinking that I had made a mistake, I checked all the other logical disks that resulted from splitting the original one. But no troubles were ever discovered. Then all the pieces of the broken logical disk were united. A subsequent full scan with scandisk and the SeaTools utility did not detect any bad sectors; the latter stated that the disk was in perfect order.
announcements and advertising
2080 Super Gigabyte Gaming OC for 60 rubles.
Compeo.ru - the right comp store without any tricks
RTX 2060 becomes cheaper before the arrival of 3xxx
Ryzen 4000
series included in computers already in Citylink
The price of MSI RTX 2070 has collapsed after the announcement of RTX 3xxx
Core i9 10 series is half the price of the same 9 series
The price of memory has been halved in Regard - it’s more expensive everywhere
Here's what we can say about this: almost all modern hard drives, when they detect bad tracks, redirect them and use tracks from the spare area. All this happens automatically and the user at first may not even realize that his screw is “crushing.” In my opinion, in this case, automatic redirection did not work immediately, but as a result of the steps described above, the problem was resolved.
At that time, I decided that this was a special case, a happy coincidence, and this article would not have appeared if this case had not repeated itself. This time with a 40GB Barracuda ATA IV drive. Remembering past experience, it was decided to exclude the bad blocks in an unused area. The area with bad blocks was brought to 7Mb (less than that is not possible), but the troubles never disappeared. I decided to give it one last try and combined the bed block plot with two small adjacent plots.
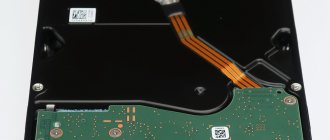
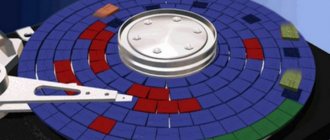
Fig.1. Before unification
Fig.2. After the merger
After rebooting the troubles disappeared.
I hope that this "method" will help other users of Barracuda ATA 4 drives if they have the same problems. At first glance, the “method” is absurd, but it helped me completely heal two screws. If anyone knows a reasonable explanation for the problem, write, I will be glad to know your opinion.
Mikhail Taburetkin
Victoria Freeware
Victoria is an “adult” program for diagnosing hard drives, which provides the user with “tons” of information that a knowledgeable person can use in a variety of ways.
This article will probably not be enough to describe the full range of capabilities of the Victoria application. However, if you are specifically interested in the ability to diagnose a hard drive, then you should pay attention to the Tests tab.
After testing the selected hard drive, you will receive detailed information about its condition. If you see a large number of “bad” sectors, take care of the safety of the data and copy them to another medium.
We have prepared a detailed video review of the program especially for you:
Functional
It’s worth mentioning right away that the developers do not provide a 100% guarantee of data recovery. The following factors increase the chance of complete data recovery:
- little time has passed since the electronic files were deleted;
- the user did not try to recover lost documents independently, using third-party software.
If all the positive conditions for optimal recovery have been met, then the percentage that File Recovery will cope with its task is extremely high.
The operating principle of searching for lost files is based on unshakable standards. First, you need to tell the program the path to the directory in which to start searching, and specify the directory’s file system. The application will begin the scanning process. Its duration will depend on the size of the disk.
At the end of the scan, File Recovery will display a list of files that can be recovered.