The application discussed in this article can run on a PC, Android smartphone or iPhone.
What is this program?
So, first of all, let's figure out what kind of application this is and what capabilities it has. The list of basic and additional functions of the Cisco AnyConnect client can be expressed approximately as follows:
- Access to the corporate network is supported from any device, including a computer or phone.
- Advanced monitoring capabilities. The network monitoring module, which is part of the application, monitors the activities of each of its participants. Based on this data, maximum security and anonymity is created.
- All-round protection. Devices that do not meet basic security requirements receive special protection through the Cisco Identity Services Engine (ISE).
- Easy to control and use. Thanks to the use of a single agent, the program is much easier to work with.
- Wide range of features and flexible licensing options.
- Advanced network monitoring.
- Improved transparency and controllability.
This list does not include all the features of the application we are talking about today. The remaining nuances will become clear upon closer acquaintance with the program.
By the way, you can also encrypt your location and the list of sites you visit using one of the programs for changing your IP.
How to download and install
Now that we've looked at the capabilities of the application, let's move on and figure out how to install Cisco AnyConnect on your computer and phone. We will consider both the first and second cases step by step in the corresponding instructions given separately below.
On computer
Let's start with the PC. In order to install the reviewed utility on your computer, you must follow the following sequence:
- If your PC has the Windows 10 operating system, everything is much simpler. First, we use the Start menu button to open the Microsoft Store.
- Next, activate the search bar by clicking the element circled in the screenshot.
- Now write down the name of the application you are looking for. As soon as the desired result appears in the search results, click on it.
- Once on the home page of our application, click the button to install it automatically.
- Then we wait until the program is downloaded and installed. The progress is displayed using a special indicator.
- As a result, our operating system will issue a notification that the program has been successfully installed. We can launch it immediately by clicking the button circled in red.
- You can also open Cisco AnyConnect by clicking on the icon that appears in the Start menu.
If you have an earlier operating system, for example, Windows 7 or 8, you will have to download the application from its official website, due to the lack of a Microsoft store on such OSes.
Once on the program's home page, you can download it for different platforms, including macOS Catalina and Linux Ubuntu or Mint, and also separately download the localization file in order to translate the utility into Russian.
If the program does not install on Windows 7, and we see the message “connection attempt has failed,” try running the installer as an administrator. In the same way, you can fix the “certificate validation failure cisco anyconnect” error (when the Internet disappears while connecting).
To phone
Now let's talk about how to install this program on a smartphone. Moreover, we will sequentially analyze the installation process for phones running on the Google Android operating system, and then we’ll talk about iPhones running on Apple iOS.
- Initially, go to the Google Play Market store by clicking its icon.
- Next, activate the search bar.
- Enter the name of the software you are looking for and click on the desired result that appears in the search results.
- On the application home page, click the install button.
- Then we wait until all the necessary files are downloaded and installed in a fully automatic mode.
- Now we can launch the program directly from the Google Play store.
In the future, you can open the program using the icon that appears on the Android home screen.
The one who uses VPN clients, and such people are known more and more in our country every day. There is such a problem as the incompatibility of Cisco Vpn Client and Microsoft Windows 10. It was on this version that they met and did not become friends. This problem can be solved if you install Shrew Soft VPN Client and forget it like a bad dream. But there are cases when the latter also fails. For some inexplicable reason, Shrew Soft VPN Client does not work on some machines; the connection is established, but the tunnel itself does not go up. If this is your case, then you have come to the right place.
After installing the update to Windows 10 version 1803, everything described below must be repeated, even if you have done this before.
In other cases, I myself switched to using Shrew Soft VPN Client; I am completely satisfied with the free version. Despite its shortcomings, its main function. especially on an unstable channel, it performs perfectly.
Let me explain a little what we will do. Since the Cisco VPN Client itself has not been updated for a long time and has long been outdated, but nevertheless it still somehow worked before Windows 8.1, which is already fantastic in itself. And so let's get started. First, we will need to install the client itself, then the supporter client, and only after that we will need to make corrections and we will be able to use the Cisco VPN Client.
First, let's install the client or make the necessary updates.
Instructions for new and clean installations of Windows 10: If you just upgraded to Windows 10 from an earlier version of Windows, you must first uninstall the SonicWALL VPN client and Cisco VPN client, and then install the installation according to the instructions below.
- Download and install SonicWALL Global VPN Client. This is necessary for the correct installation the DNE Lightweight filter network client on the workstation. Then you can uninstall SonicWall Global Client.
- Download and install Cisco VPN client ( x86 or x64).
- Optionally remove SonicWALL Global VPN Client.
Note: If you receive the message “This application cannot be run on this PC,” you need to unpack the Cisco VPN Client installer archive and run the “vpnclient_setup.msi” file.
If you decide to uninstall SonicWALL Global VPN Client, use the default settings. Be sure to check that the “Delete all settings and configuration files” and “Retain the MAC address of the virtual adapter” items are checked.
This completes the installation of Cisco VPN Client on Windows 10.
Now you need to resolve the errors: “442: Failed to enable virtual adapter” and “412: The remote peer is no longer responding”
When connecting in Windows 10 using Cisco VPN Client to a gateway (router or firewall), the connection will not be established due to the error: “442: Failed to Enable Virtual Adapter” or “412: The remote peer is no longer responding” You must do the following changes.
1. Launch the registry editor (RegEditor).
2. Find the registry branch: HKEY_LOCAL_MACHINE\\SYSTEM\\CurrentControlSet\\Services\\CVirtA
3. Find the “DisplayName” entry, right-click and select “Edit”. Or simply double-click on “DisplayName” with the left mouse button. In case of error 442: For Windows 10 x86 (32bit), change the value of the parameter “ @oem8.inf,%CVirtA_Desc%;Cisco Systems VPN Adapter ” to “ Cisco Systems VPN Adapter ”. For Windows 10 x64 (64bit), change the value of the parameter “ @oem8.inf,%CVirtA_Desc%;Cisco Systems VPN Adapter for 64-bit Windows ” (“ @oem71.inf,%CVirtA_Desc%;Cisco Systems VPN Adapter for 64-bit Windows ") to " Cisco Systems VPN Adapter for 64-bit Windows " In case of error 412: For Windows 10 x86 (32bit), change the value of the parameter " @oem71.inf,%CVirtA_Desc%;Cisco Systems VPN Adapter " to " Cisco Systems VPN Adapter ". For Windows 10 x64 (64bit), change the value of the parameter “ @oem71.inf,%CVirtA_Desc%;Cisco Systems VPN Adapter for 64-bit Windows ” to “ Cisco Systems VPN Adapter for 64-bit Windows ”
4. Now we check that the “ DisplayName ” parameter is displayed correctly.
Cisco VPN Client will then be able to establish a connection.
How to use
Now that we have looked at the process of installing Cisco AnyConnect Asa on a computer and phone, we can move on and tell you how to use this application. Similar to the step-by-step instructions given above, we will analyze the process of operating Cisco AnyConnect for PC and smartphone separately.
We work with PC
Since we started by installing the program for a computer, we will also consider instructions for working with it for this platform. As soon as the application is launched (for this, as we have already said, you can use the Windows Start menu), you should immediately go to its settings and activate the blocking of low-trust servers (blocked untrusted server). This will protect the user from loss of personal data.
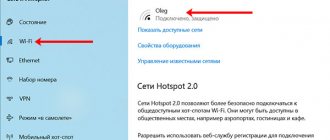
Next, go to the VPN tab and click on the button indicated in the screenshot below.
As a result, the OS settings will launch, in which we can add VPN data and also configure its use.
That's all, on a computer the basic settings of this application look exactly like this.
On a smartphone
On the phone, immediately after we launch the program, we will need to accept the Cisco AnyConnect license agreement. To do this, click the button indicated by the red frame.
First of all, you need to launch the application settings by clicking on the icon with three vertical dots located in the upper right corner of the window.
Next, in the drop-down menu, we click on “Settings”.
The program settings contain the following items:
- Hide the application icon in the status bar.
- Disable external control from other applications.
- Blocking untrusted servers.
- Activating FIPS VPN mode.
- Enable OCSP certificate revocation checking.
- Enable verification and strong trust of the certificate.
In order to start a secure connection, we need to click on the icon indicated below.
Next we must activate the switch marked in the screenshot.
Accordingly, using the same trigger, you can disconnect from the secure network.
The next point takes us to additional settings.
For example, we can add a new VPN connection here.
There is a description of the future connection, a column for entering server settings, as well as additional parameters, including, for example, advanced settings for the protocol certificate.
On iPhone, the installation sequence looks similar. The only difference is that instead of Google Play Market we visit Apple AppStore. Then, using the search, we find the program we need and automatically download it.
Cisco L2TP Client
Connect to ISP via L2TP.
In our case, ISP - beeline router - cisco 2821 LAN - Gi0/0
To connect to the ISP we will use the L2 switch port HWIC-4ESW.
WAN - Fa0/1/3
Since we connect the ISP via L2-switch, we need to configure a VLAN, assign an IP and include the necessary ports in this VLAN.
interface Vlan2 description ISP ip dhcp client update dns ip address dhcp ip nat outside ip virtual-reassembly in load-interval 30
Those. We receive IP and DNS from the provider.
Setting up WAN:
interface FastEthernet0/1/3 description ISP switchport access vlan 2 no ip address no cdp enable
Create a class and configure pseudowire:
l2tp-class beeline pseudowire-class class1 encapsulation l2tpv2 protocol l2tpv2 beeline ip local interface Vlan2
Create a tunnel interface Virtual-PPP1:
interface Virtual-PPP1 description Beeline_VPN ip address negotiated ip mtu 1454 ip nat outside no ip virtual-reassembly in ip tcp adjust-mss 1414 ppp chap hostname login ppp chap password 7 password pseudowire 85.21.0.102 10 pw-class class1
Where is 85.21.0.102 beeline L2tp server.
Don't forget to specify on the LAN interface:
interface GigabitEthernet0/0 ip nat inside
Configuring acl, NAT and registering routes
ip access-list extended acl_ISP permit ip 192.168.5.0 0.0.0.255 any ip nat inside source list acl_ISP interface Virtual-PPP1 overload ip route 0.0.0.0 0.0.0.0 Virtual-PPP1 ip route 85.21.0.95 255.255.255.0 dhcp
If there are connection problems, it is useful to enable debug:
terminal monitor debug ppp authentication debug ppp negotiation
As a result, if the login/password is correct we will get:
Final configuration:
interface GigabitEthernet0/0 ip address 192.168.5.254 255.255.255.0 ip nat inside ip virtual-reassembly in load-interval 30 duplex auto speed auto interface Vlan2 description ISP ip dhcp client update dns ip address dhcp ip nat outside ip virtual-reassembly in load- interval 30 interface FastEthernet0/1/0 description ISP switchport access vlan 2 no ip address no cdp enable l2tp-class beeline pseudowire-class class1 encapsulation l2tpv2 protocol l2tpv2 beeline ip local interface Vlan2 interface Virtual-PPP1 ip address negotiated ip mtu 1454 ip nat outside no ip virtual-reassembly in ip tcp adjust-mss 1414 ppp chap hostname login ppp chap password 0 password pseudowire 85.21.0.102 10 pw-class class1 ip access-list extended acl_ISP permit ip 192.168.5.0 0.0.0.255 any ip nat inside source list acl_ISP interface Virtual-PPP1 overload ip route 0.0.0.0 0.0.0.0 Virtual-PPP1 ip route 85.21.0.95 255.255.255.255 dhcp
Advantages and disadvantages
Let's also look at the list of positive and negative features that you will encounter when using the application discussed in the article:
Advantages:
- high degree of connection security;
- the program has Russian language;
- Internet payment security;
- a large number of positive reviews;
- a huge range of functions that are enough for any purpose.
Flaws:
- complexity of setup;
- lack of Russian language out of the box.
Download
Now that we have reviewed the capabilities of the application, described the process of installing it, and also provided brief instructions for using the Cisco AnyConnect license, you can proceed directly to downloading the program from its official website.
| Developer: | Cisco Systems Inc. |
| Release year: | 2020 |
| Name: | Cisco AnyConnect |
| Platform: | Windows XP, 7, 8, 10, Linux, macOS, Android, Apple. |
| Language: | Russian (separate installation of localization files is required for the computer) |
Installation of this software for mobile platforms is carried out from their inherent application stores. Therefore, we provide the download link only for the desktop platform.
Downloading the Cisco VPN Client Distribution
I would like to immediately make a reservation that it is not possible to download Cisco VPN Client for Windows 10 x64 from the official website. https://www.cisco.com The distribution is available only under a partnership agreement and only after payment. Free registration on the portal will also not bring results.
There are a lot of installation packages offered on the Internet, but downloading from one or another portal and the consequences for the machine are entirely your responsibility. As for Cisco anyconnect VPN Client Windows 7 x64, you can download it absolutely free from the official portal. https://www.cisco.com/assets/sol/sb/isa500_emulator/help/guide/ah1195632.html
This version is designed for home use and will allow the user to install the distribution on the following platforms:
- Linux Intel (kernel 2.6.x);
- Windows XP SP2+ (32-x and 64-x);
- Windows 7 (32-x and 64-x);
- Mac OS X 10.5, 10.6.x and 10.7.
Cisco VPN Client functionality allows you to:
- secure the local network;
- maintain complete anonymity on the Internet and hide your real IP address;
- connect to the network via a secure communication channel.