Good afternoon Dear readers and guests of one of the largest IT blogs in Russia, Pyatilistnik.org. Last time we figured out the reasons for the appearance of a black screen in Windows 10 and other editions of the system. Today I want to write you a post about RDP technology, namely, we’ll talk about Windows Remote Desktop , we’ll look at methods of how to connect to it, which clients are best to use, who have what advantages and conveniences. I am sure that this information will be useful to everyone.
What is Remote Desktop
Now in the world of mobility and remote work, a very large number of people in large cities and in many developed countries prefer to physically spend less time in the office, spending at least 2 hours a day on the road and replacing this scheme with remote work. Remote work involves not only having email, but also possibly connecting to a corporate workplace.
Remote desktop is a technology for providing remote access via RDP to a server or computer, as if the user were working on it locally (as if he were working on his own computer). The implementation of this technology involves several options:
- Terminal Table Service in older versions of Windows Server 2008 R2, users log into remote servers where they work with the programs they are familiar with.
- RDS farms - began to appear starting with Windows Server 2012 R2, users log into remote servers, where they work with the programs they are familiar with.
- Just enable remote desktop on a Windows computer, but you will need either a public IP address or configure port forwarding to the desired server.
- Working with RemoteApp are specially prepared applications that are essentially executed on a remote server in a remote desktop session
- Internet services that allow you to make an RDP connection to a remote computer through a browser or mobile application, even behind NAT, for example Getscreen.me.
It doesn’t matter how your company’s connection to a remote server or computer is configured, in this article we’ll talk about the tools that allow you to do this.
Setting up a remote desktop connection
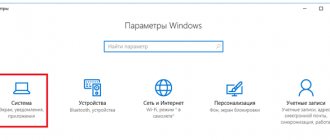
Before we look at all the variety of methods and clients for connecting via the RDP protocol, I would like to show you the minimum you must do to enable this functionality on a remote server. I remind you that you must have the function enabled to allow connections on port 3389 . There are a number of activation methods for this. For example, in Windows 10, you can open “Windows Settings” (by simultaneously pressing the Windows key + I), where we find the “System” item.
We find the “Remote Desktop” section there, where you can see a switch that enables this function “ Enable Remote Desktop ”.
Confirm that RDP is enabled.
After which you will automatically have a rule created in the Windows Firewall and you will be able to connect to the remote desktop from any device that has the required client.
The universal method to enable RDP on any version of Windows is that you open the Run window and enter:
sysdm.cpl
Go to the “Remote Desk” tab and activate the “Allow remote connection to this computer” section.
By the way, I recently told you how to remotely enable an RDP connection, I advise you to read
At this point, setting up a remote desktop is not yet complete in a minimal sense, since you need to provide connection rights; by default, they have two groups:
- Local group Administrators
- Local group "Remote Desktop Users"
The easiest way to find these groups and bring them into the form you need is in the Computer Management snap-in; to do this, enter compmgmt.msc in the Run window, then go to the Local Users and Groups section.
Next, click the “Add” button and fill the group.
If we are talking about a more complex infrastructure of terminal tables and RDS farms, then the settings are more complex, you can read about them on my blog. Now that you have made all the minimal settings for the remote connection, you can test and select an RDP client.
Remote access to Windows 7 components
After gaining access to another computer, it is also good to know how to open various services on it.
Remote command line access
To access the command line of another computer, you will need the PsExes utility, which you can download from the official Microsoft website. Install it on the computer you are connecting from and enter the psexec \\<computer name> cmd command to gain access. You can use someone else's command line just as you would your own.
Remote access to the registry
You can actually customize the registry remotely. For this:
- Go to the Services menu on the computer you are connected to.
- Find the “Remote Registry” service and start it.
- Do the same on your computer.
- On your computer, open the registry editor (regedit command in the Run window).
- In the “File” tab, select “Connect network registry”.
In the "File" tab, select "Connect network registry..."
- If prompted, enter the name and password of the remote computer, and the registry paths of the other device will appear in the Registry Editor.
After this, you can make any changes to the registry of the remote computer.
Remote reboot and shutdown of the computer
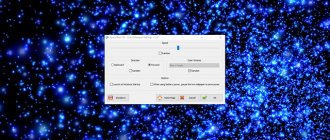
After finishing working via remote access, it is a good idea to turn off the remote computer if it is no longer needed. You may need a reboot to correctly accept changes in the system. This, like many other things, is done through the command line. Just enter the command shutdown /i and confirm the entry. After entering the command, you will see a GUI that will allow you to choose whether you want to shut down your computer or restart it.
Remote launch of programs
You can also run the program on a remote device via the command line. But there are ways to do this through third-party programs. For example, such an opportunity is available in the Lite Manager program. Running the program remotely using this utility is not difficult:
- Launch the remote startup utility.
- And just as in the “Run” window, specify the path to the program’s executable file.
Specify the path to the program in the same way as in the “Run” window
- For convenience, you can add a given path to bookmarks and launch this program faster in the future.
You can add any program to a bookmark for quick launch
- Confirm your entry and the program will start.
Remote firewall management
Typically, to remotely manage the Windows Firewall, just like in other cases, you use the command line. There are many commands to perform certain actions in the firewall:
- find out the current Windows Firewall configuration properties: netsh advfirewall firewall show rule name=all;
- enable or disable: firewall:netsh advfirewall set allprofiies state on or netsh advfirewall set allprofiles state off;
- reset the firewall configuration to default settings: netsh advfirewall reset;
- By default, Windows Firewall log files are saved in the \Windows\system32\LogFiles\Firewall\pfirewall.log folder. You can change the log saving path to C:\temp using the command: netsh advfirewall set currentprofile logging filename “C:\temp\pfirewall.log”;
- you can block or allow ping servers using the commands (probably one of the most frequently used): netsh advfirewall firewall add rule name=”ALL ICMP V4″ dir=in action=block protocol=icmpv4 or netsh advfirewall firewall add rule name=”ALL ICMP V4″ dir=in action=allow protocol=icmpv4;
- open the port (for example, for MS SQL Server it is 1433): add rule name=”0pen SQL Server Port 1433″ dir=in action=allow protocol=TCP localport=1433;
- allow program execution (for example, Skype): netsh advfirewall firewall add rule name=”Allow Skype” dir=in action=allow program=”C:\Program Files (x86)\Skype\Phone\Skype.exe”;
- allow remote administration: netsh advfirewall firewall set rule group= “remote administration” new enable=yes;
- enable remote desktop: netsh advfirewall firewall set rule group= "remote desktop" new enable=Yes;
- export and import settings: firewallnetsh advfirewall export “C:\temp\WFconfiguration.wfw” and netsh advfirewall import “C:\temp\WFconfiguration.wfw”.
Connecting to a remote desktop with the built-in client
I will connect to my Windows Server 2020 server with the DNS name SVT2019S01 . First, I'll ping it and check that it's available.
It is logical to assume that Microsoft made sure that the user did not have to look for third-party applications to work with remote connections, and it built its client into Windows.
MSTSC (Microsoft Terminal System Console ) - This is a built-in client that I have already become friends with since Windows XP. Opening it is very simple, the simplest and most universal method. Open the Run window and type mstsc, then press Enter.
As a result, the Remote Desktop Connection client window will open.
By the way, you can also open mstsc /admin in administrator mode, I cited the case of connecting to a specific terminal host located in the RDS farm
The second simple method to find an RDP client is to search the system. Click the magnifying glass icon and also enter mstsc, you noticed that I write in English, I do this on purpose, since this abbreviation will open in any localization, but no one is stopping you from typing “Remote Desktop Connection”.
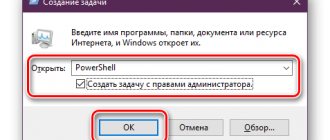
The third method for launching the built-in RDP client is from the command line or powerShell, where you just need to enter:
mstsc
Well the fourth method is to use the “Start” menu, where in standard Windows utilities you will also find the “Remote Desktop Connection” shortcut.
Problems with remote desktop access
If you encounter slowdowns, lags and other problems when using remote access, you should check:
- the quality of the Internet connection and its stability for both computers - if the Internet speed is low, there will be problems with transmission, and if the network is also not entirely stable, then it will be almost impossible to work. It is best to use a physical local network between computers, but if this is not possible, then you should at least make sure the connection is stable;
- quality settings - we wrote above how to set the quality of communication. If it is configured incorrectly (for example, the speed is set higher than the available speed), you will experience a slowdown in the program;
If you encounter brakes, then reduce the speed specified in the connection settings
- Are there any unnecessary applications running? If there are a lot of programs open on your computer or something is being installed, this may slow down the speed of remote access. If a delay occurs, close all unnecessary programs while working with remote access.
The remote desktop launch menu has disappeared
If the remote desktop launch line has disappeared from the Start menu, then you should return it:
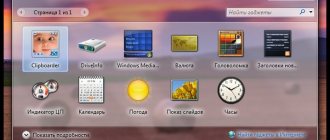
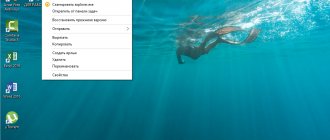
- Open “Start” and find the “Accessories” folder there. Right-click to open the context menu for this folder and display its contents in Explorer.
Select standard programs and in the context menu click on the item “Explorer to the common menu for all”
- The list of shortcuts may not contain the program you need. In this case, right-click on the empty space in this folder and select “Create Shortcut”.
You can browse all your default programs and then create a new shortcut
- We are creating a shortcut for the MSTSC program, which is a utility for remote access. You will need to specify its path: %windir%\system32\mstsc.exe.
In the “Object” line, specify the path to the remote desktop program
After this, the program you need will appear in Start. And you can also find it yourself through the search, even if you did not create a shortcut in the “Standard” folder.
You can open the mstsc application from the start menu
Remote application disabled
Another common remote access error appears along with the message “The remote app has been disabled,” interrupting the connection between computers and preventing remote access from being established. There are several options that can help:
- write the username not by itself, but after the server address. After recording in the server\username format, try again;
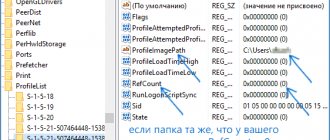
- Another fix option involves edits to the registry. Remember that you make any changes to the system registry at your own peril and risk. So, using the regedit command, open the registry editor on the computer you want to connect to. There, go to the path HKEY_LOCAL_MACHINE -> Software -> Microsoft -> MSLicensing. And delete the last folder in this path - actually, MSLicensing. After restarting your computer, the problem will be fixed;
Delete the MSLicensing folder
- The last way to fix this problem is to specify the server IP in its address.
Basic settings of the built-in RDP client in Windows
Before we connect to the Windows Remote Desktop, I would like to show you some settings that will be useful to you. In the mstsc client, click the Show Options .
As a result, you will have a huge number of settings for different scenarios. General tab will allow you to set:
- Computer field - allows you to specify the server or computer to which the connection will be made, in my example, this is SVT2019S01
- The “User” field will require you to provide information about the account on behalf of which the connection will be made. If the user is a domain user, then you can use two constructions Domain\username or [email protected] In my example, my domain root.pyatilistnik.org will be look like this: root\sem. If you connect frequently, you can speed up the process by checking the “ Allow me to save credentials ” checkbox so you don’t have to enter a password.
- Connection settings - will allow you to save the connection with these settings as a separate file; to do this, click “Save as”.
Give the rdp file a name and save it in the desired location.
I have a file saved on my desktop, by the way, you can also open it with a regular notepad to be able to see its settings; if you click the “ Edit ” button, a graphic editor will open.
Let's look at the rest of the settings that may be useful to you. Go to the “Screen” tab, here you can set:
- Display settings - allows you to set the required screen resolution of the remote desktop; in most cases, the standard “Full Screen” value is suitable.
- Color depth - sets how much of the color palette will be involved in transmitting the image during the session; if you have a weak network connection, you can reduce the quality, thereby increasing the response speed
The “ Local Resources ” tab will help you decide which devices and their functions need to be transferred to the remote desktop:
- Remote desktop sound - in the settings you can set whether you want to play sound there and have the ability to record
- Keyboard - Sets how keyboard shortcuts should be passed to your remote session.
- Local devices and resources - here you specify which devices with you will be redirected to the remote session, so for example, you can select printers, which will allow you to print to your local printer via a remote desktop, the same with the clipboard or USB devices, external drives .
Interaction tab will help you save network traffic by setting how fast your connection is and what visual effects you need to transmit, for example, you don’t need a desktop background and font smoothing, here you can easily turn it off.
A very useful function is to restore the connection when it is disconnected; here, within 30 seconds, the mstsc client will try to restore the connection to your session. The last tab is “Advanced”, here you set the behavior for displaying warnings with an SSL certificate on your remote desktop connection. The choice will be:
- Connect without warning is the least secure option, any self-signed and expired certificates will be accepted without notifications or alerts, can be used in test environments.
- Warn is the most correct option, allowing you to connect, but with mandatory notification
- Do not connect - here, if you do not trust the certificate of the server or computer, then the connection to the Windows remote desktop will be blocked immediately.
Well, after all the RDP client settings, we try to connect to the Windows remote desktop. You will be prompted to enter a password; if you wish, you can save it for future connections.
As a result, I calmly connected to my Windows Server 2019 server. At the top you will have a tab reminding you that you are connected via RDP, to get to your local computer you need to click the minimize button in the form of a dash. I would like to note that by clicking the cross you will simply close this window, but your session will continue to work. To log out correctly you need to log off , through the start, selecting the “ Exit ” item.
If you receive the error “An authentication error occurred. The specified function is not supported. Remote computer name. The cause of the error may be a fix for CredSSP encryption,” then you can see the link to see how it can be solved
Remote access to a computer via a browser at Getscreen.me
While quarantine and a pandemic are raging all over the world, a huge number of people are sitting and working from home, Internet providers are experiencing enormous loads on their channels, and system administrators around the world are racking their brains about where to get the resources to implement remote connection of staff to their workplaces. everyone has enough servers, licenses and competence to set up. Online services come to the rescue in this situation, allowing you to implement an RDP session on your server or computer in a couple of minutes. I’ll give an example of one of dozens of such sites, it’s called Getscreen.me .
Getscreen.me is a cloud-based solution for managing remote computers, servers, and even entire offices and enterprises. This service has a whole bunch of advantages:
- Connecting to a remote computer using a link from a browser
- Connecting from a browser without the need to install a client (For a one-time connection to a remote computer, installation of an agent is not required. Installation is required only for permanent access.)
- NAT bypass and independence from dedicated IP addresses
- No problems with versioning
- Ease of integration through the use of web technologies
- You can access devices running Windows, macOs, Linux operating systems, with access to mobile devices in the near future
- Strong encryption based on one-time AES keys and elliptic curves
- No intermediate servers
- NAT Traversal . There is no need to have static, dedicated IP addresses. The connection is established using WebRTC technology
- Simplicity and speed of implementation
- Does not require firewall settings, since https 443 ports are used
- Unified control center - Manage your office or enterprise from your personal account at any time
- There is a logging system that saves connection history
- You can monitor servers by performance, disk space, traffic volume
- You can share access to your computers with or without a time limit
- Transfer files in both directions
- Convenient work with multiple monitors. Switch between monitors with one click
- There is a built-in chat with a remote computer
To try the Getscreen.me service you need to follow the link https://Getscreen.me
It’s convenient that here you can immediately see a demo stand to evaluate how it will look in practice. If everything suits you, then we go through a simple registration. You provide a valid email address to which your password for your personal account will be sent.
As a result, you will be taken to your personal management account. Here you can monitor your servers and computers through agents, as well as view active sessions.
Download and install the agent on the computer or server where you plan to connect remotely via RDP; at the time of writing, Windows and MacOS platforms are available.
Next, you copy it to the desired device and launch it. You can immediately notice that it is possible to connect via RDP using a link or QR code without installation. Before installation, I recommend that you go to the “Sign in” tab and log in.
We indicate the login and password received during registration, this will connect your agent with your account.
If everything is entered correctly, you will see the status “You signed in as”
On the “Settings” tab you can set autorun and media settings.
In your personal account, you will see the new agent, its status and the ability to quickly connect.
We are trying to make an RDP connection through a browser. As a result, you will have a new tab open with a help panel at the top, note that it is easy to collapse. Here you have buttons:
- Enable/Disable sound from agent desktop
- Enable/Disable Microphone from Agent Desktop
- Hide/Show chat window
Managing the clipboard on the agent.
Two-way file sharing.
A list of hotkeys is presented that can be sent through the browser with a simple click of the mouse.
As you can see, this cross-platform solution for remotely connecting to a computer and controlling it from any device, using a browser is simply great and outrageously simple
In the settings of each agent, you can select the method through which you can provide access to other users to RDP connect to your server through a browser.
Here you either give access to another registered user of the Getscreen.me service.
Or share access using a link and password.
All active sessions will be displayed in the corresponding section.
As you can see, it is also very simple, and control is available from anywhere in the world, through any device with a browser. All the settings took me less than 10 minutes, no knowledge of firewall management, NAT and much more was required, as they say, everything ingenious is simple. I advise you to try the Getscreen.me service, I recommend it from my own experience.
For most people, the service will be absolutely free and there will be a small limit on two agents and the time of a continuous session, then a new one will be opened without any problems. For small organizations it is quite possible to allocate.
Third party remote access tools
Although Windows has its own remote access organization, there are third-party programs that do it better. Let's look at a few of the most famous of them.
TeamViewer
One of the first programs that more or less initiated people thought of when they saw the title was TeamViewer. Naturally, we will start with it.
The advantages of this program are not only well-known and popular (and, as a result, commercial success, demanding users and attentive developers, plus support). TeamViewer is a fairly simple, flexible and multifunctional solution. By and large, you don't even need a second computer to connect to your home one: an iPhone, iPad or Android device is enough. Clients exist for most mobile platforms, plus Windows, OS X and Linux.
In addition to remote desktop, the application supports voice and video calls. So, for example, if one of your family or colleagues maintains access to your computer and needs your help, you can communicate as you work directly in TeamViewer, without leaving the session or using other programs.
Your connection will be protected by 256-bit AES encryption, making it virtually useless to be intercepted.
The most valuable feature of the program, which cannot be overestimated, is the ability to turn on your home computer using a signal via the Internet. If there were hours-long power outages in your absence, no UPS will help. But TeamViewer will allow your computer to turn on when requested from outside.
And one more plus - the program is not divided into client and server parts. It is enough to install a single version on both computers. And then everything is configured in a few clicks.
By and large, the program has only one drawback: cost. A license for one copy for a private user costs about $200. But if timely access to a computer is worth it, why not?
Radmin
The name of this product means “Remote Administrator”, which immediately conveys its purpose. In terms of functionality, it roughly corresponds to Team Viewer: you can remotely access your computer, turn it on and off using network commands, launch programs, open files and move data between the remote PC and the terminal.
Radmin is inferior to TeamViewer only in some aspects: it does not offer applications for mobile devices, does not provide simultaneous access to a computer from several terminals, and is not so widespread.
One of the main advantages of Radmin is the price. A single license for the program to access one computer will cost only 1,250 rubles - that’s a little more than $20: ten times cheaper than Team Viewer! At the same time, you will receive all the benefits of commercial programs: constant support,
However, if you need a completely free solution, it is there too.
UltraVNC
Yes, it exists! A free application that works on the same principle as the above. But it provides remote access to a computer via the Internet very well.
Yes, in some aspects UltraVNC is inferior to commercial solutions. So, to provide 256-bit encryption, you will need to install a special plugin. The desktop client is only for Windows, and mobile clients exist only for Android and iOS. There is no built-in voice communication, so remote support will have to be done using Skype or a regular phone, or built-in text chat.
But, on the other hand, a remote access tool for free is not such a frequent pleasure. Therefore, we recommend using UltraVNC first, and then, if some important functions are sorely lacking, turn to commercial products.