Making a PowerPoint presentation is not difficult. The abundance of settings allows you to give them a variety of looks. One way to add variety to your presentation is to use gif images.
Inserting a GIF will greatly spice up your presentation. As a rule, GIFs capture the attention of viewers much better than dry text.
How to Insert a GIF into a PowerPoint Presentation
GIF insertion procedure
Inserting a GIF into a presentation is quite simple - the mechanism is identical to ordinary adding images. Simply because a gif is an image. So the exact same adding methods are used here.
Method 1: Paste into a text area
GIF, like any other image, can be inserted into a frame for entering text information.
- First you need to take either a new or empty existing slide with an area for content.
Of the six standard icons for insertion, we are interested in the first one on the left in the bottom row.
After clicking, a browser will open that will allow you to find the required image.
As in other cases, with such an operation the window for the content will disappear; if you need to write text, you will have to create a new area.
Why does my GIF insert like a regular image and not move?
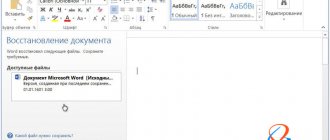
In presentation editing mode, the GIF does not move and looks like a static image. But as soon as you save the presentation with the GIF and open it for viewing, a miracle happens - the GIF animation comes to life! So if your GIF is not animated, then most likely you just opened the Powerpoint presentation in edit mode. The image below shows how to open a presentation for viewing.
To open a presentation in view mode, right-click on it, then “Show.” It will open in view mode, where all the GIFs will be animated.
Also, your GIF will lose its animation properties if you apply some Powerpoint filters to it. We don't recommend adding a frame to your GIF, but shadows won't do anything bad to it and the animation will still work. You can experiment with this. Check if the GIF you want works in view mode without Powerpoint editing applied.
Insert an animated GIF into PowerPoint using an online image search
- If you don't have a GIF on your computer, you can use an online image search to find one. Go to the slide you want to add a GIF to.
- Click Insert at the top navigation and select Network Images (PowerPoint 2013 and later).
- In the pop-up field, find an image to use in your presentation. You can refine your search by entering GIF.
- By default, Creative Commons Only is disabled. If you want to use only legal images in your presentation, leave the box checked.
- Select the image you want and click Insert to add it to your slide. Refine your search using specific keywords. For example, if you enter a desktop GIF, only animated images associated with the desktop will be displayed.
- Please note that online animated GIFs include image sources. It's best to keep them in your presentation for legal protection, even if they're licensed under a Creative Commons license.
How to find GIF files
If you don't want to use the GIF you downloaded to your computer, use PowerPoint's online image search to find the GIF.
- Open PowerPoint and navigate to the slide to which you want to add a GIF.
- Go to Paste.
- Select Pictures in PowerPoint 2010 or Online Pictures in PowerPoint 2013 or later.
- Type animated images or GIFs into the search field and press Enter. Limit your options by adding a keyword, such as an animated duck or a corporate GIF.
- Select the Creative Commons Only checkbox to search for images that are legally allowed to be used in your presentation.
- Select the GIF you want and select Insert to add it to your slide.
How to insert animation into a presentation
Many people understand the process of inserting an image into a presentation, but some have difficulties with GIFs. It's actually not that difficult to insert them. You just need to follow the detailed instructions of one of the available methods.
Inserting into text
It happens this way:
- In the slide where the text is printed, you need to click on the icon , which allows you to insert an image from the file.
- In the window that opens, you need to select the desired animation and click the “ Insert ” button.
It must be remembered that after this the window for writing text or adding a file will disappear. Because to create additional information, you should do it in a new area .
Drag and drop a GIF
The action is performed in literally three clicks:
- Click on the “ Collapse Window ” button in the folder where the animation you need for the presentation is located.
- The folder must be on top of the presentation . If not, then you need to open it.
- Left-click on the animated image should be rescheduled it to the desired part of the slide.
As you can see, there is nothing complicated about inserting a GIF image or animation into PowerPoint 2007, 2010, 2013. The action is repeated as in the case when you need to add a simple image. In order to see how the animated picture works, click on the “ Slideshow ” sign in the bottom panel.
Looping animation
The work sequence is simple:
- Click on the slide on which the GIF should subsequently be placed.
- Then select the special “ Insert ” tab and click on “ Drawing ” below.
- A window will open in which you should select a GIF image and click the “Insert" The GIF will automatically play in a loop.
Applying transitions to slides
This algorithm is standard in all versions of PowerPoint.
Inserting a Non-Looping Animation
The adding process is as follows:
- First you need to click “ Insert ”, then “ Video ” and after “ Video on your computer ”.
- In the window that opens, click on the “ Insert video ” button, and then click “ All files ”.
- Next, you need to select the desired moving picture and insert it.
Important! The GIF image is not shown in the dialog box, so you need to change " Video Files " to " All Files ".
In order to set up the playback of a GIF picture, go to the “ Working with video ” tab and configure the settings “ Automatically ”.
Simultaneous insertion on multiple slides
Another way to add animation to a Power Point presentation is to create a template. It is done like this:
- You need to select the View , then select Slide Master .
- The next step is to create a layout into which the prepared gif is inserted.
- As soon as the work on creating the layout is completed, you need to close it .
- Next, you need to right-click in the empty area and in the window that appears, click “ Layout ” and add the previously created blank.
This method allows you to insert the same animation on all slides, if required.
Tips and tricks
After inserting into a presentation, the video looks like a simple picture . In principle, it can be edited in the same way as a regular image. You don’t have to be afraid to adjust its size, drag it, or apply additional effects. You can see how the GIF behaves if you launch a presentation or preview.
You should know! The functionality of an animation should always be checked after it has undergone any processing. Some settings may make it static.
Add music to a PowerPoint presentation
Also, we should not forget that animated images can significantly weigh down the . This needs to be taken into account, especially if there are size restrictions.
It is better to choose simple GIFs to create a presentation. If it is chosen incorrectly, the important information on the slide will attract less attention. Sometimes she can be unnecessarily annoying.
It is worth choosing an animated picture taking into account the theme of the presentation . It is better to avoid inserting into a slide if its use does not reveal the essence of the presentation.
Method number 4. Insert a large number of identical slides
Sometimes there is a need to place the same gif on all (or many) slides. In this case, you will have to either mechanically insert the same gif on each slide (for example, using the Ctrl+C and Ctrl+V key combinations), or somewhat automate this process using templates. In the latter case, I recommend doing the following:
- Go to the “View” tab, in it click on the “Slide Master” button;
Click on the "Slide Master" button - Using the gif you need, create a template (the methods listed above will help);
- After creating the template, click on “Close Sample Mode”;
Click on "Close Sample Mode" - Apply your template. On the left side of the screen (where the slides are located), select the slide you need, right-click, select “Layout” from the menu that appears, and then select the template you created. The latter will be added to the slide you selected, so you can add a large number of the same slides to your presentation.
Select the Layout option to add the template you created to the slide