Inserting a video into a slide
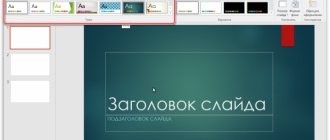
There are several different ways to insert a video file into Power Point. They differ somewhat in different versions of the program, but first it’s worth considering the most current one – 2020. It's easiest to work with clips here.
Method 1: Content Area
For quite some time now, what were once simple text input fields have turned into a content area. Now you can insert a wide range of objects into this standard window using basic icons.
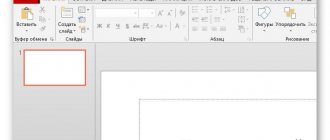
- To get started, we need a slide with at least one empty content area.
- In the center you can see 6 icons that allow you to insert various objects. We'll need the last one on the left in the bottom row, which looks like a film strip with an added image of a globe.
- When clicked, a special window appears for inserting in three different ways.
- In the first case, you can add a video that is stored on your computer.
When you click on the “Browse” button, a standard browser opens, allowing you to find the desired file.
- The second option allows you to search on YouTube.
To do this, you need to enter the name of the desired video in the search query line.
The problem with this method is that the search engine works imperfectly and rarely returns exactly the desired video, instead offering more than a hundred other options. Also, the system does not support inserting a direct link to a YouTube video.
- The last method suggests adding a URL link to the desired clip on the Internet.
The problem is that the system cannot work with all sites, and in many cases it will generate an error. For example, when trying to add a video from VKontakte.
- After achieving the desired result, a window with the first frame of the video will appear. Below it will be a special player line with buttons for controlling video display.
This is the simplest and most effective way to add. In many ways it even surpasses the next one.
Method 2: Standard method
An alternative option that has been a classic for many versions.
- You need to go to the “Insert” tab.
- Here at the very end of the header you can find the “Video” button in the “Multimedia” area.
- The previously presented method of adding is immediately divided into two options. “Video from the Internet” opens the same window as in the previous method, only without the first item. It is included separately in the “Video on computer” option. When you click on this method, the standard browser instantly opens.
The rest of the process looks the same as described above.
Method 3: Drag and drop
If the video is on your computer, then inserting it can be much easier - simply drag it from the folder onto the slide in the presentation.
To do this, you will need to minimize the folder to windowed mode and open it on top of the presentation. After this, you can simply drag the video to the desired slide with your mouse.
This option is best suited for cases where the file is present on the computer and not on the Internet.
Problems adding videos to Power Point
Adding video to a presentation is not as easy as it seems at first glance. You may encounter certain difficulties.
The first common problem is that the video does not play and appears as a small icon on the slide. The second problem is that the program may not recognize the audio or video codec or video format. Problems with playback and addition may occur due to the use of older versions of Power Point (2003 and 2007).
The file to be inserted may be too large, making it impossible to add that much. Additionally, a presentation with an embedded clip can be heavy, making it difficult to download and share the file with others. If you used YouTube videos in Power Point, they may not play due to problems with your Internet connection.
To avoid such mistakes and insert a video into a presentation without any problems, you need to remember a few simple points:
- It's always easier to work with smaller rollers
- Compress files to the required size if you cannot play them
- Use known video formats
- Convert file to WMV, ASF or MP4 format
- Place the necessary video materials in a folder along with the presentation to insure yourself against possible problems with playback
Video setup
After the insertion is completed, you can configure this file.
There are two main ways to do this - “Format” and “Playback”. Both of these options are located in the program header in the “Working with Video” section, which appears only after selecting the inserted object.
Format
“Format” allows you to make stylistic adjustments. In most cases, the settings here allow you to change how the insert itself looks on the slide.
- The “Settings” area allows you to change the color and gamma of the video, and add a frame instead of a splash screen.
- “Video effects” allow you to customize the file window itself.
First of all, the user can configure additional display effects - for example, set up a monitor simulation.
Here you can also choose what shape the clip will be in (for example, a circle or a diamond).
Frames and borders are also immediately added.
- In the "Organizing" section, you can set the position priority, expand and group objects.
- At the end is the “Size” area. The purpose of the available parameters is quite logical - cropping and adjusting the width and height.
Playback
The Playback tab allows you to customize videos in the same way as music.
How to transcode video from one format to another
Suppose we need to change the MOV video format, i.e. transcode it into AVI, MPEG, ASF or WMV format. As an example, we will transcode MOV to WMV so that you can be guaranteed to watch the video on any computer running Windows.
We will re-encode the video using the “Format Factory” program, which can be used. The program has a Russian interface, so there shouldn’t be any special problems when working.
Step 1. Launch the program, go to the Settings menu, click the Change button to the right of the “Destination Folder” field and specify the folder to save the recoded video.
Specify the folder to save the processed video (clickable)
In this particular case, a “Processed Video” folder was created on the desktop.
Step 2. Click on the button for the format into which we want to convert the file.
We indicate that we will recode the file into WMV format. Naturally, you can choose another output format, such as AVI or MPG
Step 3. In the window that appears, click the Add file button and specify the file that needs to be recoded.
Select the file to recode. If necessary, you can specify several files by selecting them with the Ctrl key pressed (clickable)
Step 4. Click OK.
To confirm the selection, press the OK button.
Step 5. To start the conversion process, just click on the Start button.
Click on the “Start” button
Once the conversion is complete, the process status will be marked as “Completed”. In order to quickly get to the folder with processed files, just click the Destination folder button.
In order to quickly get to the folder with processed files, just click the “Destination folder” button
Additional settings
To find this section of parameters, you need to right-click on the file. In the pop-up menu, you can select the “Video Format” option, after which an additional area will open on the right with different visual display settings.
It is worth noting that there are significantly more parameters here than in the “Format” tab in the “Working with Video” section. So if you need more fine-tuning of the file, you need to go here.
There are a total of 4 tabs here.
- The first one is “Fill”. Here you can customize the file border - its color, transparency, type, and so on.
- “Effects” allow you to add specific settings for the appearance - for example, shadows, glow, anti-aliasing and so on.
- “Size and Properties” opens up options for formatting videos both when viewed in a specified window and for full-screen demonstration.
- “Video” allows you to adjust brightness, contrast and individual color patterns for playback.
It is worth noting a separate panel with three buttons, which pops up separately from the main menu - below or above. Here you can quickly set the style, go to editing or set the style for the beginning of the video.
How to insert a video into a PowerPoint presentation 2007, 2010, 2020
The sequence of actions differs in different versions, so let's start with 2007.
- To add a video file, go to the “INSERT” tab and click “MOVIE”.
- Select the desired file on your computer
- Trying to reproduce
Supported formats:
- Windows Media (.asf),
- Windows Video (.avi),
- Movie (.mpg or .mpeg),
- Windows Media Video (.wmv)
For the 2010 presentation, follow these steps:
- Go to the INSERT tab
- In the Multimedia block, click “VIDEO”
- Select the insert option “VIDEO FROM FILE”
- In Explorer, find the file and click “INSERT”
When all the steps are completed, go to the settings in the “WORKING WITH VIDEO” tab. By clicking on “FORMAT”, you can change the brightness and contrast, the screensaver image and the color of the video. You can also enlarge and reduce the format. In the “VIDEO EFFECTS” block, borders, shadows, and glows are adjusted.
The “PLAYBACK” tab takes you to editing. Choose the volume of the clip, trim if necessary. Video options allow you to play automatically and on click. The following formats are available for PowerPoint 2010:
- Adobe Flash Media (.swf),
- Windows Media (.asf),
- Windows Video (.avi),
- Movie (.mpg or .mpeg),
- Windows Media Video (.wmv)
Working with PowerPoint 2020 video is even easier than previous versions. Adding occurs the same way as in 2010. However, this version supports more formats.
| Video file formats | Audio file formats |
| Windows Video File (.asf), Windows Video (.avi), MP4 Video (.mp4, .m4v, .mov), Movie (.mpg or .mpeg), Adobe Flash (.swf), Windows Media Video File (.wmv) | AIFF Audio (.aiff), AU Audio (.au), MIDI (.mid or .midi), MP3 (.mp3), Advanced Audio Coding – MPEG-4 Audio File (.m4a, .mp4), Windows Audio (.wav), Windows Media Audio (.wma) |
In the direct settings of the clip, you can trim it, resize it, and so on. This is done in the “FORMAT” and “TRIMMING” tabs. There are many useful features for playback. In addition to starting the video by clicking and automatically, there is also continuous playback. You can open a video clip in full screen or hide it until the user starts it.
Video clips in different versions of PowerPoint
It is also worth paying attention to older versions of Microsoft Office, as some aspects of the procedure are different.
PowerPoint 2003
In earlier versions they also tried to add the ability to insert videos, but here this function did not work properly. The program worked with only two video formats - AVI and WMV. Moreover, both required separate codecs and were often buggy. Later, patched and improved versions of PowerPoint 2003 significantly improved the stability of clip playback during viewings.
PowerPoint 2007
This version was the first to support a wide range of video formats. Types such as ASF, MPG and others have been added here.
Also in this version, the option of inserting in the standard way was supported, but the button here is called not “Video”, but “Film”. Of course, adding clips from the Internet was out of the question then.
PowerPoint 2010
Unlike 2007, this version has learned to process the FLV format as well. Otherwise, there were no changes - the button was still called “Movie”.
But there was also an important breakthrough - for the first time it became possible to add videos from the Internet, in particular from YouTube.
How to Convert and Compress Video to Make It Compatible with PowerPoint
You can achieve both the goals mentioned above by processing your videos with Clipchamp's online converter and compressor.
All videos you process in Clipchamp remain private and secure. Even though Clipchamp is a completely online app, it works with files right on your computer, so you don't have to upload anything directly to the site.
Your files are not uploaded to servers outside of your control, and are available on your computer as soon as Clipchamp finishes converting and compressing them, ready for immediate addition to PowerPoint.
For older versions up to PowerPoint 2007
It's best to convert the video to Microsoft's own codec, such as WMV, using the .ASF container format. Videos converted this way will also work on older computers running Windows XP, Vista, or Windows 7. Note that ASF files may be larger than the original video, so you won't be able to reduce the overall presentation file size using ASF.
For PowerPoint 2010
you can convert videos to WMV/ASF or MP4. However, in the latter case, you also need to install Apple QuickTime on your computer, and you may have problems with QuickTime videos unless you convert them to MP4 using Clipchamp.
Everything gets a little easier with PowerPoint 2013 and 2016
, where the preferred video format is MP4. However, for video and audio codecs to work reliably, the MP4 container must be H.264 and AAC.
Converting videos to WMV will also work, and PowerPoint 2016 supports a wider range of video formats than any of its predecessors. Although MP4 is still the most versatile option, compressed MP4 will help reduce the size of your presentation if you're embedding videos directly.
Additionally
Here's some additional information about the process of adding video files to PowerPoint presentations.
- The 2020 version supports a wide range of formats - MP4, MPG, WMV, MKV, FLV, ASF, AVI. But there may be problems with the latter, since the system may require additional codecs that are not always installed on the system as standard. The easiest way would be to convert to another format. PowerPoint 2016 works best with MP4.
- Video files are not stable objects for applying dynamic effects. So it's best not to add animation to your clips.
- Video from the Internet is not inserted directly into the video; it just uses a player that plays the clip from the cloud. So if the presentation will be shown on a device other than the one on which it was created, you should make sure that the new machine has access to the Internet and source sites.
- You should be careful when giving a video file alternate forms. This may negatively affect the display of certain elements that do not fall within the selected area. Most often, this affects subtitles, which, for example, in a round window may not completely fit into the frame.
- Video files inserted from a computer add significant weight to the document. This is especially noticeable when adding long, high-quality films. If there are regulations, inserting videos from the Internet is best suited.
That's everything you need to know about inserting video files into a PowerPoint presentation.
We are glad that we were able to help you solve the problem. Add the Lumpics.ru website to your bookmarks and we will be useful to you. Thank the author and share the article on social networks.
Describe what didn't work for you. Our specialists will try to answer as quickly as possible.
How to solve these problems
To overcome these problems and minimize the risks associated with them, two most important points need to be considered:
- Small video files are always easier to process, so it is recommended to compress them before embedding or linking them.
- Videos must be in a format that PowerPoint can recognize without any deviations, so converting them
in WMV/ASF or MP4 should help with many problems.
convert-video-powerpoint
Reducing the file size and converting it to a PowerPoint-compatible format will reduce errors and the likelihood of clips not playing. You still need to make sure that the videos you link to from the presentation are available in their original folder. Also, in case of problems with your Internet connection, if you are using a video from YouTube, it is better to have a local copy of it.
It's actually safest to copy all the videos you want to use to the same folder on your device that contains the ppt or pptx file, and treat the entire package as one archive so they always stay together.
Sometimes it's easier to show once than to endlessly prove
Do you remember that exciting moment in the presentation? When an enthusiastic exclamation escapes from the audience: “Oooooooo!” This is often the moment that makes the entire PowerPoint presentation worth creating. How will your presentation cause this exclamation? Perhaps it will be an unexpected selection of pictures. Perhaps it will be an unexpected inclusion of animation in the presentation. Of the entire range of possible tools that give the maximum effect, inserting a video fragment is beyond competition. If, of course, this fragment is chosen to fit the topic, with humor and accurately notes exactly what you need. Listeners will remember for a long time, for example, quotes from famous films that confirm your idea.
Inserting a video clip into a PowerPoint presentation is easy. The only thing you need to know is that the video you want to insert into your presentation must be stored on your computer. PowerPoint, unfortunately, can't work with online video.
Summary table of supported PowerPoint video formats
| Video file format | PowerPoint 2003 | PowerPoint 2007 | PowerPoint 2010 |
| AVI | Yes | Yes | Yes |
| WMV | Yes | Yes | Yes |
| A.S.F. | X | Yes | Yes |
| MPG/MPEG | X | Yes | Yes |
| FLV | X | X | Yes |
It must be remembered, however, that the file inserted into a PowerPoint presentation has a size limit and should not be more than 2 gigabytes. This applies mainly to video files in AVI format. The simplest thing you can do to compress a file is to reduce the video resolution and convert to MPEG format. How to do this is described below. It's worth noting that this limitation only applies to FAT16 and FAT32 file systems, but if you don't know what the file system of the computer you'll be playing your presentation on is, it's best to play it safe.