Where are screenshots saved in Windows?
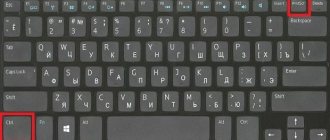
By default, the PrtScr key is responsible for the screenshot option in Windows. It is located at the top of the keyboard. After pressing the print screen button, the resulting image is placed on the clipboard and stored until the text or the next image is copied.
To understand where a screenshot is saved in Windows 7, you need to follow the steps below.
- Having fixed the screen, go to a graphic editor (Paint or another) and press Ctrl + V to insert a photo.
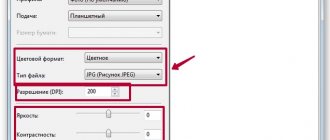
- Go to the “File” – “Save” menu and select the path.
The answer to the question of where screenshots are saved in Windows operating systems is simple - in any folder that is specified in the graphic editor.
Computers running Windows 8 and later provide a convenient feature: the folder where screenshots are saved is automatically set. First, press the Windows + Print Screen combination. To find a screenshot on your computer, all you have to do is go to Libraries-Images-Screenshots.
The update is useful if you are processing a lot of images.
In the “Search” section of the Start menu, you can enter the name of the image in order to find out the location of the screen among the open folders and retrieve it later.
Scissors
Snipping Tool is a built-in tool for taking screenshots that appeared in Windows 10. To launch the utility, go to “ Start ” - “ All Apps ” and click on “ Scissors ”.
A program window will open that supports screenshots in any form. The tool allows you to highlight specific parts of the screen and save them. The application also has a delay function , which can be very useful, especially if you take screenshots from open menus.
Once you've created a picture, you can edit it using the Pen or highlight certain elements. If advanced editing is required, then you need to copy the screenshot to the clipboard and paste it into any photo editing utility.
After editing the image, you just need to click on “ Save fragment ” and then select the saving path. By default, it will offer to save to the images folder in My Documents.
Steam – where are screenshots stored?
Steam is a popular gaming platform that is designed not only for games, but also for communication between players.
In the application you can share your achievements, items, and you are also allowed to post photographs of the best moments from the games. Screenshots from games are saved a little differently: to do this, you need F 12 key and the picture will be saved. The location of photos is usually located by default in the Steam , but in some games the manufacturer assigns their own location for the screenshots.
How to find screenshots on Steam:
- You need to open the list of applications , which is located at the bottom of the desktop on the right, right-click on Steam and click on “ Screenshots ”.
- A window will open containing screenshots taken over the entire period. In the drop-down menu you can also see photos for certain games . For example, Shadow of the Tomb Raider.
- Another way, but more complicated. To do this, you need to go to the “ Program Files ” folder, which is located on your hard drive and go to “ Steam ” - “ Userdata ”.
What is the difference between thick, thin and web clients?
How to change the Steam snapshot path:
- Open Steam and go to “ Settings ” - “ In Game ”.
- Click on “ Screenshot Folder ”. After which a window will open with a path that you can change at your discretion.
Specialized programs
For advanced editing of screenshots on a laptop or computer, it is recommended to use third-party programs. The settings are identical everywhere, so let’s look at the Icecream application as an example.
Icecream Screen Recorder is a simple tool with enough features. To make the most of it, you can change many settings to suit your preferences.
Here you can, for example, change the video quality, save location, mouse cursor size and select hotkeys.
To create a photo in Icecream Screen Recorder, you need to click on “ Screenshot ” and select the area. In the bottom panel, you can edit the photo , as well as save it to a specified location or to the clipboard.
Android
Most Android phones take screenshots the same way.
- The power and volume down buttons are pressed.
The method is suitable for users of Samsung or Asus.
- To further work with the finished image, go to Gallery – Screenshots, where all screenshots taken by the device are stored.
On HTC and Samsung Galaxy S2-S4 smartphones, hold down the Home and Lock keys. The answer to the question in which folder the screenshot is located is similar: Gallery-Screenshots.
Thousands of users know that you can take a screenshot using special applications downloaded from the Play Market. An example program is the “LightShot” utility. Among the main advantages of the service: a convenient graphic editor, the ability to view pictures from the prnt.sc website directly in the application and share screenshots with friends on social networks. The screen is quickly and easily captured, the photo is sent by mail, or the system saves it in the Lightshot Gallery folder (or with a similar name).
Windows Phone
Let's find out where the screenshots taken on Windows Background are located. The method for creating a screen depends on the device version. Windows Phone 8.1 owners press and hold Volume Up + Power at the same time. The resulting screenshot will be immediately saved in the “Screenshots” album.
Windows Phone 8 provides a combination and “Power”. The photo in the Photos folder is viewed.
Taking a screenshot using scissors
If you are too lazy to press buttons, or you are completely confused, then I can recommend another interesting and not complicated way to take a screenshot of the screen on a computer. Some versions of Windows have a built-in Snipping Tool program. Let's try to find it on your device? To do this, click the “Start” button and enter “Scissors” in the search bar. Well, did you find it? Then let's launch!
Find the “Create” button. If you click on it, only the application window will be bright. And all other applications on the screen will seem to become dim. The cursor will turn into a cross, and if you press the left mouse button and hold it, you can select any area on the screen. By default, this area will be rectangular. But you can choose a different form for creating a screenshot, which will be very convenient for many. To do this, click the down arrow next to the “Create” icon. A list will appear in front of you, in which there is an arbitrary shape, a rectangle, a window, the entire screen. Click on the “free form” line and draw around any part of the screen as you please.
In the Scissors program, the user has access to some tools for editing the saved area, although there are even fewer of them than in Paint. But you can still work with the “Pen”, highlight something with the “Marker”, erase unnecessary marks with an eraser. To save the screenshot, click the floppy disk icon. Here, as in Paint, it is best to choose the JPEG or PNG format.
iOS
The saving instructions are suitable for users of the latest versions of iPhones, starting with iPhone 6/6s.
- Turn on your phone and go to the tab, image, or panel you want to pin.
- Simultaneously hold the “Home” and “Lock” buttons for a couple of seconds. The first is the round interface piece on the front of the phone. The second is located in the upper right part of the device.
- If a click is heard after pressing a key, the image has been successfully created.
- You can find the image in the Photos application, Camera Photos section.
In other versions, the folder name changes (iPhone 6/6S - “Recently added”). You have to look for the printscreen at the bottom of the list.
Linux
The procedure is similar to the instructions for the Windows OS. But, unlike Windows, the operating system in question offers an expanded range of capabilities without downloading additional programs.
To create a screenshot of the entire screen, press the Print Screen key. Then in the window that appears, select the path where the screenshots are saved.
You can press Alt+PrtScn and activate the print screen of only the currently active tab on your computer. It’s easy to find a screenshot taken on a computer in the “Pictures” folder.
You can also take a photo of the selected area on the monitor. First, press the Shift+PrtScn combination, which activates the screenshot function. Next, select the desired area for the screen. By default, the print screen is saved in the “Pictures” folder.
Additional settings are available in the Gnome-Screenshot service. The utility is located in “Accessories” – “Applications”. The option to delay the shot for a few seconds is often used. The program stores the screenshot in “Pictures”.
Screenshots of the computer screen are created simply and are located in the standard system folder of the device or in a path you specify yourself. Sometimes they use a special program to take and then find a screenshot faster.
How to take a screenshot using Print Screen
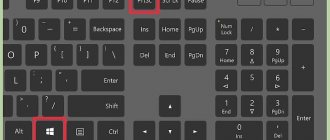
The Print Screen key in all versions of Windows, including Windows xp, is used to create a screenshot. Just by clicking a button you take a full screenshot. Everything that is currently there is captured. If you need a picture of one active window, use the combination alt + printscreen. Then the top window you are working with will be copied.
These keys only work in Windows, for example, on MAC OS, capturing the entire screen is done using the combination Command + Shift + 3. And in order to “catch” a fragment, instead of three, you need to press four, selecting the desired area with the mouse. On a Mac, captured images are placed on the desktop as png files by default. We'll look into where screenshots are saved on Windows below.
- Recipes for cooking barley porridge in a slow cooker
- What laxatives are most effective for constipation?
- Apple cider vinegar benefits and harms for the human body