The most popular effect in photo processing is vignetting. However, non-professionals rarely know how to create it. In this tutorial you will learn how to create a simple vignette effect in Adobe Photoshop (cs5, cs6, cc) in six different ways. Each method has its own characteristics that you can use in different projects.
Vignetting. How to remove vignetting in Photoshop and Lightroom.
Not long ago we talked about chromatic aberration (color distortion) and distortion (geometric distortion).
Today you will learn about such a photography defect as vignetting , and, naturally, I will tell you how to deal with it.
As usual, let's start with the definition.
"Vignette" is translated from French as "saver".
Everyone has probably come across the word “vignette” more often - a photo frame that covers part of the image area. In this case, this is an artistic effect, and not a defect in the photograph (as in our case).
Vignetting is a photographic defect that manifests itself in a decrease in image illumination from the center to the edges of the frame.
It looks something like this
Vignetting effect
And ideally it should look like this
A few words about the causes of vignetting.
The main and most important reason for this defect is the limitation of the light beam by various elements included in the lens design.
To reduce vignetting in this case, you need to increase the aperture value.
If you are using a zoom lens, dark edges may also appear at maximum magnification.
Another reason for reducing the brightness of the frame at the edges is the use of a hood and filters with high edges - this will be especially noticeable at a wide angle (that is, if you have a lens with a focal length of 18-105 mm, then at 18 mm the defect will appear more strongly), called This is mechanical vignetting .
Let me give you an example:
If you wear a cap in sunny weather, then part of your face will be in the shadow; the longer the visor, the greater the shadow. It’s the same with a lens - the longer the edges of the filter (or hood), the higher the risk of dark edges appearing in the frame.
The question is brewing: How to remove vignetting without graphic editors?
For ease of understanding, I will tell you using the Nikon 18-105 mm f/3.5-5.6G AF-S DX VR Nikkor lens as an example.
- Increase the aperture value. For example: you decide to take a portrait of a person at a focal length of 18 mm and aperture of 3.5. It would be wiser to increase the aperture value to 5.6 or 6.3, this way you will kill two birds with one stone - there will be less vignetting and less aberration.
- Do not take photographs at maximum magnification (in our case 105mm), otherwise darkening will appear at the edges of the frame.
- At a wide angle (in our case, 18mm), vignetting from the lens hood or filters may appear. There is only one way out - use a filter and a lens hood with low edges.
- Use more expensive optics and switch to prime lenses.
And now about eliminating vignetting in graphic editors.
Traditionally, we will use Adobe Photoshop CS5 and Adobe LightRoom 3.4.1 for this.
How to remove vignetting in Photoshop. Lens Correction.
Open the image.
Next Filter -> Lens Correction (Filters -> Lens Correction) - you can also use the hot keys “Shift + Ctrl + R”, and the keyboard layout should be in English.
How to remove vignetting in Photoshop
There are two ways to remove vignetting in Photoshop using the Lens Correction filter - automatically, based on data about the lens and camera model, and manually.
In automatic mode, you need to select Auto Correction, select Vignette, then select the camera manufacturer (Camera Make), camera model (Camera Model) and lens model (Lens model), if your camera model or lens is not in the list, click the button “Search Online” and Photoshop will search for suitable profiles on the Internet.
If you can’t remove vignetting in Photoshop using the automatic method, you can use the manual method (Custom)
How to remove vignetting in Photoshop
We are interested in the Amount and Midpoint sliders.
Amount – removes darkening at the edges, and midpoint adjusts the degree of darkening from the edges to the center of the image.
How to remove vignetting in Photoshop – Camera Raw 6.3.
If you shoot in Raw format, you can use Camera Raw Converter to eliminate vignetting.
Select the Lens Corrections module. Further adjustments can be made manually or automatically.
How to remove vignetting in Photoshop
In automatic mode, in the “Profile” menu, activate the “Enable Lens Profile Corrections” item (activate the lens correction profile), and data about the camera and lens model will be obtained from the raw file (if this does not happen, select them from the list manually) and produce elimination of vignetting in auto mode. You can then manually adjust the settings using the “Vignetting” slider and achieve the perfect result.
Manual mode – Manual.
How to remove vignetting in Photoshop
To remove vignetting in Photoshop in the Camera Raw plugin, use the Amount and Midpoint sliders in the Lens Vignetting panel.
How to remove vignetting in lightroom .
Import images into Lightroom.
Next, go to the Develop module -> Lens Corrections.
How to remove vignetting in Lightroom
Next, activate the “Enable Profile Corrections” item, and Lightroom will automatically remove the vignetting.
You can adjust the automatic algorithm using manual settings using the “Vignetting” slider.
Removing vignetting in Lightroom is as easy as shelling pears, and its main advantage over Photoshop is that you can apply these settings to dozens (hundreds and thousands) of photos at once.
You can also deal with this photographic defect in manual mode – Manual
How to remove vignetting in Lightroom
The sliders familiar to us from Photoshop are Amount (magnitude) and Midpoint (midpoint).
The principle of operation is the same as in the Lens Corrections module of the Camera Raw plugin in Photoshop.
Amount – removes darkening at the edges, and midpoint adjusts the degree of darkening from the edges to the center of the frame.
When taking photographs, you should pay attention to such photographic defects as digital noise and movement (image blur), but do not get 100% carried away by the technical parameters of shooting, remember also about the artistic component of the frame (the basics of composition in photography). Coming home after shooting, it’s a sacred task to process photos (or at least view them), but monitors often fake colors (especially at factory settings) - so it’s better to calibrate the monitor at home, so to speak, get closer to the ideal.
Download the book “Invaluable Tips on the Basics of Composition”
Put photo processing on autopilot with the training “Adobe Lightroom - it's as easy as 1,2,3”
Register for online training and become successful “Springboard to success“
How to use the action
Step 1
Having finished creating the action, let's test it in action!
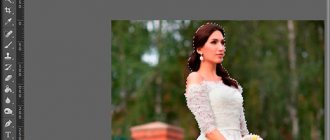
Create a new document (Ctrl+N). This time the document will be the same size - 5 x 7 inches - but in portrait orientation.
Then insert the second photo onto the document. If you wish, you can trim off the excess and choose the most favorable position.
Step 2
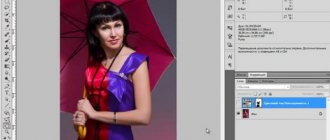
Now let's apply our action! Select the photo layer.
Then, on the Actions panel, select the “Vignette” action.
After that, click on the Play .
Step 3
As a result, the vignette was applied to the new photo! As you can see, this action can be used an infinite number of times on any picture.
However…
Step 4
Not everyone succeeds in everything the first time. What to do if there are errors in the action or you want to edit some actions?
Luckily, it's very easy to fix!
Let's assume that we wanted to add color correction to the action. On the operations panel, select a suitable location. In my case, I want to add a new action at the end of the action. I selected the last action on the panel and clicked the Record .
Step 5
Now create a new layer (Ctrl+Shift+N), fill it with beige color (#E0C398), then switch the blending mode of this layer to Color (Color) and reduce the opacity to 40%. The result, combined with a vignette, will create a vintage effect.
When finished, click on the Stop .
Voila! We've added a new action to the action.
Step 6
What if the action contains extra actions that need to be removed?
As an example, I'll remove a few actions. While holding down the Shift key (to select several actions at the same time), select the desired actions that you want to delete. Then at the bottom of the panel click on the button in the form of a trash can.
Please note that it is the actions of the action that will be deleted, not the layers or part of the photo.
Step 7
Let's explore another handy aspect of action games. Let's say you want to save a finished action somewhere on your computer or, conversely, load someone else's action into Photoshop. This is also very easy to do.
Select the set of actions you want to save; next to its name there is a folder icon.
Then in the upper right corner of the panel, click on the menu button and select Save Actions . As a result, a window will appear and you can save actions in .ATN format.
Step 8
Uploading action games downloaded from the Internet is just as easy!
Go to the menu on the action panel. This time we select Load Actions . A window will open in which you need to select the .ATN file. This is the same file format that we saved in the previous step.
Additional advice: sometimes complex and well-developed actions require additional resources to work - brushes, patterns, etc. Make sure that you have installed everything you need, otherwise the action will throw an error and will not be able to exit correctly.
Thank you for studying this tutorial and learning how to create a vignette effect. I hope the knowledge gained will help you in future projects. Good luck!
Author: Daisy Ein
The easiest way to create a vignette
There is another, probably the fastest way to add a vignette:
- Open the desired image.
- Create a new layer .
- Select the black Brush
- Next, select “Filter”, “Blur”, “Gaussian Blur” , set the value to about 70 px .
- Click " Ok ".
From the above methods, you can choose any one you like, you can also add the “ Noise ” and “ Color Correction ” filters to your taste. A vignette will help give a photo a special charm and mystery; such a photo will definitely not go unnoticed; this lesson will be useful both for a person without special skills in working with Adobe Photoshop, and for a professional to replenish his knowledge base.
Using the Camera Raw app
To create a vignette in Photoshop using Camera Raw, you need to open the original image in the program, then immediately create a copy of it by pressing “Ctrl+J” on the keyboard.
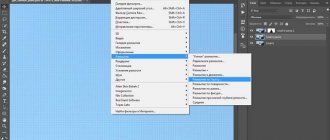
Right-click on the field of the layer with the duplicate image and select the “ convert to smart object ” command from the list.
If everything worked out, a symbol appears on the thumbnail, indicating that the layer has been converted into a “smart object”.
Next, select the “ Filter ” menu from the “ Camera Raw Filter ” pop-up list.
How to beautifully retouch a photo in Photoshop
Camera Raw filter window opens .
In order to create a vignette effect, go to the “ fx ” (Effects) tab at the bottom of the panel.
Effect function is available in the “ Vignetting after cropping ; if you move this slider, subsequent functions will open.
, the color along the edges will change , to the right - white, to the left - black.
The following functions are available when working with this panel:
- “ midpoint ”—changes the vignetting diameter;
- “ roundness ” - will help you choose the shape of the vignette, square or round;
- “ feathering ”—smoothes the edges of the vignette;
- “ Highlights ” reduces the darkness of the image.
When all image settings are adjusted, click “OK” .