Disk Management is a useful and effective tool for managing Windows disks and partitions, but it is not as powerful as Diskpart. This command line tool allows you to delete, create, and modify partitions on any hard drive or USB drive that your PC can detect.
We recommend using a Disk Management tool in most cases, but if Windows won't start properly or you prefer to use the PowerShell terminal, Diskpart is an ideal alternative. Here are some of the most common Diskpart commands that will help you learn how to use Diskpart effectively.
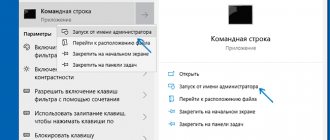
If you want to use Diskpart, you need to open a Windows Command Prompt or PowerShell Terminal. Diskpart is a destructive tool, so you need to open a terminal window with administrator rights.
- To open Diskpart in Windows, right-click the Windows Start menu button and select Windows PowerShell (Admin).
- In an administrator-level PowerShell terminal (or similar Windows command prompt), type diskpart and press enter.
- The Diskpart tool will launch in a window, ready to use. Type exit at the "DISKPART>" prompt and press enter once you're done using it.
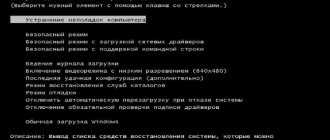
- Diskpart is also available for users booting into the Windows Recovery Environment, which is available when the computer is booted using Advanced startup mode in Settings > Windows Update & Security > Recovery.
- Click Restart Now to boot WinRE.
We'll cover some of the most common Diskpart commands in this article, but if you want to quickly see the full list of available Diskpart commands, type help at the "DISKPART>" prompt and press enter.
List existing hard drives, volumes and partitions
When Diskpart is open, the first thing you should do is check the current layout of your hard drives and attached storage.
- At the DISKPART command prompt, type list disk and press enter. This list will list all available storage devices (including hard drives, USB drive, SD cards, etc.) that your PC can currently detect.
- Starting from scratch, Diskpart will list all detected drives. You will need to remember the drive number (for example, "0" for your Windows hard drive) for use with future Diskpart commands.
- Along with your list of disks, you can also ask Diskpart for a list of detected volumes. At the "DISKPART" prompt, enter list volume.
- Diskpart may also allow you to list individual hard drive partitions (some of which may correspond to volumes listed using the "list volume" command). First you need to select your hard drive using the list disk command.
- At the "DISKPART>" prompt, type select disk followed by the disk number (for example, select disk 0). Diskpart will confirm that the drive is selected at this point.
- After selecting the drive, enter the list partition. This will be a list of the current partitions on your disk. You will be able to remove or change these partitions from here using the partition number in the later Diskpart command.
How to format a write-protected flash drive
12/25/2013 windows
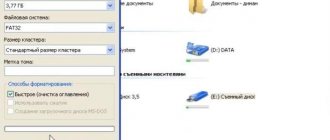
Previously, I wrote a couple of articles about how to format a flash drive in FAT32 or NTFS, but I did not take into account one option. Sometimes, when you try to format, Windows writes that the disk is write-protected. What to do in this case? We will deal with this issue in this article. See also: How to fix Windows cannot complete formatting error.
First of all, I note that on some flash drives, as well as on memory cards, there is a switch, one position of which sets write protection, and the other removes it. This instruction is intended for those cases when the flash drive refuses to format despite the fact that there are no switches. And the last point: if everything described below does not help, then it is quite possible that your USB drive is simply damaged and the only solution is to buy a new one. It’s worth trying, however, two more options: Programs for repairing flash drives (Silicon Power, Kingston, Sandisk and others), Low-level formatting of a flash drive.
Update 2020: in a separate article there are other ways to fix the problem, as well as video instructions: The flash drive writes the disk is write protected.
Removing write protection using Diskpart
To get started, run the command line as an administrator:
- In Windows 7, find it in the start menu, right-click on it and select “Run as administrator.”
- In Windows 10 and 8.1, press the Win keys (with logo) + X on your keyboard and select “Command Prompt (Admin)” from the menu.
At the command prompt, enter the following commands in order (all data will be deleted):
- diskpart
- list disk
- select disk N (where N is the number corresponding to the number of your flash drive, will be shown after executing the previous command)
- attributes disk clear readonly
- clean
- create partition primary
- format fs=fat32 (or format fs=ntfs if you want to format to NTFS)
- assign letter=Z (where Z is the letter to be assigned to the flash drive)
- exit
After this, close the command line: the flash drive will be formatted in the desired file system and will continue to be formatted without problems.
If this does not help, then try the next option.
Removing write protection for a flash drive in the Windows Local Group Policy Editor
It is possible that the flash drive is write-protected in a slightly different way and for this reason is not formatted. It's worth trying the Local Group Policy Editor. In order to launch it, in any version of the operating system, press the Win + R keys and enter gpedit.msc and then press Ok or Enter.
In the Local Group Policy Editor, open the branch “Computer Configuration” - “Administrative Templates” - “System” - “Access to Removable Storage Devices”.
After this, pay attention to the item “Removable drives: disable recording”. If this property is set to “Enabled”, then double-click on it and set it to “Disabled”, then click the “Ok” button. Then look at the value of the same parameter, but in the “User Configuration” - “Administrative Templates” section - and so on, as in the previous option. Make the necessary changes.
After this, you can format the flash drive again; most likely, Windows will not write that the disk is write-protected. Let me remind you that it is possible that your USB drive is faulty.
And maybe this will be interesting:
remontka.pro
Removing a hard drive partition or volume using Diskpart
The hard drive (disk) is divided into partitions, which are often the same as specified volumes. If your hard drive is divided into multiple partitions or volumes and you want to remove one, you can do so using Diskpart commands.
- Select your hard drive using the selector drive.
- At the "DISKPART" prompt, enter list partition, then select partition #, replacing # with your partition number.
- After selecting the partition, enter delete partition. Diskpart will confirm if the partition was deleted later.
- You can also delete disk volumes directly if you wish. Enter volume list, find the selected volume number, then enter select volume #, replacing # with the volume number.
- Type delete volume to completely delete the volume. Diskpart will confirm whether the command was successful or not after this.
Mistake #4. Error in CRC data
Occurs due to the presence of bad (bad) sectors on the device.
Solution
Use CKDSK as described above, or run “Partition Guru”, select the problem disk, select the “Disk” menu section, and in it “Verify Or Repair Bad Sectors” - “Start Verify”. When the check is completed, click on “Repair”.
Check for bad sectors on your disk using Partition Guru
Complete hard drive removal with Diskpart Clean
Instead of deleting individual volumes or partitions on a disk, you can completely erase your hard drive using the Diskpart clean command. You can also use this command if you want to erase a USB drive that is ready to be formatted.
You won't be able to do this on the system drive (and won't want to!) unless you use Diskpart in your Windows installation
- At the "DISKPART>" prompt, select the disk you want to erase by typing select disk # , replacing # with your disk number. If you don't know your disk number, first type list disk.
- If you are sure that you want to completely wipe the drive (deleting all volumes/partitions of the drive), type clean and press Enter. You won't be asked to confirm, so make sure you want to do this before you start.
- Diskpart will confirm that the disk is "cleaned" and is ready to create new partitions.
Causes Diskpart encountered an error
There may be several of them. Often the main one is the enabled function of prohibiting writing to the disk (Wright-Protection). The next most popular reason is the lack of rights for the console itself, launched as a user with limited rights.
How to run cmd console with administrator rights?
So problems with errors will be solved precisely in the plane of these two. First, make sure that the command console is running as an administrator. This point is very important, as it will probably haunt you throughout your entire work with DiskPart. Be sure to check your user group membership in the system. If the system denies you rights, refer to the articles:
How to create a user with the maximum set of rights?
or use the Windows repair console or boot disk/flash drive with Windows. Versions of DiskPart launched from there do not care about system rights.
Creating and formatting new hard drive partitions
With a blank disk, you are ready to create a partition in the free space using the Diskpart create partition command. You can then format this new partition with a Windows-friendly file system such as NTFS or FAT32 using the Diskpart format command.
- Start by selecting the selected disk using select disk #, replacing # with your disk number (and using list disk to find the disk number if you don't know).
- Once you've selected your drive, type create partition primary to create a partition using all the space on that drive.
- If you want to create a partition that takes up only a portion of the free space (allowing you to create more than one partition), enter the command create main partition size = X instead, replacing X with the partition size measured in megabytes (for example, size = 1024 for 1 GB of space) .
- Type a list of partitions to make sure your new partition is listed, and then click Select Partition 1 to select it. To mark a partition as active, enter "active" at the "DISKPART>" prompt. This is necessary if you want to use it as a boot drive.
- To quickly format a drive with the NTFS file system, enter the command fs = NTFS label = Y quick. You can replace Y with whatever shortcut you prefer to use.
- After formatting, Windows will likely automatically assign a drive letter. If this is not the case, enter assign letter Z, replacing Z with the free drive letter.
DiskPart failed to remove disk attributes
If this error prevents you from working with the selected device, check the following:
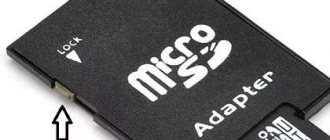
- The device must not have PHYSICAL write protection. Thus, many modern media or disc boxes have a write protection function. They can take different forms:
- Reset UAC settings to minimum. At least while working with DiskPart
- This is a device with a RAW . DiskPart cannot handle such a system correctly. And the utility can start working with it only after formatting. It's up to you to decide whether you should resort to formatting or use other options for working with RAW disks, but the formatting command from DiskPart looks like this:
To format to NTFS, the command takes the form:
One of the common problems when formatting SD and MicroSD memory cards, as well as USB flash drives, is the error message “Windows cannot complete formatting”, and as a rule, the error appears regardless of the file system in which formatting is performed - FAT32, NTFS , exFAT or other.
In most cases, the problem occurs after the memory card or flash drive has been removed from some device (camera, phone, tablet, etc.), when using programs for working with disk partitions, or in cases where the drive is suddenly disconnected from the computer while performing operations with it, in case of power failures or when using the drive with any programs.
This instruction provides details on various ways to fix the “format cannot be completed” error in Windows 10, 8 and Windows 7 and return the ability to clean and use a flash drive or memory card.
Expand hard drive capacity
If you have an existing hard drive volume that doesn't take up all the free disk space and you want to expand it, Diskpart's commands will allow you to do so.
- Start by selecting the selected disk using select disk #, replacing # with your disk number (and using list disk to find the disk number if you don't know).
- Type list volume to get a list of all available volumes on your PC, then type select volume # , replacing # with the one you want to expand.
- Enter an extension to increase it to its maximum size. Diskpart will confirm if the extended command is working correctly. Confirm that the volume size has increased by typing the second volume of the list afterwards.
Diskpart has other options available, as the help command briefly explains.
If “Diskpart has detected an error” you can’t remove it...
I would like to add that DiskPart “officially” adds attributes to all partitions of the selected disk. However, as for the attributes themselves (including “Read-Only”), their capabilities are not documented. And work, including abandoning them or reappropriating them, is sometimes fraught with difficulties. The fact is that the attributes will be in the nature of only advisory instructions and, I repeat, are VERY CLOSELY tied to the rights of the system. So sometimes, in addition to working with the disk itself, it is worth checking the list of volumes on them. DiskPart can do this too:
list volume select volume X detail volume
If the problem disk has multiple volumes, check the attributes of each. If necessary, by analogy with the previous commands, you should try to remove attributes from volumes:
attributes volume clear readonly
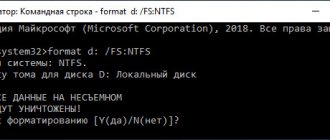
The first formatting option is the “format” command
In essence, the “format” command repeats the standard formatting procedure with the only difference - it is implemented using the command line. The algorithm consists of the following steps:
Step 1 : Open a command prompt. For this action, use the “Run” utility or the WIN+R key combination. In the window that opens, specify the cmd command, which will lead to the display of the software environment on the monitor screen.
Type in the CMD window and click OK
Step 2. Specifying parameters for upcoming formatting. After the blinking cursor, enter the command word format, supplementing it with the necessary attributes separated by a space:
- F: - the letter assigned to the flash drive in the rank of disks on this computer;
- /FS:NTFS - file system type after the procedure is completed;
- /Q - quick version of the process;
- /V:FleHka - media name.
Specify the parameters for upcoming formatting
Step 3. The command is entered into action by pressing the Enter key on the keyboard. If the parameters are specified correctly, a message will appear in the program window asking you to insert a formatted disk. Pressing Enter again will activate the formatting process.
Activate the formatting process
Step 4. After completing the procedure, a system message will be displayed in the program window with information about the available memory on the media. The command line can be closed, and the flash drive can be used for its intended purpose.
System message with information about the available memory capacity on the media
Note! If an error message was displayed while using the “format” command, the algorithm should be repeated, having first selected safe mode. In this case, no extraneous processes will affect the execution of the command.
Mistake #2. Access denied
DiskPart detected an access denied error that usually occurs when you try to clean your flash drive using the diskpart "clean" command. In the error message, the system recommends viewing the logs, which may detail the cause of the problem.
Solution #1
View the system logs (Control Panel – System and Security – Administration – Event Viewer – Windows Logs – System). Perhaps the cause of the dysfunction will be indicated there, you will be able to identify and correct it.
Solution #2
Run the command line only as an administrator, and enter the “diskpart” command in it.
Current: File too large for target file system: how to fix?
Methods for formatting a flash drive
- To prepare a flash drive with the file system you need, you can use the tools built into your operating system, both graphically and via the command line
- Through the Disk Management snap-in
- HP-USB-Disk-Storage-Format-Tool
- USB Disk Storage Format Tool v.5.0
- HDD LLF Low Level Format Tool
- kingston_format_utility
- EaseUS Partition Master
- DiskGenius Professional
- AOMEI Partition Assistant
- Acronis Disk Director
