Users are faced with situations where it is necessary to format a disk through the Windows command line, for example, if for some reason formatting the hard disk using another method failed.
In this case, the user has the opportunity to format the hard drive through the command line in the Windows operating system. Using the command line, depending on the situation, you can format the entire hard drive or one of the partitions (volumes) on the hard drive.
If the computer has one partition: “Logical disk (C:)”, which contains the Windows operating system and user data, it is impossible to format the disk while the system is running, because this disk is currently used for system operation. In this guide, we will look at how to deal with this situation.
Please note that when formatting, all data will be completely deleted from the disk: files, folders, programs, photos, videos, music, etc. Therefore, take care in advance of the safety of the necessary information: copy important data to another disk that will not be formatted, or on removable media, such as an external hard drive, flash drive or CD/DVD drive.
Disk formatting is carried out in some situations:
- when installing an operating system on a disk;
- in case of virus infection or PC malfunctions;
- when using a new hard drive;
- to remove unnecessary data.
In this article, we will look at several ways to format a hard drive via the command line; the instructions provide examples for different situations that users encounter. These methods work on the operating systems Windows 10, Windows 8.1, Windows 8, Windows 7.
How to format a drive through the command line using the format command
The Command Prompt (CMD) tool has a "format" command that formats the drive to the specified file system. In a running operating system, using this command you can format partitions on the disk on which Windows is not installed.
If there are several partitions on the hard drive (the system is located on drive “C”), for example, drives “D” and “E” that need to be formatted, then using the “format” command, first format the drive “D” and then the drive "E". If you connect another additional hard drive to your computer, this drive can be completely formatted because it does not have an operating system.
You may also be interested in:
- Windows Command Line Commands: List
- How to run command prompt as administrator - 7 ways
Option 1. We format the disk via the Windows command line (standard option):
- Run Command Prompt as Administrator.
- Enter the command to format the disk:
format d: /FS:NTFS
In this command, “d” is the name of the local drive on the computer that you want to format. “FS:NTFS” is the selected file system; instead of the “NTFS” file system, you can select another suitable file system. In the vast majority of cases, the choice is made between the “NTFS” and “FAT32” file systems.
- Enter the volume label for the disk that will be formatted.
Assign a volume label (disk name) to the disk. You can choose any convenient name, which can be changed later from Windows settings.
- Next, you need to press the “Y” key to agree to the conditions for formatting the disk, and then press the “Enter” key. You are warned that all data on the disk will be destroyed.
After this, the disk formatting process will begin.
Option 2. If you add additional switches to the "format" command, you can customize formatting options.
- Run Command Prompt as Administrator.
- In a command line interpreter window, run the command:
format d: /FS:NTFS /x /q
The following keys have been added to this command: /x - disable the volume, /q - quick format. The first key disables external influence on the disk from the running operating system so that everything goes well. The second key starts quick formatting. During a quick format, Windows marks all disk space as unused. The data remains on the disk, the operating system does not see it, and new files are gradually written to this place. A normal, full format deletes all data on the disk, but this process takes much longer than a quick format.
- To start formatting, press the “Y” key.
After the process is completed, information about the completion of this operation will appear in the command line window.
We looked at the option of formatting individual partitions of a hard drive, or another hard drive on which Windows is not installed, at the command line.
How to format a hard drive in Windows 10
The practice of formatting a hard drive has been around for a very long time. Today it has become more advanced, but has retained its simplicity as before. “Ten” is no exception here.
In this article we will try to talk about all the methods for formatting an HDD, both non-system and system-based with Windows 10.
Note. Before you begin, make sure that you have backed up all your personal data because the formatting process will completely erase the information from the HDD.
Why is this required at all?
Formatting is a process that erases all data from the hard drive in order to subsequently write new ones on it. If you've noticed that your PC has been running slower than usual lately, or that your HDD is having difficulty reading and writing, then it might be time for a format. In addition, it would not hurt to do the same with the new hard drive that you just purchased.
How to format a non-system HDD
First you will need to go to Disk Management. You can do this by clicking “Win” and typing “Disk Management”. Select “Create and format hard disk partitions.”
This is where all the hard drives connected to your PC are located. Right-click on our disk and select “Format”. We get a window with parameters where you need to set the necessary settings, as well as select the option of quick or full formatting.
File system.
We are presented with the following values:
NTFS, exFAT and FAT32. NTFS is the fastest system, but the least compatible with other devices.
FAT32 , on the contrary, is universal, but limits file sizes.
exFAT is an upgraded version of FAT32 that has no size restrictions.
Cluster size.
The larger the block size, the technically faster the reading speed. If you use your hard drive to watch movies or play games, choose a larger block size. If not, you can specify a smaller volume.
Quick formatting.
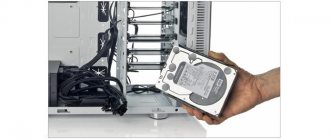
If you have free time, we recommend not choosing this version. A full format scans the HDD for damaged clusters and fixes them, which will ensure better hard drive performance in the future. After selecting the desired option, click “Start” and “OK”. If one of the hard drives is new and just connected, you cannot format it. It will be indicated as "Disk not allocated".
There is nothing wrong with this inscription - you just need to create a new section in an unoccupied area.
1. Right-click on the unallocated disk and click “Create simple volume.”
2. Specify the size limits, as well as the letter of the future section.
3. Next, set the parameters. We suggest leaving the default ones.
4. After this, simply follow the further instructions of the “Wizard”. A new volume will be created and formatted like all the others.
By the way, in the settings window, which we wrote about just above, in point 3, you can immediately select “Quick formatting” and do it at the creation stage.
Formatting using the Command Line
Sometimes, due to improper operation of the HDD or USB, it is not possible to complete the process using Windows.
In this case, you should use the DiskPart application. DiskPart is a powerful utility that has long been part of Windows, allowing you to manage partitions and volumes using functions. This application can often solve a problem where the built-in tools are powerless.
Note. It is important to remember that DiskPart will completely delete all data from the hard drive being formatted. Therefore, we recommend that you perform a backup before starting the operation.
Now let's move on to formatting using the Command Line method.
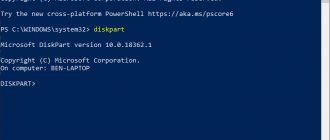
1. Using Start, launch Command Prompt as Administrator.
2. Type diskpart and press Enter.
3. Next, to get a list of all available disks, type listdisk and press “Enter”.
4. Identify the HDD that needs to be cleaned. Then select it by typing: selectdisk [selected disk number] and press Enter.
5. Type clean to clean the HDD and press “Enter”.
6. Set the desired file system and formatting option.
For example, the option with quick formatting in the NTFS system looks like this: format FS=NTFS label=Disk quick
and for full: format FS=NTFS label=Disk
Here, in the first and second commands, do not forget to put your volume label instead of Disk.
7. When the process is complete, type exit to close DiskPart.
Formatting the system disk with Windows 10
Let me note right away: you can’t just format the system disk, because the system itself is present on it. This action cannot be performed while in the OS.
There are several options for resolving this problem: using a boot disk with the OS or using safe mode.
First option
1. We restart the PC in Safe Mode and go to “Diagnostics” “Advanced”. options" "Command line".
2. After this, launch the DiskPart utility and perform the steps from the previous paragraph.
Second option
If you have a Windows 10 boot disk, you can use it to format your system drive. To do this, turn on the system installer and when selecting the disk on which the OS will be installed, select our drive C and then “Format”. At the end of the process, create a new partition and then follow the instructions of the installer.
Conclusion
To summarize, these are all the ways to format a hard drive in Windows 10 that we wanted to tell you about. You can apply these same methods to solid-state drives, flash drives, and other external drives.
The main thing is to remember to make backup copies in advance.
Using the DiskPart utility
The Diskpart utility is designed to work with disks; the application performs the following operations: creating a new disk (volume), deleting an existing disk, creating a bootable USB flash drive, formatting a disk partition or the entire hard drive.
The program can be used on a running Windows operating system, but for simple formatting it is much easier to use the “format” command. We will consider two options for using DiskPart: formatting a hard drive partition, or formatting a system partition of a hard drive, the entire hard drive, if we only have one partition.
Due to the fact that we will not be able to format the system disk in a running Windows, we will use bootable media from which we will launch the command line. To do this, we need bootable media from which we can boot the computer and then run the command line: Windows bootable USB flash drive, Windows Recovery Disk, Windows installation DVD, USB flash drive or disk with Windows PE, “live disk” (Live CD, Live DVD, Live USB).
You need to boot onto your computer from a USB flash drive or CD/DVD, depending on what media you are using. First, enter the BIOS or UEFI boot menu, select the boot device, and then, after booting from the media, launch the command prompt in the Windows RE recovery environment.
You may also be interested in:
- How to enter the Boot Menu on a desktop PC or laptop
- Windows Recovery Environment (Windows RE)
Part 2: Formatting an External Drive on Mac
Similar to Windows, Apple introduced a hard drive formatting feature in MacOS, but the procedure is completely different.
Note: Again, don't forget to back up your Mac before formatting.
Step 1. Also connect your external hard drive to your computer using a USB cable.
Step 2. Open your Disk Utility. You can find it in Application > Utilities.
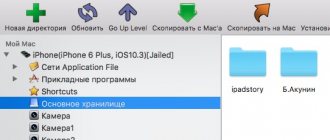
Step 3. Find the external hard drive on the left sidebar and click on it.
Step 4. Go to the Erase tab at the top of the window.
Step 5. Next, select Mac OS Extended (Journaled) from the Format drop-down list. Place a name in the Name field.
Step 6. Click the Erase button at the bottom right. Then read the pop-up message carefully and click Erase to begin formatting the external hard drive again.
After formatting the NTFS drive, you can write data to it. (Otherwise, you'll have to learn how to write to NTFS files on a Mac here.)
How to format a disk via the command line using Diskpart - 1 way
To format a separate non-system partition or hard drive, you can work from Windows or from bootable media.
In the command line interpreter window, you must execute the following commands (after entering the command, press the “Enter” key):
- Launch the DiskPart utility.
diskpart
- Enter a command to display a list of all disks (volumes) on the computer.
list volume
We need to find out the volume number (disk number) that needs to be formatted. When working from a recovery environment, the disk name may differ from the volume letter in the running operating system; use the partition size as a guide.
On this computer this is “Volume 3”. You need to select your disk number that needs to be formatted.
- Select the volume letter (you will have your own number).
select volume 3
- Start formatting in the “NTFS” file system; if necessary, you can select the “FAT32” file system.
format fs=ntfs quick
In this case, the “NTFS” file system is selected. The "quick" command performs a quick format.
- Run the command to exit the DiskPart application.
exit
Part 1: Formatting External Drive on PC
Formatting your hard drive will erase all data on it, and you should back it up before formatting it.
Keep in mind that formatting your external hard drive will erase all your data, so it's best to back it up before proceeding. Then follow the simple steps below to format your external hard drive. It is available for Windows 10/8/7/XP/Vista.
Step 1. Connect your external hard drive to your computer via USB cable.
Step 2. Click Start menu and open the panel from the context menu. Select System and Security > Administrative Tools > Computer Management > Disk Management.
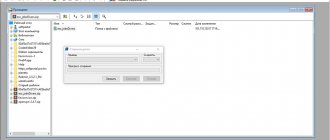
Step 3. Here you can manage all your hard drives including HDD. Right-click on your external hard drive and select "Format" to activate the Format Dialog.
Step 4. Enter a name for the hard drive in the Volume Label box. Then select the correct file system from the File system dropdown list. To use an external hard drive in Windows, select NTFS. FAT32 is compatible with both Windows and Mac.
Step 5. Select Default from the Select Merge Size option. Next, uncheck the box next to Perform a quick format. This will perform a standard format that will check for errors and overwrite them in each sector.
Step 6. Click OK button. When prompted, click OK to immediately begin formatting the external hard drive.
For your external storage device like SD card, all the steps are similar and you just need to insert the SD card into the reader and connect it to your computer.
Formatting a disk via the command line in Diskpart - method 2
If you need to format the entire system disk with all partitions, you need to boot onto the PC from bootable media.
When using this method, all partitions on this disk will be cleared, all information will be marked as deleted.
In Windows RE, enter a command prompt, and then run the following commands:
diskpart list volume
select volume 2
In our case, the system is located on the “C:” drive, which corresponds to “Volume 2”. On your computer, the system drive may have a different volume number.
clean
The "clean" command performs a quick disk cleanup that removes all partitions or volumes.
create partition primary format fs=ntfs quick exit
How to Fix - Windows Can't Complete Formatting
If you cannot format your hard drive, flash drive or memory cards using the standard method, then try to do it in other ways:
Solution 1: Format the hard drive through Disk Management
Windows Disk Management helps you manage partitions and disks on your computer. Here you can create a new volume, expand or shrink a partition, change the drive letter, delete or format a partition, etc.
Step 1
Open Disk Management. Right-click on Start and select Disk Management.
In the central part of the window you will see the local hard drive and partitions, as well as connected flash drives or memory cards.
Step 2
Right-click on the device you want to format and click "Format...".
Solution 2: Format the USB flash drive via the command line
Disk Management does not always help solve the problem when Windows cannot complete formatting a flash drive. You can also try formatting your device via the command line. This solution is no more difficult than the previous one, just follow each step carefully.
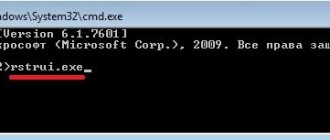
Step 1
Click on Start and type cmd. Right-click on the cmd program and select “Run as administrator.”
Step 2
Type the command diskpart in the black window and press Enter. Now enter the command list disk. You'll see a list of all the drives and connected storage devices on your computer.
Step 3
Enter your device number (for example, Disk 4) and press Enter. The disk will be scanned and damaged files will be deleted.
Step 4
Next, enter the command create primary partition and press Enter. Now you need to create a partition using the command format /FS:FAT32J (you can copy and paste it into the command line). Press Enter. The letter J is your drive letter, you can enter any other.
The hard drive, flash drive or memory card will be formatted in the FAT file system.
Solution 3: Format the memory card using PartitionGuru
If the first two methods did not help solve the problem Windows cannot complete formatting of your hard drive, flash drive or memory card, you can use third-party software, for example, PartitionGuru.
This is a useful program for working with disks, partitions or recovering files. If Windows is unable to complete formatting the flash drive due to bad sectors, you should try to repair them.
Step 1
Download and run the PartitionGuru program. In the main window you will see detailed information about the disks and their partitions.
Step 2
Select the device (hard drive, flash drive or memory card) that needs to be formatted. Next, click on “Disk” at the top of the window, and select “Verify or Repair Bad Sectors”.
Step 3
The program will show colored blocks that indicate good or bad sectors. When the bad sectors check is completed, click the "Repair" button to fix the bad sectors.
Step 4
Select a hard drive, flash drive or memory card, and click the “Format” button.
If the hard drive cannot be formatted
Before you panic, it is worth assessing the seriousness of the situation and the associated moments, perhaps, of your erroneous actions.
- It is impossible to use the “format” command on a system disk while directly in its environment.
- You cannot remove an operating system located on another partition of the HDD, taking into account the conditions described above. For example, using an OS installed in the “C:” partition, you will not be able to format a local disk with another, previously registered copy of Windows.
- Very often, antivirus programs create a kind of rule that prohibits low-level access to hard drive partitions. This option can be disabled in the corresponding settings.
- The interference of third-party applications, as well as the adverse effects of multi-level viruses, can be obstructive elements in a situation where the user has limited rights, as a result of which the hard drive is not formatted properly.
Free program "HDDscan"
An incredibly popular and no less popular utility for low-level diagnostics of your hard drive will help you check (monitor) the condition of the HDD, and will also become an indispensable tool through which you can repair bad sectors, format the disk and perform various tests. It is worth noting that this program can be loaded either from DOS or run in a Windows environment.
- Download and install the “HDDscan” utility.
- Run it with administrator rights.
- Click on the spherical icon in the middle of the program interface.
- Select the first item - “Surface tests”.
- A hard drive partition is not formatted often due to the presence of BAD sectors, so you need to wipe them. Use the "Erase" command by simply placing a marker in the appropriate line.
- The “Add test” tab, located in the right corner, will activate your selection.
- Then select the “Scan” command, write down the data of the erroneous sectors (lower right corner, under the colored designation cubes).
- Run “Scan” again, but first set the “EraseWAITs” option to “ON”.
- When you find that there are fewer erroneous values, repeat the pass a couple more times until the broken areas of the HDD completely disappear.