There are times when we need to format a hard drive via Bios. This may be needed immediately after purchasing a new hard drive, when installing or reinstalling an operating system, or as an anti-virus tool. In this material I will tell you how to format a disk via BIOS, introduce the reader to various methods of this formatting, and also describe programs for formatting via BIOS that will help us with this.
If you want to know how to enter the BIOS, we have collected for you all the methods for each device.
HDD
Formatting a hard drive via BIOS
Typically, the need to cleanse via BIOS arises in a situation where full access to the corresponding Windows OS tools is impossible, and everything must be done from scratch. I’ll immediately make a reservation that the companies that developed the existing BIOS versions - Award Software (AwardBios), American Megatrends (AmiBios), Phoenix Technologies (PhoenixBIOS) and others did not include a tool for formatting the hard drive in their bios versions, while access to the hard drive in the BIOS available by default.
Control via BIOS
Consequently, “formatting a hard drive through the BIOS” is only possible conditionally; in such an algorithm, the BIOS acts only as a logistics link, allowing the user to use it to perform the necessary operations to format the hard drive.
Let me make a reservation right away that formatting (especially full formatting) completely deletes all information on the disk being formatted, so if you have something valuable there, then before formatting it is better to copy it to a flash drive, another hard drive, send it to the cloud, and so on.
Formatting using external media
Set the highest boot priority for USB flash devices
If you have a flash drive with Windows recorded and a boot option (a special option that allows the system to read data from the flash drive without loading the main Windows), then you are already close to solving the problem. You just need to insert the USB flash drive into the computer, go into the BIOS (using the special Alt+F command indicated on the boot screen) and go to the Boot tab. In this tab you should go to the Boot Device Priority option and in this option in the 1st Boot Device menu set the name USB-FDD.
System names in BIOS may be different. For example, in a later version of the system utility, you need to install USB-FDD in the First Boot Device menu, which is located in the Advanced tab. After loading the operating system from the flash drive, you can right-click on the desired media and format it. It is worth considering that the external media should not contain files for installing Windows; Windows itself should be installed on it (be sure to take this note into account).
Using the command line
Once you have decided to format your hard drive, you can select auxiliary tools. The easiest option is to use a regular Windows boot disk, which almost every user has. To use its capabilities we need to run it through the BIOS.
- To do this, we restart the computer (if it was turned off, turn it on), and immediately after the start, quickly press several times on the button responsible for entering the BIOS - usually this is the “Delete” key, but there are also variations with the F8, F12, Ctrl + F2 keys and Escape.
- After entering the BIOS, go to the Boot tab, select the “Boot Device Priority” item in it and press “Enter”.
- We install our CDROM or DVDROM as the main boot device (in first place), click on F10 and save our changes by clicking “Ok”.
- The computer will start to boot and the message “Press any key to boot from CD or DVD” will appear in front of you. Press any key.
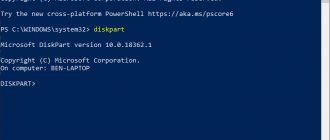
- On the language selection screen, press Shift+F10, which will give you access to the command line. If you are a Windows 8 user, then go to the path select language - diagnostics - advanced options - command line.
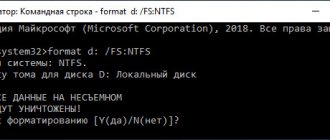
- At the command line, type the following command (instead of C, you can enter another partition of your hard drive - D, E, etc.):
format /FS:NTFS C: /q – fast format in the NTFS system
format /FS:FAT32 C: /q – fast format in FAT32
You can write it even simpler, for example: format c :/ q
Click “Ok” and wait for the end of the formatting process.
HDD cleaning
Formatting via ERD Commander
There is another effective way to quickly format a hard drive without loading the OS. To do this, you need to download the ERD Commander program and create a boot disk based on it. In the BIOS, select the disk drive as the main boot device (you already know how to do this). When the program starts, go to the “MicroSoft Diagnostic and Recovery Toolset” section. In all the requests that appear, click “Next” until a working window appears, in which we select the “Disk Cleanup” item and format the hard drive.
Thus, we have looked at all the main ways to format a hard drive through the BIOS. If there are boot disks with other operating systems, the names of the items may change slightly, but the logic of the procedures will not change.
Formatting from a flash drive
As a boot tool with a Windows installation, you can use a flash drive on which the Windows OS installation is recorded. In this case, the flash drive itself must be made bootable using special programs (for example, UltraISO). Although sometimes it’s enough to simply copy the Windows installer to a USB flash drive and run it from the BIOS. Don’t forget to make the flash drive the first boot device in the BIOS as shown above (sometimes in the “Hard Disk Drive” menu item you need to specify the flash drive first and the CD (DVD) second).
Formatting through the Windows installation boot panel
You can format a hard drive through the operating system installation panel only if you have the physical Windows installation media itself or a flash drive with files for installing Windows with the boot option. You insert the media into the computer, the data verification process begins, after a few minutes you will see a window asking you to select a disk for installation. At the bottom you can find the “format hard drive” function. It is with the help of it that you can clean the desired hard drive.
We use the Acronis Disk Director Suite program
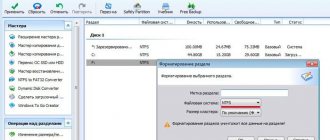
This program is usually included in the LiveCD and other Windows OS builds, and is an auxiliary utility for working with the hard drive. After launching the application, select the hard drive you need to format, right-click on it, in the menu that appears, click on “Format”, select the type of file system and confirm the operation by clicking “Run”. After the operation is completed, reboot.
You can visually see how this program works in the video:
Formatting using a special program
To format a hard drive using a program, you must first burn a program called HDD Low Level Format Tool v4.30 onto the media. Then you must enter the BIOS, go to the Boot tab in the Boot Device Priority menu and set the name of the CD/DVD. After this installation, the system will first begin to load data from the media, that is, the program itself will start. Again, it is worth considering that you should install the program on disk, and not write its files for installation.
After launching the program, you will be able to intuitively understand what to do in it. HDD Low Level Format Tool v4.30 is a comprehensive program in Russian with a built-in assistant that will allow you to understand every function of this software. This method is the most comprehensive, since it allows you not only to format the hard drive, but also to save and transfer data, restore damaged sectors, and emulate data.
So we looked at all the main ways to clear a hard drive from data. Each method is unique in its own way and will definitely help you cope with the problem that has arisen. Now, when you or your friends have a question about how to format via BIOS, you can immediately give a lot of examples in order to achieve the desired result. Once again, carefully study the hard drive formatting methods and choose the one that is most suitable for you.
How to format a hard drive using Windows Installer
If you want to format your hard drive in order to install an operating system on it, you can do this using the Windows Installer. In this case, you don’t have to look for any additional boot disks or tricky methods like formatting through BIOS. All you need is a disk or flash drive with the Windows operating system. If you don’t have such a disk or flash drive, then you can read our articles on how to burn Windows to a disk or flash drive.
If you already have a disk/flash drive, then you can start installing Windows. Connect your flash drive or disk to your computer and go to BIOS. Here you need to change the boot priority from disks so that the computer boots first from our flash drive or disk. You can read about how this is done in our article on booting from a flash drive.
After that, we boot from our disk or flash drive, start the Windows installation and follow the installer’s instructions until a menu for selecting a disk appears on the screen. In this menu, you need to select with the mouse the disk that you want to format and click on the “Disk Settings” button, which is located under the list of disks.
After this, a number of buttons will appear for setting up the disk, including the “Format” button. Click it to format the selected disk.
The system will warn you about deleting files on this drive. Click "Ok" to start formatting.
Once the formatting is complete, you can continue installing Windows on the newly formatted drive. As you can see, in order to install Windows there is absolutely no need to format your hard drive via BIOS; everything you need is already built into the operating system installer.
Supporting tools
The formatting procedure can be performed in several ways, but each of them will require an additional tool, namely: a bootable USB drive, a disk with a burned operating system, or a Live CD .
As a rule, HDD and SSD media are formatted quickly and without problems at the initial stage of installing the operating system.
If you need to completely wipe your hard drive and reinstall Windows, it is better to use a boot disk or flash card with the system. If there is no need to install the OS (for example, when the media is formatted for subsequent sale), you should use special utilities.
Working with bootable media
As an auxiliary tool, you can use both flash drives and CDs or DVDs. Since DVD drives have actually lost popularity, it makes sense to describe the process algorithm based on the use of a bootable flash card. In order to receive it, you need to perform the following steps:
- Download an image of the desired Windows OS in ISO format from a trusted site.
- Prepare a flash drive with a capacity of at least 4 GB, depending on the system that needs to be written to it. All information on the drive will be destroyed, so you need to copy important files to another medium in advance.
- Download, install and run the Rufus utility.
- Insert the prepared flash drive into the USB port and format it by right-clicking on the drive and selecting the appropriate menu item.
- In the Rufus program, specify the connected flash card, select the MBR partition scheme and the NTFS file system.
- Specify the ISO image that you want to burn to the drive and click the “Start” button.
