You shouldn’t demand too much from a budget Android smartphone: in our opinion, gadgets of this class should be able to cope with basic tasks without freezing when performing them or tormenting the user with all sorts of errors. Of course, we don’t expect performance records, design delights and a camera like a flagship from devices of this class.
ZTE Blade A510 (official photo)
Approximately these requirements are used to create devices like the ZTE Blade A510, the main purpose of which is to work stably and cope with all standard tasks. True, we know that some budget Android devices do not meet even the minimum requirements. It’s interesting what the Blade A510 is capable of, especially since its characteristics look more interesting than many of its classmates.
⇡#Technical characteristics
Out of interest, we decided to compare the characteristics of the ZTE Blade A510 and more expensive smartphones. Gadgets in the table are arranged in ascending order of price.
| ZTE Blade A510 | LG X view | (Lenovo) ZUK Z1 | ASUS Zenfone 2 (ZE551ML) | |
| Touch screen | 5 inches, | 4.93 inches, | 5.5 inches, | 5.5 inches, |
| 720 × 1280 pixels, IPS; | 720 × 1280 pixels, IPS; | 1080 × 1920 pixels, IPS; | 1080 × 1920 pixels, IPS; | |
| Capacitive, up to ten simultaneous touches | Capacitive, up to ten simultaneous touches | Capacitive, up to five simultaneous touches | Capacitive, up to ten simultaneous touches | |
| Additional screen | No | 1.76 inches, | No | No |
| 80 × 520 pixels, IPS; | ||||
| Capacitive, multi-touch, gesture support | ||||
| Protective glass | Yes (manufacturer unknown), with oleophobic coating and polarizing filter | Yes (manufacturer unknown), with oleophobic coating and polarizing filter | Corning Gorilla Glass 3 | Corning Gorilla Glass 3 |
| with oleophobic coating and polarizing filter | with oleophobic coating and polarizing filter | |||
| CPU | MediaTek MT6735P: | Qualcomm Snapdragon 410 MSM8916: | Qualcomm Snapdragon 801 MSM8974AC: | Intel Atom Z3580: |
| four ARM Cortex-A53 cores, | four ARM Cortex-A53 cores, | four Krait-400 cores, | four Tangier architecture cores (x86-64), | |
| frequency 1.0 GHz; | frequency 1.21 GHz; | frequency 2.46 GHz; | frequency 2.33 GHz; | |
| ARMv8-A instruction set; | ARMv8-A instruction set; | ARMv7 instruction set; | support for 32-bit and 64-bit computing; | |
| support for 32-bit and 64-bit computing; | support for 32-bit and 64-bit computing; | support for 32-bit computing; | process technology: 22 nm | |
| process technology: 28 nm | process technology: 28 nm | Process technology: 28 nm HPm | ||
| Graphics controller | ARM Mali-T720, | Qualcomm Adreno 306, | Qualcomm Adreno 330, | Imagination Technologies |
| frequency 650 MHz | frequency 400 MHz | frequency 578 MHz | PowerVR Rogue G6430, | |
| frequency 533 MHz | ||||
| RAM | 1 GB LPDDR2 | 2 GB LPDDR3 | 3 GB LPDDR3 | 4 GB LPDDR3 |
| Flash memory | 4 GB (~1.7 GB available to user) + microSD | 16 GB (11.3 GB available to user) + microSD | 64 GB (~54.7 GB available to the user); | 32 GB (~25.5 GB available to user) + microSD + 5 GB cloud storage ASUS WebStorage |
| no slot for memory cards | ||||
| Connectors | 1 × micro-USB 2.0 | 1 × micro-USB 2.0 | 1 × USB Type-C 3.0 | 1 × micro-USB 2.0 |
| 1 × 3.5mm headset jack | 1 × 3.5mm headset jack | 1 × 3.5mm headset jack | 1 × 3.5mm headset jack | |
| 1 × microSD (SDHC/SDXC) | 1 × Nano-SIM/microSD (SDHC/SDXC) | 2 × Nano-SIM | 1 × microSD (SDHC/SDXC) | |
| 1 × Micro-SIM | 1 × Nano-SIM | 2 × Micro-SIM | ||
| 1 × Nano-SIM | ||||
| cellular | 2G/3G/4G | 2G/3G/4G | 2G/3G/4G | 2G/3G/4G |
| One Nano-SIM format SIM card and one Micro-SIM format SIM card | Two Nano-SIM format SIM cards | Two Nano-SIM format SIM cards | Two SIM cards in Micro-SIM format | |
| Cellular connection 2G | GSM/GPRS/EDGE 850/900/1800/1900 MHz | GSM/GPRS/EDGE 850/900/1800/1900 MHz | GSM/GPRS/EDGE 850/900/1800/1900 MHz | GSM/GPRS/EDGE |
| 850/900/1800/1900 MHz | ||||
| Cellular 3G | DC-HSPA (42 Mbps) | DC-HSPA (42 Mbps) | DC-HSPA (42 Mbps) | DC-HSPA (42 Mbps) |
| 900/2100 MHz | 850/900/1900/2100 MHz | 850/900/1900/2100 MHz | 850/900/1900/2100 MHz | |
| Cellular 4G | LTE Cat. 4 (150 Mbit/s, 50 Mbit/s); | LTE Cat. 4 (150 Mbit/s, 50 Mbit/s); | LTE Cat. 4 (150 Mbit/s, 50 Mbit/s); | LTE Cat. 4 (150 Mbit/s, 50 Mbit/s); |
| FDD LTE: band 1, 3, 7, 20 | FDD LTE: band 1, 3, 7, 8, 20 | FDD LTE: band 1, 3, 7 | FDD LTE: band 1, 2, 3, 4, 5, 7, 8, 9, 17, 18, 19, 20, 28, 29 | |
| TDD LTE: band 38, 39, 40, 41 | TDD LTE: 38, 39, 40, 41 | |||
| WiFi | 802.11b/g/n 2.4 GHz + Wi-Fi Direct | 802.11b/g/n 2.4 GHz + Wi-Fi Direct | 802.11a/b/g/n/ac 2.4/5 GHz + Wi-Fi Direct | 802.11a/b/g/n/ac 2.4/5 GHz + Wi-Fi Direct |
| Bluetooth | 4.1 | 4.1 | 4.1 | 4 |
| NFC | No | No | No | Eat |
| IR port | No | No | No | No |
| Navigation | GPS, A-GPS, GLONASS | GPS, A-GPS, GLONASS, BeiDou | GPS, A-GPS, GLONASS, BeiDou | GPS, A-GPS, GLONASS |
| Sensors | Illumination, proximity, accelerometer/gyroscope, magnetometer (digital compass) | Illumination, proximity, accelerometer/gyroscope, magnetometer (digital compass) | Illumination, proximity, accelerometer/gyroscope, magnetometer (digital compass), pedometer | Illumination, proximity, accelerometer/gyroscope, magnetometer (digital compass) |
| Fingerprint's scanner | No | No | Eat | No |
| Main camera | 13 MP (4160 × 3120), | 13 MP (4160 × 3120), f/2.2 aperture, | 13 MP (4160 × 3120), | 12.6 MP (4096 × 3072), PixelMaster technology, f/2.0 aperture, |
| autofocus, single LED flash | autofocus, single flash | autofocus, optical stabilization system, dual LED flash | autofocus, LED flash | |
| Front-camera | 5.0 MP (2880 × 1728), | 8 MP (3264 × 2448), | 8 MP (3264 × 2448), | 4.9 MP (2560 × 1920), |
| no autofocus, no flash | no autofocus, no flash | no autofocus, no flash | no autofocus, no flash | |
| Nutrition | Non-removable battery: | Non-removable battery: | Non-removable battery: | Non-removable battery: |
| 8.36 Wh (2200 mAh, 3.8 V) | 8.74 Wh (2300 mAh, 3.8 V) | 15.58 Wh (4100 mAh, 3.8 V) | 11.4 Wh (3000 mAh, 3.8 V) | |
| Size | 143 × 71.5 mm | 142 × 72 mm | 156 × 77 mm | 152 × 77 mm |
| Case thickness 8.2 mm | Case thickness 7.1 mm | Case thickness 8.9 mm | Case thickness 10.9 mm | |
| Weight | 130 g | 120 g | 175 g | 170 g |
| Water and dust protection | No | No | No | No |
| operating system | Android 6.0 Marshmallow | Android 6.0 Marshmallow | Android 5.1.1 Lollipop | Android 5.0 Lollipop |
| ZTE's own shell | LG's own shell | Shell CyanogenMod 12.1 | ASUS ZenUI shell | |
| Current price | 9,990 rubles | 17,990 rubles | 23,690 rubles | 23,490 rubles |
| ZTE Blade A510 – information about the system and hardware according to the CPU-Z application | ||||
⇡#Appearance and ergonomics
The ZTE Blade A510 is a fairly compact smartphone due to the use of a small display by modern standards, with a diagonal of only five inches. It is very convenient to operate it with one hand: the thumb can easily reach any point on the display, there is no need to place the device in the palm of your hand. The device also weighs a little - about 130 grams.
ZTE Blade A510 – front panel
The layout of the keys on the Blade A510 is classic for an Android smartphone - your fingers find all the buttons and connectors themselves. At the bottom of the panel there are three physical touch keys: “Back”, “Home” and “Menu of open applications”.
ZTE Blade A510 – setting the keys under the display
Unfortunately, the touch keys are not backlit - you will have to learn to use them blindly. As if as compensation, the user is given the opportunity to reassign them.
ZTE Blade A510 – keys at the bottom of the front panel
Above the screen there is a slot for the earpiece, a front camera lens and sensitive sensor areas. The frame around the display is small - about two millimeters on each side.
ZTE Blade A510 – front panel
The thickness of the device’s case is quite standard – 8.2 millimeters. But due to the neatly rounded rear panel, the gadget looks slimmer than it actually is.
ZTE Blade A510 – side view
The power and volume keys are located on the right side. The audio output for connecting a wired headset is on the top edge, the Micro-USB interface is on the bottom. Next to the latter are the slots for the external speaker. The location of the loudspeaker is good - it does not overlap either when the device is lying on the table, or when it is in the hands (even in horizontal orientation).
| ZTE Blade A510 – sides | ||
The body of the smartphone is made of plastic, but of high quality: no significant gaps were found. True, if you strongly squeeze the sides, small colored spots appear on the display - still, you should handle the gadget carefully.
ZTE Blade A510 – rear panel
On the back of the device there is a rear camera lens and an LED flash. The back panel of the ZTE Blade A510 is matte - the device does not slip out even from wet palms, and the “back” itself practically does not get dirty - the device retains a neat appearance for a long time.
ZTE Blade A510 with the back cover removed
The body of the device is collapsible. Despite this, users do not have access to the battery - to replace the battery, you need to take the smartphone to a service center, and attempting to replace the battery yourself will void the warranty. Under the back cover of the device there are slots for a microSD memory card and for two SIM cards: one Nano-SIM and one Micro-SIM.
NET.Gadget
Articles
Content
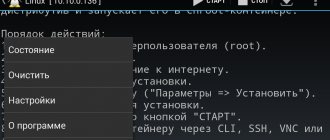
Firmware for ZTE Blade A510
Even in modern, balanced Android smartphones from recognizable manufacturers, sometimes there is a situation that characterizes software developers for the device from a not entirely good side. Quite often, even a relatively “new” phone will cause problems for its owner in the form of a crash of the Android accounting software (software), which makes the upcoming implementation of the device unfeasible. The ZTE Blade A510 is a mid-level accessory, which, despite its good technical properties, is unfortunately not capable of being compromised by the stability and reliability of system software directly from the manufacturer.
Modern, above-mentioned problems are eliminated by flashing the device, which now does not present any particular difficulties even for a novice user. The material below tells you how to flash a ZTE Blade A510 phone - from simply installing/updating the official version of the accounting system to getting a new Droid 7 in the device.
Once a competent installation is carried out and proceed to the manipulations according to the instructions below, understand the following.
Stitching procedures carry potential danger! Only accurate execution of instructions can ensure smooth software installation processes. With all this, the Administration of the resource and the creator of the article to ensure the functionality of the methods for each specific device! Our client is left to manipulate the gadget at his own risk and risk, and bears responsibility for their consequences without the help of others!
Preparation
Every software installation process is preceded by preliminary procedures. In any case, to be on the safe side, do all of the following before you start overwriting the ZTE Blade A510 memory partitions.
Hardware revisions
The ZTE Blade A510 model is available in 2 versions, the difference between which lies in the types of monitor used.
Rev1
– hx8394
f
_720p_lead_dsi_vdo
Rev2
– hx8394
d
_720p_lead_dsi_vdo
For this version of the phone there are no restrictions on the use of software versions; you can install any official OS from ZTE.
In this version of the monitor, only official firmware versions will work properly
RU_B04
,
RU_B05
,
BY_B07
,
BY_B08
.
You can find out which display is used in a particular device using the Device Info HW Android application, which is available in the Play Market.
After installing and launching Device Info HW, as well as granting root rights to the application, the display version can be viewed in the “Display” line on the “General” tab of the main program screen.
As you can see, determining the display type of the ZTE Blade A510 and, accordingly, the hardware revision of the device is a simple procedure, but it requires Superuser rights on the device, and obtaining them requires the preliminary installation of a modified recovery, which is done after a series of rather complex manipulations with the software and will described below.
Thus, in some situations you will have to act “blindly”, without knowing for sure what type of display is used in the device. Before the revision of the smartphone is determined, you should use only those firmwares that work with both revisions, that is
RU_B04
,
RU_B05
,
BY_B07
,
BY_B08
.
Drivers
As is the case with other Android devices, in order to manipulate the ZTE Blade A510 through Windows applications, you will need drivers installed in the system. The smartphone in question does not stand out in this regard with anything special. Install drivers for Mediatek devices by following the instructions from the article:
If you encounter problems or difficulties when installing drivers, use a specially created script to install the system components required for proper pairing of your smartphone and PC.
- Unpack the archive received from the link above and go to the resulting directory.
Install.bat
by right-clicking on it and selecting “Run as Administrator” from the menu.
Backup important data
Every intervention in the software part of all Android devices, and the ZTE Blade A510 is no exception, carries a potential danger and in most cases involves clearing the internal memory of the device from the data it contains, including user information. To avoid the loss of personal information, make a backup copy of important information, and ideally a complete backup of your smartphone’s memory sections, using the tips from the material:
The most important point to pay attention to is backing up the “NVRAM” partition. Damage to this area during flashing leads to erasing of the IMEI, which in turn leads to the inoperability of SIM cards.
READ How to Open the Back Cover of a Samsung Galaxy
Restoring “NVRAM” without a backup is very difficult, therefore, in the description of software installation methods No. 2-3 below, the article indicates steps that allow you to create a partition dump before interfering with the device’s memory.
Firmware
Depending on what your goal is, you can use one of several ways to rewrite the ZTE Blade A510 software. Method No. 1 is most often used to update the version of the official firmware, method No. 2 is the most universal and radical method of reinstalling software and restoring the device to a working state, and method No. 3 involves replacing the smartphone’s system software with solutions from third-party developers.
In general, it is recommended to go from method to method, starting from the first and stopping manipulations when the desired software version is installed in the device.
Method 1: Factory recovery
Probably the easiest way to reinstall the firmware on the ZTE Blade A510 is to use the capabilities of the device's factory recovery environment. If the smartphone boots into Android, you don’t even need a PC to follow the instructions below, and if the device is not working correctly, then the steps listed will often help restore functionality.
- The first thing you need to do is get the software package for installation through factory recovery. Download the package from the link below - this is version RU_BLADE_A510V1.0.0B04, suitable for installation in any revision of ZTE Blade A510
Log lines will appear at the bottom of the screen. Wait until the message “Install from SD card completed” appears, and then reboot your smartphone into Android by selecting the “Reboot system now” command.
Additionally. If any errors occur during the installation process or a prompt appears to reboot, as in the photo below, simply repeat the procedure again starting from step 1, after restarting the recovery.
Method 2: SP Flash Tool
The most effective method of flashing MTK devices is to use the proprietary development of Mediatek programmers, which, fortunately, is available to ordinary users - the SP Flash Tool program. As for the ZTE Blade A510, using the tool you can not only reinstall the firmware completely or change its version, but also restore a device that does not start, hangs on the boot screen, etc.
No. 5 Official firmware zte blade a510
blade official website
/
blade
-
a510
/
firmware
via computer.
No. 86 Official firmware zte blade a510
TIH TV CHANNEL VK GROUP.
Among other things, the ability to work with the SP Flash Tool will be needed to install custom recovery and modified OS in the ZTE Blade A510, so it’s definitely worth reading the instructions, and ideally, following them regardless of the purpose of the firmware. The version of the program from the example below can be downloaded from the link:
The model in question is very sensitive to firmware procedures and quite often during the manipulation process various failures occur, as well as damage to the “NVRAM” partition, so only strict adherence to the instructions below can guarantee installation success!
Before proceeding to the process of installing system software in the ZTE Blade A510, it is recommended that you read the article at the link below, this will help you more fully understand the picture of what is happening and better understand the terms.
The example uses the firmware
RU_BLADE_A510V1.0.0B05
, as the most universal and fresh solution for models of both the first and second hardware revisions. Download the package with firmware intended for installation via SP FlashTool from the link:
- Launch
flash_tool.exe
from the directory resulting from unpacking the archive.
MT6735M_Android_scatter.txt
- this is a file that is present in the directory with the unpacked firmware. To add a file, use the “choose” button located to the right of the “Scatter-loading File” field. By clicking it, determine the location of the file through Explorer and click “Open”.
Method 3: Custom firmware
If the official ZTE Blade A510 firmware is not satisfied with its functionality and capabilities, you want to try something new and interesting, then you can use modified solutions. For the model in question, many custom ones have been created and ported, choose any according to your preferences, but keep in mind that developers often upload firmware with non-working hardware components.
The most common “disease” of modified solutions for the ZTE Blade A510 is the inability to use the camera with flash. In addition, you should not forget about the two revisions of the smartphone and carefully read the description of the custom, namely what hardware version of the A510 it is intended for.
Custom firmware for the A510 is distributed in two forms - for installation via the SP Flash Tool and for installation via a modified recovery. In general, if you decide to switch to custom, it is recommended to follow this algorithm. First flash TeamWin Recovery (TWRP), get root rights and find out exactly the hardware revision. Then install the modified OS via FlashTool without a recovery environment. Subsequently change the firmware using custom recovery.
Installing TWRP and obtaining root rights
In order for a custom recovery environment to appear in the ZTE Blade A510, use the method of installing a separate image using SP FlashTool.
The image file of the modified recovery can be downloaded from the link:
- Load the scatter from the official firmware into SP FlashTool.
recovery.img
from the "TWRP" folder in the Explorer window.
SuperSU.zip
through the “Install” item in TWRP.
The obtained Superuser rights will make it possible to accurately determine the hardware revision of the smartphone, in the manner described at the beginning of the article. Knowing this information will determine the correct choice of a package with a custom OS for the device in question.
Installing custom via SP FlashTool
The procedure for installing custom firmware is generally no different from the similar process when installing an official solution. If you transferred the official firmware files using method No. 2 above (and it is highly recommended to do this before installing a modified solution), then you already have an “NVRAM” backup, which means that after installing any modified OS, if necessary, you can restore the partition.
As an example, let's install a custom solution in ZTE Blade A510
Lineage OS 14.1
based on Android 7.1. The disadvantages of the build include the occasional freezing of the Camera application when the flash is turned on. Otherwise, this is an excellent and stable solution, and besides, it’s the newest Android. The package is suitable for both revisions of the device.
- Unpack the archive with the software into a separate folder.
modified, moreover, specifically for the model in question.
Installing custom via TWRP
Installing modified firmware via TWRP is very easy. The procedure is described in detail in the material at the link below; for the ZTE Blade A510 there are no significant differences in the process.
One of the interesting solutions for the device in question is the ported MIUI 8 OS, which is characterized by a nice interface, a lot of possibilities for fine-tuning the system, stability and access to Xiaomi services.
You can download the package for installation via TWRP from the example below using the link (suitable for both
Rev1
, so
Rev2
):
- Unpack the archive with MIUI (password -
lumpicsru
), and then place the resulting file
MIUI_8_A510_Stable.zip
to the root of the memory card installed in the device.
- Reboot into TWRP recovery and make a backup of the system by selecting “Backup”. Make a backup copy on a “Micro SDCard”, as the internal memory will be cleared of all data before installing the software package. When creating a backup, it is advisable to mark all partitions without exception; “nvram” is mandatory.
And then perform the initial system setup.
Thus, for the ZTE Blade A510 there are several methods for installing system software, used depending on the desired result. If something goes wrong during the installation of the system in your smartphone, do not worry. If you have a backup, restoring the smartphone to its original state using the SP Flash Tool takes 10-15 minutes.
READ What is Siri on iPhone 6
⇡#Display
As we said earlier, the ZTE Blade A510 has a five-inch screen with a resolution of 1280 × 720 pixels. Its pixel density is correspondingly low: almost 274 dots per inch, but this is enough for comfortable work with the device - individual pixels are not striking. Movies and photographs look quite detailed, the text too, except that the smallest font “floats” a little. There is a pixelation effect, but it doesn’t hurt the eyes: the notorious ladder of dots will only be visible if you bring the device close to your eyes. The low resolution looks doubly justified if you remember the class of the device - the computing power of the chip used in it is not enough to quickly render images in Full HD.
The screen is made using IPS technology. Of course, the matrix in the device is inexpensive. This is hinted at, for example, by not very wide viewing angles - if you look away from the perpendicular, the contrast will noticeably drop and the black color will turn dark purple. The touch surface is well configured: the device responds to touch accurately and quickly, adequately recognizes gestures and supports up to ten simultaneous clicks. You won't be able to work with the A510 wearing gloves - the sensitivity is not that high.
The display has a high brightness margin, which you wouldn’t expect from a budget solution. The maximum white field luminance of the ZTE Blade A510 screen is 466 cd/m2, and if necessary, it can be increased to 474 cd/m2 in the “bright” mode. The protective glass is equipped, as usual, with an oleophobic coating and a polarizing filter, and there is no air gap between it and the matrix - all this reduces the number of unwanted reflections and helps to easily erase fingerprints from the screen. The image is visible even in the sun - on a fine day you don’t need to look for a shadow to see what’s happening on the screen. It is noteworthy that the device is equipped with a light sensor - in the budget class this is more of a bells and whistles than a standard component. With its help, the device can independently set the brightness level that is comfortable for working in certain conditions and does this quite correctly.
The contrast of the ZTE Blade A510 screen is also quite good. In “standard” mode – 1063:1, in “bright” mode – all 1089:1. Blacks look relatively deep at any backlight setting. For a budget model, these are simply excellent indicators.
The color temperature, unfortunately, is significantly higher than the reference value of 6500 K - on average as much as 9000 K. The picture on the display looks cold. Fortunately, the ZTE shell provides the ability to programmatically adjust color reproduction. It is noteworthy that you can customize not only the white balance, but also brightness, contrast, color saturation and a number of other parameters thanks to MediaTek’s proprietary MiraVision technology. This somewhat saves the situation with color rendering.
| ZTE Blade A510 – software color adjustment | ||||
With such a white balance, there is no need to wait for precise adjustments to gamma 2.2. However, the green and red gamma curves are close to the reference curve - the deviation is not very insignificant. Medium and light shades of gray are overexposed, but also not critical. But the curve of blue... in general, here is the explanation for the cold colors - it is very strongly raised along its entire length.
| ZTE Blade A510 – gamma curve of gray color (left) and color components (right) in comparison with the reference curve (indicated by a dotted line in the graphs) | ||
The color gamut is almost identical to the sRGB reference color space. In general, if it weren't for the miracles with the blue color, we could say that the display is set up well. Well, you’ll have to tinker with setting it up, fortunately the ZTE Blade 510 provides all the possibilities for this.
⇡#Hardware and performance
The system-on-chip in the ZTE Blade A510 is, of course, not a flagship - here it is MediaTek MT6735P. It includes four ARM Cortex-A53 cores with a frequency of 1 GHz. The graphics controller is an ARM Mali-T720 module operating at 650 MHz. The platform is made using a 28nm process technology. The RAM in the device is one gigabyte. And this, of course, is not enough - even taking into account the HD screen. There is almost no built-in flash memory at all - four gigabytes, of which approximately 1.7 GB is available to the user. The rest of the space is reserved by the operating system. Fortunately, there is support for microSD - this partially saves the situation.
Budget smartphones in our test laboratory are, frankly, rare. Moreover, it is so rare that we really have nothing to compare the ZTE Blade A510’s scores in synthetic tests with. I had to pair the smartphone with a obviously stronger and more expensive rival - LG X view. This gadget is built on a Qualcomm Snapdragon 410 chip and costs 18 thousand rubles - almost twice as expensive as the Blade A510.
General benchmarks that test the performance of the entire computing subsystem - AnTuTu Benchmark 6 and Geekbench 3 - clearly showed that these smartphones are close in power: the Blade A510 lags behind its more expensive competitor only slightly.
The device copes well with everyday tasks: the Blade A510 can sometimes become thoughtful or slightly twitch the image when displaying operating system animations, but during a week of testing it never came to a critical freeze. The A510 copes with displaying multimedia content, viewing electronic documents and web surfing quite confidently - and it is not entirely correct to demand more from it.
To be honest, ZTE Blade A510 toys are difficult. The number of frames per second even in simple arcades or puzzles often falls below the coveted 30 FPS, while “heavy” 3D applications are best left for more expensive gadgets. This smartphone is not intended for games - it has other tasks. Until the very end he maintained the same level as the LG X view - for that alone you can applaud him.
Instructions for moving from Gen1 to Gen2
It is assumed that ClockworkMod Recovery and drivers are already installed.
- Download the firmware or and put it on the phone’s SD card.
- Download and transfer the stock one to the memory card.
- With the smartphone turned off, hold down the volume “-” and “on” and go to ClockworkMod Recovery, then install the downloaded recovery via CWM as an update. After installation Reboot
- Download the archive with partition redistribution (cache; system; data). In this case, 136 MB are allocated for the system, and more than 2 megabytes are allocated for the cache.
- Unpack the archive on PC
- Turn off the smartphone, then hold down the volume “-” and “on”, when the FTM message appears, connect the phone to the PC.
- In the unpacked partition redistribution archive, run download_nochecksGen2.exe, click Start and do not touch anything until the installation completion notification appears. After completion, click OK.
- Go to “advanced” and select “Reboot Recovery”.
- CWM will restart, after which we install SS RLS4b or CyanogenMod from CWM (when installing SS RLS4b it will write your device generation Gen2).
- We make a Backup of the Channel1.nvm file, which will appear after switching to Gen2, in the folder from which download_nochecksGen2.exe was launched. This is necessary to save IMEI data in case of switching back to Gen1.
If after the transition there are problems when starting CWM, but the firmware has been installed, then download and install OneClickRecovery_ver2.apk and launch it. You can download the file.
⇡#Communication and wireless interfaces
ZTE Blade A510 can fully work with two SIM cards. Moreover, the smartphone has two separate slots for SIM cards and its own slot for a microSD memory card - the common half-measure in the form of combined connectors has bypassed this smartphone, and this is good news. But, of course, there is only one radio module in the device, so when any activity occurs on one of the cards, the second one becomes temporarily unavailable - a classic implementation of an inexpensive dual-SIM smartphone.
It is noteworthy that the Blade A510 has one slot for a Micro-SIM card, and the second for a Nano-SIM. If you plan to use the device with only one SIM card, then you definitely won’t need to contact the cellular operator’s office to get a card of the required format. It's comfortable. Working with SIM cards is carried out in a standard way: the user needs to determine which one to use to call, send messages and access the Internet by default. The Blade A510 copes well with its main task - voice calls. The volume reserve of the conversational speaker is decent; the interlocutors did not complain about poor audibility. We had no comments regarding the quality of network signal reception during the test. The device can operate in fourth generation networks: it supports the LTE Cat standard. 4 with a maximum theoretical data reception speed of 150 Mbit/s, transmission speed of 50 Mbit/s. All bands important for Russia are supported.
ZTE Blade A510 – SIM card management
The device has Bluetooth and Wi-Fi support. Wireless interfaces work stably. The device easily transferred songs to wireless speakers and connected to public Wi-Fi access points. All this happens quickly.
| ZTE Blade A510 – AndroiTS outdoor test results | ||
The device navigates the terrain using a module that can receive signals from GPS and GLONASS satellites. It copes well with the role of a navigator - it takes less than a minute to determine the device’s location. After running the profile test, the ZTE Blade A510 detected eight satellites and navigated by six of them. The navigation error radius was small - about four to five meters.
⇡#Camera
The front camera in the smartphone is five megapixel, with fixed focus and without flash. The quality of the photos is quite standard - in good lighting the picture turns out quite good, in artificial light it becomes overgrown with noise and loses detail, and in the dark the front camera is completely helpless.
ZTE Blade A510 – example photo on the front camera
The main camera of the Blade A510 is equipped with a 13 megapixel sensor, an automatic focus system and a single LED flash. She can shoot videos in Full HD format.
ZTE Blade A510 – main camera
To be honest, we don’t have much to say about this camera – we can neither praise nor criticize it. She is not very quick, periodically misses the subject when trying to focus - it is better to duplicate especially important shots just in case. With sufficient lighting, the picture turns out quite good, but in the dark there is the notorious noise and a noticeable loss of contrast and detail. For a budget smartphone it will do.
ZTE Blade A510-camtest
View all images (8)
How to update Android version on ZTE Blade - step by step instructions
Updating the firmware of a ZTE Blade smartphone involves correcting errors made in previous versions of the software, adding new functions that were not previously supported by the device, and in some cases, adding new programs that the manufacturer deems necessary to include in this update. To check if your phone has an update, you need to:
- Go to “Settings” and select the “About phone” section.
- In the menu that opens, click on “System Update”.
- If a new firmware version is available, characteristic information will be displayed on the screen. To update, you need to click on the “Download” button, after which the update package will be downloaded to your phone (this is not the update itself).
- Once the new firmware version has been downloaded to your phone, you can install it at your discretion at any time. The phone will reboot and you will be able to work with the new firmware.
⇡#Autonomous work
The battery of the ZTE Blade A510 is not very large - 8.36 Wh (2200 mAh, 3.8 V). The small battery capacity is compensated by low energy consumption - a budget system-on-a-chip and an HD screen are not too demanding to eat. So if you periodically let go of your smartphone, the battery will last for a working day. If you are a very active user, it is better to keep a charger on hand. The device is powered from the Micro-USB connector. A full charging cycle using the included charger takes approximately two and a half hours.
| ZTE Blade A510 – power saving options | ||
The ZTE shell does not provide its own software algorithms for energy saving - only the standard Android energy saving option.
Download firmware
When adding a review to our website through the comment system, do not forget to indicate your real email if you need advice and were unable to install the firmware according to our instructions. Instructions for firmware are on the download page. Our assistance in the form of consultations is free and therefore there may be delays in our responses, since there are many people interested. Downloading firmware for ZTE Blade AF3
can be done either through a torrent with instructions in Russian, or directly without depositfiles and other bloodsuckers.
Installation instructions
- Click on the download link, selecting the firmware you need
- Download Android M firmware - we checked you, to be honest M is Marshmallow, follow the second link
- Download the file with firmware and application
- Run the application file
- Select the required firmware version
- Follow the instructions from the file archive