(Ad space - Like you, I wish the site existed without it...) Create Bootable USB Drives Easily
Rufus is a utility that helps you format and create bootable Flash/Pen/Key disks, memory cards, etc.
Rufus will be especially useful in cases where:
- you need to create a bootable USB disk from a bootable ISO image (Windows, Linux, UEFI, etc.)
- need to work on systems that do not have an installed OS
- you need to flash the BIOS or other firmware from DOS
- you need to run a low-level utility
Despite its small size, Rufus can do everything you need!
Rufus also works very well
fast. For example, twice as fast as UNetbootin, Universal USB Installer or Windows 7 USB download tool when creating a bootable Windows 7 USB disk from an ISO image. Rufus is also slightly faster at creating a bootable Linux USB from an ISO image. (1) A partial list of ISO images that Rufus can work with is presented at the bottom of the page. (2)
Download
Last update 2020.06.18:
- Rufus 3.11
(1.1 MB) - Rufus 3.11 Portable version (1.1 MB)
- Other versions (GitHub)
- Other versions (FossHub)
Supported languages:
| Bahasa Indonesia | , | Bahasa Malaysia | , | Bulgarian | , | Čeština | , | Dansk | , | Deutsch | , | Ελληνικά | , |
| English | , | Español | , | Français | , | Hrvatski | , | Italiano | , | Latviešu | , | Lietuvių | , | Magyar | , | Netherlands | , | Norsk | , |
| Polski | , | Português | , | Português do Brasil | , | Russian | , | Romana | , | Slovensky | , | Slovenia | , | Srpski | , |
| Suomi | , | Svenska | , | Tiếng Việt | , | Türkçe | , | Ukrainian | , | 简体中文 | , | 正體中文 | , | 日本語 | , | 한국어 | , | ไทย | , |
| עברית | , | العربية | , | پارسی | . |
System requirements:
Windows 7 or later, no matter 32 or 64 bit. Once downloaded, the application is ready to use.
I would like to express my gratitude to the translators who have translated Rufus as well as this web page into various languages. If you find that you can use Rufus in your own language, you have them to thank!
Usage
Download the executable and run it - no installation required.
The executable file has a digital signature containing:
- "Akeo Consulting"
(v1.3.0 or later) - "Pete Batard - Open Source Developer"
(v1.2.0 or earlier)
A few words about DOS support:
If you create a DOS boot disk and use a non-US keyboard, Rufus will select a keyboard layout based on your system's regional settings. In this case, FreeDOS, which is the default, is recommended over MS-DOS because it supports more keyboard layouts.
A few words about ISO support:
All versions of Rufus since 1.1.0 allow you to create a bootable USB drive from an ISO image (.iso).
Creating an ISO image from a physical disc or a set of files is very easy using CD burning software such as the freely available InfraRecorder or CDBurnerXP.
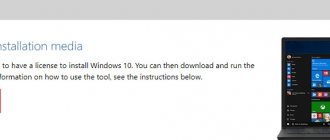
How to Create a Bootable Windows 10 USB Flash Drive with Rufus
Making a bootable Windows 10 USB flash drive in Rufus is one of the easiest ways and makes a bootable USB from almost any Windows ISO file, including Linux. Next, we will look at the procedure for creating a bootable Windows 10 flash drive using a well-known tool called Rufus.
The first thing to do is (which you want to use to create a bootable disk) on your desktop and insert the USB flash drive. Please note that the drive must be formatted, so make sure you do not insert a USB flash drive that contains useful information. Now launch Rufus and select your USB flash drive from the drop-down list at the top.
Click on the "Select" button located on the right side, find the ISO file that you downloaded to your desktop. Please note that if there is no ready-made OS image, you can download an iso image from Rufus (shown in the screenshot below), at the moment this is Windows 10 2004.
Then choose how you want to format the USB flash drive.
Select the option to create a standard Windows installation. Select Partition Scheme (method for creating partitions) and Target System (type of computer with BIOS or UEFI). Leave all other settings untouched.
Now click on the “Start” button (located at the bottom) to create a bootable Windows 10 Rufus USB flash drive.
Please note that this process may take a few minutes, depending on your PC. Once the indicator turns completely green, close the program.
- Related materials
Changes
- Version 3.11
(2020.06.18) Add Rock Ridge deep directory support - Add an option to write small ISOs to an ESP (GPT only)
- Add a cheat mode (
Ctrl—
SELECT
) to extract content from an additional zip archive on top of the ISO
- Add a cheat mode (
Alt—
G
) to disable Virtual Hard Disk listing
- Add a cheat mode (
Alt—
P
) to toggle a GPT ESP to Basic Data (Windows 10 only)
- Fix improper x86 32-bit NTFS driver being used for UEFI:NTFS
- Improve UEFI:NTFS compatibility with older UEFI firmwares
- Improve startup time by running the ISO download feature check in the background
- Remove Ubuntu's splash screen for persistent UEFI drives
- Enable ASLR for the Rufus executable
Donations
Since questions about donations are constantly asked, let me clarify that there is no
donate buttons.
The reason for not having the option to donate is because in my opinion, donations do not help in software development, but only make users feel guilty for not donating.
If you still insist, you can always donate to the Free Software Foundation, since the FSF is what makes Rufus possible.
In any case, I want to thank
for your continued support and enthusiasm for this little program: it means a lot to me!
Please continue to use Rufus for free, without any donations - you don't owe anything!
(1) Comparison of the speed of Rufus and other applications
Comparisons were carried out on a computer running Windows 7 x64 with a Core 2 duo processor, 4 GB RAM, a USB 3.0 controller and a 16 GB USB 3.0 ADATA S102 flash drive.
| • | Windows 7 x64 | : | en_windows_7_ultimate_with_sp1_x64_dvd_618240.iso |
| Windows 7 USB/DVD Download Tool v1.0.30 | 00:08:10 |
| Universal USB Installer v1.8.7.5 | 00:07:10 |
| UNetbootin v1.1.1.1 | 00:06:20 |
| RMPrepUSB v2.1.638 | 00:04:10 |
| WiNToBootic v1.2 | 00:03:35 |
| Rufus v1.1.1 | 00:03:25 |
| • | Ubuntu 11.10 x86 | : | ubuntu-11.10-desktop-i386.iso |
| UNetbootin v1.1.1.1 | 00:01:45 |
| RMPrepUSB v2.1.638 | 00:01:35 |
| Universal USB Installer v1.8.7.5 | 00:01:20 |
| Rufus v1.1.1 | 00:01:15 |
| • | Slackware 13.37 x86 | : | slackware-13.37-install-dvd.iso |
| UNetbootin v1.1.1.1 | 01:00:00+ |
| Universal USB Installer v1.8.7.5 | 00:24:35 |
| RMPrepUSB v2.1.638 | 00:22:45 |
| Rufus v1.1.1 | 00:20:15 |
What's new in Rufus 2.0
I think that for those who have decided to try or install the recently released Windows 10 Technical Preview on their computer, Rufus 2.0 will be an excellent assistant in this matter.
The program interface has not changed too much, as before, all actions are elementary and understandable, signatures are in Russian.
- Select the flash drive to record on
- Partition scheme and system interface type - MBR + BIOS (or UEFI in compatibility mode), MBR + UEFI or GPT + UEFI.
- After setting o, select the ISO image (or you can also use a disk image, for example, vhd or img).
Perhaps point number 2 about the partition scheme and the type of system interface does not mean anything to some of the readers, so I will briefly explain:
- If you are installing Windows on an old computer with a regular BIOS, you need the first option.
- If the installation takes place on a computer with UEFI (a distinctive feature is the graphical interface when entering the BIOS), then for Windows 8, 8.1 and 10 the third option will most likely suit you.
- And for installing Windows 7 - the second or third, depending on what partition scheme is present on the hard drive and whether you are ready to convert it to GPT, which is preferred today.
That is, the correct choice allows you not to encounter a message stating that installing Windows is impossible, since the selected disk has a GPT partition style and other variants of the same problem (and if you do, you can quickly solve this problem).
And now about the main innovation: in Rufus 2.0 for Windows 8 and 10, you can make not only an installation drive, but also a bootable Windows To Go flash drive, from which you can simply launch the operating system (by booting from it) without installing it on your computer. To do this, after selecting an image, simply check the appropriate box.
All you have to do is click “Start” and wait until the bootable flash drive is prepared. For a regular distribution and the original Windows 10, the time is just over 5 minutes (USB 2.0), but if a Windows To Go drive is required, then it’s longer - the time is comparable to that required to install the operating system on a computer (because, in fact, Windows is installed on flash drive).
(2) Partial list of ISO images that Rufus can work with
| Arch Linux | , | Archbang | , | BartPE/pebuilder | , | CentOS | , | Damn Small Linux | , | Debian | , | Fedora | , | FreeDOS | , |
| FreeNAS | , | Gentoo | , | GParted | , | gNewSense | , | Hiren's Boot CD | , | LiveXP | , | Knoppix | , | KolibriOS | , | Kubuntu | , |
| Linux Mint | , | NT Password Registry Editor | , | Parted Magic | , | Partition Wizard | , | Raspbian | , |
| ReactOS | , | Red Hat | , | rEFInd | , | Slackware | , | Super Grub2 Disk | , | Tails | , | Trinity Rescue Kit | , | Ubuntu | , |
| Ultimate Boot CD | , | Windows XP (SP2+) | , | Windows Vista | , | Windows Server 2008 | , | Windows 7 | , |
| Windows 8 | , | Windows 8.1 | , | Windows Server 2012 | , | Windows 10 | , | Windows Server 2016 | , | … |
| Copyright | © | 2011-2020 | Pete Batard |
Translation into Russian Kirill Ivanov Application icon PC Unleashed Hosting on GitHub
Bootable Windows USB flash drive on a Mac, Windows or Linux computer
The balenaEtcher software tool is attractive to beginners because there are no steps that require computer knowledge and skills.
Go to the official website of balenaEtcher, a program for burning ISO images to SD memory cards and USB drives (flash drives). Please note: the utility interface is shown in the browser window.
Scroll the page. Click the "Download for Windows" button to download a version compatible with Microsoft operating systems.
If the boot drive will be created on a PC running a different OS:
- Click on the down arrow located on the light green background on the right
- Select platform version: macOS or Linux
- Download the version for your OS to HDD or SSD
Edge offers you:
- “Run”: run the executable file immediately after downloading
- “Save”: place the file in the path you specify on your PC drive
- Cancel download
The first option is more convenient for novice users because it has fewer steps. In the second option, the downloaded program must be launched from the directory in which it was saved.
After checking the security of the downloaded EXE file...
...the utility installation wizard starts. The program will work only after the user accepts the terms of the license agreement. Please read the text carefully before clicking the “I Accept” button.
Installing the tool will take some time.
If you use Linux, Windows or Mac and prefer to install software using commands, pay attention to the line below the list of versions of the utility for different platforms.
Click on the link: "Debian (.deb) packages" if your OS is based on Debian. Such systems include Ubuntu and Linux Mint. “Red Hat (.rpm) packages” is a link for Linux users who support installing software from RPM packages. Example: Fedora. Both links lead to the same page describing the installation process for different OSes.
The links contain instructions for installing and uninstalling the utility:
- for DEB
- for RPM
- for Solus (GNU/Linux x64)
- via Brew Cask on macOS
- via Chocolatey on Windows
In the upper right part of the program window there is a settings icon (“gear”). Click on it.
Leave the default settings unless you need special options that you know about. The only parameter worth paying attention to is the first line of the list. Prompts the user to submit reports about errors and usage of the tool. The option is initially enabled, but can be disabled by you. To do this, you need to uncheck the “bird” to the left of the text.
The second option from the bottom is automatic program update.
The process of creating a flash drive for subsequent installation of the operating system consists of three steps.
The first one (“Select image”). Specify the path to the OS image (ISO file):
- Windows 10
- Windows 7
- Linux Mint
- Ubuntu
- Another Linux distribution
Second (“Select target”). Select a clean flash drive connected to the USB port of your laptop or desktop PC. It will become bootable after completing the third step of the software tool.
Third (“Flash!”). Write a system image to a flash drive. Wait for the program to complete.
Remove the created boot drive from the slot. In the future, use it as a source for installing the system.