After releasing and selling new computers, manufacturers often fix many problems with them by releasing new versions of the BIOS. Problems can be very different.
For example, Acer has created a new BIOS for the Aspire E5-574G laptop, which improves performance on Nvidia video cards and also solves black screen problems when connecting the laptop via an HDMI cable.
In addition to eliminating problems and shortcomings, manufacturers are improving the characteristics of their products by creating a new BIOS. For example, manufacturers of motherboards with FM2+ processor socket, releasing a new BIOS version, enable users to use the latest processors .
So that the user can independently update the BIOS of his PC, we have prepared material in which we will describe this process in detail. For new computers, there are now two options for updating the BIOS:
- The first is updating via a flash drive.
- The second is updating using a utility for Windows.
In our examples we will use installation using a flash drive , since this option is more reliable.
New BIOS version
The very first thing that needs to be done to install a new BIOS is to download its new version.
You need to download the new BIOS version only from official sources, that is, from the websites of manufacturers of laptops, netbooks, nettops and other types of PCs. Never download BIOS from third-party sources.
Using BIOS from third-party sources, you can damage your computer and also void your warranty, after which you will have to restore your computer at a service center.
Let's look at loading the BIOS for the Aspire E5-574G laptop, ASUS Transformer Book T100HA netbook and desktop PC based on the MSI A58M-E33 motherboard. To download the firmware for the Aspire E5-574G laptop, you need to go to the official Acer website - www.acer.com. On the main page of the site, look for the “ Support ” link and follow it to the support page for Acer devices.
On this page, open the “ Search by Category ” tab and enter the series and number of our laptop in the parameters that appear. After these steps, the Aspire E5-574G laptop support page will open. This page has a BIOS/Firmware that contains all firmware versions for the Aspire E5-574G.
At the moment, the latest version of the firmware microcode is numbered 1.13. This version contains bug fixes from March 2016. In addition, all new firmware versions also include all the microcode fixes that were in previous versions.
Let's download this version of the BIOS firmware and save it to a local disk. The BIOS microcode is distributed in an archive, so we will unpack it on a local disk and find the file “ZRW_113.exe”. A file with the “exe” extension means that the firmware for Acer laptops and netbooks can only be installed through Windows.
When updating the BIOS from Windows, you need to be extremely careful, since any anti-virus program can disrupt the update process, thereby damaging the laptop, after which its restoration will only be possible through a service center.
The ASUS Transformer Book T100HA tablet, which can transform into a netbook, is an interesting model for our review, since it can be updated via BIOS from a flash drive .
You can download the new BIOS version on the official laptop page www.asus.com/ru/Notebooks/ASUS_Transformer_Book_T100HA. To do this, go to the “ Support/Drivers and Utilities ” tabs and download the new BIOS version.
After downloading the archive, you need to unpack it to a local disk and write the firmware file for an update example.
The principle of loading a new BIOS for a desktop PC based on the MSI A58M-E33 motherboard is similar to the previous examples. You can download from the official motherboard page on the support tab https://ru.msi.com/Motherboard/A58M-E33.html.
Let's download the latest version of the archive with the BIOS to the local disk under number 32.8 and unpack the file with the microcode also onto a flash drive for an example of installing the firmware.
Flashing BIOS from a flash drive
The procedure for flashing BIOS from a flash drive is simple and does not require special knowledge
Before describing the process of flashing the BIOS, you need to consider how to flash it and what operations need to be performed. Installing BIOS from a flash drive is becoming more common and widely practiced. This option helps to flash the BIOS of video cards and motherboards of both desktop computers and netbooks. Unique firmware and individual software are used for each device. From time to time, motherboard developers offer BIOS updates.
The BIOS firmware contains various optimizations and newer functionality. For example, installing the overclocking function. When a new final version appears, it is recommended to update the BIOS, but it is better to skip the beta and alpha versions. When the system is unstable, and you know for sure about this fact, start the procedure for flashing the BIOS from a flash drive. You should not practice this if there is nothing wrong with your system or you are not confident in your competence.
The process of flashing the BIOS is basically identical for different boards, but sometimes companies use proprietary developments and offer their own utilities that operate under Windows. This greatly simplifies the process of installing from a flash drive. How to flash the BIOS if the system is unstable and has problems starting Windows? This fact significantly complicates the situation, increasing the risk of failure to flash the firmware using classical methods. Therefore, you have to use hotswap or BIOS firmware from a flash drive, which complicates the work a little.
To create the boot space of a flash drive, we use the HP USB Tool software and an MS-DOS image. Almost all modern motherboards have a flashing utility built into the BIOS, and it will be easiest to install the firmware using it. The flash drive requires: FAT32/FAT16 file system and a volume of no more than 2 gigs (for some motherboards no more than 4 gigs).
You shouldn’t wonder how to install a BIOS from a flash drive when your machine is equipped with a new configuration, works like a clock with the BIOS version on the m/n, and you don’t have any plans to buy new components that are not compatible with its version. Sometimes it happens that the stability and integrity of system operation is disrupted as a result of flashing a newer BIOS version from a flash drive. One of the reasons may be a change in the interaction of the newer version with the processor when using memory that is not included in the Qualified Vendors List (QVL) of your device (checked on your device’s page, in “Supported Memory Modules”).
Updating the BIOS of the ASUS Transformer Book T100HA netbook from a flash drive
First of all, we will describe the process of updating the ASUS Transformer Book T100HA netbook. Let's use a flash drive with the saved BIOS file and reboot the netbook. When the netbook starts, press the Delete key and go to the main BIOS window. In this window, open the “ Advanced ” tab.
In the window that opens, click on the “ Start Easy Flash ” link. This link will allow us to open the BIOS Easy Flash .
Using this utility, you can select an update file from both a flash drive and a local disk. In our case, we will select a file not from a local disk, but from a flash drive and confirm the BIOS installation.
After these steps, the BIOS update will begin.
As you can see from the example, flashing the BIOS of the ASUS Transformer Book T100HA netbook is not at all difficult, especially if you don’t have a flash drive, you can easily flash it from a local disk.
Start Easy Flash what is this in the BIOS?
Helovchik guys We are studying the BIOS, today we will find out what kind of item Start Easy Flash is? Well, well, I quickly learned something. In short, Start Easy Flash has something to do with updating the BIOS, then the thought immediately came to me, well, it’s better to bypass this point altogether! Because there’s something wrong, select it and that’s it, screw the bios. Updating the BIOS is for knowledgeable people, understand? It seems like the Start Easy Flash item launches the EasyFlash interface, but there you can already update the BIOS
In general, it is dangerous to play with the Start Easy Flash item. If you know how to update the BIOS, then there are no questions, you can try. By the way, I’ll tell you a secret, I bought myself a motherboard three years ago and now I inserted a percentage into it, that’s all. But the computer did not turn on, and there was nothing on the screen. In short, I immediately needed to update the BIOS for the new processor. I studied the instructions up and down on the Internet and tried it. So this is my mistake, I had no experience in updating the BIOS! In short, to be honest, it was a MIRACLE that we managed to update the BIOS without any hassle! But I think I was just lucky...
Well, here is the Start Easy Flash item in the BIOS (by the way, the old-style BIOS):
Here's another example:
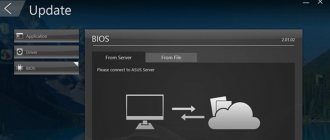
And here is an example of a proprietary program for updating the ASUS Update BIOS:
But this is just an example. Manufacturers often have similar programs for their motherboards
Guys, remember, okay? Update the BIOS ONLY if there is an URGENT NEED. Otherwise you can screw up!!!
That's all. Good luck and positivity
Published: 09/21/2017 | Tags: bios |
990x.top
Updating the BIOS of the MSI A58M-E33 motherboard from a flash drive
Just like in the netbook example, reboot the computer and go to the BIOS using the Delete key.
In the main window, go to the “ M-FLASH ” tab, after which the BIOS update options will open.
To update from a flash drive, we will select the “ Update BIOS ” item, which will open the following window. In the window that opens, select the BIOS file from our flash drive.
After these steps, the process of updating the BIOS microcode will begin.
At this stage, you need to make sure that the power supply to the computer does not turn off, as this can lead to damage to the motherboard, after which you will have to order its restoration at a service center.
Therefore, when updating the BIOS of a desktop computer, it is best to use uninterruptible power supplies .
How to update the BIOS on an Asus motherboard
ASUS, a well-known manufacturer of computer components, tries to release stable BIOS versions for its motherboards that have all the necessary functions.
However, from time to time new features are added to motherboards or bugs are discovered. In this situation, updating the BIOS may allow the user to install additional hardware or improve the stability of the PC.
Conclusion
From the examples discussed, it is clear that updating the BIOS is not a difficult task at all. But when updating, you need to be extremely careful and not allow the computer to turn off during this process.
I would also like to remind our readers once again that under no circumstances use BIOS files for firmware from unofficial sources, as this can lead to breakdowns and you will have to restore your computer at a service center.
We hope that, guided by our examples, readers will be able to update the BIOS, thereby ensuring stable operation of their PC.
Bios back flash what is this in the BIOS?
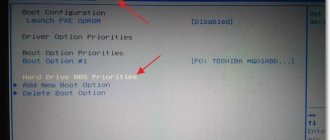
If you have ever gone into the BIOS settings and seen the Bios back flash option there, then you will probably be wondering what this setting is and what it does. By default, it is always turned off, that is, Disabled.
In this article you will learn about those cases when Bios back flash needs to be activated (set to Enabled).
What is Bios back flash responsible for?
As many of you should know, on any motherboard there is a so-called basic input output system, or BIOS for short. It plays a very important role and is responsible for starting the computer before the operating system starts loading.
From time to time, situations arise when motherboard manufacturers release BIOS updates. In these updates, they correct some found errors and shortcomings in the operation of the motherboard. This way the BIOS is updated.
BIOS update
But updating the BIOS does not always lead to improvement. Sometimes situations occur when, after installing a new version of BIOS firmware, users notice problems in the operation of the computer that did not exist before installing the updated BIOS version.
In such a situation, there is only one way out - install the previous version of the firmware. Or, in the language of computer scientists, roll back the BIOS. This is where the Bios back flash option comes into play.
Bios back flash in BIOS
In order for the system to give you the opportunity to install an older version of BIOS firmware, you need to set the Bios back flash to the Enabled state.
Conclusion
As you can see, the Bios back flash option is needed to remove protection from installations of older versions of BIOS firmware. If you are not going to roll back the BIOS firmware to an earlier one, then it is better to keep this option in the Disabled state, that is, disabled.
helpadmins.ru
Creating a bootable USB flash drive (easy way)
To solve many computer maintenance problems, it becomes necessary to create a bootable USB flash drive. This may be needed, for example, to flash an updated BIOS version or install an operating system.
There are many methods and different utilities for creating a bootable USB flash drive. But often these methods are complex and not user-friendly for a novice user (or require several different utilities).
But nevertheless, there are very simple ways. One of them is to use the rufus utility to create a bootable USB flash drive.
Rufus is a miniature, but very fast and functional program. With its help, you can very quickly make a bootable USB flash drive with the desired operating system for installation or maintenance.
Bios update | do it yourself
When updating the BIOS, you need to download the update file from the motherboard manufacturer's website.
To do this, you need to know the name of the board and the manufacturer. If there are instructions for use, then there will be no problems with the information. Some manufacturers describe several models in the instructions, so you will have to select the one you need, located on your computer. If there are no instructions, then to determine the name it is better to use special diagnostic programs or determine it visually. Eg. Everest Home Edition (www.lavalys.com) Having installed and launched the program, select (motherboard), then (BIOS) and on the right we see complete information about the BIOS version with the manufacturer’s address. Updating the BIOS for older computers takes place in MS DOS; it is also necessary to prepare a startup disk, so it will be difficult for an ordinary user to carry out the update procedure. Let's consider the update operation for Asus with the update program in the BIOS environment.
To use the Asus update program, you need to burn the update file to a CD in the new *.rom format, where * is the motherboard model. Next, insert the CD and restart the computer. Using the F2 button, open BIOS Setup and launch the program using the Advanced - Start Easy Flash menu. Specify the update file and Enter. The update operation begins and the computer restarts.
By not following the above rules or for another reason, the BIOS code may be corrupted. The result of this is that the computer does not boot, although signs of operation are observed: fans and indicators of external devices are working. Now you need to turn off the computer from the network and use jumpers to correct the BIOS settings (you need to short-circuit two contacts for 1 minute or move the CMOS Clear jumper from 1-2 to 2-3 on the motherboard (do not forget to return it back before turning on the PC net)). After restoring the BIOS to factory settings, the computer may not boot... Therefore, go to the BIOS (F2 or Del) and set the BIOS defaults (load defaults). The computer boots. If any external devices do not work (eg USB), then you need to go back to the BIOS and turn them on, since the factory settings depend on the specific BIOS program.
www.dimexpro.eu
