When to reset the BIOS configuration
Most often people think about BIOS when the computer does not start or freezes upon startup. A forgotten password or a bug when starting the operating system also reminds the user that there is such a tool as BIOS. However, a number of cases that can be solved through BIOS are described below.
If you need to reset the password to enter the BIOS (or the password to continue starting the OS)
For example, if the user has forgotten the password for the account and further work in the OS is impossible. If, when you start your PC, the message “Enter the correct password” appears on the screen, then you need to go to the BIOS. We are talking about the password from the BIOS itself, and not from the account, although resetting the general settings removes all passwords.
Resetting BIOS settings via the BIOS Setup interface
The easiest way to reset BIOS settings is to enter the BIOS Setup interface, find the reset function there and activate it. In order to enter the BIOS, you need to restart the laptop and the moment the boot starts, press the button to enter the BIOS Setup interface (at the time of boot, information will appear on the screen about which button to press).
If there is no information about the button on the screen, you can try pressing the keys that are most often used to open BIOS Setup. For example: DELETE, F10, F11, F12, F1, F2, F3, Esc.
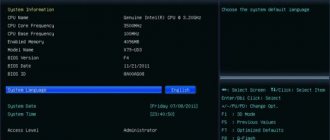
After entering BIOS Setup, you need to find a function to reset settings. Typically, this function is located in the last section of the BIOS settings and is called “Load Setup Default”. Other names for this function are also possible. For example, "Load Safe-Fail Defaults". It is impossible to say exactly what this function will be called in your BIOS version. Here you have to navigate yourself.
After using this function, the computer will reboot, after which it will start with standard BIOS settings.
How to reset BIOS settings
Let's look at the most popular ways to reset the BIOS to factory settings , which even a beginner can handle. Before carrying out operations, disconnect the computer from the network so as not to provoke short circuits or damage to spare parts. After turning off the power, you must wait at least 10 seconds before restarting.
Resetting BIOS Setup using the CLRTC jumper on the motherboard
In order to perform the operation, you will have to disassemble the system unit.
CLRTC jumper on motherboard
- Remove the cover.
- Find the motherboard.
- On it, near the battery (which will be discussed below), you can see a small jumper.
- It needs to be taken out and moved one notch to the right (it is better to use tweezers for this).
- Press the power button (to discharge the capacitors).
- Move the jumper back.
- BIOS has been restarted.
The jumper looks like a small blue cube that switches between two positions. When restarting capacitors, you also need to wait 10 seconds before and after the procedure, otherwise there is a chance of failure.
Resetting BIOS settings using a jumper on the motherboard
Most motherboards are equipped with a jumper (otherwise known as a jumper) that allows you to reset the CMOS memory (which is where all BIOS settings are stored). You can get an idea of what a jumper is from the picture above - when the contacts are closed in a certain way, certain operating parameters of the motherboard change, in our case this will be resetting the BIOS settings.
So, to reset you will need to follow these steps:
- Turn off the computer and power (using the switch on the power supply).
- Open the computer case and find the jumper responsible for resetting CMOS; it is usually located near the battery and has a label like CMOS RESET, BIOS RESET (or abbreviations for these words). Three or two contacts can be responsible for reset.
- If there are three contacts, then move the jumper to the second position, if there are only two, then borrow a jumper from another place on the motherboard (don’t forget where it came from) and install it on these contacts.
- Press and hold the computer's power button for 10 seconds (it won't turn on because our power supply is turned off).
- Return the jumpers to their original state, reassemble the computer and turn on the power supply.
At this point, resetting the BIOS settings is complete, you can install them again or use the default settings.
How to restore functionality to a motherboard with a crashed BIOS
Asus
Many Asus desktop motherboards support USB Flashback , which is designed to quickly update and restore the BIOS in the event of a failure.
This does not require anything other than a USB flash drive with a capacity of up to 4-16 GB and the BIOS file itself, which must be downloaded from the manufacturer’s website from the section about your motherboard model. After downloading the firmware you need to rename it. For example, the file “Sabertooth X79” (model name) is renamed to “SABERX79.ROM”, the file “Sabertooth Z77” is renamed to “Z77ST.CAP”. Information on what the firmware file for your model should be named is most likely on the Asus website, but if you don’t find it, check on the forums or in support.
Next, save the renamed BIOS on a flash drive formatted in FAT32 and connect it to a USB port labeled “ Flashback ” or “ ROG Connect ”. It is advisable to turn off the computer before this, this will increase the chance of successful recovery.
After connecting the flash drive, turn on the PC and press the “ BIOS ” button on the rear panel. Hold it down for about 3 seconds until the indicator light on the board starts flashing. Blinking indicates that the file has been successfully read and is being flashed into memory. When the firmware process is completed, the indicator will turn off.
If your board is from the budget segment or is not very new, that is, it does not support USB Flashback, most likely you can restore it in another way. If your computer has a floppy drive or optical drive, write the renamed BIOS file to the root directory of a blank floppy disk or CD, place it in the drive, turn off and then turn on the PC. The firmware will be completed when the drive indicator goes off. If there is no drive, use a flash drive.
This is interesting: How to set the BIOS to boot from a drive or flash drive
Gigabyte
On Gigabyte boards with Dual BIOS, failures rarely occur, since if the firmware in the main chip (Main_BIOS) is damaged, a dump from the backup chip ( Backup_BIOS ) is copied into . As long as the main flash memory is healthy and contains the firmware, even if damaged, the board remains operational.
Problems with starting a board with Dual_BIOS are possible in the following cases:
- The main chip is missing or faulty.
- The microcode in the main chip is completely erased.
- The contents of both microcircuits are damaged.
Some Gigabyte motherboards can boot from backup flash memory and use it as the main one. Another group of boards from this manufacturer uses a dedicated area on the hard drive as BIOS backup media. This is a less reliable option, but still better than nothing.
Restoring the Gigabyte BIOS from a backup is usually performed automatically, but if this does not happen, try turning off the computer from the outlet, wait a little and turn it on again.
MSI and others
Most motherboards manufactured by Micro-Star use a firmware recovery technology very similar to ASUS's - using a flash drive, floppy disk or CD. Copy the BIOS onto a blank medium, connect it to the PC, press the power button for 4 seconds, press the left Ctrl + Home (or Alt + Ctrl + Home ) combination on the keyboard and, without releasing the keys, turn on the computer. The start of the firmware process can be judged by the flashing of the flash drive or drive indicator.
BIOS on MSI board.
On the right is the JSPI1 port for flashing firmware on the programmer. On MSI motherboards and some other brands that are more than 8-10 years old, flashing the BIOS is done from a floppy disk. The instructions for AWARD and AMI BIOS are slightly different.
To restore the AMI BIOS, do the following:
- Rename the BIOS file downloaded from the motherboard manufacturer's website to AMIBOOT.ROM.
- Transfer it to the root of a blank floppy disk. Insert the floppy disk into the drive of the switched off PC.
- Press left Ctrl + Home on your keyboard and turn on your computer.
To restore AWARD BIOS:
- Place the firmware and BIOS files on a floppy disk (usually downloaded in one archive).
- Create a text document on a floppy disk that specifies the name of the BIOS file with the bin extension. Rename the document to autoexec.bat.
- Further actions are similar to those above.
By the way, some motherboard manufacturers post BIOSes on their websites only in exe format - in “one bottle” with a firmware program for updating from Windows. Sometimes such a file can be unpacked as an archive, but users often do not understand which of its contents is firmware. There is no universal solution for such problems. In order not to aggravate the problem, it is better to consult specialized forums or the manufacturer’s technical support.
This is interesting: How can I set the BIOS to boot from a flash drive on an Asus laptop? Some tips for installing Windows 7 from a USB 3.0 flash drive
On some boards, before restoring the BIOS, you also need to remove the real-time clock (RTC) battery from the socket or reset (remove) the CMOS clear jumper. It is important to clarify these points before starting the procedure.
Restoring BIOS on a laptop
If the BIOS on a PC has crashed, but the user does not know how to restore it and cannot guarantee the safety of the machine, then it is better to perform a complete reset of the firmware on the laptop.
The algorithm of operations is as follows:
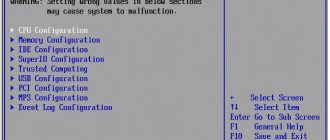
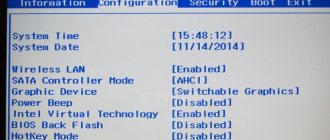
- Turn on the computer and study the BIOS splash screen, which will appear at the very beginning and tell you which function key (F2/F8) you need to press to access the configuration.
- Press and hold this key until the setup screen appears.
- If you miss the opportunity to press in a timely manner, the PC will continue to boot from Win as usual, and a reboot will be required to repeat the steps.
- After successfully entering the BIOS setup screen, use the function and scroll keys to navigate through the menus.
- Find the option “reset to factory settings”.
- If Windows has crashed, restoring the BIOS will usually help by following the instructions on the screen to switch to the original configuration.
- Confirm your choice and close the screen.
- Because the BIOS is in ROM, it must have a constant power supply to store all the changes that are made to it every time the computer is unplugged from AC power.
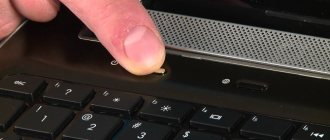
- If it is not possible to return to factory settings, turn off the power from the BIOS, it returns to its original configuration. The process consists of disconnecting the motherboard's small battery. In many laptops, the BIOS battery is easily accessible and located at the bottom of the device.
- No matter how the BIOS on the computer crashed, updating the SMOS of the motherboard will help restore it correctly. To do this, you will need to remove the battery and touch a metal object to ground it.
- Next, remove all the screws that hold the battery cover in place.
- They find the BIOS battery in the form of a small lithium structure, similar to a watch battery, and remove it, being careful not to damage the adjacent circuits. Wait for a minute for it to discharge and insert it into place. Then repeat the startup procedure from the beginning.