What is needed for the job?
Before you begin the upgrade, it is important to have all your data and tools ready. Among them:
- code of product. Most often it is located on a sticker on the bottom cover of the laptop;
- the presence of printed instructions or a saved page with it, if there is an additional device with the ability to connect to the network;
- To update the Bios on an HP Pavilion Dv6 laptop and other models, you must have stable Internet access. This is necessary for the updates to download successfully. Therefore, you can use an additional computer;
- paper and pen/pencil.
Let's take a closer look at HP BIOS Update
Stop. I’ll say right away that if you need to update the BIOS, you can read the official manual on the HP website.
Now about the HP BIOS Update utility. To use it, you need to find out the product number, that is, the laptop, it is located on a sticker that is located on the bottom of the laptop or on its box:
That is, this is some kind of
p/n , and above it there is, as I understand it, a serial number - s/n .
Then you need to go to the off-site, where you need to enter the number, by the way, the website indicates that you need to enter the serial number. In general, it doesn’t matter, the main thing is that all the information you need is on the sticker. After entering the number, click BIOS (most likely this means a section or button), there will be the latest version of the BIOS, which accordingly needs to be downloaded.
As I understand it, it will not just download the BIOS version, but will download it directly with the installer, which will allow you to write the BIOS file to a flash drive. When you start the installer, the following window will appear, where you need to click Next:
Then it will be said that this utility is for updating and restoring the BIOS, as well as creating a copy of the current one (perhaps this means even with the settings):
Next, select what we need:
- Update - to create a flash drive with which you can update the BIOS.
- Create Recovery USB flash driver - create a flash drive for recovery, perhaps useful if, for example, when updating the BIOS the lights went out or some kind of failure occurred.
- Copy - create an image of the current BIOS version into a file, perhaps the settings will also be saved, if so, then the function is really useful.
For example, select the second item to create a flash drive for recovery:
And then the HP BIOS Update utility will prompt you to select a flash drive, select it, you can immediately format it (Format button) and then click Next:
If everything is successful, you will see the word successfully:
All that remains is to click the Finish button.
What then? Then we insert the USB flash drive, boot into the Hardware Diagnostics UEFI menu, where we select the Firmware Management item:
And then you can work with the BIOS:
In the picture above we see three buttons:
- BIOS Update - actually to update the BIOS, and as I understand it is also suitable for recovery.
- BIOS Rollback is a rollback, that is, as I understand it, the cancellation of the last BIOS update.
- Main Menu - just to return to the main menu.
How to find out the current BIOS version?
Before updating the Bios on an HP G62 laptop and other models, you need to find out what version of the software is installed on a particular computer. For this:
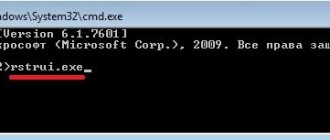
- open the Run program window (win+r);
- enter msinfo32.exe in the search bar;
- in the window that appears, among the system information, find the installed BIOS;
- write it down.
Determining the processor type
This step is necessary. The problem is that each processor needs a special BIOS version, so to speak, personal. To find out the processor type, you need to repeat the previous paragraph:
- launch the Run program;
- enter msinfo32.exe;
- and in the same section, right above the BIOS version, the processor data is indicated.
Find the latest version
Before updating the Bios on an HP Compaq laptop or any other model, you need to find the latest version of the BIOS program. For this:
- through the settings, open the HP software and driver downloads tab on the Internet;
- select your laptop model and go to a new tab;
- Now you need to select the operating system installed on the laptop and the bit depth (32 or 64). Click the “Submit” button;
- Next, a list of available updates will be shown. Among them you need to find the BIOS. If it is missing, then this model has the latest version and no update is required. Either there are no updates for the current operating system;
- Now you need to download the installer and save it to any location convenient for you. For example, on a flash drive.
How to restore BIOS: complete guide for 2020
We'll tell you why you can't restore the BIOS on a PC and laptop. We will learn how to restore the BIOS on ASUS, Gigabyte, MSI motherboards using a flash drive, disk and floppy disk...
Most often, you can restore the BIOS without contacting service. To do this, just read the instructions for the motherboard. If the manual did not help, then World of Access will always help. Go!
How to restore BIOS on ASUS
Most ASUS motherboards support USB Flashback technology. It allows you to quickly and efficiently restore and update the BIOS.
To restore, you will need a USB flash drive on which the BIOS file will be written - it must be suitable for the motherboard used. You can find the BIOS file on the motherboard manufacturer's website. You will also need to change the name of the firmware file
All information about what exactly your firmware file should be called can be found on the ASUS website. If such information is not there, then you need to look for it on various forums.
The procedure is as follows:
- Download the BIOS file for your motherboard
- Change the file extension to .ROM. For example, change the file J1900I (board model name) to J1900I.ROM
- Format the flash drive to FAT32.
- We drop the renamed file onto the prepared flash drive.
- Turn off the PC and connect the flash drive to the PC (required with the note “Flashback” or “ROG Connect”).
- Turn on the PC, during boot you need to press and hold the boot button until the indicator on the board turns on.
If the indicator is active, then the file is successfully flashed into memory. When the indicator goes off, the firmware process is complete.
There are also cases when the motherboard does not support USB Flashback - in this case, you need to put the firmware file, which was previously renamed, onto a floppy disk, place the media in the drive, turn off and turn on the PC again. After the drive indicator goes out, the firmware will be installed. If your PC does not support floppy disks, you can use an optical disk or flash drive.
Especially for you: Cube ACR can’t hear the interlocutor: what to do
How to restore BIOS on Gigabyte
If Gigabyte motherboards support Dual BIOS technology, then restoring the BIOS will not be difficult.
If something happens to the firmware of the main chip, the backup BIOS immediately takes control of the boot and the question of how to restore the BIOS is resolved automatically
When starting a system with a motherboard based on Dual BIOS, however, difficulties may arise. They are associated with three factors:
- Damage to two microcircuits.
- Erasure of the microcode of the main circuit.
- Failure of the main microcircuit, or its absence.
Some Gigabyte boards can boot from backup flash memory and then use it as the main one.
Other Gigabyte motherboards use a reserved area that is stored on the hard drive. In the latter case, the BIOS is restored automatically from the backup
If automatic BIOS recovery does not occur, you need to turn off the PC, then remove the power supply plug from the outlet and wait about ten minutes. We turn on the computer again - the BIOS should be restored automatically.
How to restore BIOS on MSI
Restoring BIOS on Micro-Star motherboards is practically no different from restoring BIOS on Asus motherboards.
Restoring the BIOS on MSI motherboards occurs as follows: the BIOS is copied to a formatted flash drive (you can also use a floppy disk or optical disk). The flash drive is connected to the USB port. Press and hold the PC shutdown button, at this time press and hold the combination Alt+Ctrl+Home (or left Ctrl+Home) - without releasing all the pressed keys, you need to turn on the computer
If the flash drive or drive indicator starts blinking, it means the installation procedure has begun and the problem of how to restore the BIOS will soon be solved.
The BIOS on some MSI motherboards (especially old ones, which are more than ten years old) can only be flashed from a floppy disk. The procedure for AWARD and AMI BIOS will be different. To restore the AMI BIOS, you need to download the BIOS file from the MSI website.
Especially for you: The escapists crashes when starting epic games: what to do
You need to change the name of the downloaded file - rename it to AMIBOOT.ROM. Now this file must be copied to the root of the formatted floppy disk. The floppy disk is installed in the appropriate drive, but only in a switched off PC. Then you need to simultaneously press and hold the Ctrl+Home key combination, and then turn on the PC.
Restoring AWARD BIOS occurs as follows: the BIOS and flasher files (usually they come together in the archive) are written to a floppy disk. We create a text file on the floppy disk - in it you need to write the name of the BIOS file and assign it a bin extension. Now this file needs to be given a new name - autoexec.bat. Next - perform the steps given above
Some motherboard manufacturers allow you to update the BIOS by downloading the corresponding exe file, which is published by the manufacturer on the motherboard website. Such a file includes not only the BIOS, but also the firmware file.
At first glance, everything is simple, but in practice this is not always the case. The main problems may arise from the fact that in such archives it is difficult to separate the firmware file from the BIOS and the flash driver.
In some cases, the exe file can be unpacked as an archive, but even in this case, it can be very difficult to understand what exactly is the firmware and what is the bios. To solve this problem, it is better to create a support ticket on the motherboard manufacturer’s website
Some motherboards allow you to restore the BIOS only after removing the RTC (editor's note: we are talking about the clock battery) or after removing the CMOS jumper.
How to restore BIOS on a laptop
On laptops, the BIOS, in most cases, is stored on two flash memory chips, just like on Gigabyte motherboards. Only in the case of laptops there is no BIOS backup. On laptops, the main BIOS is located in one chip, and the multicontroller program is located in the other. In addition, both chips may contain different parts of the firmware. It is enough to damage the microcode of one chip and the system will stop functioning.
Especially for you: The phone does not connect to the speaker: what to do
Restoring BIOS on a PC and laptop is practically the same. First, you need to download the laptop firmware - to do this, open the laptop manufacturer’s website. Then the firmware is copied to a formatted flash drive and connected to a de-energized device
Often you will not only have to turn off the laptop, but also remove the battery, and also disconnect the power supply. Then the battery is put back in place and the laptop is turned on again, while holding down a special key combination.
Key combinations on laptops from different manufacturers may vary:
- Fn + B;
- Fn+Esc;
- Fn + M;
- Fn + F;
- Win+F;
- Win+M;
- Win+Esc;
- Win+B;
- Ctrl (left or both) + Home.
Difficulties and errors when restoring BIOS
There are no particular difficulties when restoring the BIOS. Most of the action involves unpacking and renaming files. Sometimes you need to extract the firmware yourself from the exe files.
The main difficulty is that manufacturers almost always include BIOSes of different revisions in the program (editor's note: such BIOSes can be intended for different versions of a series of platforms) - which is why choosing the correct file for your motherboard can be very difficult. In order not to make a mistake, you need to study the manual of your motherboard in as much detail as possible and if you have questions, contact the manufacturer’s support on the website
We will not discuss instructions for restoring the BIOS by closing contacts and replacing removable flash memory within the framework of this material, as well as methods related to flashing the programmer firmware, as well as desoldering it.
Thus, even an untrained user can solve the problem of how to restore the BIOS. The main thing is to carefully follow these instructions.
Update process
Now it's time to update the Bios on your HP laptop. However, before doing this, there is an important detail that needs to be communicated. During the update process, the computer will beep and turn the screen and cooling fans on and off. This behavior is standard for this situation. Don't be scared and try to cancel the installation process.
Now we can give the last part of the instructions on how to update the Bios on an HP laptop:
- Do not disconnect the device from the network and ensure that it is not running on battery power during installation;
- disable antivirus programs and close all applications;
- run the installer exe file and simply follow all the steps reported during the update;
- Once the process is completed, the laptop needs to be restarted.
What to pay special attention to when updating the BIOS
- The latest BIOS versions can be downloaded exclusively from the official website of your laptop manufacturer and only for your model;
- During the update process, the laptop must be connected to the network and not be disconnected until the procedure is completed;
- During the BIOS update process, it is better to leave the laptop alone without touching any keys or buttons;
- Before performing the update, you should disconnect all connected equipment except the mouse. You should not connect anything during the process.
What do you need for work?
Before updating the BIOS, you need to prepare all the necessary tools. The list includes:
- as stated earlier, you need to find the product code. Most often it is written on a sticker on the back of the laptop;
- a stable Internet connection so that there are no failures during work. They can lead to serious system errors;
- Availability of an empty flash drive for storing the installer.
Downloading and installing BIOS
The first part of this paragraph has already been described earlier in this article. But in order not to scroll back and forth, the main summary will be given:
- go online to the HP software and driver downloads tab. Here you can find your computer model, Windows version and BIOS update;
- Click on the “Detailed information” button to obtain information about additional data when installing the update;
- Now you need to familiarize yourself with the list of system requirements. This is necessary in order to install the correct BIOS version and not cause damage to the laptop;
- download the installer onto a pre-formatted flash drive;
- now activate the program and run the “Setup Wizard”;
- Click “Next” and agree to the terms of use of the license;
- after this, the special HP System BIOS Update program will launch. Select “Next”;
- after going to a new page, you must select the line to create a USB drive to perform the recovery. Click “Next” again. A list of available options will open. Among them, select the flash drive with the installer and confirm the action. Once the ready message appears, click the finish button.
The drive is now ready for BIOS software recovery.
Updating BIOS and BMC in HP DL160 G6 Server
Often, users do not attach importance to BIOS updates and similar systems. However, it is impossible to overestimate the importance of such procedures. Updated software versions contain important changes, such as security updates, support for new hardware, bug fixes, optimization of speed and usability. Although the update procedure is quite simple, we will explain step by step how to update the BIOS version and BMC version for the Hewlett-Packard DL160 G6 server. BIOS firmware
If you believe us, then you can immediately download the required file from our website ittelo.ru. If you don't believe me, then follow the steps further.
Model support section on the official HP website
Our HP Dl160 G6 server has already been selected here
Go to Select driver language and OS
Driver language select English
Operating systems in English, select OS Independent
Then you need to scroll down the site a little and you will see the following content
We need the point where the BIOS firmware of our server is located
Click download, after downloading we get the EXE file SP63043, double-click on it with the left mouse button, click Next
We select a folder to unpack the files; by default, we are asked to unpack the files into the SWSetup\SP63043 folder on drive C
Leave everything as it is and click Next
. The files were successfully unpacked into the previously specified directory.
Now we need to go to the specified path C:\SWSetup\SP63043
, the contents of the folder look like this
Here you need to go to the folder
The folder contains the following files
Next, insert the USB flash drive into our computer and run the file
Then a window appears
Click Start
, after which the necessary files are written to our flash drive.
After recording the files, a window will appear in which you need to click Ok
and remove the flash drive from the computer.
Next, take a flash drive and insert it into the USB connector of our server.
Then we perform the following steps on the server itself:
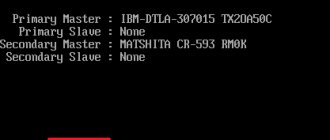
- Turn on the server and wait for the following message to appear:
Press F10 ROM-based Setup Utility
- Press the F10
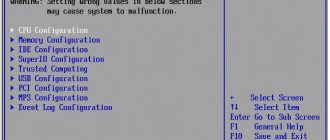
, thereby getting into the BIOS - Use the arrows to go to the Exit
- In the Exit tab, select Restore Default Settings
and press
Enter - In the window that appears, select Ok
and press
Enter - Next, press the F10
and in the window that appears, select
Ok
and press
Enter
, after which the server will restart, and all settings will be reset to default. - We are waiting for the server to load and the Next Please!!! message to appear. Start…
- After the BIOS has been flashed, the message flashing finished will appear. Please restart your system
- Reboot the server by simultaneously pressing the Ctrl+Alt+Del
- Removing the flash drive from the server
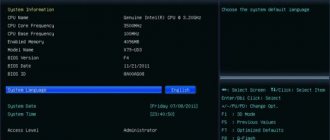
- After waiting for the reboot, you need to make sure that the HP System BIOS line indicates 07\01\2013
, and, if so, then the BIOS was updated successfully.
BMC firmware
Again, if you believe us, then you can immediately download the required file from our website ittelo.ru. If you don't believe me, then follow the steps further.
Go to Select driver language and OS
Driver language select English
Operating systems in English, select OS Independent
Then you need to scroll down the site a little and you will see the following content
We need the point where the BMC firmware of our server is located
Click download, after downloading we get the SP62696 EXE file, double-click on it with the left mouse button, click Next
Select the folder to unpack the files; by default, we are asked to unpack the files to the c:\SWSetup\SP62696 folder on drive C
Leave everything as it is and click Next
. The files were successfully unpacked into the previously specified directory.
Now we need to go to the specified path C:\SWSetup\SP62696
, the contents of the folder look like this
Here you need to go to the folder
The folder contains the following files
Next, insert the USB flash drive into our computer and run the file
Then a window appears
Click Start
, after which the necessary files are written to our flash drive.
After recording the files, a window will appear in which you need to click Ok
and remove the flash drive from the computer.
Next, take a flash drive and insert it into the USB connector of our server.
Then we perform the following steps on the server itself:
- Turn on the server and wait for the following message to appear:
Press F10 ROM-based Setup Utility
- Press the F10
, thereby getting into the BIOS - Use the arrows to go to the Exit
- In the Exit tab, select Restore Default Settings
and press
Enter - In the window that appears, select Ok and press Enter
- Next, press the F10
and in the window that appears, select
Ok
and press
Enter
, after which the server will restart, and all settings will be reset to default. - We wait for the server to load and the window with Ready to Flash appears, indicating the current firmware version and the version to which we want to update
- Press Enter and wait for the flashing to complete
- After the firmware is completed, the message ROMPAQ Flash Complete will appear
- Reboot the server by simultaneously pressing the Ctrl+Alt+Del
- Removing the flash drive from the server
- After waiting for the reboot, you need to make sure that in the lines BMC Firemware Version BMC SDR Version the value is not NULL, it should be 4.26 if so, then the BMC was flashed successfully
Where can I find the motherboard code?
Before updating the Bios on an HP laptop, you need to find this information that will help you determine the required BIOS file. You can find out the code like this:
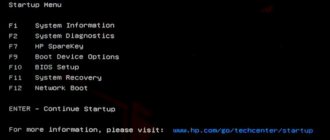
- at the very beginning of turning on the device, press the F10 button (can also be F2 or F6). You will be taken to the BIOS program menu;
- in the “Home” tab in the list of indicators, find the motherboard code (about the fifth one). Rewrite. It will come in handy during the update process;
- To close the program, use the same F10.
How to update the BIOS of a laptop (using HP as an example)
Good day! In general, you don’t have to update the BIOS very often (and I would warn anyone who is simply chasing a new version from this operation in advance.) . There usually must be good reasons for this:
- Errors have been fixed in the new BIOS version, which will make the device run faster;
- the old version does not see some equipment (or does not work with it correctly);
- New features have been added.
Well, I can’t help but say that if some error or failure occurs during the BIOS update process (for example, you tried to install a BIOS version not from your laptop, or your power went out and the battery ran out), there is a high probability that you will be able to restore the device’s operation on your own you will no longer be able to (note: there are devices that can restore the old firmware version; there are those that cannot). The laptop will simply refuse to turn on.
In addition, it is impossible to say with 100% certainty how the new firmware will behave (although, if everything is done correctly, in most cases everything is OK).
Now (with all the warnings out!) let's talk about how best to carry out this update.
If your device is under warranty, updating the BIOS may void warranty service!
How to open UEFI?
Before updating the Bios on an HP laptop if the system cannot start, you must open the UEFI menu. For this:
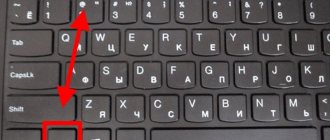
- At the very beginning of turning on the computer, press Esc on the keyboard several times. Repeat until the start menu appears;
- To start UEFI you need to press the F2 key.
Now you can start updating.
Final stage
In the last paragraph we talked about how to open UEFI. Now, assuming that it is open, you can proceed to the update:
- Insert the USB flash drive with the installer into the laptop connected to the network and select the firmware control line (sometimes BIOS) in the “UEFI Hardware Diagnostics for HP” menu;
- activate the refresh key;
- after the currently installed version appears on the monitor, click on the image selection line;
- Next, you must first click on HP_TOOLS, and then HEWLETT_PACKARD. Go to the folder with the BIOSUpdate image;
- When choosing the required version, you must compare it with the motherboard code. A zero must be present. If the code is 2332, then you must select 02332;
- select the update application key. The process has started;
- After successfully installing the new version, the laptop will reboot itself. In about 30 seconds.
MyHPmini
The easiest way is provided by the manufacturer using the InsydeFlash program. We go to the HP website. We find our model and in the list of drivers and other software we look for: “WinFlash for updating the BIOS system of HP netbooks - Microsoft Windows.” Yes Yes! On the HP website it is called WinFlash, although, after accepting the license agreement, it will be InsydeFlash that will launch. In the latter, everything is simple - 2 buttons: Start and Exit. Click Exit if you decide to think again, or Start if you are ready for the flashing procedure. In this case, the BIOS flashing process will start, which can no longer be interrupted UNDER ANY EVENT!!! That is why it is recommended to have a charged battery and connect power to the mains. Well... The method is the simplest. However, what should we do if we want to upload not the version supplied by the manufacturer, but something of our own (or provided by reliable, verified sources)? Let's take a closer look at the sp47030.exe file we downloaded with BIOS version F13 (for other versions there will be different numbers in the file name): it turns out that this is a self-extracting pseudo-installer archive ("pseudo" - because it actually does not install anything into the system, but only launches the desired program for execution). Let’s extract from it with WinRAR (or another favorite archiver) the only file it contains, 3651F13.exe (it’s easy to guess that Fxx at the end of the name is the version of the BIOS being flashed). This is the same program that runs from sp47030.exe after we accept the license agreement. Let's continue our research and again ask the archiver to open this new file. And oh, miracle! — we get a whole bunch of new files (you can immediately in the hotel directory if you ask the archiver about it). Here we immediately notice InsydeFlash.exe, which actually flashed our BIOS for us, as well as the file 3651F130.fd (about a megabyte in size), which contains the BIOS we need. Attention! There is also a similar file 3651F131.fd (already 2 megabytes), which we absolutely do not need! Well, have you guessed it? We edit it with a specially trained editor for InsydeBIOS (for example EZH2O_v2.1.0.4) or replace the 3651F130.fd file with one already patched by someone else. Now InsydeFlash will fill our BIOS with what we want, and not what HP wants