How to insert a button into the keyboard on a laptop
A laptop, unlike a personal computer, has a built-in dialing device, the cost of which is significantly higher due to its compact size and integral design. That is why its repair, including independent repairs, is constantly in demand and economically justified.
With prolonged use and active use, parts of the keyboard fall out or break, requiring replacement, quite often.
However, before you run to the service center, let’s try to figure out whether you can insert a button into the laptop keyboard yourself at home and, perhaps, save money and personal time.
Keyboard repair
Let's look at ways to repair keys on a laptop keyboard
There are two ways.
First way
If any fastening is broken, you can try to restore it using a needle from an insulin syringe:
- the needle is applied to the damaged part. It is better if it extends two to three millimeters beyond the edge of the breakage;
- Use a soldering iron to heat the needle and carefully fuse it into the plastic;
- Carefully bite off the excess plastic using side cutters.
Second way
If you don't have any tools, you can use superglue:
- heat the needle with a lighter;
- make a groove using lint from a comb or similar objects. The main thing is that the size of the groove allows the lint to enter;
- fix the lint with superglue;
On a note! The result can be checked in about an hour. Typically, the process takes about forty minutes to an hour.
Video - How to repair and insert laptop keyboard buttons
Possible reasons
There can be many possible reasons for keys breaking or falling out:
- excessive effort at work;
- a fall;
- increased suction power of the vacuum cleaner when cleaning;
- spillage of liquid;
- ingress of crumbs and other debris;
- child;
- pet and much more.
To understand what this leads to and determine the likelihood of self-repair, consider the following cases when one or more keys have fallen out or do not work:
- the upper part simply jumped out of the mounts, got stuck, the plastic mount broke, or the fixing lugs on the aluminum base of the keyboard were bent. — We install, repair or replace ourselves;
- there was a short circuit and/or destruction of the conductive paths due to a manufacturing defect, liquid ingress or other outside interference. — It’s worth contacting the service if you don’t have certain skills;
- damage to the cable connecting to the motherboard. — Replacement (preferably by a specialist) of the film or the entire device.
Taking into account the fact that the majority of users are amateurs, we will consider only the correction of breakdowns in the first case: mechanical damage.
To do this you may need:
- a regular needle or a syringe;
- paper clip;
- glue;
- knife, small screwdriver;
- wire cutters and pliers;
- thin soldering iron and lighter;
- small vice.
The first two positions of the list are enough to simply insert the dropped item, and the rest may be needed for minor repairs.
Important: Please note right away that all work must be carried out ONLY with the device disconnected from the network and the battery removed.
Types of keyboard mounts
There are two types of fixing the keyboard in the device:
- modern netbook and laptop keyboards are mounted on a special panel using plastic latches. Depending on the model and manufacturer of the device, there can be from 4 to 8 mounts. In order to see them, you need to look very carefully, since they are well hidden so as not to interfere with the design and appearance of the device, and not to disturb the user. Fasteners are usually marked with small notches. And this type of securing the keyboard in the device is the most common and complex;
- Less known, but more easily removed, are keyboards secured with screws. This applies mainly to old and rare laptop models.
As a rule, 1-2 screws are used for fixation. After unscrewing them, you just need to pry the keyboard panel with a sharp object.
Withdrawal procedure
If liquid gets on the keyboard, it is recommended to immediately turn off the power to the device to prevent leakage to the motherboard and other live parts.
After de-energizing your laptop, do not forget that the basis for its uninterrupted power supply is the battery, so you need to get it out. Only then can you begin to study the type of fastening and other operations.
You can remove the keyboard in a laptop yourself. The main thing is to exercise maximum caution. The fasteners are very fragile and break easily. To get started, you'll need a pair of small, thin socket head screwdrivers.
If you have a common type of fastening, you need to follow these steps:
- 1. You need to start with the latch located in the upper corner. You need to press it with a screwdriver without making much effort;
- 2. with the second tool you need to carefully pry up the corner of the keyboard;
- after that, you can move on to the next mount and so on.
When opening the first latches, hold them with a second screwdriver or other thin object. Do not use your fingers or rush, as the plastic of the device is not very thick and can easily crack.
Disabling the loop
After disconnecting the keyboard, do not forget that it is connected. You can't tug or pull it. It is connected to the motherboard using a cable, which is very easy to damage. Therefore, this must be done carefully and correctly.
The cable is located directly under the keyboard and is attached to it using a special lock. These fasteners can be of different types and require actions such as pinching the tabs, lifting the fastener, or lifting the spring latch to release.
If your goal was to replace the keyboard as a device, then the job is done.
Button and its design
Before inserting a button into the laptop keyboard yourself, we recommend that you become familiar with its design. This will help you carry out repairs correctly, as well as make installation easy and simple. It should be remembered and taken into account that, unlike a stationary one, a laptop keyboard has a shorter stroke.
They consist of:
- directly the lid with latches - a rectangular piece of plastic that is pressed with your finger (hereinafter simply “lid”). On the inside there are two pairs of fasteners: latches and grooves, and on the long ones there is also a metal stiffness stabilizer;
- folding X-shaped mechanism with latches that hold the lid. It is commonly called a "swing", "lift" or "cot". Please note that each of the two parts of the folding mechanism is attached to the key in two places;
- a spring element that raises and lowers the key, and also directly closes the electrical contact - a rubber nipple cone (hereinafter simply “spring”);
- films containing contact conductive pads and tracks.
A typical keyboard base in a laptop is an aluminum plate, stamped with ears for good fixation of the clamshell and the contact pad, under which there are three layers of film with conductive graphite tracks.
Reliable fastening of the swing ensures uniform movement and the absence of distortions when pressing the key.
Please note that different manufacturers may have slight design differences in the shape and types of clamps.
Therefore, if you need to disassemble it yourself for the first time, proceed carefully.
The main reasons for replacing a key on the keyboard
They can fall out for several reasons. Here are the main ones:
- a strong blow to the laptop or keyboard;
- independent attempt to remove debris from under the buttons. As a result, some of them may fall out;
- excessive pressure on the keys while working with a laptop;
- liquid getting inside.
There are several options for keys not working. Depending on this, you should carry out repairs yourself or contact specialists. If the reason is a short circuit or damage to the cable, then you should definitely contact a specialist.
Important!
The button has so-called antennae. If one of them breaks as a result of external influence on the keyboard, then it is necessary to completely replace the button. Otherwise, it will constantly crash. Replacement of the keyboard is required when the matrix is broken, as a result of which it is impossible to restore full functionality of one or more keys.
Disassembly procedure
There are often situations when it becomes necessary to completely remove and disassemble the button. For example, sinking, lack of response on the screen when it is pressed, or deformation of the folding bed mounting ears. Removing, disassembling and inserting a button into a laptop keyboard is quite easy.
To do this, you will need a thin, flat instrument, such as a dental hook. As you know from the previous section, the swing is attached to the lid in four places. You can’t just bend it and “tear it off” - this will deform the swing and lead to damage.
That's why:
- First, we insert the tool between the fastenings of the cover to ONE part of the elevator and, turning it slightly along the axis, snap it off. Then we lift it and similarly disconnect the other half. When the mechanism is raised, you will notice that the upper attachment points are movable and the lower ones are fixed. It is convenient to start removing the swing from the fixed mounts;
- remove the folding bed from the base. There are small design differences between different manufacturers and depending on the year of manufacture of the laptop itself, but usually the mechanism is fed forward to one of the fasteners for disengagement. Easy and quick removal will be ensured by a regular needle;
- If necessary, the spring is removed, the base ears are inspected or repaired, and additional dust is removed.
How to remove keys from an hp laptop keyboard
In some situations, it is not enough to know how to remove keys from an HP laptop keyboard, since it becomes necessary to completely remove it. In some situations, cleaning and replacing keys does not lead to the desired result. As a result, you need to remove the keyboard. By the way, with the keyboard completely removed it is much easier to disconnect all the keys.
To remove the keyboard, you need to use a thin screwdriver to remove the latches. It is best to start this procedure from the upper left corner. Having removed the latch, slightly raise the keyboard and begin moving horizontally. The main thing is to take your time so as not to damage the keyboard. The last thing left to do is to disconnect the cable. It should be said that the train is an unusually fragile element, so we proceed with caution.
In general, every user can figure out how to remove a key from an HP laptop. Moreover, such a procedure is quite easy to carry out at home. All that is required is to act carefully, take your time and be extremely careful. So, you are guaranteed to be able to remove and return the keys to their place.
GD Star Rating loading…
How to properly and quickly remove keys from a laptop keyboard, 1.7 out of 5 based on 3 ratings
Inserting a button on a laptop is very easy
First, we carefully inspect all the fasteners, ears, antennae and grooves again. If you have carefully studied the device and design, read the disassembly procedure, then putting the popped element back in place will not be difficult.
This process involves two simple steps:
- install the folding mechanism on a metal base - place it under the large one, then, pressing lightly, onto the 2 small ears;
- Using light pressure, we attach the lid to the clamshell (a slight click is heard), which we first fix with a regular paper clip in the raised position.
Please note that sometimes the lid will fall out along with the swing. In such a case, you should disassemble it, carry out an inspection, and only then install it. Moreover, first we insert the folding mechanism, and then the lid itself.
The described process may seem complicated, but you just have to try it once and you will see for yourself that inserting a button into a laptop keyboard is very simple!
Inserting a button
Now we’ll look at how to make a spacebar button on a laptop.
To work you will need super glue and a flathead screwdriver.
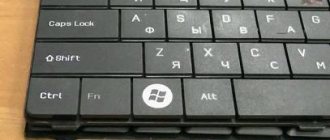
First we must pry the old key from the bottom on both sides with a screwdriver or a mild knife and pull it up slightly. In this case, the button should bounce off on its own. Malfunctions in operation could be caused by a breakdown of the system itself. If the system is really broken, then you should select some other button, for example Ctrl, Shift, CapsLock and remove it.
Installing large buttons
Function keys (space, register, tab, enter, etc.) are larger than the others. It is this property that requires a slightly different order of installation. The reason for this is the presence of a metal stabilizer, which ensures even pressure.
There are additional lugs on the keyboard backing for reliable fixation of the rigidity amplifier itself.
And although everything else is exactly the same as described above, we install long buttons on the folding bed in three stages:
- At the first stage we install the stabilizer.
We insert the ends of the fastening into special holes and fix them in the grooves that are located directly on the keyboard body;
- on the second - we press and connect the lower part of the surface of the lid with the clamshell;
- at the third stage, lightly pressing and snapping the upper latches on the lid and the swing, we put it in place.
Please note that some long keys (for example, the spacebar) are fixed by two folding mechanisms and a rigidity amplifier.


