Third step. Turn on images of objects that are hidden
To open such files, enable their display in “Folder Options”.
- When using “Windows 8” and “Windows 10”, enter a random folder and select “View”, “Options”.
- In Windows 7 , go to the folder and press ALT . You will see drop down menus at the top. Open “Tools” , and there – “Folder Options” .
- There is a window “Folder Options” , select “View” and scroll down to find the item “Advanced options” , where you need to uncheck the box next to the line “Hide protected system files” and enable the option “Show hidden files, folders and drives” " . Click "OK".
The files hidden by the malware should now be visible to you.
Explorer help for Windows 7 owners
The easiest and fastest way is to use Windows Explorer.
- Open “My Computer” through the “Start” menu, insert the USB flash drive into the port and double-click on it. In the top menu there is a “Service” section, by clicking on which you need to select “Folder Options” from the list.
In the “Tools” section, select “Folder Options”
- A window will appear where you also need to find “View” in the top menu. There are two thematic blocks in this tab; we will need “Advanced parameters”. There you will need to find the “Show hidden files” column and check the box next to it. Then the user needs to save the changes by clicking “Ok”.
Select “View”, activate “Show hidden files”, click “Apply” and “Ok”
- After these steps, the user will see a list of files, but their peculiarity is that they will not be able to work with them. Select all folders with the mouse and press RMB (right mouse button). In the list that appears, click “Properties”.
Select all folders with the mouse, right-click and select “Properties”
- The user will immediately see the “General” tab, where he needs the “Attributes” block, where there will be a checkbox next to the “Hidden” indicator. You need to remove it and save the changes.
In the “General” tab, uncheck the box next to the “Hidden” indicator
- The system will confirm the attribute change. You must check the box next to the second option, agreeing to change all selected folders. Click the “Ok” button, then “Ok” again, but in the same “Properties” window.
Check the box “To selected elements..” and click “OK”
After these simple steps, all hidden files will be visible again.
Fourth step. Opening files on flash
To enable the visibility of flash drive objects, select them and open “Properties”. There you need to uncheck the box next to the “Hidden” line and save by clicking “Ok”.
I note that once the infection has passed, the concealment may not be removed. Here it is better to copy objects to the PC and clear the flash.
How to hide a folder on a flash drive?
There is nothing complicated here. Create a folder and go to its properties (RMB - “Properties”). On the “General” tab, check the box next to the “Hidden” attribute and click OK.
We open the flash drive and see that the folder and files in it have become hidden. You can make them visible using the method described above.
Few people, even among experienced computer users, know that the system hides some folders and files from us. They can be made visible to the eye, but this is not advisable. The fact is that most hidden files and folders are system ones, i.e. necessary for the smooth operation of your operating system. Removing them can cause serious problems. But... knowing how to show hidden files will still be useful to you.
One type of computer virus works in such a way that we have to find out how to open hidden files and folders on the computer. This virus especially loves flash media. As soon as you insert a flash drive into a computer infected with a virus, your folders on it are converted into applications (i.e., they become viral), and copies of the folders become hidden. You come home, insert a flash drive into your computer and, like any reasonable person, check it for viruses using the installed antivirus program. This is where the problems begin... The antivirus program deletes infected files. Of course, you get upset, but what can you do? It’s good if one of the folders is still preserved on the computer itself, but when you try to copy it to a flash drive, the system only displays: copying failed, such a folder already exists. Yes, your folder is there, it was not deleted from the flash drive by the antivirus program, but you don’t see it. And here we return to the problem - how to open hidden files?
In the window of each folder (also in the window of an open flash drive) there are command buttons in the top panel, one of them is “Service”. By clicking on “Tools” we will find “Folder Options”. In the window that opens, select the second tab “View”. In the “Advanced options” list, somewhere at the end, find the “Show hidden files and folders” function, check the box next to it. But before you click OK, there's one more thing you need to do. In the same place, in “advanced settings”, but a little higher, find the inscription “Hide protected system files (recommended)”. Also put a tick (dot) opposite this inscription. The system will display a message confirming this operation; indicate your consent by clicking “Yes”. But now you can click “Ok”. The setup for all folders on the computer is completed, after this procedure you will be able to see hidden files on the flash drive.
Versions of operating systems are different for everyone, and it happens that this method is not available. How can I open folders if the “Tools” command button is not available on the window panel? You can find this function through the Start menu, in “Settings”, then “Control Panel”, and lastly - “Folder Options”. The same window will open, in which you should put a dot in front of the same inscriptions “Show hidden files and folders” and “Hide protected system files”. The settings will also be applied to all folders on the system. Open the flash drive and you will see the folders that have disappeared from view.
More experienced users will enjoy another way to display invisible files - through the Run command in the Start menu. This is a more complex method; perhaps only those with basic programming knowledge can do it. But it helps out in cases where the above setup method does not work, and also when a virus has penetrated the system so much that it has removed the “Service” command button from all folder windows. This recovery method should be entrusted to a specialist, since careless actions on your part can damage the entire operating system, and you will lose important information not only on the flash drive, but on the entire computer.
We now know how to open hidden files, but what to do next with these translucent folder icons? You can work with hidden folders in the same way as before, or you can make the transparent icon normal. Call the context menu with the right mouse button directly on the hidden folder icon. Select "Properties" from the menu that appears. A window will open, at the bottom of which in the “Attributes” section you will see that opposite the inscription “Hidden” there is a “tick” or a dot. This is what needs to be removed (with the left mouse button). Then click the “Apply” button at the bottom or immediately “Ok”.
After you have found the lost folders, returned them to normal, you can work with them again, after all this you should disable the function of showing hidden folders, just in case...
And one last thing. Run your antivirus program to scan your entire PC. This kind of virus settles on a flash drive and infects the entire computer. Don't underestimate the danger of this virus. So, for example, if the “Service” command button has disappeared in the window of any folder in the top panel, this is a clear sign that the system has been completely damaged by the virus. If your antivirus program has not been active yet, launch it immediately! A good antivirus program will clean your computer of the virus and any remaining traces of it on the removable flash card. The same cannot be said about the computer from which this virus came to you...
All operating systems allow you to enable or disable the display of hidden files. If you are using the Windows operating system, a virus or other malware may cause your personal data to disappear. We will tell you how to recover hidden files.
Another way using the command line
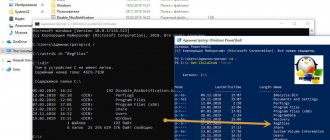
- There is also the option to solve this problem using the Command Line. Launch it and enter the letter of your flash drive, followed by a colon.
- Now enter the following data: attrib -s -h *.* /s /d
- In a short time, the program will solve the problem and the objects will become visible.
Just a moment, friends! If I have already started talking about flash drives, I advise you to read articles on the topic of a flash drive not being formatted, the disk is write protected or how to write Windows to a flash drive, as well as how to remove write protection from a flash drive. And finally, don’t miss to learn about why the computer doesn’t see the flash drive or how to set the BIOS to boot from a flash drive, as well as why you can’t format the flash drive.
Creating a bat file
You can create a simple script with your own hands that will independently “repair” all the data on the removable media. Follow a few simple steps indicated in the instructions:
- Open Explorer and go to the root directory of the flash drive.
- Right-click anywhere in the window to open the menu.
- In the drop-down list, you need to hover over the “Create” action, and then select “Text Document”.
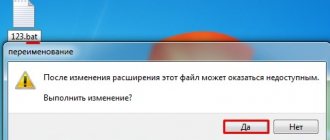
- The files created in this way must be given a name using the template “*any_name*.bat”. This will create an empty bat file.
- Open the document.
- In the text field, type or copy the following line “attrib -s -h -r -a /s /d” without quotes.
- Save your changes by pressing the S and Control keys simultaneously.
- Run the bat file.
The script you created will change the attributes of all objects located in the current folder in just a few seconds. If you need to open the visibility of information on another medium, simply copy the script onto it and run it.
System Restore
If the virus has recently appeared, then this method may help. Press Windows + R to open the execute window, insert “rstrui.exe” there, the system recovery window will open, click next, select the desired setting point by date, then the system will ask you are you sure, click “OK” and the system setting process will begin. After recovery, a window should appear indicating that the process was completed successfully.
At this point, perhaps, in most cases, all of the above methods should remove virus shortcuts, but if they do not help, then copy the hidden files to the computer and completely format the flash drive, then copy it back and change the attributes.
back to top
- < Back
- Forward >
Making folders visible using TotalCommander
Here the process is much simpler and faster than in the first option. To do this, of course, you need to have the TotalCommander file manager program. We launch the program, select display of the drive in one of the windows.
The program is very easy to set up. In the top menu, select “Configuration” - Settings... - Panel contents - Display files - check the box “Show hidden/system files”.
Let's look at the picture:
After this, we can freely see all hidden files; by default, they will be marked with a red exclamation mark.
Then we make hidden folders visible, that is, we remove unnecessary file attributes.
Let's look at the picture:
If the level of infection of the folders is of the second level, then all the folders will become visible; all that remains is to follow the point marked IMPORTANT from the first part. If it was not possible to remove the file attributes, then we proceed to the use of heavy artillery.
For several years I have not encountered a virus that hides files and folders on a flash drive (I say hello to the library of Nekrasov KSTU). In a nutshell what this virus does:
- the virus hides all files and folders on the flash drive from the user by assigning them the hidden and system attribute. The thing is that Windows, by default, does not display files with such attributes and the user simply does not see them.
- the virus creates shortcuts instead of your files and folders , and when you click on them, the virus starts. Thanks again to Microsoft, file extensions are not displayed by default.
- in the trash, a copy of the virus is created on the flash drive , this could be, for example, RECYCLER\f4448e25.exe
- also created, autorun.inf , which until recently was very actively used on CDs (DVDs) and migrated to flash drives. It was a convenient thing: insert the CD and the driver or game installation program immediately starts. Virus developers have found another use for the autorun.inf file - launching a virus)
What does the user see? Users do not notice anything, it launches shortcuts that launch the virus and then open the desired file or folder. But, if you insert a flash drive into a computer on which a simple antivirus is installed, the antivirus will delete all shortcuts, the autorun file and the virus file from the recycle bin. The user, in this case, will see an empty flash drive and will “beat himself on the cheeks with his ears.”
But, in fact, nothing bad happened , you just need to check the flash drive for viruses again (I recommend ESET) and display hidden and system files . I would recommend two methods (the simplest ones, let’s not get too carried away):
Method 1. For those who are at least somewhat familiar with the command line:
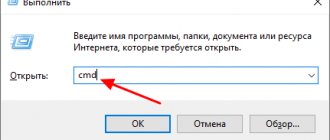
- Start -> Run -> cmd
- Go to the USB flash drive by typing the drive name at the command line, for example e:
- Run a command that will remove the “hidden” and “system” attributes from your folders (files) and show hidden files attrib -S -H /S /D Wait until the command finishes executing.
Method 2. For the lazy:
- Download the showFiles.bat file
- Copy it to a USB flash drive.
- Run showFiles.bat
- You need to wait a little, it all depends on the size of the flash drive, maybe 10 minutes.
We need to explain how we showed the files on the flash drive that were hidden by the virus:
- ATTRIB command is used to display and change attributes of files and directories from the Windows command line
- -S — removes the “System” attribute, in the case of +S — sets the attribute
- -H — removes the “Hidden” attribute; if you do +H , it will set the attribute.
- /S - Processes files with the specified names in the current directory and all its subdirectories.
- /D Process files and directories.
- If you do not specify file names on the command line, ATTRIB assumes *.* and acts on all files in the current directory.
In the comments you can ask questions, describe situations that I did not provide for.
