A lot of time has passed since the world saw the Windows 10 operating system, but still, many users reject the product and remain supporters of the proven Windows 7. This article will discuss how to install Windows 7 on Windows 10. We will discuss all possible solutions this issue and the nuances arising in connection with this.
You can roll back the operating system after an update only if the previous OS was saved as a copy. If “Ten” was installed on your PC by default or the disks were formatted before installing it, only a clean installation of the system will help.
You can install Windows 7 instead of Windows 10 using one of the following scenarios:
- Windows 7 has been updated to Windows 10 and no more than a decade has passed since the update period. There must be a Windows.old folder on your disk, where all the files of the previous system are stored;
- The old system has not been preserved and we need to install it again.
Returning to Windows 7
Rolling back to the previous edition of Windows and saving all existing data can be done, as we already wrote, only during the first 10 days after the update itself (previously a whole month was allotted for this, but after taking a number of points into account, the developers decided to reduce the figure by three times).
If the deadline is missed and more than 10 days have passed, skip this section and proceed to a “clean” installation of the system. This period is determined by the deletion of the folder with the saved data of Windows 7. In order not to clog up the hard drive, “Ten” erases them after you have worked with the new OS for some time and realize that you are happy with it.
During the process of returning to "Seven", all changes made in Windows 10 will be canceled and the files will be permanently deleted. Your computer will return to the state it was in before the update occurred.
According to our recommendation and the advice of Microsoft itself, before starting a rollback, be sure to create a backup copy of all existing data.
Creating bootable media
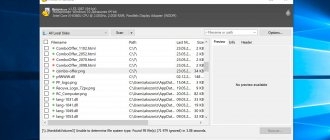
Now, to install Windows 7 after Windows 10, you need to create a bootable USB flash drive. You can use any programs designed for this. However, the best option, which is recommended by most experts, is to use the Rurfus utility.
In this portable program, you just need to select the desired image file, and the remaining parameters do not need to be changed (especially since the application will set them automatically and without your participation).
Downgrade from an existing version of Windows 10
This option involves using the resources of the system itself to return the PC to its previous state. Let's get started.
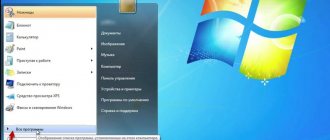
- Let's go to the Windows 10 settings. To do this, open the Start menu and click on the gear icon indicated in the screenshot.
- We go to the section indicated in the picture with a red circle.
- In the left half of the window, select the “Recovery” item, and on the right side we find the inscription “Return to Windows 7” and click on “Start”.
- We indicate the reason that prompted us to return back to Windows 7.
- We will be asked to check system updates: supposedly, if we install them, Windows 10 will become better and we will change our minds about leaving... but no, we refuse.
- We are reminded once again that the process will take time, that we will need to reinstall programs and re-configure the system. We don’t listen to anything - click “Next”.
- Microsoft's final argument will be the possibility that we have forgotten our password and will not be able to log in. Click on “Next” anyway.
- When all the arguments have been exhausted and the system understands that we are not going to leave everything as it is, we will finally be allowed to roll back.
- The system will reboot.
After this, if all goes well, you will see the familiar Windows 7 screen again.
How to install Windows 7 and Windows 10 on the same computer
Two operating systems on one computer open up serious prospects for us. We can test another version or build without losing the old system. In the environment of one system we will be able to run software that is incompatible with another. If one of the systems undergoes a critical failure and cannot start, while the bootloader remains intact, without any Live disks we will go into the second system and, if we do not fix the first, then at least we will save our data, configured program files and reinstall the problematic system. How to install Windows 7 and Windows 10 on the same computer? These are the two most popular versions of Windows: one is fast, understandable and predictable, the other is unstable and heavy, but this is the point of evolution of this operating system reached here and now.
In this article, we will look at two ways to install Windows 10 on a computer with an existing Windows 7 system. We will install Ten on one hard drive, but on a different partition. However, if you have two or more hard drives connected to your computer, the installation procedure will not differ from the one below. It’s just that with these installation methods, the two systems will have a common bootloader. In order for Windows to have its own separate bootloader on the second hard drive and be able to boot autonomously, slightly different actions are needed. And this is a completely different story. Let's return to our story: let's prepare a partition for Windows 10 on which we will install it.
Preparing a partition for a second Windows
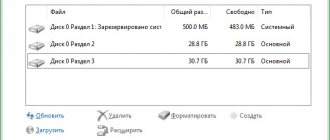
If your hard drive is partitioned and there is already a partition structure on it, you just need to select one of them for Windows 10 that is most suitable in weight and format it. If there is no such partition, you can create it specifically by separating the disk space from one of the large partitions. In our case, we will create a partition for Windows 10 during the disk partitioning process, which contains only Windows 7 system partitions. We will do this using standard disk management. To launch this utility, press the Win+R , enter: diskmgmt.msc and press Enter .
Our picture is as follows: we have a small 200 GB hard drive with MBR style, with boot and system C partitions for Windows. We will divide the entire section C into three parts and form a section for “Ten”, also for data storage. On section C we call the context menu, we need the “ Shrink Volume ” item.
In the “ Size of compressed space ” column, enter the value indicated above in the “ Space available for compression ” column. Click “ Compress ”.
On unallocated space, we need to call up the context menu and select “ Create simple volume ”.
Click “ Next ”.
We indicate the size of the new partition, the one we are creating for Windows 10. Our case is a test case, we will not actively use “Ten” in the future, so we will allocate a little less than 50 GB for it. But to fully work with the system, the volume of its partition should be 70-100 GB. Click “ Next ”.
" Next " again.
Label the partition “ Win10 ”. Click “ Next ”.
Ready.
Using exactly the same principle, we create a section for data labeled “ Data ” from the remaining unallocated space. The disk space is allocated, the partition for Windows 10 is ready.
And you can start installing “Ten” using any of the two proposed methods.
Classic Windows 10 installation from bootable media
Installing a second Windows is no different from a regular reinstallation, except that at the stage of assigning the installation location of the system, you must specify a different disk partition. Therefore, for this process you need everything the same as usual:
- ;
- Write it to a bootable USB flash drive.
We boot from the flash drive and go through the steps of the system installer.
Click “ Install ”.
If you don’t have a Tens license key, we postpone entering it.
We choose the editor.
We accept Microsoft's terms and conditions.
Click on custom installation.
And here we indicate the partition prepared for the second system, in our case it is the one labeled Win10. If there is no label, we focus on the sizes of the partitions.
The files of the installed system will begin to be copied.
Next, the computer will reboot and we will see the Windows bootloader menu. Here, accordingly, we need to select “Ten” to continue its installation. The bootloader menu can later be edited by clicking the option to change values at the very bottom. When editing, we will be able to specify a different time for the startup timer of the system that is first in the queue. As well as we will be able to change the priority system for launch.
After the background installation of various Tens drivers, we will move on to the stage of creating a user profile.
This process is described in detail in another blog article dedicated specifically to installing Windows 10.
Installing Windows 10 from Windows 7
An alternative to the classical method discussed above is to install a second system from the environment of the first one using special software. This method is convenient because it does not require creating bootable media. The programs WinNTSetup, WinToHDD, Dism++ can install Windows from the working system environment. They all have their own features, but the latest Dism++ is perhaps the simplest. We will choose it as a working tool.
It is free, download it here: https://www.chuyu.me/en/index.html .
But before you start working with Dism++, you need to prepare a Windows 10 distribution kit - mount an installation ISO image to display its contents in Windows 7. The latter does not know how to natively mount ISO, so you will have to resort to third-party software like Daemon Tools, Alcohol 120% , UltraISO, etc. In our case, UltraISO came to the rescue. In its window, press the Ctrl+O , click the ISO file with the Windows 10 installation. Click the image mount button and click “ Mount ”.
The image is mounted, now we launch Dism++. Click “ File ”, then “ Apply image ”.
We fill in the two lower columns: in the first we indicate the path to the file install.wim (or it can install.esd ), which is located in the “ source ” folder on the disk of the mounted ISO image. In the second column we indicate the Windows 10 installation section, in our case it is section E. Next, in the “ System ” column we indicate the “Tens” edition. At the very bottom, check the “ Add.load” option. " Click " Ok ".
We confirm the process in the notification about adding information about the new system to the bootloader.
We are waiting for its files to be copied to the partition of Windows 10 being installed. Upon completion of this process, we will receive the following notification from Dism++.
Now we can reboot, select “Ten” in the bootloader menu and go further with the installation process - create a user profile.
What to do if Windows 7 stops starting after updating
If something went wrong during the update and Windows 10 does not allow you to install Windows 7 (which is often the case in Microsoft OS), the situation can be corrected. To do this, you will need an installation flash drive or disk. You can read how to record such media here.
Next, follow our step-by-step instructions:
- Boot your computer from the installation media and in the first step, click the “Next” button.
- In the next step, click on the line indicated in the screenshot.
- Here we choose the first option.
- In the newly opened window, select the “Return to previous version” option.
- Once again we confirm our intention and click on the boxed item.
After this, the recovery itself will begin, which duplicates the process described above, with the difference that we launched it from the system settings.
Problems installing Windows 7
When installing Windows 7, various problems may also arise. Let's look at a few common ones.
Windows 10 does not start after installing Windows 7 as a second system
Have you installed Windows 7 next to Windows 10, but at startup you are not prompted to select the old operating system? In this case, make sure that you do not mix up the partitions during installation. If you installed Windows 7 on top of Windows 10 or on the same partition, the reason for the malfunction is clear. If everything is correct with the partitions, then do the following:
- Search the Internet and download the bootsect utility. Place it in the root of the system drive (for example, C:).
- Press the Win+R key to open the Run window and enter the command c:\bootsect /nt60 all /force.
Enter the command c:\bootsect /nt60 all /force into the Run window and confirm the entry
- After entering the command, restart your computer. You will be able to choose between two installed systems.
After entering the command, you will be able to choose which operating system to boot
Clean installation
This installation involves removing the old system and installing a new one. In this case, you can complete the process in two ways: without deleting the files of the old Windows and with it. We will use the second option.
In order to install the system, we do not need a license key. We can enter it later, when Windows is already installed.
There are 2 options when entering a key is not required at all:
- This PC or laptop previously had a licensed Windows 7 installed, which we updated to “Ten”;
- we did not format the disk partition on which the system was installed.
The same conditions remain relevant when installing another “Seven”. For example, if you had Windows 7 32 bit, and you uninstalled it and installed a 64 bit system, the license remains.
Don't forget to back up all the data you have on your hard drive. Simply copy the files to a second partition or removable drive.
Methods to return to Windows 7
At the time of the release of the Windows 10 operating system in 2020, all users had the opportunity to switch to it free of charge for 6 months. If for some reason the user did not like the new product, Microsoft allowed them to roll back to the old version that was installed before the update within 30 days from the date of installation. Today, users no longer have this option.
The exception is the case when “Seven” was installed on the laptop by the developer and you can roll back to it from any installed system. In other cases, you need to make backups of browsers and other programs, and then save them to a removable disk. And install the OS in the traditional way, formatting the hard drive.
Refund if more than a month has passed
If the month has expired, you will not be able to return, since there will be no “Start” function. Therefore, only loading from external media is offered. The activation key may no longer work and you will have to contact Microsoft technical support.
The top ten has its shortcomings, and the desire to return to the stable top seven arises not just out of whim, but out of necessity. Technical support does not provide information on fixing bugs, it remains silent, but according to unverified rumors there is another way. It can be used when there is a hopeless situation and there is nothing more to lose. Take risks if the image is missing.
To do this, rename the new system folder $Windows.~BT (or $Win...~WS) to Win...Old . After these manipulations, the option to rollback, with the offer to return to the previous version, should appear. If this does not happen, you will have to use a boot disk or other media.
How to return Windows 7 after installing Windows 10 on a laptop via BIOS
A situation often arises when it is not possible to roll back to the previous version, even if the month of using the “ten” has not ended. Is it possible to recover through BIOS? The answer is clear - no. Through bios you can check the settings and swap the devices from which you will boot first. You cannot get “seven” after Win 10 on a laptop or PC through the BIOS.
Using the F9 button, you can restore to factory settings if the archive with the files has been saved (that is, there have been no reinstallations on the computer).
Via command line
In what cases can the command line help? If during a rollback they ask you to delete your account, and you don’t understand where it is, then the CS will come in handy. Open it as an administrator, enter the following: Net user Windows manager / enter the account name / del, press Enter.
The same actions, but without the CS, can be solved more radically. To return Windows 7 after installing Windows 10, when you need to deal with accounts that you did not register, you need to:
- On drive C: open the User folder.
- Delete all accounts except your own.
If the start does not work
Start not working in Windows 10 is the most common bug. The main reasons for its occurrence are changes in registry settings that occur after cleaning or installing old programs. Often, owners cannot understand why certain applications refuse to work. Below are some tested solutions.
Method number 1. Using the keyboard, type Ctrl + Alt + Del, the task manager window will appear. Go to the Details tab, then File and click on Run a new task. In the line that appears (Creating a task), enter PowerShell. In the checkbox, check the box to obtain admin rights. OK or Enter. Enter the text Get-AppXPackage -AllUsers | Foreach {Add-AppxPackage -DisableDevelopmentMode -Register "$($_.InstallLocation)\AppXManifest.xml"}. Confirm (OK). Sometimes you need to restart your PC or laptop (ignore red errors).
Method number 2. Type Win + R from the keyboard and open the Run window. Type regedit – Enter or OK. In the window that appears, click the Edit option, in the Find context menu, insert EnableXAMLStartMenu (or EnableStartMenu), and wait for the result. Check its value, it should be 0. If otherwise, then (context menu - change) set it to 0 (zero). Reboot.
Method number 3 . Right-click on Start while holding Shift . Select (if possible) “End... or Exit... Reboot ”. From the proposed list of actions - Diagnostics . Next – Rollback or Restore. Installed programs will not be saved.
Method number 4. Download the FixWin 10.0.1.0 utility. from Microsoft, which automatically fixes bugs, including problems with Start. There is no need for manual setup mode.
