Unfortunately, it is not possible to upgrade Windows XP to Windows 7. This uses a complete installation of a new operating system. In this article we will tell you how to transfer files from your computer and reinstall the software.
First, decide which version of the operating system suits you:
- The 64-bit version is designed to handle large amounts of memory, but not all computers support this version.
- The 32-bit version can be installed on almost any machine.
You can read more about the OS bit depth - 64 or 32 bits
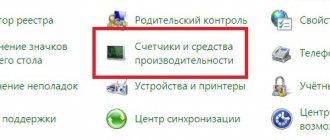
In order to find out which version is suitable, you need to:
- Start - My Computer - Properties.
- If you have 64-bit Windows XP installed, the operating system information will say “x64 Edition.” If there is no such inscription on the computer, the 32-bit version is used.
Clean installation of Windows 7 instead of Windows 10
By a clean installation of Windows 7, we mean deleting the previous copy of Windows 10 with or without formatting the system partition. In essence, it is no different from installing Windows on a new computer: you will need bootable media with the distribution kit and a key to activate the OS, since the “tens” license is not retroactive. And yet, you have a small chance to do without purchasing a new license if 2 conditions are met:
- this computer previously had a licensed Windows 7, which you subsequently upgraded to Windows 10;
- the partition in which the licensed system was located was not formatted.
It is important to observe the same conditions when installing a new “seven”: it must certainly be the same version and bit depth as the old one (if the old one was 32 bit, and you install 64 bit, the license will be invalid). In addition, during installation you must save all data on the system partition of your hard drive.
If maintaining the license is not critical for you, the edition of the newly installed system can be any.
Preparation
We talked about how to create media with a Windows distribution kit and how to boot a computer from it in an article about methods for a clean installation of Windows 10. To write a bootable USB flash drive of the Windows 10, you can use the same utilities, except for Media Creation Tools, since it is intended only for working with the “ten”.
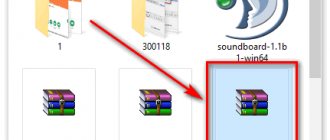
To create a DVD installation disc, simply burn a Windows 7 ISO image downloaded from the Internet to it using any suitable program (Nero, UltraISO, Alcohol 120%) or native Windows tools. If you choose the second option, place a blank disc in the drive, open the context menu of the ISO file and click on the “Burn image” item.
Installation progress
Starting the installation process for Windows 7, like other versions of Windows, is possible in two ways:
- If your computer has Windows 10, which boots and works normally, just open the distribution package and double-click on the Setup.exe file.
- If “ten” does not load or the installation program in it does not start for some reason, you should turn off the computer and boot it from the distribution media.
Further actions for both options are the same. Let's take a closer look at them.
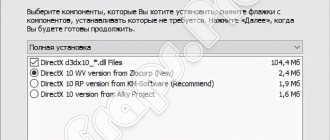
- In the first window that the installation program opens, you have to select the main system language, date and time formats, currency units and keyboard layout.
- This is followed by the launch of the installation process itself. Click the "Install" button.
- Agree to the license terms.
- Select your installation type. The “Update” option (with saving user files, programs and settings), unfortunately, will not work. This is only possible when the computer already has a working copy of Windows 7, so choose the full installation.
- Next comes the most important part: choosing the hard drive partition where the new system will be located. If you hope to keep the license, put the system on the same partition as Windows 10 and do not format it. If not, you can not only format, but also resize the partition. Click Disk Setup.
- To change the capacity of a partition, click the “Create” button and indicate its new size in the appropriate field. Apply the setting and click “Next”.
- When the installer prompts you to create an additional partition for system files, click OK. If such a partition exists (and during re-installation it should exist), this window will not appear.
- Now you can format the disk partitions. If you skip formatting the system partition, the old copy of Windows files and all other data will remain in place, but will be moved to the C:\Windows.old folder. By the way, there are times when Windows cannot be installed without formatting. The reason is the lack of free space in the system partition.
- When you click the Format button, the installer will warn you that all data on the drive will be destroyed. If you agree, click OK.
- Then you can rest a little: copying and unpacking files of the new OS, installing components and updates does not require user participation. This stage lasts on average 20-40 minutes.
- After several reboots, you will see a window asking you to enter the names of the first user and computer. The account that is created during installation has system administrator rights.
- Next you will be asked to protect your account with a password. If you do not plan to use a password to log into Windows, leave these fields blank.
- The next window is for entering the product key. If you have one (usually found on a company label glued to the bottom of the laptop), fill out this field. If not, or if you plan to enter it later, click Skip. Also, do not forget to uncheck the box next to the offer to automatically activate the system when you connect to the Internet.
- After entering the key, the setup program will offer to download and install Windows 7 updates. Selecting “Use recommended settings” can delay the installation process for several hours - it all depends on the Internet speed and the size of the downloaded files. If you want to finish the installation faster, click “Delay decision”.
- Set the system time and time zone.
- Specify your computer's current network location. You can choose any, but for safety reasons it is better to choose “Public”. Later, when you install an antivirus and firewall, you can change this setting.
- That's almost all. It remains to wait until the “seven” finishes applying the parameters.
- Preparing your desktop takes just a couple of minutes.
And here, finally, is what you were looking for: the Windows 7 desktop. So far, it is completely empty. There is no trace left of what was in Windows 10, because you reinstalled the system completely. All you have to do is install programs in it - and you can start using it.
Windows Anytime Upgrade options
How to upgrade windows 7 home to professional or ultimate part 1-0
Here is my test site, I have a virtual machine on the VMware ESXI 5.5 hypervisor with Windows 7 Home Premium installed. To switch to Windows Anytime Upgrade, you need to click Get access to additional features by installing a new edition of Windows 7
How to upgrade windows 7 home to professional or ultimate part 1-02
Or through the Start menu
How to upgrade windows 7 home to professional or ultimate part 1-04
As a result, the Windows Anytime Upgrade program window will open. There are two options
- Connect to the Internet and choose the edition of Windows 7 that suits you best - you're essentially sent to the store
- Enter the update key - our option assumes that you have the key. Below I will give a link to a generator that will give Windows 7 anytime upgrade update keys
How to upgrade windows 7 home to professional or ultimate part 1-03
How to switch to Windows 7 while maintaining program settings?
There is an opinion among ordinary Internet users that the new operating systems of the Windows family are no better than previous versions. This is fundamentally incorrect; as a rule, the new version is more stable than its predecessor.
Once you install the OS and configure it as necessary, the system can serve you faithfully for a very, very long time! Provided, of course, that the user clears it of debris in a timely manner and does not experiment with it.
Over time, the OS is “filled” with various programs, each of which retains its own settings for the user. Also, over time, the user accumulates data in the folders My Documents, My Pictures, My Music
etc.
Naturally, when the need arises to upgrade to a new version of the OS, many users refuse to do so for fear of losing personal data and program settings.
Today I will tell you about a program that will do everything for you.
Problematic issues of transition to a new OS
To upgrade to a new OS version you must do the following:
- find the distribution kits of all applications installed on the PC and save their settings;
- then, after installing the new OS, install all applications and reconfigure them accordingly.
Why can't you just copy the programs you need and paste them in a new location?
1. Firstly, programs during their operation use many service files, which are scattered throughout the system partition (in the Windows,
Program Files, My Documents, Common Files, Users
, etc. folders). Of course, it is possible to collect them, but it is very difficult.
2. Secondly, when installing programs, they usually save separate service information in the system registry. Therefore, in order to correctly transfer the program to a new OS, it is also necessary to transfer the corresponding system registry keys.
3. And the last difficulty that you may encounter when switching to a new OS is that some programs save information about the current system configuration. And therefore, when transferring programs, it is necessary to correct this information correctly.
An effective solution for a safe transition to a new OS
Parallels
Desktop Upgrade to Windows 7 ( PDU to Win7)
is the solution that I use and recommend to my friends.
To make the transition, you will need a disk with the Windows 7 distribution. If you still decide to transfer the system to another computer, you will need an external storage medium on which you can temporarily save the settings.
I should immediately note that PDU
to Win7
supports migration of any version of Win XP and Vista OS to any version of Win7 OS.
The undoubted advantages of the program include the fact that PDU
to Win7
will ensure the operation of even those programs that are not compatible with the new version of the OS. Which I was pleasantly surprised by.
This is achieved due to the fact that the program implements a well-proven virtual environment (implemented in Virtual
Box
and
Virtual PC
).
I would like to note right away that the program is not capable of correctly transferring cumbersome applications that operate at the system kernel level to a new OS. Such programs include antivirus packages (I had a problem with Kaspersky), MS Office, Photoshop, etc. The error was mainly due to incorrect license transfer.
PDU
Win7
operation options :
- updating the system while saving important programs and files;
- transferring all documents and installed applications to another computer.
Transition from Win Xp to win7
1. The first step is to purchase the software you need.
2. Then launch the program distribution package. The first thing the program will do is check for updates on the developer's website. The Migration Wizard will then prompt you to select the option to install a new operating system.
3. Next, the program will once again warn you about possible problems with transferring licenses of some programs and offer you to select a data transfer option:
- standard transfer (transfer all data);
- selective transfer (select programs that need to be transferred).
4. Next, PDU
to Win7
will prompt you to read the license agreement and activate your copy of the program.
5. Next, the Migration Wizard will copy the data it needs to your hard drive and will be ready for the update procedure.
6. Insert the installation disk with a copy of Windows7 into the computer drive, specify the serial number of the OS to be installed and wait while the Migration Wizard installs the new system.
7. You will then be prompted to install OS updates. And, voila, the transition to the new system has been successfully completed.
Virtual environment
After installing the new OS, you will actually have two systems installed: Windows7 and virtual Windows (old version). To start the virtual machine: click Start
-> click on
“Use Windows XP”
-> a
Parallel Desktop
with Windows XP running.
All! Now you can work in two operating systems simultaneously. If you need to edit the settings of the virtual system, click
the menu item
“File ”
->
“Settings... ”
Parallel
Desktop and make the necessary changes.
It is also possible to tell the application which programs will automatically run in the virtual environment. To do this, in the Start
select
Parallels
->
Program Switcher
. In the window that opens, specify programs that will automatically launch in the virtual environment.