In the Windows operating system, all objects are designated by their icons, with the help of which the necessary actions are performed, for example, starting a program, opening a window, etc. For any object in Windows, you can create several icons by placing them in different places on the computer.
These icons are called "shortcuts". You can distinguish a shortcut from a file by the small blue arrow located in the lower left corner of the icon.
The arrow indicates that the shortcut is associated with a specific object in Windows. Shortcuts make the operating system easier to use, allowing you to quickly access files or programs.
Some users need to remove the arrow from the Windows shortcut. Why might this be needed? Perhaps due to the user's aesthetic ideas about how Windows elements should be displayed on the PC screen.
A shortcut is essentially a reference to an object. The program itself, file or system element is located in its place in the operating system by default, and the shortcut can be freely placed in any other convenient location on the computer.
The shortcut can be moved, deleted or renamed, or a new one can be created, without the original file itself being affected in any way. If we create a new document or some other file on the Windows Desktop, it will no longer be a shortcut, but an object itself. There are no arrows on such files.
How to remove arrows from labels? There are several ways to remove arrows from icons in Windows.
Despite the fact that some users want to remove arrows from shortcuts in Windows 7, Windows 8.1, Windows 10, I do not recommend doing this due to the risk of negative consequences. It will be impossible to distinguish by eye where the shortcut or the file itself is located, so when working on a computer, erroneous actions with objects are possible, for example, deleting necessary and important files.
In this article, you will find instructions on how to remove blue arrows from shortcuts, as well as how to put arrows back on icons after removing them. To do this, we use a system tool - Registry Editor and third-party software - the Winaero Tweaker program.
How to remove arrows from Windows 10 shortcuts - 1 method
You can remove arrows from icons by making changes to the Windows system registry. After making changes to the registry settings, icons without arrows on the desktop will appear on the computer, which in fact are actually shortcuts.
Before making changes to the Windows operating system, back up the registry or create a system restore point.
Follow these steps:
- Open Registry Editor.
- Follow the path:
HKEY_LOCAL_MACHINE\SOFTWARE\Microsoft\Windows\CurrentVersion\Explorer
- In the Explorer section, create a section called Shell Icons.
- Right-click on an empty space in the Registry Editor window.
- From the context menu, first select New and then String Parameter.
- Give the created parameter the name “29” without entering any other values.
- Restart your computer or restart File Explorer.
After completing these steps, the arrows will disappear from the shortcuts, but these icons are still shortcuts.
You can easily verify this by right-clicking on the icon and selecting “Properties” in the menu that opens. In the window that opens, in the “Shortcut” tab, information about the object on the computer to which this shortcut is attached will be displayed.
To return shortcuts in Windows 10, do the following:
- Enter the Registry Editor, follow the path:
HKEY_LOCAL_MACHINE\SOFTWARE\Microsoft\Windows\CurrentVersion\Explorer
- Remove the "Shell Icons" key from the registry.
- Restart your computer or restart Windows Explorer.
How to remove arrows near icons
This procedure is performed by editing the system registry. It should be noted that the system registry is a system-critical database of low-level settings. Therefore, you should not change these parameters blindly, or simply delete different keys. Thoughtlessly editing the registry can cause the system to perform poorly or fail altogether.
For reference : before proceeding directly to the instructions, we advise you to create a Windows restore point. This way you will create a backup copy of the system registry and, if something goes wrong, you can quickly return everything to its original form. Creating a Windows restore point won't take much time, but it will save you headaches in case of an error or unexpected result.
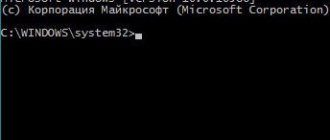
- Press Win + R and type regedit . You can also open the Registry Editor using other methods you prefer. Fortunately, there are a lot of them in the system.
- In the Registry Editor window, click on the address bar located under the application menu at the top. Then paste the address below there. You can also manually go to this branch, but we recommend copying and pasting the path so as not to get lost in the jungle of the registry and accidentally wander into the wrong section.
Computer\HKEY_LOCAL_MACHINE\SOFTWARE\Microsoft\Windows\CurrentVersion\Explorer\Shell Icons
- Right-click on the empty field on the right side of the window and select New – String parameter .
- Name the created parameter 29. After that, double-click on it and in the field Meaning enter the following:
%windir%\System32\shell32.dll,-50
- Click OK and close the Registry Editor window.
- Now you need to restart your computer, log out, or simply restart Explorer. To do this, open File Explorer and then open Task Manager . In the list of processes, find Explorer , click on it, and then click on the Restart in the lower right corner.
- After this, you will notice that all shortcuts have gotten rid of the annoying arrows in the lower left corner.
There is a high probability that this method will only work until the computer is rebooted for the first time (it will work without problems on earlier versions of Windows 10). After this, large black squares will be displayed instead of arrows, which is even worse. In this case, you need to do the following:
- Delete the created key 29.
- Download the blank transparent icon from the link. It will be used instead of arrows.
- Place the icon in a safe place where it cannot just disappear. For example, C :\Windows\icon.ico .
- Now open the registry editor and go to the path:
Computer\HKEY_LOCAL_MACHINE\SOFTWARE\Microsoft\Windows\CurrentVersion\Explorer\Shell Icons
- Create a string parameter and call it 29.
- Double-click on the created key and in the Value enter the address of the downloaded icon. In our case, this is C :\Windows \ icon.ico . Click OK and restart your computer or Explorer.
- Now the icons will be displayed normally without arrows and annoying black squares.
The shortcut arrows are designed to allow the user to easily distinguish between a regular file and a shortcut. Deleting the latter will leave the file on the system (only the empty link will be deleted), while deleting the file will also cause the shortcut to fail. Therefore, it is important to understand what exactly you are deleting - the final file or shortcut. Since you just removed the shortcut arrows, the links now appear as regular files, so there is no visual reference. To check what type of file you are deleting, right-click on it and click Properties . Go to the General the File type setting . If it is indicated there that this is a Shortcut (. lnk ) , then it can be freely deleted if necessary, without worrying about the safety of the file itself to which this shortcut refers. Alternatively, you can simply hover your mouse over an object and wait for a tooltip to appear. If you hover over a shortcut, the file's location will appear. If you are dealing with a file, the system will display its properties, such as format and size.
How to remove arrows from the Windows desktop - method 2
When using the second method, the standard arrow icon is replaced with a transparent one, so the arrows are not displayed on the PC screen.
Do the following:
- Download the ZIP archive from the link.
- Unzip the “Icon_Arrow” archive on your computer. The archive contains a transparent image “Blank” with the extension “.ico” and two registry files.
- Copy the “Blank.ico” file to the “Windows” folder on the Local drive “C:”.
- Right-click on the "RemoveArrow.reg" file.
- Select “Merge” in the context menu and agree to make changes to the registry.
- Restart your PC or restart Windows Explorer.
To return the shortcut arrows in Windows, you need to do the following:
- Double-click on the “RestoreArrow.reg” file and then agree to apply the changes to the registry.
- Restart Explorer or restart your computer.
What Windows Developers Say
Let's start from afar. If you install Windows 10, then by default all elements are displayed with an arrow in the lower left corner. These arrows mean that the element is not an independent file, but just a shortcut. That is, a file that contains only the path to its original source. But the question is, why display this with an arrow in the corner, if everyone already understands that there are shortcuts on the desktop.
As for the developers themselves, they were asked this question on the official forums. However, the answer was not what many wanted to hear. They say that these label designation measures are standard and changes to standard elements are not permitted.
But despite this, there have been programs on the Internet for a long time that can remove arrows from Windows 10 shortcuts. By the way, not only programs, this can also be done manually, the main thing is to know how. And you will learn how to do this by reading the article to the end. Three methods will be considered.
Removing arrows from labels in Winaero Tweaker - method 3
Winaero Tweaker is a free program that removes arrows from shortcuts. This is a powerful application for customizing the Windows operating system to suit the user's needs. The application works in English.
Follow these steps:
- Download Winaero Tweaker from the official website here.
- Install the program on your computer or use the portable version (this option is available during the application installation process).
- In the program window on the left panel, find the “Shortcuts” section, click on the “Shortcut Arrow” item.
- In the right area, activate the “No arrow” item.
- Click on the "Restart Explorer" button.
To return to Windows default settings, you need to do the following:
- In the Winaero Tweaker program window, open the “Shortcuts” section.
- Select "Shortcut Arrow".
- In the settings of the “Customize Shortcut Arrow” section, check the box next to the “Windows default” item.
- To apply the changes, click on the “Restart Explorer” button.
After you restart File Explorer, the blue arrows will appear on the shortcuts again.
What Windows Developers Say
Let's start from afar. If you install Windows 10, then by default all elements on your desktop are displayed with an arrow in the lower left corner. These arrows mean that the element is not an independent file, but just a shortcut. That is, a file that contains only the path to its original source. But the question is, why display this with an arrow in the corner, if everyone already understands that there are shortcuts on the desktop.
You might be interested in:
As for the developers themselves, they were asked this question on the official forums. However, the answer was not what many wanted to hear. They say that these label designation measures are standard and changes to standard elements are not permitted.
But despite this, there have been programs on the Internet for a long time that can remove arrows from Windows 10 shortcuts. By the way, not only programs, this can also be done manually, the main thing is to know how. And you will learn how to do this by reading the article to the end. Three methods will be considered.
Important:
Before performing any manipulations with the registry in Windows, it is advisable to create a restore point. This will protect you from death.
Using third party utilities
You can do without manually editing the registry and remove the arrows through tweakers - these are special programs for customizing Windows. At least two utilities will cope with the task: Winaero Tweaker and AeroTweak.
Winaero Tweaker
Download the tweaker from the official website, unpack and install. After launch, a simple interface appears - albeit in English. But it's not a problem.
- In the menu on the left, expand the Shortcuts section.
- Select the Shortcut Arrow item.
- In the right part of the window, select the No Arrow value.
This option removes arrows from all labels
A message will appear at the bottom of the window asking you to restart Explorer to apply the configuration. Click Restart Explorer. You can refuse to perform this action and restart Explorer through the Task Manager, the result will be the same.
Quick access to applications
How to quickly launch programs if the desktop is empty? Before cleaning you can:
- pin shortcuts to the taskbar;
- Pin to Start (on the Start screen);
- place it on a pop-up panel using a third-party utility, for example, RocketDock, Circle Dock, Winstep Nexus, or their analogues.
Option #1
In the first case, open the object's context menu and select "Pin to Start."
Option No. 2
1. Place the shortcuts in a separate directory.
2. Open the context menu of the toolbar, select “Panels” - “Create...”;
3. Specify a folder with shortcuts and open it.
If the desktop content is not visible, the Desktop directory in the %UserProfile% folder can be used as a source to create a new panel.
The panel size changes: hold down the left key on the vertical line next to its name and drag it in the desired direction. By clicking on the icon with two arrows, you will expand the list with all the objects in the directory.
In subdirectories you can create folders to group icons by category: Internet, office programs, etc.
How to reduce desktop icons in Windows 10: using system tools or a program
How to make a slideshow on the lock screen and desktop of Windows 10
How to put a picture as a background on the Windows 10 desktop
How to make a window on top of all windows in Windows 10