Creating a Backup
One of the main guarantees of maintaining data integrity is creating a backup copy. Acronis True Image offers advanced capabilities when performing this procedure, because this is one of the main tasks of the application.
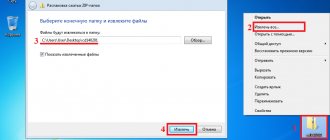
Immediately after launching the Acronis True Image program, a start window opens, which offers the possibility of backup. A copy can be made entirely from the entire computer, individual disks and their partitions, as well as from marked folders and files. In order to select the copy source, click on the left side of the window, where there should be an inscription: “Change source”.
We find ourselves in the source selection section. As mentioned above, we are given three copying options to choose from:
- The whole computer;
- Separate disks and partitions;
- Individual files and folders.
Select one of these parameters, for example, “Files and folders”.
A window opens in front of us in the form of an explorer, where we mark those folders and files that we want to make a backup copy of. Mark the required elements and click on the “OK” button.
Next we have to choose the destination of the copy. To do this, click on the left side of the window that says “Change destination.”
There are also three options here:
- Acronis Cloud cloud storage with unlimited data storage space;
- Removable media;
- Computer hard drive space.
Let's choose, for example, Acronis Cloud cloud storage, in which you must first create an account.
So, almost everything is ready to create a backup copy. But we can still decide whether to encrypt the data or leave it unprotected. If we decide to encrypt, then click on the corresponding inscription on the window.
In the window that opens, enter a random password twice, which you should remember in order to be able to access the encrypted backup in the future. Click on the “Save” button.
Now, in order to create a backup copy, all you have to do is click on the green button that says “Create a copy.”
After this, the backup process starts, which can continue in the background while you do other things.
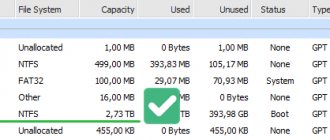
After the backup procedure is completed, a characteristic green icon with a checkmark inside appears in the program window between the two connection points.
Synchronization
In order to synchronize your computer with Acronis Cloud cloud storage and have access to data from any device, from the main window of the Acronis True Image program, go to the “Synchronization” tab.
In the window that opens, which outlines the synchronization capabilities, click on the “OK” button.
Next, the file manager opens, where you need to select exactly the folder that we want to synchronize with the cloud. We look for the directory we need and click on the “OK” button.
After this, synchronization is created between the folder on the computer and the cloud service. The process may take some time, but now any changes to the specified folder will be automatically transferred to Acronis Cloud.
Advantages
- Creating backups in the background;
- creating a railway image;
- data recovery from the cloud;
- support for ntfs, fat32, ext2, ext3, ext4 file systems (linux swap);
- all data is securely encrypted;
- system recovery if certain information was lost;
- creating a boot disk on removable media;
- creating backups of important information using separate files;
- performing backups manually or automatically;
- availability of 5 GB of your cloud (Acronis Cloud);
- updated via the official website of the developer;
- the dashboard allows you to manage data uploaded to the Acronis Cloud server;
- Minimum system requirements: Windows XP;
- optimization of work with Win10.
Backup management
Once the data backup has been uploaded to the Acronis Cloud server, it can be managed using the Dashboard. It is also possible to manage synchronizations.
From the Acronis True Image start page, go to the section called “Dashboard”.
In the window that opens, click on the green button “Open online dashboard.”
After this, the browser that is installed on your computer by default is launched. The browser redirects the user to the Devices page in their Acronis Cloud account, where all backups are visible. In order to restore a backup, just click on the “Restore” button.
In order to view your synchronizations in the browser, you need to click on the tab of the same name.
Completing the operation to create new partitions
Now select the letter of the new partition. You can assign it any letter. This will not affect performance in any way. The default file system will be determined as NTFS. You should not touch this parameter. As well as the cluster size. In general, after selecting the letter of the section, it is better to click on the “Finish” button. However, that's not all. Now you need to apply the selected operations. At the top of the screen is an oblong button with a checkered flag and the words “Apply Pending Operations.” You need to click on it. The wizard will display a window with general information about the parameters for creating a new partition. You need to check everything and click on the “Continue” button. The volume creation process will begin. Upon completion, a new one will appear in the list of disks. This means that everything went well. But how to use Acronis Disk Director 12 Build 12.0 3270 if you just need to format the disk? More on this in the next chapter.
Creating bootable media
A boot disk, or flash drive, is needed after a system failure to restore it. To create bootable media, go to the “Tools” section.
Next, select “Bootable Media Builder.”
Then, a window opens in which you are asked to choose how to create bootable media: using Acronis’ own technology, or using WinPE technology. The first method is simpler, but does not work with some hardware configurations. The second method is more complicated, but at the same time it is suitable for any hardware. However, it should be noted that the percentage of incompatibility of a bootable flash drive created using Acronis technology is quite small, so, first of all, you need to use this particular USB drive, and only if it fails, proceed to creating a flash drive using WinPE technology.
After selecting the method for creating a flash drive, a window opens in which you should specify a specific USB drive or disk.
On the next page, check all the selected parameters and click on the “Proceed” button.
After this, the process of creating bootable media occurs.
How to create a bootable USB flash drive in Acronis True Image
Installing and getting started with Acronis Disk Director Suite
To install Acronis Disk Director Suite:
- Follow the installation program instructions;
- You will be asked to select a Typical, Custom or Full installation type. Custom installation gives you the option of not installing Bootable Media Builder. You may not need this tool if you purchased a boxed version of the product that includes a bootable CD.
Running on Windows operating system
In the Windows operating system environment, Acronis Disk Director Suite is launched by selecting Start -> All Programs -> Acronis -> DiskDirector -> Acronis Disk Director Suite. When you first launch Acronis Disk Director Suite, you will be taken to a program window in which you will be asked whether you want to work with the program in the mode of automatic operations on partitions (Automatic mode) or in the mode of manual operations on partitions (Manual mode). The capabilities provided in automatic mode are quite sufficient to create almost any configuration of partitions on the hard drives of your computer. However, if you need a detailed view of the structure of partitions on disks, a full range of operations on partitions, as well as full control over their execution, select manual mode. While working with Acronis Disk Director Suite, you can change the mode at any time.
Acronis Disk Director Suite provides the user with two modes:
- “Automatic operations on partitions” mode - designed to perform the most common operations that will be sufficient for most users.
- “Manual operations on partitions” mode - designed to perform any operations on partitions. The mode is addressed to users who have some experience and knowledge of organizing data storage on a disk, and assumes full user control over the execution of operations.
Automatic operations on partitions
In the “Automatic operations on partitions” operating mode, operations are performed using Acronis Disk Director Suite wizards. Four wizards are available to the user:
- Partition creation wizard - allows you to create a partition on unallocated disk space or at the expense of the space of other partitions;
- Wizard to increase free partition space - allows you to increase the partition using unallocated disk space or space on other partitions;
- Partition Copy Wizard - allows you to create a copy of a partition.
- Partition Recovery Wizard – allows you to recover deleted or damaged partitions.
In this operating mode, even the most inexperienced user will be able to perform operations on disk partitions step by step, guided by comprehensive instructions.
Manual operations on partitions
In the “Manual operations on partitions” operating mode, all Acronis Disk Director Suite operations are available to an experienced user, including those that are performed relatively rarely. Operations on partitions are performed using dialog boxes in which the user enters the necessary operation parameters. The main difference between automatic operation modes and manual operation modes is the following: in automatic operation mode, wizards perform a variety of actions on sections. In manual operations mode, one operation is always one single action on a partition/disk.
Switching between modes
To do this, use View -> Automatic mode to switch to automatic operation mode or View -> Manual mode to switch to manual operation mode. Acronis Disk Director Suite is managed from the main window. The main window includes a menu, a toolbar, a sidebar, and a tree of disks and partitions (which can be turned on and off using the View menu), and also presents a visual list of disks connected to the computer and the partitions on them. The appearance of the main window differs depending on the selected operating mode. This difference concerns the composition of the operations offered to the user in the main menu, context menus of sections, sidebars and toolbars, as well as the degree of detail in the presentation of the section structure. Consideration of basic operations with hard disk partitions
All operations on partitions in modes intended for both ordinary and advanced users are called and performed in the same way. Any operations on partitions can be called:
- selecting operations from the Disk item of the main menu;
- from custom toolbars;
- from the section context menu (both in the main window and in the graphical presentation panel);
- from the Operations and Advanced lists in the sidebar.
Please note that the list of available operations in the Disk item, as well as the list of Sidebar Operations items, depends on the type of partition selected. The same is true not only for partitions, but also for areas of unallocated space.
Additional operations
Additional operations on hard disk partitions include the following operations:
- Convert - convert the partition's FAT16 file system to FAT32, Ext2 to Ext3 and vice versa,
- Hide - hide section/show hidden section,
- Make active - make the section active,
- Change root folder size - change the size of the root folder of a FAT16 partition,
- Change number of bytes per INODE - change the size of the INODE table (for Linux Ext2/Ext3 file systems),
- Change cluster size - change the cluster size of a FAT16/FAT32 partition,
- Change type—change the section type.
- Recover - restore a deleted or damaged partition
- Edit — edit data stored on the hard drive. Additional operations on partitions are called from the Additional list in the sidebar, the partition context menu item, or from the toolbar with the same name.
Permanently deleting data from disks
Acronis True Image has a Drive Cleanser tool that helps you completely erase data from disks and their individual partitions, without the possibility of subsequent recovery.
In order to use this function, from the “Tools” section, go to the “More tools” item.
After this, Windows Explorer opens, which presents an additional list of Acronis True Image utilities that are not included in the main program interface. Launch the Drive Cleanser utility.
A utility window opens in front of us. Here you need to select the disk, disk partition or USB drive that you want to clean. To do this, simply click the left mouse button on the corresponding element. After making your selection, click on the “Next” button.
Then, select the disk cleaning method, and again click on the “Next” button.
After this, a window opens warning that the data on the selected partition will be deleted and the partition itself will be formatted. Check the box next to “Delete selected partitions without recovery” and click on the “Proceed” button.
Then, the procedure for permanently deleting data from the selected partition begins.
Program operating modes
Few people know, but “Disk Director” can easily work both under the installed OS and under MS-DOS. The last option is useful because you can partition the hard drive into partitions even before installing the operating system. You can also perform some operations with partitions if the OS for some reason does not want to boot. Just before doing this, you need to burn the software product image to a disk or USB drive. Without this, you will not be able to run the program in the MS-DOS environment. Now let's move on to direct answers to the question of how to use Acronis Disk Director 12.
System cleaning
Using the System Clean-up utility, you can clean your hard drive of temporary files and other information that could help attackers track user activities on the computer. This utility is also located in the list of additional tools of the Acronis True Image program. Let's launch it.
In the utility window that opens, select the system elements that you want to remove and click on the “Clean” button.
After this, the computer is cleaned of unnecessary system data.
Improved Backup
Now a few words about the backup itself. In the new version, this subsystem has been tuned, and now it allows:
- Perform resumable replication of backups so that if the Wi-Fi connection is lost or other connection problems occur while saving a local copy to the cloud, the process will resume from the point where it was interrupted, rather than starting over again. This avoids duplication of stored data and reduces the load on the network connection.
- Validate backups faster using only the latest version, greatly speeding up the process of assessing backup performance.
- Mount, move, rename and convert .tibx archives to .vhd format, using them as virtual machines.
- Perform a complete backup of your entire electronic economy: operating systems, applications, settings, files, Microsoft 365 accounts and mobile devices.
Working in trial mode
The Try&Decide tool, which is also located among the additional utilities of the Acronis True Image program, provides the ability to run a trial mode. In this mode, the user can run potentially dangerous programs, go to dubious sites, and perform other actions without the risk of harming the system.
Open the utility.
In order to enable trial mode, click on the topmost inscription in the window that opens.
After this, an operating mode is launched in which there is no risk of damage to the system by malware, but at the same time, this mode imposes some restrictions on the user’s capabilities.
As you can see, Acronis True Image is a very powerful set of utilities that is designed to provide the maximum level of data protection from loss or theft by intruders. At the same time, the functionality of the application is so rich that it will take a lot of time to understand all the capabilities of Acronis True Image, but it is worth it.
We are glad that we were able to help you solve the problem. Add the Lumpics.ru website to your bookmarks and we will be useful to you. Thank the author and share the article on social networks.
Describe what didn't work for you. Our specialists will try to answer as quickly as possible.
Consideration of basic operations with hard disk partitions
Creating a new partition
You may need a new partition on your hard drive in the following cases:
- to place a large set of similar data on a partition - for example, a collection of audio files in MP3 format, video files, etc.;
- to place backup copies (images) of other partitions/disks on the partition;
- to place a new operating system (or swap file) on the partition.
The Create Partition Wizard will allow you to create a partition of any type (Active, Primary or Logical), select a file system, assign a label and letter, etc.
If you need to create a new partition:
- Call the section creation wizard by selecting Wizards -> Create section or a similar item in the sidebar in the Wizards list, or by clicking the Create section button on the toolbar;
- The wizard will analyze the disks and partitions on them connected to the computer. If the wizard finds unallocated space on the disks, you must choose how to create a new partition.
If you want to create a partition on unallocated disk space:
- Set the switch to Unoccupied Space;
- In this case, the wizard will offer to create a partition on the found area of unallocated space of the maximum size. For example, if you have free areas of 5.0 GB and 12.0 GB on your disks, the wizard will offer to create a partition on an area of 12.0 GB;
- On the Partition Size page of the wizard, set the size of the partition to be created;
- On the next page of the wizard, select the type of partition to be created - Active, Primary or Logical.
- As a rule, the Primary type is selected if the operating system is to be installed on the partition. If the partition is intended to store data, the Logical type is selected;
- Select the Active type if you want to install an operating system on this partition that will load by default when you turn on the computer;
- On the next page of the File System wizard, select the file system on the partition. The wizard offers to select one of the Windows file systems - FAT16, FAT32, NTFS or Linux - EXT2, EXT3, ReiserFS, Swap, or leave the partition unformatted;
- On the next page of the wizard, you will be asked to select a letter for the partition.
Increasing free partition space
You may need to increase the free space of a partition in several fairly obvious cases:
- There is not enough space on the partition to install new programs or write data,
- Some disk-intensive programs, such as defragmentation programs, stop working or perform poorly if the free space on a partition falls below a certain amount.
- If the free space on the system partition decreases below a certain value, the operating system may malfunction.
The Increase Partition Free Space Wizard will allow you to increase the size of a partition at the expense of free space on other partitions. Moreover, if there is no significant free space on other partitions, this can be done using unallocated disk space. If you need to increase the free space of a partition (partition size):
- Call the Increase Partition Size Wizard by selecting Wizards - Increase Free Space or a similar item in the sidebar in the Wizards list, or by clicking the Increase Free Space button on the toolbar;
- On the Select a partition to increase page, select the partition whose size you want to increase.
Copying a partition
By creating a copy of a partition, you will receive an exact duplicate of everything that is located on this partition. A copy of the section can be used in the following cases:
- As a backup copy of a partition (primarily the data located on it);
- As a backup copy of the system partition, which is reasonable to create if you are planning to update the operating system installed on the partition;
- To quickly transfer the contents of an old hard drive to a new, larger drive.
If you need to create a copy of the partition:
- Call the wizard for increasing partition size by selecting Wizards -> Copy partition or a similar item in the sidebar in the Wizards list, or by clicking the Copy button on the toolbar;
- On the Select Partition to Copy Master page, select the partition you want to copy;
- On the next page of the Partition Location wizard, a record is created with the characteristics of the copied partition;
- The selected drive may not have enough space to accommodate the copy. You can, however, create a copy of the partition by selecting partitions from which you can take some of the space they occupy. Do this in the Select Partitions window;
- On the next page Partition Size of the wizard, you can enter the desired size of the partition copy, and the wizard will automatically calculate the minimum and maximum possible copy size;
- On the next Partition Type page of the wizard, you can select the type of partition copy: Active, Primary, and Logical.
As a rule, the Primary type is selected if the operating system is located on the partition. If the partition is intended to store data, the Logical type is selected.
Select the Active type if you want the operating system installed on the copy of the partition to load by default when you turn on the computer.
Clicking Finish on the last page of the wizard will cause Acronis Disk Director Suite to generally create a batch of pending copy creation operations. If you need to split a partition:
- Select the partition to change;
- Call the partition division operation by selecting Disk -> Split or a similar item in the sidebar in the Operations list, or by clicking the Partition button on the toolbar;
- In the folder tree, select the folders that should be moved to the newly created partition. If you want to create an empty partition, don't tag any folders.
Merging sections
Acronis Disk Director Suite allows you to combine two partitions, even with different file systems. All data will remain intact and will be located on the resulting partition. This partition will have the same file system as the target partition (to which the data from the attached partition is added). If you need to merge sections:
- Select the partition to be attached to the target partition;
- Call the operation of merging partitions by selecting Disk -> Merge or a similar item in the sidebar in the Operations list, or by clicking the Merge Partitions button on the toolbar;
- Select the target partition;
- Select a folder on the target partition where the data from the attached partition will be placed. You can create a new folder using the icons located above the folder tree;
- By clicking the Proceed button, you will create a pending operation.
The new partition structure on the disk will be reflected graphically in the main window of Acronis Disk Director Suite.
Formatting a partition
- Select the disk and partition on it;
- Call the operation of formatting a partition by selecting Disk->Format or a similar item in the sidebar in the Operations list, or by clicking the Format button on the toolbar;
- In the Format Partition window, enter a partition label;
- Select the file system that will be created on the partition as a result of formatting.
- FAT16/FAT32, NTFS - file systems of the Windows OS family;
Linux EXT2, Ext3, ReiserFS, Swap - Linux OS file systems.
- the smaller the cluster size, the less wasted disk space;
- the smaller the cluster size, the more space the file allocation table (FAT) takes up;
- The larger the file allocation table, the slower the operating system works with the disk.
Acronis Disk Director Suite supports the following file systems:
- Select the cluster size (options available: Auto, 512 bytes, 1, 2, 4... 64 KB);
- Note that:
Checking your hard drive partition for errors
Acronis Disk Director Suite provides the ability to scan a hard disk partition for file system errors. It is strongly recommended that you check your hard drive partitions before performing any operations on the drive partitions.
If you need to check a hard drive partition: 1. Select the hard drive and the partition on it in the main window of Acronis Disk Director Suite, 2. Call the operation to check the partition for errors by selecting Disk -> Check or a similar item in the sidebar in the Operations list , or by clicking the "Check" button on the toolbar, 3. If you want to not only check for errors, but also correct the errors found, select one of the following options:
- Finding errors on the section;
- Searching and correcting found errors;
- Search for errors and bad sectors.
Check for errors check the Correct errors found checkbox, 4. By clicking OK, you will directly launch the partition check operation, 5. The results of checking the disk partition are reflected in the Check Partition window.
Defragmentation of a partition
Defragmentation is the process of reorganizing the way files are stored on a hard disk partition, resulting in the data that makes up the contents of the file being placed in sequential clusters.
Defragmentation is a procedure for eliminating file fragmentation, in which, as a result of repeated update operations, parts of files end up scattered across different parts of the disk.
File fragmentation significantly reduces the performance of a personal computer or server, especially when there is a significant volume of I/O operations. Conversely, defragmenting files on a hard drive under the same conditions can improve performance by requiring the read head to move less around the disk to read all parts of the file.
Acronis Disk Director Suite defragments only Windows XP and Windows 2003 Server. Windows 2000 has its own built-in disk defragmenter. To defragment a partition in Windows 4.0 and earlier Windows operating systems, install a third-party defragmenter. If you need to defragment a hard drive partition:
- In the main window of Acronis Disk Director Suite, select the hard drive and its partition to be defragmented;
- Invoke the partition defragmentation operation by selecting Disk - Defragment or a similar item in the sidebar in the Operations list, or by clicking the Defragment button on the toolbar.
www.timosh.ru
Acronis True Image 2020 is an integrated software package with which you can create backup copies of documents, photos, emails, selected partitions or the entire disk, including the operating system, applications, settings. Backup copies of disks (partitions) contain all the data stored on them. This type of backup is typically used to create an exact copy of a system partition or an entire system drive. This backup allows you to restore the system if Windows does not work properly or does not start. By default, Acronis True Image 2020 copies only those hard drive sectors that contain data. If necessary, you can select sector-by-sector mode. When backing up in sector-by-sector mode, the program copies both used and unused sectors of the hard drive, so the backup file size will typically be significantly larger. This backup mode is only required in special cases. To protect your documents, photos, music files, and video files, you can choose not to back up the partition containing these files. You can back up individual files or folders. Acronis Bootable Media Builder allows you to make a bootable USB flash drive or CD/DVD with a standalone version of Acronis True Image 2020. Using bootable media, you can restore normal operation of the operating system after virus attacks, hardware and other failures. Cloning allows you to move the contents of one drive to another drive, for example, if you want to move your operating system, applications, and data to a new, larger drive. This can be done in two ways: 1. Use the disk cloning utility. 2. Create a backup copy of the old disk, then restore it to the new disk. If you choose to use the Disk Clone utility for cloning, be sure to back up your old hard drive. This will help save your data in case something goes wrong. For example, there have been cases where users have selected the wrong drive as the target drive and thus destroyed all data on the system drive. Additionally, another backup can be used to create redundancy and improve security. Due to numerous requests from users, the Acronis Try&Decide function (trial mode) has been returned to Acronis True Image 2020. This feature can be found in the Tools section. When Try&Decide is enabled, you can perform any potentially dangerous operations without worrying that they may damage your operating system, programs, or data. Try&Decide mode can work indefinitely, as it does not turn off if the operating system is rebooted. When you turn off Try&Decide mode, you decide whether to apply the changes you made or cancel them. A dialog box will appear with two options to choose from: stop working in trial mode and discard the changes, or continue working in trial mode. Acronis DriveCleanser allows you to destroy all data on selected hard drives and partitions without the possibility of recovery (including the system partition). To destroy data, you can use one of the ready-made algorithms or create your own. The System Cleanup Wizard allows you to ensure that all traces of activity on your computer that are stored in the Windows operating system are removed. By default, all system components are scanned for cleaning. If you need to specify which system components need to be scanned and which not, you can change the cleaning parameters in the wizard settings. A number of outdated and redundant features have been removed from Acronis True Image 2020. Removed: Email backup, local and mixed synchronization, backup version merging, Acronis Extended Capacity Disk Manager (in Windows Vista and later, hard drives larger than 3 TB are supported by the operating system), SSD truncation (in Windows 7 and later versions, SSD truncation is a built-in feature of the operating system). The interface has been redesigned for easier use, including the backup and restore dialog boxes.
Minimum system requirements: 1 GHz or greater Pentium processor 1 GB RAM 1.5 GB available hard drive space CD-RW/DVD-RW drive or USB flash drive for creating bootable media Screen resolution 1152 x 720 Mouse or other pointing device (recommended) Administrator rights are required to run Acronis True Image 2020. Supported operating systems: Windows XP SP3 Windows Home Server 2011 Windows 7 SP1 (all editions) Windows 8 (all editions) Windows 8.1 (all editions) Windows 10 Insider Preview Supported file systems: FAT16/32 NTFS; Ext2/Ext3/Ext4 ReiserFS Linux SWAP Ext2/Ext3/Ext4, ReiserFS and Linux SWAP file systems are supported only for disk or partition backup and recovery operations. Acronis True Image 2020 on these file systems cannot be used to back up and restore files, search for files, mount an image, and restore files from an image. If the file system is not supported or damaged, Acronis True Image 2020 will copy data in sector-by-sector mode. Supported storage media: Hard drives Solid state drives (SSD) Network storage devices FTP servers CD-R/RW, DVD-R/RW, DVD+R (including dual-layer DVD+R), DVD+RW, DVD-RAM, BD- R, BD-RE Storage devices USB 1.1/2.0/3.0, eSATA, FireWire (IEEE-1394) and PC Card Dynamic disks do not support the creation of an Acronis Secure Zone. It is not possible to restore a dynamic volume as a dynamic volume by manually resizing it. The disk cloning operation is not supported for dynamic disks. Download Acronis True Image 2020 (build 5518) for free
Archive size: 318.6 MB The interface when installed on the Russian version of Windows is Russian. The product interface language can be changed in the settings. There is no need to reinstall Acronis True Image 2020. Activation: OK Developer website: www.acronis.com/ru-ru/
Note. When cloning (restoring) previously activated Windows 8/8.1 operating systems to another hard drive, to the same hard drive, replacing the motherboard, to a new (different) computer, activation (license) may not work, since the type product key has already been used on another computer or on more computers than permitted by the terms of the Microsoft software license agreement. If you are using an unlicensed copy of Windows that has not been published and licensed by Microsoft, activation will not work because Microsoft will not be able to match your computer's hardware profile to your product key.
Acronis True Image 2021 25.4.1.30290 + BootCD VIP
Subscribe to updates
When the news changes, you will receive a notification by E-mail.
Subscribe
Already subscribed: 2
Acronis True Image 2020 is an integrated software package that ensures the security of all information on your computer, which can be downloaded for free at manshet.org. True Image provides the ability to create backup copies of the operating system, applications, user settings and all existing data, as well as securely destroy all confidential information that has become unnecessary. With this software, you can back up selected files and folders, settings and email messages from Microsoft clients, and even entire drives and selected partitions. Online storage allows you to store your most important files in remote storage. Your data will be protected even if your computer is lost, stolen or destroyed. Acronis Continuous Protection periodically (every five minutes) saves changes that have occurred in the system and files, which, if necessary, makes it easy to return to the state at any point in time.
Acronis True Image features:
- Acronis Drive Snapshot backup features (quick image creation)
- Archive separation
- Performing a backup archive check before restoring
- Backup to network shares
- Processors 64-bit and 32-bit
- Acronis Management Console
Acronis True Image features:
- Disk image backup. Back up a complete backup of your computer, including the operating system, applications, and all data, to an external hard drive or NAS device.
- Universal Restore. Restore entire operating system, application and data backups, or just individual files as needed, to your computer or other hardware.
- Optimized for Windows 10 and the latest versions of Mac OS X. Certified for Windows XP, Windows 7, Windows 8 and Windows 10
- The fastest backup and recovery. Save time and effort with the fastest backup and recovery—50% faster than the competition!
- Security and privacy. With 256-bit encryption and a user private key, your data is safe.
- Fast and convenient recovery. Return your computer to the state it was in whenever you need it. Quickly recover data from the cloud or local storage. In this case, you do not need to manually reinstall the OS or use additional tools.
- Flexible file recovery system. Recover only selected files and folders in seconds. However, it is not at all necessary to restore the entire system.
- History and advanced methods of backup. Choose from the 20 most recent system states - backup history allows you to go back to different points in time. Save only changes made since your first backup and save time and disk space.
- Proven backup technology. Millions of businesses and individuals around the world use Acronis AnyData Engine, the most advanced backup technology.
Bootable media is used for the following purposes:
- restoring an operating system that does not start;
- access to data stored in the damaged system and its backup;
- deploying an operating system on bare metal;
- creating primary and dynamic volumes on bare metal;
- sector-by-sector backup of a disk with an unsupported file system;
- offline backup of all data that could not be copied online due to access restrictions, permanent blocking
- running applications or for any other reason.
Changes in Acronis True Image 2021:
- Enhanced protection features that include real-time threat protection and on-demand antivirus scanning to help protect devices from all types of malware: Malware
- Ransomware
- Illegal cryptocurrency mining
- Signature-based analysis (traditional antivirus)
- Complete and fast
OS: Windows 7, 8, 10
Download speed is 300 kb/s, to download files faster, purchase Premium!
Download Acronis True Image 2021 25.4.1.30290 [808.81 Mb] + BootCD [673.89 Mb]
Buy Premium - More details
To report a new version/bug, please register
backup, Acronis, True Image