Interface
The AutoPlayMediaStudio program window (picture below) can be divided into 6 areas.
- Menu panel.
- Toolbar.
- Project Conductor.
- Object properties panel.
- Workspace.
- Project size panel.
Let's look at them in a little more detail.
Menu bar
The menu bar contains items such as:
- File.
- Edit.
- Alignment. This will be discussed in more detail in the following sections of this article.
- Page.
- Dialogue. This will be discussed in more detail in the following sections of this article.
- An object. It will be discussed in more detail in the articles “Overview of AutoPlay Media Studio (part , , )”.
- Project. It will be discussed in more detail in the article “Overview of AutoPlay Media Studio (Part 5). A program for creating startup shells."
- Publication. It will be discussed in more detail in the article “Overview of AutoPlay Media Studio (Part 5). A program for creating startup shells."
- View.
- Tools.
- Help.
File menu. Contains commands for saving, opening and creating a new project. You can export your project as a project template file (*.APT) and as a project archive (*.APZ). When saving as a template, you will have the option to enter the author's name, contact information, website, and so on. Saving as an archive can be used to create a backup copy. In any of these cases, options for optimizing the project will be available to you before exporting. I will talk about this in more detail in the following reviews in the topic Saving a project. The Open command will allow you to open a previously created Indigorose AutoPlay Media Studio project versions 3 - 8, as well as an archive and project template file. When opening project files from an earlier version, AutoPlay Media Studio 8 will convert to the new format without changing the original project file. The Create a new project command (picture below), in addition to the ability to create a project from scratch, allows you to open one of fifteen pre-installed template projects, with the ability to edit them.
The Edit menu (picture below) contains very familiar commands. Cut, paste, group (more on that below), and so on. In the same menu there is access to the program settings. I will talk about them in more detail below.
AutoPlay Media Studio allows you to overlay objects (buttons, images, etc.) on top of each other like layers. This menu contains options that allow you to move objects higher or lower.
The Page menu (picture below) contains commands for creating, deleting, duplicating and renaming pages. It will be especially useful if your project has many pages. Using, for example, duplication, it will be possible to create copies of pages of the same type, changing only the main content in them, and leaving the auxiliary elements, background, window control buttons, and so on.
The View menu (picture below) will allow you to enable/disable AutoPlay Media Studio 8 toolbars, grid, snap to grid and various additional panels (button gallery, script editor, object explorer, and so on).
Toolbar
The toolbar (picture below) contains the main visual tools with which you will create your project.
The toolbar consists of several small panels (Standard, Objects, Pages, Alignment), which can be moved or disabled, depending on your desire.
Project Explorer
The Project Explorer (image below) contains a list of all pages, actions, dialogs and objects of your project in a tree view. Similar to Windows Explorer. Using this panel (Project Explorer) you can easily access editing, copying and other actions on almost any object in the project.
This is especially convenient if you use overlapping objects (layers). The Project Explorer allows you to access some Menu Bar items.
Object Properties Panel
The object properties panel (picture below) contains options that you can change for the selected object.
The example above shows the options available if you select the Button object (all objects will be discussed in more detail in the articles “Overview of AutoPlay Media Studio (part , , )”). As you can see from the picture above, you can change the font parameters of the inscription on the button, set its colors to repaint when the mouse cursor acts, position, resize, and much more. Different properties will be available for different objects.
Workspace
The work area (picture below) is the area of the program window in which you will directly create your project. At the top there is a horizontal ruler and project sheet tabs. On the left side of the AutoPlay Media Studio 8.0 area there is a vertical ruler.
For convenience, I recommend that your project fit entirely into the Indigorose AutoPlay Media Studio workspace without scroll bars. This will make working on the project more comfortable and productive.
I think that as a program for creating a disc menu, AutoPlay Media Studio has a fairly convenient workspace.
Project size panel
The project size panel (picture below) displays the size of the finished project with all external files. This is very convenient if you know that your project will be recorded on DVD media. You can always see how much free space remains on the disk and whether the project will even fit on the media.
I will discuss how to set the media scale a little lower.
Search in Autoplay media studio 8.2
Autoplay media studio has the ability to create a program search. I note that this function is very limited and cannot be compared with a site search. You should also take into account that the search is carried out using keywords that you must first enter. If, for example, on one of the program pages there is a Paragraph object, you can read more about it in the article “Overview of AutoPlay Media Studio (Part 2). Creating a disk shell”, and it contains text with the searched word, then the search will not yield anything if this word is not in the keywords of the page.
To create a program search, follow these steps.
- In the page properties on the Settings tab, enter in the Keywords field all the keywords for which this page should be displayed in search results (picture below). In my example, this is “Home, Page 1, First page, Autoplay media studio 8 lessons.” Please note that the words “Autoplay media studio 8 lessons”, “Autoplay media studio 8 lesson”, “autoplay media studio 8 lessons” and “8 Autoplay media studio lessons” are different words (phrases). Separate different keywords (and/or phrases) from each other with a comma and a space.
- In the Name field, enter how you want the page to appear as a search result. In my example this is “Page1”. It's best to use a more descriptive name that suits the page and its content.
- Then place any object, clicking on which will open a search dialog. In my example, this is a Button object. You can read more about this object in the article “Overview of AutoPlay Media Studio (Part 2). Creating a disk shell."
- Now go to the Script tab, there open the OnClick tab and paste the following code (image below).
Dialog.PageSearch();
Now, if the user clicks on the search button and enters the searched word or phrase, for example, “Autoplay media studio 8 lessons,” then a list of pages will appear in front of him, in the keywords of which the searched phrase (word) appears (picture below).
At the end of this article you can download the Autoplay media studio 8.2 project with the implementation of this lesson.
Program settings
AutoPlay Media Studio 8 settings consist of thirteen main sections. Some of the sections have subsections.
- Construction. On this tab you can select the speed of burning your project onto a CD\DVD\BD disc, tell AutoPlay Media Studio 8.0 to ignore any warnings, sign the code and other options related to the final stage of creating your finished program.
- Code signing. In the code signing settings, you can embed a certificate identifying you into your program, as well as connect a file with other information about you as a developer.
- Documentation. This tab contains settings for automatically saving the project.
- Environment. On this tab you can set colors for selected and grouped objects, select a theme for the user interface, and so on. Tabs. You can specify the position (left\right) of dialog boxes. Guides. Guide display settings (their colors). Net. Settings for grid display colors and cell sizes. Project size. On this tab you set the maximum storage media size for your project and the percentage after which Indigorose AutoPlay Media Studio will issue a warning about exceeding the volume. This is where you adjust the gradation of the Project Dimensions panel. You can select 30, 50, 180, 650, 700, 4403, 4813, 25600, 51200, 102400 MB or specify an arbitrary value. Rulers. Ruler color settings.
- Directories. On this tab you can specify the default directories for temporary and permanent saving of the project and the path to the settings file.
- Objects. Font settings for displaying text on various objects (buttons, trees, drop-down lists, etc.). If you use the Cyrillic alphabet for inscriptions on objects in your project, then I advise you to initially set this encoding everywhere and not think about the question: “Why is my “Exit” inscription on the button displayed as “☺♣◄ⱶⱤ”?!” But this can be changed in the future for each specific object separately.
- Drag and drop. Drag and drop action settings for files and scripts. Inserting into a page\dialog. Settings for mouse drag actions for various objects on a page or dialog. Insert on an object. Settings for actions when dragging the mouse for various objects on other objects.
- Association with files.
- Preview of the resource. Settings for auto playback of video/audio files inserted into the project.
- Script editor.
- Spellchecking. Spell checking settings with the ability to connect a custom dictionary (*.DIC).
- Autostart. Action settings when starting Indigorose AutoPlay Media Studio itself.
- Updates. AutoPlay Media Studio update check period settings.
Working with objects
I would like to include the following among the main operations with objects in AutoPlay Media Studio:
- Choice.
- Position.
- Grouping.
- Blocking.
- Hiding.
- Alignment.
As mentioned above, AutoPlay Media Studio allows you to overlay objects one on top of another in layers (picture below). However, it may not be entirely convenient for you to select them using the mouse cursor.
Especially for this, AutoPlay Media Studio provides a special Select menu (picture below). You can also use the Project Explorer panel.
To move an object up or down (between layers) AutoPlay Media Studio provides the Position menu (picture below). The commands collected in it resemble Microsoft Word commands when working with layers.
You can also group objects. This is very convenient, especially for objects that are related “by meaning”. For example, for the Inscription and Text objects. In the case where the Caption is the title of the test block.
If you decide that an object is temporarily (or permanently) not worth moving, for example, then you can lock it so that you don’t accidentally move it while working with other objects on the page. For example, there are three objects (picture below) that are present on all pages in the same place. So, for convenience, I blocked them and worked on creating pages without fear of them being moved, deleted, etc.
Using the same example of the “Fairy Tale” autorun shell, you can see on the main page links to different fairy tales (other pages) in the form of images arranged in a column (picture below).
You can evenly align them using the mouse by calculating and setting coordinates in the properties of objects (this will be discussed in the following parts of the AutoPlay Media Studio review), or you can select these objects and use the commands presented in the Alignment menu (picture below).
This will make this task much easier.
Program features:
- The program includes ready-made templates for designing menus with various buttons for launching programs, playing sounds, printing files, and opening Internet sites.
- You can also easily design your project using any content of your choice - music, video, flash animation, text.
- Projects created using AutoPlay Media Studio are in no way inferior to professional products developed in C++/Java.
- The application created using AutoPlay Media Studio will be presented in the form of an object model at the final stage. This model consists of a group of individual pages, similar to how it is implemented on Internet sites. You can place any objects on these pages (graphics, text, video, Flash, HTML, etc.).
- Any element of the project, be it an object or a page, can be assigned a specific action. The program provides hundreds of different actions that can be associated with objects.
- You can also expand the capabilities of AutoPlay Media Studio using additional modules - plugins. With their help, you can automate some of the tasks that you perform in the program most often. For example, you can quickly create and manage animated menus, directory trees, and databases.
- The ability to create autoplay windows of any shape using transparency masks. Such a mask can be graphic files in .jpg, .bmp, .png formats.
- Ability to burn CD-R (CD-RW) directly from the program. The finished project can be presented as a self-extracting archive or saved in a separate folder on your hard drive.
- Built-in spell checker. This option works with Label, Paragraph and Button objects. The full version of the program contains a large number of plug-in dictionaries, with the help of which AutoPlay Media Studio checks spelling while typing.
- The AutoPlay Media Studio user additionally gets access to a video presentation, professional content elements, an online forum, 24-hour technical support and many other services.
Pages
In most cases, your program created in AutoPlay Media Studio does not consist of one window on which all objects are located, but of several. It's a bit like a website. In AutoPlay Media Studio projects, these are called pages. Pages have properties (picture below).
In the page properties, you can set the page name, which will be displayed in the project explorer, the page description (it will be displayed in search results, if you provide such an option in your program), the background color of the page and the background gradient (two colors). You can use an image as a background; if it is smaller than the size of the window, you can also specify the background color. You can set an animation when changing pages (similar to slides in Microsoft PowerPoint). Unfortunately, by default, only three animation effects with settings for each of them are available in AutoPlay Media Studio 8.0.6.0. It is very convenient to have such options as Background from Page and Objects from Page. By specifying “master page” from the drop-down list, you can create new pages with a customized background and repeating objects. I created a page on which I placed window control and navigation buttons, which are found on almost all pages in the program, and set a background image. I called it “Master Page” (picture below).
And in the settings of another page I indicated that I needed to use the background and objects from the Master Page (picture below).
As a result, the background and objects from the Master page appeared on the new page (picture below). Objects taken from the Master page are blocked. If you need to edit them, then you need to edit the Master page. This is very convenient if you have several pages of the same type.
I would like to note that all objects that extend beyond the edges of the program area will be invisible or partially visible. As in the example with the autorun shell “InDesign CS2 Video Tutorial”.
In the page properties you can also set a “custom” script (picture below). This will give you the opportunity, for example, when you launch this page, to Perform some action. For example, start a timer, and when a specified time comes, display some object. Or a script that starts playing a video or audio file when you go to a page. We'll talk a little more about the capabilities of the script editor in the second part of the AutoPlay Media Studio review.
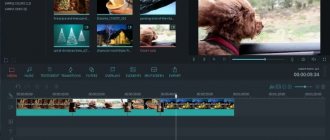
Media Studio 18.28.006
Media Studio is a video editor with advanced functionality.
The best Telegram channel about technology (possibly)
- More than 30 special effects in the effects store.
- Encoding up to 30Mb/s, maintaining HD video quality.
- Processing is carried out on the device, no internet is required.
- Ability to exit the application once a process has been added to the queue; the process can be canceled at any time.
- Save a still image at a specified time in jpeg format.
- Upload to Facebook, YouTube, Picassa or through any application like GMail, Whatsapp, etc.
Free version - all options for simple video editing:
- Special effects
- Split
- Form/Filters
- Rotate and Rotate
- Video extraction
- Audio extraction
- Add text
- Blurring a specific area
- Negative
- Black and white
- Kaleidoscope
- Blackout
- Remove middle part or trim clip
- Volume change - low, medium, high
- Change speed
- Overlay photo on video
- Increase volume
- Add audio (one file in trial version)
- Brightness/Contrast
- Storyboard in PNG format
- Several special video effects
Full Paid Version - Upgrade from within the app to use the following features:
- All the features of simple video editing
- Add audio from a specified location
- Advanced Editing: Apply more than one editing option on one video, Overlay one video with another, negative, vintage, sepia and Xross video filters
- Editing multiple videos: Combine multiple videos of different shapes and sizes Can be converted to MP4, FLV, 3GP formats
- Create a video from pictures - slideshow, edit the image before applying
- Play video in reverse
- Audio editing: Easy editing - trim, remove middle, convert to video format
Note:
- When you first launch the program, it downloads additional 14Mb files necessary for further operation.
- To edit FLV video, convert it to MP4 or 3GP, and then access the editing options where viewing is required.
- Supported audio formats are MP3, M4A, WAV and AMR. To edit other audio formats, you need to convert them to the ones listed above.
- Media Studio uses libraries from the FFmpeg project under LGPLv2.1, the FFmpeg version can be updated through Media Studio - Settings - Check for updates.
- The application is supported on all ARMv5, ARMv6, ARMv7, Intel X86 and MIPS processors.
Dialogue
The dialogue in AutoPlayMediaStudio is similar to the page. Various objects can be located on it (drawings, buttons, and so on). But unlike a page, a Dialog appears separately on top of your program's main window. The dialog, like the pages, is displayed as tabs above the AutoPlay Media Studio workspace (picture below).
The Dialog, just like the page, has properties and a script editor (picture below).
In addition to this, there is also an Attributes tab (picture below). In it you can choose the “style” of display of the Dialog window and its size.
Dialogues are an advantage of AutoPlay Media Studio as a presentation program compared to PowerPoint.
The disadvantages of AutoPlay Media Studio include the lack of a Russian interface language, a Russian help system, a spell checker (for the Russian language), as well as a small number of built-in objects (buttons, frames, sounds, icons, and so on). Regarding icons (PNG, ICO, and so on), I would like to recommend several search engines that specialize specifically in searching for icons by keywords and categories.
- iconarchive.com
- icongal.com
- iconfinder.com
- iconseeker.com
- iconsearch.ru
- veryicon.com
- findicons.com
Despite the fairly large capabilities of the visual tools of AutoPlay Media Studio, do not forget that your program will look as good as all the elements of its interface (images, sounds, videos, and so on). Also, do not forget about the ease of use of the interface, the speed of its operation, spelling and grammatical errors in the text, and much, much more. Even if all this is at a fairly high level, do not forget that your program is only as useful as the content (videos, texts, links, etc.) of this program is useful and interesting to the user. Therefore, high-quality content is the key to a good result of your work.
In conclusion, I want to say that the AutoPlay Media Studio program will be useful to those users who do not have sufficient programming knowledge, but want to create simple and beautiful disc menus. As a program for creating DVD menus, its capabilities are more than enough.
In the next article, “AutoPlay Media Studio Review (Part 2). Creating a disk shell." We will look at some objects that will help you create your own program.
AutoPlay Media Studio
This is a unique program for creating disc menus. These can be e-books, video courses, presentations, albums, etc. In principle, a simple program can satisfy all your fantasies when working and is a great tool for doing business on the Internet. If you want to create a collection of lessons, culinary recipes, fairy tales for children, photo albums, program reviews - everything can be solved simply. It’s not a rewarding task to explain on your fingers and it’s better let’s watch the video
As you can see, there is nothing complicated. AutoPlay Media Studio is available to everyone and for any thematic niche. The question “How to create a product menu” disappears forever. Once again I want to repeat - AutoPlay Media Studio is one of the most popular programs. Use your imagination and create unique navigation menus. download AutoPlay Media Studio from the link below. But the program costs money, I don’t ask for money - just share with your friends, click on one of the social network buttons.
https://yadi.sk/d/JEM7mzizbeRLU
Without technical knowledge, you can give up your dream of earning income on the Internet. It is not theory that feeds you, but the ability to work with programs. You can constantly sit on webinars, hear about how you absolutely need to create something, but this won’t create anything on its own. The best principle: “Take it and do it!” - no one will do anything for you, not even lift a finger for “thank you”!