How to add a picture to a video using Wondershare Filmora
We use the Wondershare Filmora program
Filmora is a simple yet powerful video editor that not only provides basic editing features such as trimming, audio editing and adding titles, but also provides some advanced editing tools including stabilizing shaky frames, creating green screen effects and color correction.
Moreover, this video editing tool comes with over 300 built-in effects. You can add filters, overlays, and motion elements to make your video unique. The effects store has some specially designed sets such as blockbuster, fitness, cinema, business and beauty.
Ideal program for bloggers
If you are a YouTuber, we encourage you to join the Filmora.io community where you can get all the resources you need to quickly grow your YouTube channel.
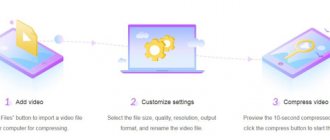
The process of adding images to videos is very simple.
Step 1. Download Filmora and install the program following the installation instructions. Then open it.
Open the Filmora program
Step 2 : Import files into Filmora.
Importing the file into Filmora
Click "Import" and select the target audios, images and videos from the folder or drag and drop them into your Filmora media library. Then drag and drop the video onto the video track (first track).
Note! Please note that if you place all video files on the same timeline, they will be merged together.
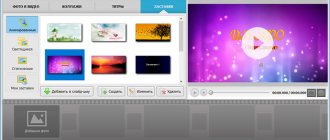
Step 3 : Add an image to the video.
Adding images to videos
After that, select the image you want to add to your video and drag it onto the timeline track, ours is image F. The image will appear in the preview window (like the image below).
Step 4. Image Adjustment.
Setting up the image
- Adjust the size and position to make it suitable for your video.
- Then simply move the image to the desired location on the video or drag the time slot to make the image fit the length of your video.
- You can also add more effects to your image. To do this, right-click and select Advanced Editing.
- In the windows that appear, you can add movement, a mask, make a transparent part of the clip, add a border, a shadow, etc.
Adding more effects
For example, you can make an image more transparent if its background color is too obvious in the video. To do this, go to the "Effect" tab. Here you can make part of the clip transparent, add a border, shadow, etc. and thus make your video perfect.
Advice! You can add multiple images to a video. What you need to do is put them on different tracks and adjust the settings as above.
Step 5. Export the file.
Exporting the file
If you are happy with the result, click the "Export" button. Here you will find the following options:
- save as different formats: select the export format and save to your local disk;
- save according to different devices: select a specific device model and save in a compatible format;
- upload to Facebook/YouTube/Vimeo;
- fill out your account to share your video directly with Filmora;
- recording to DVD;
- Insert a DVD disc and get high-quality DVD video in minutes.
Advice! Wondershare Filmora also allows you to add your logo to the video by checking the “Add logo to video” checkbox and apply your own branding to what you create by providing all the necessary information.
How to insert a picture into a video
Inserting a picture into a video helps not only to make the film more vivid and informative, but also to hide filming defects. In a similar way, the company logo and any other image are inserted into the video to increase the rating of the film.
Step 1. Download Windows Movie Maker to your computer
A new improved version of the popular program is available for domestic users. The distribution is downloaded via a link in the email. Installation takes a few minutes, after which it takes up very little space on your hard drive and is completely ready to use during the free period.
Step 2. Upload video to the utility
Launch the program from a shortcut on your desktop. Next, select “New Project”, go to the main menu, and through the “Add” tab, find and drag the video for editing to the lower work ribbon (or double-click on it with the left mouse button).
Step 3. Insert a picture into the video
In the right video preview window, click on the “Edit Slide” icon. Click on the play button and move the slider to the place where you want to insert a new image. Press pause. Next, look at the image of the green cross in the upper left corner of the editor.
Select “Photo”, find the image in your computer’s memory, and click “Open”. Move the picture to the desired part of the screen. On the right, click on the “Photo Filters” icon and use the sliders to set new values for brightness, contrast and saturation. Here we suggest using the built-in collection of effects, for example, an old photo (check the box next to the appropriate item). Click "Save".
How to add a photo to a video using Film Studio
Windows Live Movie Maker is a great solution for adding photos to videos.
Step 1: Download Movie Maker. Install the program following the installation instructions. Then open it.
Open Movie Maker
Step 2. Import files. Click "Add Videos and Photos" and select the target audio, images, and videos from the folder or drag them to your media library. Change the orientation of the image in the video. To do this, use the "Home" tab.
Importing the file
Step 3. Click on “Edit” and start editing your video.
Let’s start editing by clicking on “Edit”
Inserting an image into a video is very easy
- Start the video and stop it where you want your picture to be.
- Then use the Split tool to cut the video.
- Play the video again and do the same in the place where the picture should disappear.
- Select the fragment on which you want to overlay the image. Do this by holding the mouse cursor.
- In the window that appears, you see the duration of this fragment (as in the picture above).
Remember these details.
Step 3. Adding a picture.
Adding a picture
- Select the image you want to overlay.
- Then you need to set the time for displaying the picture. It should be the same as the duration of the fragment on which we will superimpose the image.
- Then drag the image to this fragment. The fragment must be deleted, but the picture remains. Everything is as in the picture above.
- Repeat this process as many times as you need.
Step 4. Add sound.
Adding sound
- Click on the first fragment of the video. It will be highlighted with a blue frame.
- Then click on “Video Volume”, as in the picture above. Adjust the volume to zero.
- We repeat the procedure with each video fragment.
The duration of the finished collage should match the original duration of the video. If it matches, the video can be saved. If not, it means that some kind of error occurred or part of the video was deleted. This needs to be fixed, because otherwise the audio and video will not be synchronized.
Step 5. Save the finished video.
Save the finished video
How to add a photo to a TikTok video?
It is believed that standard TikTok functionality cannot link a static image to a video. Therefore, users are limited to creating a slide show from several photos. In fact, such a method exists. It's just that not everyone is aware of it.
We study the intricacies of video editing, thoughtfully delving into the details. First you need to open the application and log in to it. Then press the plus sign icon at the bottom of the screen to activate video recording mode. Next, click on “Download”. This will provide access to all content that is in your device's memory.
Then it’s easier: you need to sequentially select “Clips”, then “Several”. To add pictures, select the “Images” section. Don't forget that the number of uploaded images is limited. There can be no more than 12 of them.
Once you have decided on the required frames, the “Slideshow” option will become active at the top of the display.
Click and get a video. All that remains is to provide it with a description, including hashtags, inviting friends, and defining the target audience. At the end of the procedure, the project is saved in drafts or published immediately. This was an instruction in general for users of the Android platform. But a surprise has been prepared for iPhone owners.
The developers have created free software that expands the capabilities of TikTokers. We're talking about Animoto, an accessible application for processing photos and videos. First you need to register, this is a standard procedure. Then, in the center of the display, click the “Create Video” button. At the same time, the type of collage is set from the proposed options.
We skip downloading music, this is not the main thing now. A blue arrow will appear at the top right. Click it, then “Photo”. You can upload 2 dozen pictures at the same time! Selected, clicked on the arrow again, a tab with an editing option appears. Now you need to select the photo that you plan to change.
Adding photos to videos in the VideoMASTER program
VideoMASTER is a wonderful video editing program. It supports more than 350 formats and allows you to add photos to videos in just a couple of minutes. And here's how to do it.
Step 1. Download VideoMASTER. Install the program following the installation instructions. Then open it.
Open the videoMASTER program
Step 2. Import files.
Importing the file
Click "Add" and select the target audio (or drag and drop).
Step 3 : Add an image.
Adding an image
- Click on "Process" and select "Overlay Text and Graphics."
- Start the video and stop it where you want your picture to be.
- Then use the Crop tool. Select the area where your picture should be.
- Play the video again and do the same in the place where the picture should disappear. Click on the text and select “+Add Image” (on the left, as in the picture above).
- Select a picture, after which it will appear in the area you selected.
- Define transparency and image size settings.
- When everything is ready, click “Apply”.
Step 4. Convert and save your video.
Convert and save videos
Click "Convert" (bottom right). The conversion will take some time. After its completion, you will see a window that will inform you about this. You can also use functions such as "Upload to YouTube after converting" and "Shut down PC after converting." You can also burn your video to DVD or post it on a website.
From computer
The main work with videos on modern YouTube takes place in the Creative Studio, a special section of the platform for content management. Therefore, the instructions below in a few steps are relevant specifically for a creative studio. So, to install the cover, you will need to follow a few simple steps.
- Opening a creative studio is the first of them. To do this, click on the icon of your YouTube account at the top right and select “ Creative Studio ” from the drop-down menu.
- Open the video section using the menu item on the left, then move the cursor over the desired video and click on the pencil icon.
- A section with information about the video will open, where you can edit its title, description, select an audience, and so on. We are interested in the “ Icon ” item. Here you need to click “ Upload icon ” prepared in advance.
- After this, the image will automatically be set as a preview of your video, all that remains is to save the changes by clicking the button at the top right. It should be blue.
How to insert a picture into a video: 1. on top of the image; 2. between individual video frames
Good day.
An ordinary picture/photograph, carefully inserted into a certain part of the video, can significantly enliven your video. Not only will it add emotions and memories, but it can also solve a purely technical problem: for example, discreetly hiding an unwanted object in a video, filling in the gaps between two clips, etc.
As the title suggests in this post I wanted to present two cases at once:
- when we add a picture on top of the video image (remember TV as an example - each channel has its logo in the corner);
- when the picture will be placed between certain frames of the video (for example, it’s convenient to explain something to the viewer, or to glue two or three videos together).
The material will be presented in the form of a dozen screenshots with arrows explaining each step (designed for the inexperienced video lover