We do everything step by step
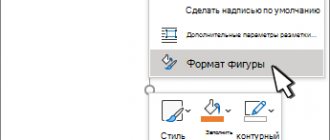
- Open the “Page Layout” tab on the ribbon, go to the “Page Options” section and in the lower right corner click on the desired icon (see the screenshot):
Another option that is suitable for Word 2010 and higher: File, then Print and at the bottom click on Page Setup.
2. In the Page Setup dialog box, click the Margins tab. Under Multiple Pages, select Brochure from the drop-down menu. In the Number of pages per brochure section, select All or specify the exact number of pages you plan for the brochure.
In the Margins section, specify the Binding size to create a small margin. The binding defines the distance between the fold line and the border of the text.
Reminder about page sizes (in millimeters):
|
3. Now you can start creating content for the brochure. However, keep in mind that when printed it will look different than what you see on the monitor. Pages 1 and 4 will be printed on one side, and pages 2 and 3 will be printed on the opposite side.
Each page will be compressed to half the size of a standard landscape page. The figure below illustrates this.
4. When you are ready to print the brochures, click File and then Print. Next, in the Pages section, select Print Settings, configure the settings supported by your printer.
If your printer supports automatic printing on both sides, then use one of the options for Duplex printing - Flip pages on the long edge or Flip pages on the short edge. However, if your printer model requires manual feed to print on both sides, select Manually print on both sides.
Ready template
Method 1: brochure template in Word 2010
Create a Word 2010 document, you should see a white sheet. In the upper left part of the monitor, find the “File” menu and click on it. In the drop-down menu on the left there will be a column of possible actions; you need to find the “New” tab among them and left-click on it. In the drop-down menu, among the possible options, select “Catalogues and brochures”, and then in the window that appears, click on the “Brochures” icon. Then select the type you want to use; if you don't have any templates, Microsoft will download the template you need.
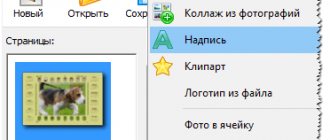
After completing the above steps, the selected brochure template will appear in the Word window and you can start editing it. For example, change existing images in the template. To do this, select this image and change or delete it. After that, click on the “Insert” tab, then on the “Image” icon. Find the image saved on your computer that you want to insert and select it. Resize the image and paste it into a location on the document that you think is appropriate.
After this, you can change the text; to do this, click on it, erase it and write your own text that you need.
You can create a brochure in Word 2013 in a similar way.
Method 2: brochure template in Word 2007
Open a new Word document, and in the drop-down menu after selecting “File”, select the template of the desired brochure. If the program does not offer you any template, you need to go to Microsoft.com and select the templates you need and download them to your computer.
Once you select a template, you can add your own text and format the template however you like. To change existing text in a template, you just need to select it; in addition to the content, you can also change the color of the text, its style, letter size, and so on.
Be sure to replace all text in the document template. Leaving out a part like “Insert your description here” will make your product look unprofessional. To be absolutely sure that you have changed all of the original text, simply change the color of the modified text, and then any unmodified part of it will stand out when you first look at the brochure. When you finish writing your text , then you can change its style to the desired one.
Insert the image you need into your document; to do this, do the following:
- Click on the image supplied with the template;
- Delete this image by pressing the Delete key on your keyboard;
- Go to the "Insert" menu on the Microsoft Word 2007 taskbar and select the "Image" button;
- Find the desired image in your computer’s memory and place it;
- Wait for this image to appear in Word. It should be noted that, most likely, the size and placement of the image will not satisfy you;
- Left-click on the image and drag the corners, resizing it until it suits you. Then click on the image and drag it entirely with the mouse to the desired field of the document.
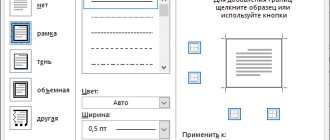
Make additional changes to your brochure if you wish. For example, add and change background color, move text and images by dragging, add frames, and so on. To explore the capabilities of each area of the page (block with text, block with image and others), you just need to right-click on their images and select the desired element formatting in the context menu that appears.
First way
Let's start creating a booklet in Word by setting up margins and columns on a blank page. Then we will write the text, and of course, insert pictures. With this algorithm of actions, there will be no problems with the design of the booklet.
You can, of course, make columns on a page with already typed text. But then the text, when divided into columns, may not be positioned the way we need, if we do not first make text breaks. This is discussed in the second method.
We will make the booklet so that it can be folded three times. Therefore, we will make three columns.
In a new document, on a blank page, open the “Layout” tab. We look for the “Orientation” button and click on it, select “Landscape”.
Set the margins on the page to 1.2 cm each.
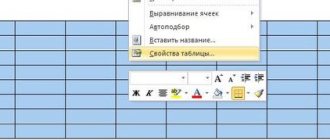
Now you need to set the number of columns on the page. In our case, we need three columns. Go: “Layout” → “Columns” → “Other Columns”.
In the dialog box that appears, set the following settings:
The number of columns is 3. The gap between them is 2.4 cm, because we set the margins to 1.2 cm. After printing, we will fold the booklet along the columns. A folded booklet page will have equal margins on all sides.
Now we fill the columns with content (text, pictures, graphs, etc.). Don't forget to design the back of the booklet in a similar manner. And print it on a color inkjet printer.
We bend it in two places. Ready.
Second way
If the text has already been typed and filled the entire page, you need to divide the text into columns in two places. Place the cursor in the desired place in the text, where the first column should end and the second begin. In the “Layout” tab, click on the “Breaks” button and select the “Column” option.
Our text is divided into two parts. Now in the second part we find the place where the second column will end and the third column will begin. Place the cursor there and again click “Breaks” → “Column”. The text is divided into three parts. These are our future columns. Let's now create them. “Layout” → “Columns” → “Other Columns”.
In the dialog box that appears, set the following settings:
The text is divided into three columns, but now you need to adjust the page margins. We proceed like this:
In the dialog box that appears, set the following settings:
All our text is now lined up correctly:
We edit it, add pictures, graphs, etc.
Booklet designer
To quickly create a booklet online, special skills and professional experience are not needed. Our website provides a step-by-step procedure for independently preparing a color layout of a Eurobooklet for subsequent digital or offset printing of the circulation in a printing house.
The clear and simple interface of the designer makes your work easier, helps you edit ready-made templates, use your own photos or images selected from a free photo stock. This accelerated method of developing a layout saves you money and the time it takes to design advertising printing.
To create a free booklet in an online program you will need:
- choose a classic or non-standard booklet format;
- upload personal graphic materials or stock images;
- use text editing tools;
- apply full color hand-drawn clipart, background illustrations.
Some tips for preparing brochures in Word
The information below concerns, for the most part, the answer to the question of how to print a brochure on A4 sheet in Word.
- As a rule, brochures are folded in half or three. When folded in half, they bend only once, providing four panels. Tri-folds fold twice and provide six panels.
- It is necessary to clearly understand how the image on the screen (Word document) is converted into an actual brochure on a piece of paper, since brochures are printed on both sides and your Word document will have two pages, the first will be the inside and the second the outside. A single-fold brochure will have two outer and two inner panels, while a double-fold brochure will have three inner and three outer panels.
- If your toolbar in Word has a standard view (File, Edit, View, Insert, ...), then you are using Word 2003 or older.
- Remember that you must print your brochure using double-sided printing. If you don't know how to do this, read the corresponding Wikipedia article.
Seal
- Browse to the main brochure file and click Print.
- Click on the line Single-sided printing and select from the drop-down menu the option of duplex printing, in which the page turns over
.
- Depending on your printer, there may not be such a line in the list of options, in which case click on
.
- Start printing and wait until the printer prints one side of the booklet.
- Take a stack of printed sheets and place them in the input tray, but with the other side (
). And only after that
to continue printing.