Windows users often see this message when starting services.
Error 5 tells us that "access is denied". That is, we lack some rights to start the service, although most users work in the administrator account.
The problem often occurs not only when connecting services, but also when opening files, creating folders, running a diagnostic policy, etc. In this article we will try to figure out what is the cause of this malfunction and, if possible, eliminate it.
Full access to the system disk
One of the options for correcting the error is to open full access to the system drive C (you may have it under a different symbol; this is the drive on which the operating system is installed).
Open Explorer, right-click on drive C and select “Properties” from the context menu. In the disk properties, go to the security tab and click on the “Edit” icon.
Next, click “Add”. In the window that appears, enter the word “All” in the line. This will allow us to save changes to disk access for all users. Then click “Check names”. The word should become underlined - this means that the system has correctly identified the new “user”.
Next, we set the appropriate marker to give all users full access to the local drive C.
Click “OK” and agree to the changes. Then we check whether we managed to get rid of the error when starting services.
Reasons for the error
Experts identify three main reasons why “error 5” may occur:
- Associated with the first is the mechanism by which the account is controlled . The process appeared in Windows Vista, and subsequently moved to other operating systems.
- The second reason is insufficient file permissions , which can occur on Windows 7 systems with standard settings.
- In the third case, there may be problems with service permissions .
Access for Local Service
We do not leave the security properties of drive C. Again, go to the last closed tab and click “Advanced” there.
Click on search and then look for a “user” with the name Local Service. We add it to the list and then, as in the previous section, we give it full access.
Changing User Account Control settings
This method is much simpler than the previous ones; to resolve error 5 in Windows 7, 8, 10, it is recommended to do the following:
- launch Control Panel ;
- Next you need to go to the User Accounts ;
- from the list that appears, select Change User Account Control settings ;
- in the window that opens, go down, where we activate the Never notify ;
- then it is recommended restart PC.
Command line
The following solution is a response from Microsoft technical support to a user who also encountered this problem. In the command line launched as an administrator (read here how to do this), you need to write two commands in turn:
- net localgroup Administrator /add networkservice;
- net localgroup Administrators /add localservice.
Important! In the English version, we indicate Administrator in the first command, and Administrators (in the plural) in the second.
After running the commands, restart your computer and try starting the Windows service.
How to fix error 5 in Windows 10
Sometimes, when installing programs or applications, a message appears on the computer screen stating that Windows 10 error 5 has occurred. This means that the user is denied access. This happens if the system has several accounts of people using a PC.
Error 5 Access denied Windows 10
This error occurs due to lack of access rights to the directories in which temporary TEMP files are stored. This means that the user has limited rights to read and perform other actions with the information in the folder.
This problem can be solved as follows:
- You can restore rights if you run the program as an administrator. This simple and temporary method will help get rid of the error. You need to right-click on the existing installer icon. A menu will appear from which you need to select “Run as administrator”.
To use this option, a user who does not have access rights must have the password of one of the people in the administrative group and enter it. After the procedure, the program will start.
To allow access to a folder for all users, you must perform the following steps:
- Press the Win+R combination.
- Enter: %USERPROFILE%\AppData\Local\.
- Find the TEMP folder, in it you need to right-click on “Properties”.
- Next, go to the “Security” section.
- Find the category called "Groups and Users" and then click on "Creator-Owner".
- In the window that opens, you need to mark and confirm access for all PC users,
A similar procedure is done with such parameters as “Administrators”, “Users”, “System”, “TrustedInstaller”.
- You can try another equally effective method. You need to open the command line as an administrator. In the window you need to enter net localgroup Administrator /add networkservice.
One thing to take into account is that if the operating system is English, then you need to write not “Admin”, but “Administrator”. After this, the “Enter” key should be pressed. The next step is to write: net localgroup Administrators /add localservice. (Administrators). At the end of the procedure, you must close the window and restart the computer. If everything was done without errors, then Windows 10 error code 5 will no longer appear.
- It happens that the method of disabling or removing the antivirus and trying to start the service without it helps.
- Reinstalling the OS works flawlessly to solve the problem.
Windows 10 System Error 5
Security settings often give this error. You can fix it through the operating system registry. First you need to find out the name of the service that does not want to start. In the list of services you need to select the appropriate one and find the line “Service name”. You need to remember it and start working with the registry. The Registry Editor is launched using the Run window.
After this, the branch shows a list of services, arranged alphabetically. Find the name you need, right-click and look for the “Permissions” line. Then in the security settings you need to configure access in the “Users” and “Administrators” groups for all users.
There are times when the Xapofx1 5 dll error appears for Windows 10. This happens due to the missing Xapofx1 5 dll file. The failure may affect the process of launching games, installing utilities, or updating drivers. This file belongs to the executive DLLs. The cause of the failure may be pirated versions of games. Therefore, the user is recommended to use only licensed content. To correct the error, you need to reinstall the system.
Related Posts
Error 0xc004f074 on Windows 10
Often, Windows 10 users, after updating Windows or individual programs, for example, Microsoft Office, are faced with the fact that error 0xc004f074 appears, which cannot be removed with one click on the cross...
Error 0x80070002 in Windows 10
Unfortunately, not a single system can boast of flawless operation, and from time to time, Windows users encounter operational failures. They are called “errors”, and for convenience, quick diagnosis and correction, they are numbered….
Error 0x80070422 on Windows 10
The occurrence of various errors, for example, 0x80070422 in Windows 10, during system operation is a common occurrence. Despite the fact that they are written in a certain encoding, which is not particularly understandable for the average user, there is a way to eliminate such a nuisance...
howwindows.ru
Editing the registry
The next way to solve the problem is to work with the registry. To do this, we need to find out the exact name of the service that is having problems starting.
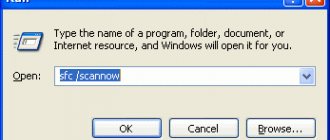
To do this, go to “Services”: the key combination Win + R and the command services.msc. Double-click on the service with the left mouse button and remember the name. Note that the name displayed in the list is not the name of the service itself. The real name is displayed in the service properties.
Now go to the registry editor (here it is described in detail how to do this). In the editor, follow the path indicated in the screenshot. Right-click on the service directory and select “Permissions” from the context menu.
In permissions we need to set full access for administrators and users.
We also recommend giving full access to the Local Service “user” we added earlier.
"Error 5 Access is denied" in Windows 7
error.
This error indicates that the user does not have enough rights to run any application or software solution. But this situation can occur even if you are in an OS environment with administrative capabilities.
Fixing “Error 5: Access denied”
Most often, this problematic situation occurs due to the user access control (UAC) mechanism. Errors occur in it, and the system blocks access to certain data and directories. There are cases when you do not have access rights to a specific application or service. Third-party software solutions (virus software and incorrectly installed applications) also cause problems. Below are several ways to eliminate “Error 5”.
What is system error 5
This system problem occurs when a user tries to start a service, program, or open a folder. However, at this moment a window appears on the screen informing you that it is impossible to execute the given command. The message may contain a note that you do not have administrator rights to perform such actions. This error can occur even when there is only one account on the computer, when the user logs in with administrator rights. We suggest you figure out what causes this problem, and also read the recommendations on how to fix it yourself.
Why does “System Error Code 5. Access denied” occur?
When working in Windows 7, “Error 5. Access is denied” creates certain difficulties for users, preventing them from performing all sorts of actions. It occurs due to supposedly missing access rights. However, the question immediately arises: how can they be absent if you are working in the system under the “Administrator” account?
Experienced computer scientists claim that this situation happens when there is a failure in the account mechanism. Various negative circumstances can provoke such a failure. However, the most common cause of such a failure is unfortunate viruses. For this reason, it is useful to ensure that the necessary software is installed on the computer, in particular an antivirus program, and that its databases are always up to date.
How to fix the error
Now let's figure out how to fix error 5. There is no one universal method. We will offer several options, you should start with one of them. If it does not bring the desired result, then you should move on to other proposed options. We suggest you read the instructions on how to run as an administrator. Let’s say right away that this method is great when you have to work with installation files. If your actions extend to directories, you are unlikely to get a positive result.
If you have to install any new program on your computer, you download the installation file in advance. Next, do not rush to “traditionally” click on it with the left mouse button, in order to prevent a failure and not cause error code 5. In any case, you need to click on the mouse button, but only with the right one. After this, a context menu will appear in which you need to select the “Run as administrator” option and click on it. Next, the installation process will proceed as usual. If you have set a password for the operating system, then you will need to enter it at one of the installation stages.
If the problem does not arise at the moment when you decide to install new software on your PC, but when you try to open a folder, then we suggest doing something a little differently. So, we suggest following these steps to provide access to the folder:
- launch “Explorer” with administrator rights (right-click on the “Start” icon, select the line “Open Explorer”);
- now open the system drive C, go to the Windows folder;
- scroll the slider, carefully reading the names of all subfolders, we need the “Temp” subfolder;
- right-click and select the “Properties” option;
- go to the “Security” tab;
- visually inspect the contents of the window, find the “Add” button, click on it;
- select the “Check names” option;
- after completing the search, you will find a new name “Users”, select it;
- at the bottom of the window, check all the checkboxes in the “Allow” column;
- At the end of the manipulations, confirm your actions by clicking the “Ok” button.
Often, after performing such simple sequential steps in Windows 10 or 7, the problem disappears. When working with directories, you will no longer encounter problems and scary windows. If, after performing these steps, you continue to encounter a malfunction, then we suggest that you perform some more actions that involve making changes to the settings of user accounts. Don't be alarmed, this proposed method does not involve any complications, it is surprisingly simple, but very effective.
Initially, we need to get into the “Control Panel”. This is easy to do if you click on the “Start” menu, and then reorient your gaze to the right side of the menu that opens. It’s easy to find the “Control Panel” line there; all you have to do is just click on it.
In the new window that opens, go to “User Accounts”. Now you need to find the line “Change User Account Control settings”.
On the screen you will find a slider that can easily be moved up or down with the mouse. You need to move the slider to the very bottom, this is where the check mark is located, accompanied by the “Never notify” parameter. For all changes to take effect, click on the reboot button.
What to do if error 5 occurs when installing programs on Windows
When installing programs or games on Windows of any version and build, users periodically encounter error 5. The message that the system displays along with this error sounds like “The file in the temporary directory cannot be executed. Installation aborted. Error 5: Access denied." Most often, this happens on systems where there are several user accounts, and on this page we will provide ways to resolve error 5 on Windows OS.
Reasons for error 5 in Windows
To install programs or games, the Windows operating system automatically creates temporary copies of all installation files from a disk or flash drive on the hard drive, places them in a special directory, and installs them from there. This temporary directory is located at %USERPROFILE%\AppData\Local\Temp or %WINDIR%\Temp. And, if the system cannot access this directory or cannot run a particular file from this directory, error 5 will be automatically generated.
This behavior of the system is most often associated with the banal lack of rights to write and read information from a temporary folder for a specific user.
How to resolve error 5
- In order for the system to receive all the necessary rights to work with the temporary folder and the files located in it, sometimes it is enough to run the game or application installer as Administrator. If you are using a regular account on this PC, you may be required to enter the Administrator password.
- In order to give access to this folder to all PC users, you must take the following steps:
- Press the combination Win+R.
- Enter %USERPROFILE%\AppData\Local\.
- Select the Temp folder and open its properties using the right mouse button.
- Go to the Security tab.
- Select the Creator-Owner option under the Groups and Users category.
- In the new window, set Full Control permissions and confirm the changes.
- The same operations must be performed with the parameters “system”, “TrustedInstaller”, “Users” and “Administrators”.
- All the actions described in method 2 can also be done with the directory located at %WINDIR%\.
For the changes to take effect, restart your computer and try installing programs or games again.
- If the methods described above do not give the expected result, you can go a slightly different route and simply change the address of the temporary folder by changing the Windows settings.
- Create a directory at the root of the system drive and give it any name. For example, this could be the Temp directory. Its address should look like this: C:\Temp, where C is the letter of the system partition, and Temp is the name of the created directory.
- Open your computer's properties by right-clicking on the My Computer icon.
- In the left column of the window that opens, find “Advanced system settings” and open them.
- In the system window that opens, click “Advanced” and then “Environment Variables”.
- Select the Temp folder option and Give it a new address.
After making changes, be sure to restart your computer and try installing the programs again. Error 5 will no longer bother your PC users.
Found a typo? Select the text and press Ctrl + Enter
gamesqa.ru


