Greetings to all my readers! Today you will learn how to test your motherboard for functionality. You may have encountered a situation where your device (laptop, computer) often began to unexpectedly interrupt its operation (starting a blue screen), display some errors, have difficulty loading, or even stopped responding to startup attempts altogether. If this is your case, then do not rush to get upset and think that now you will have to look for a service center and spend money and time on repairs.
In this article I will try to help you solve this problem yourself. To do this, you will need to diagnose such an important element of the computer as the motherboard, because it may be the solution to the problem. Don't worry about not having enough knowledge or experience in solving a problem like this.
I will try to explain in accessible language what should be done and how. Also for diagnostics you may need: a working power supply, a multimeter and a speaker. We'll start by defining the basic technical concept.
What is a motherboard?
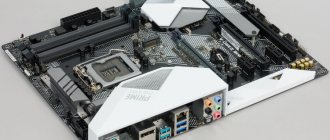
The motherboard is the main element of the computer system unit, to which all other elements are connected and connected. Thus, it is the connecting link of the entire system, carrying out the interaction of the elements included in this system. Schematically it looks like this:
Here's a visual example:
Visual control
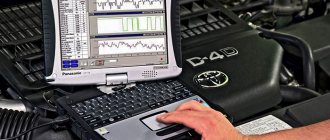
At the initial stage of testing, you need to remove the board from the computer and visually inspect it for visible defects: carbon deposits, stains, cracks, etc.
It is necessary to carefully inspect the electrolytic capacitors; they should not be swollen, since most often they become the cause of the device’s inoperability. If they become swollen, the entire motherboard will have to be replaced, since in this case it will never function stably. You also need to carefully inspect all electrical elements: resistors, microcircuits, etc. for burnout. In this case, it will be enough to replace the burnt element. Installing programs on the computer
Good and bad capacitors
Where does diagnosis begin?
The first and necessary diagnostic step is a visual inspection of the condition of the motherboard. We have to identify the presence of visible damage on its surface. To do this, remove the cover of the system unit and look directly at the motherboard. The first thing you need to pay attention to is whether the electrolytic capacitors are swollen (as shown in the figure).
If yes, then you will have to change the entire board (replacing individual capacitors will not work). If no swelling is found, we proceed to further inspection.
Carefully inspect other electrical components for darkening on their surfaces and erased inscriptions (shown in the figure).
Visual check for serviceability
Even if you take a component out of the box, it's better to be on the safe side. When purchasing a used motherboard secondhand, this must be done. Subsequent testing should only be carried out if there is no visible damage.
I would like to note that if suspicion arises, an external inspection should be carried out even if you have been using the computer part for some time. Even by opening the side cover of the system unit, obvious damage can be detected.
The first thing you need to pay attention to when diagnosing is electrical capacitors. There are not too many of them on this PC part, but failure of any of them can lead to glitches in operation or complete loss of functionality.
A sign of a failed capacitor is swelling, as well as cracks in the housing. Similarly, you need to inspect other components - resistors and microcircuits.
As a rule, a burnt-out element has a darker color than usual. There may be traces of soot on the substrate itself.
Fourth step
Let's do a more detailed test by disconnecting all components connected to it from the motherboard and try to find out if there is a problem with any of them. To do this, disconnect all connectors (RAM, video card), except for the central processor and power. After that, turn on the power supply and speaker to the network and press the computer's power button.
Just a moment, you might be interested to know where the clipboard is on your phone or why the BIOS doesn’t see the hard drive.
If the motherboard is healthy, you should hear one short and one long beep from the speaker, which indicates a faulty RAM and indirectly indicates that everything is fine with the board. If the speaker is silent, then the motherboard is faulty. In this case, it will have to be replaced.
Next, we connect the RAM modules and listen to the speaker again. If the RAM is good, you will hear one long and two short beeps. This indicates that the problem may be with the video card.
We repeat the procedure, only this time, connecting the video card and monitor. If everything is fine, you will hear one beep in the speaker and see the BIOS splash screen on the monitor. If not, the problem is with the video card. However, there may be no signal, and the video card will also be working properly. This can happen if the central processor has a built-in graphics core (its presence can be determined in the operating instructions or on the manufacturer’s website).
How to determine a motherboard malfunction at home.
If you turn on the computer and it does not want to work adequately, that is, it throws blue screens, or constantly reboots, then you have a reason to check the functionality of your motherboard. But how to do that? There are two options:
1) take the computer to a service center and pay for diagnostics; 2) check the motherboard for functionality yourself. The advantage of the first option is that the service will tell you exactly what the problem is (perhaps not even in the motherboard or not only in it). There are two disadvantages: firstly, you will pay money for diagnostics, and secondly, you will never learn to solve computer problems on your own. Therefore, we will consider the second option for solving the problem, that is, self-diagnosis of the motherboard. So!
To determine whether the motherboard, and not some other component, is really to blame for the computer breakdown, you need to do the following manipulations: 1) disconnect the computer from the network. Then, disconnect the following cables from the motherboard: mouse, speakers, keyboard and, if available, LPT cable. We leave only the network cable and the monitor cable (for dummies: a network cable is not an Internet cable, but a cable that supplies power to the computer. It is black and connects to the power supply through a connector on the back wall of the system unit); 2) now remember this detail: how long ago did you change the battery on the motherboard? If your computer is a couple of years old and you have never changed the battery, then be sure to replace it (the fact is that the voltage in the battery must be at least 2.9 V); 3) You should now CLEAR CMOS. To do this, remove the battery from the socket, wait a couple of minutes and insert it back; 4) now we remove all the boards from the slots, leaving only the processor and speaker on the motherboard; 5) start the computer and listen: if after the start the speaker makes a characteristic squeak, then you can breathe a sigh of relief: the motherboard is alive and well, if not, then... well, you understand; 6) but that’s not all: if the motherboard is alive, then you now need to find out which node is faulty. To do this, start inserting the boards into place one by one. The order is as follows: 6.1. RAM (if the speaker has changed the squeak, it means that the RAM is seen by the system and this is very good); 6.2. video card; 6.3. and so on until the fault is identified. As a rule, when a node is faulty, the speaker emits a drawn-out squeak. It only seems at first glance that everything described in the article is intended for more experienced users. Believe me, friends, this is not so! Everything is very simple, the main thing is to carefully carry out the algorithm. With this I say goodbye to you. See you in new articles!
How to check the motherboard for functionality - video
So, we have discussed all the necessary steps for self-diagnosis of your motherboard and how to check the motherboard for functionality. If you still cannot identify the problems, you have only one step left - contact the service center. However, I hope that my article will still be useful and accessible, and the recommendations outlined will help you avoid turning to specialists. Wish you luck!
Previous post Where is the clipboard on the phone and what is it?
Next entry Which browser is the best and fastest?
Basic recommendations before testing
How to check the motherboard for functionality? There is no single mechanism capable of finding an answer to the question posed. And the main reason for this is the extensive powers. There is interaction with a bunch of components, responsibilities for loading the operating system, BIOS and dozens of interfaces that control additional functions. That’s why tests have to be carried out in three stages – first looking at every millimeter, then connecting each individual component and starting the system.
In addition to the main reason, there are other nuances. First of all, it is worth noting the lack of a nominal set of tools capable of studying in normal mode how the motherboard reacts to the equipment and what difficulties arise with it. Therefore, sometimes, in attempts to get to the truth, problems that arise are most likely related to the video card, hard drives or RAM. And don’t forget about the power supply, line overloads or increased voltage.
Situations where the motherboard becomes the source of other problems are extremely rare and hardly compatible with reality...
Verification methods:
Visual inspection
If the board is new and not yet unpacked, then the box will have to be opened and looked at the contents (such a check is especially necessary in a store when the purchase has been made, but the equipment is allowed to be “touched” and evaluated for performance). It is worth considering visual defects - chips, abrasions, dust or traces of previous use. In such cases, you should immediately apply for an exchange of products or a refund.
If the motherboard is already in use, then it’s worth taking a look at the capacitors, batteries and transistors - each listed element must be in the “correct” condition - no “swelling”, ruptures, or traces of “scale” due to overheating. A separate list should include “deflections” due to heavy components, especially video cards. If the motherboard can hardly withstand the load and is bursting at the seams, then it is worth separately considering options to reduce the “risks”. It’s worth either coming up with an additional stand or finding a special fastener-holder in an online store that can reduce the load by redistributing excess weight to the body. If no chips, no abrasions, no strong signs of use are found, then it’s time to move on to the next options.
Checking through RAM
Testing using a minimal set of components is carried out as follows - first, everything is turned off except the processor, cooler, hard drive with a pre-prepared operating system and video card (if the processor has a graphics core installed, then you should also get rid of the video card). Before disconnecting components, you should place the system unit on the floor (put it in a horizontal position), and turn off the power supply for the duration of the procedure. After rearranging, turn it on again and perform a test run. A message should appear on the screen - they say that the RAM was not found and the performance is impaired. This error demonstrates the main thing - the motherboard is suitable for use.
Testing via graphics adapter
An alternative way to check is to turn off non-essential components, including the video card. The personal computer is restarted and the result is evaluated. Did you receive a beep indicating an error? This means that the motherboard copes with the task - it starts, but the other components are not connected.
If the methods listed above do not bring the desired result, then you should use other verification methods. The first of which is connecting only the power supply and processor. Carrying out a launch and studying sound signals and the behavior of sensors on the motherboard. If some indicators turn red, then the check for the presence of the necessary components has not been passed, but the motherboard is working 100%. The second method is the gradual connection of additional equipment. First the RAM, then the video card, then the main hard drives and those that store entertainment content.
You can also look at articles on the topics How to find out the characteristics of the motherboard and How to find out the serial number of the motherboard.
How to reset the BIOS yourself
Resetting the BIOS on the motherboard can be done using a jumper , which is usually located near the battery. According to the factory settings, the jumper closes contacts No. 1 and No. 2. You need to move it to contacts No. 2 and No. 3 for literally 10-20 seconds and return it back. Be sure to turn off the power to your PC before changing jumpers! You can also read in detail the article where I told you how to enter the BIOS, as well as how to reset the BIOS settings.
- If none of the things I listed above help, then we will resort to the last method . Disconnect the power supply from the mains, and also turn off all devices in the system unit. We leave only the motherboard and cooling system . We will also need to connect the internal speaker so that, if necessary, it will give us BIOS signals about a malfunction.
- Now we turn on the power supply to the network, and the speaker should immediately signal a malfunction of the RAM. The presence of this sound indicates that everything is fine with your motherboard. You will have to replace the RAM. If you don’t hear any sound, then you can say goodbye to the board.
- Okay, let's say that the speaker gave us a signal, now we need to install new RAM in the slot and turn on the PC. After this operation, the speaker will again signal that the video card is faulty.
- Now it’s worth checking the video card itself. We insert it into the slot on the mother card. We connect the monitor, turn on the PC. The speaker gives a signal indicating that the system unit devices are working properly, and if you see the BIOS splash screen, then your motherboard is probably in working order. If not, you should replace the video card.
If none of the operations helped identify problems with the motherboard, then we can conclude that the cause of the malfunction will be the hard drive or, possibly, another device. In this case, I would recommend not running the state of your computer and contacting a service center for help.
Just a moment, friends! I suggest you read the articles I recently wrote. In them I told you what WhatsApp is and how to disable the smart tariff on MTS, as well as how to check the authenticity of an iPhone. I also advise you to make tea and don’t miss the flocks on the topic of Yandex transport online for the computer or how to read someone else’s correspondence in contact.
Now you know how to check your motherboard for functionality. If you have any questions for me, ask them in the comments, I will answer everyone with joy. And don't forget to like the article as a sign of gratitude. Peace to you and beaver)
How to check the motherboard for functionality?