Algorithm of actions
Boot your computer or laptop and open the iTunes application. Update the program if necessary. Establish pairing between gadgets. Now everything is ready to copy.
Advice!
To increase data transfer speed, it is recommended to use a wire.
Step-by-step instructions on how to backup an iPhone via iTunes on a computer:
- After pairing, if required, enter the password for your smartphone.
- Go to the "Overview" section. Select iPhone.
- Specify what data you want to copy. Click "Create a copy now."
- Check if the procedure was successful. The Browse section should display a copy with the date and time it was created.
Alternatives to iTunes for backups using iMazing as an example
Advantages : with their help, you can not only access data without the Internet, but also feel like a real geek who uses not only standard software. In addition, alternatives may be more convenient in some specific cases - for example, to quickly save photos to your hard drive.
Disadvantages : all backup processes still require a computer, which is not always accessible.
What you can save : Almost the same amount of data that iTunes saves (but different applications may have their own nuances).
How to do it : in most cases, a backup in iTunes alternatives is created or restored by pressing one or two buttons (for example, in the same iMazing). But each specific option may have its own nuances - in some solutions you can separately save messages, contacts or other data.
My opinion : in some cases, using alternatives for iTunes may be even more than appropriate - especially on PCs, for which Apple’s program is simply not tailored. It works extremely clumsily even on fairly powerful computers. But on Mac today I’m still leaning towards the standard solution.
Additional features
Before you start creating a reserve, you need to consider a few nuances:
- To create a backup on your computer, you must use devices running OS X or Windows. Linux PC owners will have to look for other ways to copy data.
- When creating a copy, encryption cannot be installed, and data such as “Health” and “Activity” cannot be transferred to the PC.
- After encryption, you can only access the reserve by entering a password. The password must be written down. If you forget it, even Apple employees will not help restore access to information.
It is recommended to back up at least once a week. No one is protected from thefts and sudden phone breakdowns. If you wish, you can use both this method and cloud storage at the same time.
Backing up your iPhone, iPad or iPod
Creating a backup copy is not difficult, and this can be done not only through the iTunes program, but also on the Apple device itself, and the data can be saved both to a computer and to iCloud cloud storage.
Option 1: iTunes
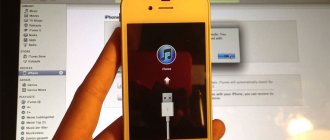
Before you start creating a backup, launch iTunes and connect your device to your computer using the included USB cable.
How to backup iPhone to computer using iTunes
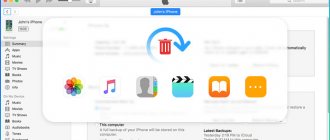
1. Open iTunes on your computer or laptop, if you do not have this program installed, do so. Connect your iPhone to your computer. If you are asked to trust your PC or enter your account password, confirm.
2. Click on the phone icon in the control panel at the top of the program and in the main window, in the “Overview” section, you will see a block with backup options.
3. Click on “Create a copy now” to start the process and wait for it to finish without removing the cable from the smartphone; you can also check the encryption box so that passwords are also saved. You will need to wait about five minutes, depending on how much data is currently on the device.
Important! You may be asked to confirm purchases that are not in your iTunes library - you can do so. But they will still not be restored if they are not in the library. This is usually written about applications that have been removed from the App Store, and in any case they cannot be downloaded again.
At the end of the process, you will be able to see the time the last backup was created in the program, both in iTunes and iCloud.
Where is iPhone backup stored?
When you create an Apple ID, you will receive free 5 gigabytes of iCloud space for storing and backing up data. Honestly, this volume is enough for me for now (iPhone 4S + iPad mini 2), despite the fact that I use my devices like an average person.
Most of the backup will consist of photos and videos you took. I don’t have the habit of storing pictures taken 2-3 years ago in the iPhone’s memory, and periodically I dump “unnecessary” photos onto an external hard drive. This frees up the phone's memory, and the backup copies are very affordable in size.
If with iCloud backup everything is somehow virtual, then the copy created on the computer can actually be “felt and touched” on the hard drive. To access backups stored on your computer, you need to select the Devices iTunes Settings .
Depending on the operating system used, backups are located in the following folders:
- Mac : ~/Libraries/Application Support/MobileSync/Backup/ The tilde character (~) corresponds to the user folder. By default, the Library is not visible. To display it, click Go and hold down the Option - the Library link will appear in the menu that opens.
- Windows XP : \Documents and Settings\(username)\Application Data\Apple Computer\MobileSync\Backup\.
- Windows Vista, Windows 7,8,10 : \Users\(username)\AppData\Roaming\Apple Computer\MobileSync\Backup\.
How to Backup Your iPhone Online to iCloud
It's highly likely that iCloud backup is already enabled on your device. It's easy to check:
1. Unlock your iPhone and go to Settings → <Your name> → iCloud.
2. Scroll down to iCloud Backup and tap it.
3. Make sure the switch is in the On position. Pay attention to possible notifications about iCloud storage sizes and the time of the last backup.
4. Click the "Back Up" button to force the iPhone to begin this procedure, or do it later at a convenient time.
If you see a message saying that your iPhone can't back up due to insufficient free space, you'll need to either reduce the amount of data on your device (such as photos) or upgrade your cloud storage plan. When you sign up for iCloud, Apple only provides 5 GB of free space, which is not very much by modern standards. Go to Settings → <Your name> → iCloud → Manage storage and click “Change storage plan” to increase your storage capacity.
If you have an iPhone with low memory and don't store many photos, games or videos on the device, then purchasing 50 GB of cloud storage for $1 per month will be enough. If you need to make backups for multiple devices or share storage with family members, or you actively use digital content, then 200 GB of cloud space for 149 rubles per month would be an excellent option.
How to independently select data for backup in iCloud?
It is possible to fine-tune the backup of your device in the Settings → <Your name> → iCloud → Storage management → Backups section.
Tap your device's icon and view all the items scheduled to be backed up to iCloud. Exclude Photo Library (photos and videos) or selected apps from backup by setting the switch to Off.
♥ ON TOPIC: All functions of the buttons of the original headphones included with the iPhone.
Why do you need an iPhone backup anyway?
Obviously, backup, or, as it is also called, data backup, is needed in order to protect yourself from losing important data. In fact, you don't always have to lose your iPhone to lose information and data that wasn't backed up beforehand. There are times when data such as videos or photos may disappear from your phone's memory without your knowledge. This can happen if the phone's memory is very full and/or if you often let the phone's battery drain completely. One of our clients actually had such a case: all the videos were completely erased from the iPhone’s memory, although the photos were still there. Unfortunately, it was not possible to recover 40 GB of lost videos - a backup copy of this iPhone was not created in advance.
How to Delete iPhone Backup from iCloud
1. On your phone, open Settings, go to your account, and open iCloud.
2. In “Storage Management”, go to “Backups”, select the one you need and delete it. You can also delete data from specific applications individually.


