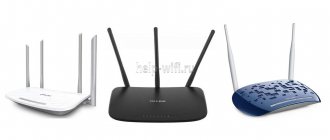
Options for connecting a computer or laptop
A computer can be connected to the router in two ways:
- By wire. The downside is that it can sometimes be difficult to extend it if the computer is located far from the router. But there are overriding advantages here - reliability and speed of the connection, besides, there is a network card for the wire on almost any stationary PC.
- By air. Using the same Wi-Fi adapter. There are no default adapters on your computer, but they are easy to purchase and install. It is used when you don’t want to pull the wire or there is no such opportunity. Disadvantages - speed limitation and possible problems from using Wi-Fi technology. But sometimes it is still very necessary. Another possible purpose is to analyze wireless networks from a computer.
Next, we will get acquainted in more detail with wireless modules, their types, connection and use options. Let me mention again that they can be used not only on a PC, but also on laptops (for example, if the built-in WiFi adapter is broken, or you need a special one). Some smartphones also support some Wi-Fi adapters via OTG - it’s better to check for your model.
Network Equipment Identification
If you have a personal computer, then in order to find out what driver is needed for the network adapter, you first need to find out the model of the motherboard and download the required driver from the manufacturer’s official website , and then install it.
The network card is built into the motherboard. How to find out the motherboard model?
If you still have the box, receipt, warranty card, then this information is on them. If there is no box, then through the “Command Line”.
Algorithm:
- We type on the keyboard Win + R >>>
Win + R combination on the keyboard - In the window that appears, enter >>> cmd >>>
To open the command line, press the key combination Win+r and enter cmd in the window that appears
- In the “Command Line” we enter the commands sequentially
- wmic baseboard get Manufacturer
- wmic baseboard get product
Enter the commands one after another “wmic baseboard get Manufacturer” “wmic baseboard get product”
Motherboard in the example: manufacturer - ASRock; model - Z77 Extreme4.
Where and how to find the required driver?
Using the site https://www.asrock.com/ as an example, let's look at how to find the right driver, we need - Lan driver
asrock.com. Go to the "Support" section
"Support" section >>> enter your motherboard model
Click “Download”
Select your operating system
Driver – Broadcom Lan driver ver:14.8.4.1
On the websites of other manufacturers, the algorithm is similar: go to the “Support” section, etc.
What is it for?
The main functionality of our device for which people purchase it:
- Connecting to existing Wi-Fi networks from a PC - home router, Wi-Fi modem. Wi-Fi receiving device on a computer.
- Create a wireless access point from your PC so that other devices in your home can connect.
- Replacing a failed adapter on a laptop.
- Specific use - such as analyzing external networks, when there is not enough power or the hardware on the built-in adapter is not suitable.
How do I turn off my device?
To turn off Wi-Fi or edit previously entered data, you should select the wireless networks icon in the tray (relevant for Win7 and Win8) and in the drop-down list of all available connections, select the one that you configured earlier. To disable, use the “Disable” button, and to edit, right-click and select “Properties”. In the “Connection” and “Security” tabs, you can either disable the device or make changes to the password, encryption type, or security level.
Disabling Wi-Fi on your computer
For Win XP you need to do the following:
- Start Menu;
- Network Neighborhood icon;
- "Wireless connection";
- In the list that opens, select the established connection and click the “Disconnect” button.
Types of adapters
Here we will briefly consider the main characteristics by which you can choose an adapter. There are not so many of them here, so everyone can easily figure it out.
Attention! Do you still have any questions? The comments in this article are always open to them - we will definitely consider any problem and try to solve it.
Connection interface
First you need to decide how you will connect it. There are only two main options on sale.
USB is the most popular external adapter option. And for me – the most convenient, because USB ports are now everywhere. In addition, they are more compact - there are options that look like a flash drive or a mouse connector, as well as “modem” powerful adapters, even with a plug-in external antenna. Appearance:
USB WiFi
Such devices can also be used through a cable extension, for example, to move them out of the window for better signal reception. If you need stable reception, use an external antenna. It may be inconvenient to place, but here it is more convenient for anyone. For me, USB adapters should be considered first.
PCI Express . Internal adapter. We are talking about a card slot on the motherboard itself inside the system unit. Various other extensions are placed in such slots, such as video capture cards, TV tuners, dial-up modems, etc. There are also Wi-Fi modules that are the same. On the plus side, you won’t even notice it, because... located on the back of the system unit. The downside is that there is not always free space there, you can’t pull it out and connect it to a laptop, it’s difficult to access. But it will also be convenient for some. For remote outdoor antennas and a system unit, laying the cable once will be more convenient than constantly pulling out and fiddling with USB. Another option for such boards to expand the old format is PCI. The difference here, perhaps, is only in internal standards. PCI Express is still newer.
Which adapter is better - USB or PCI? There is no particular difference between these two types - it’s just the type of connection, all other characteristics apply to both. But for me now it’s more universal to use USB. Arguments above.
Let me mention that there is another type - PCMCIA or Card Bus, which is an analogue of PCI cards for laptops. But this is a little unnecessary.
Old Card Bus wireless network adapter
Other interesting options are connecting the adapter via wire directly to the Ethernet port (RG45) of the network card, which sometimes occurs.
RG45
Antennas: internal, external, external removable
The main task of the receiver is to receive the signal efficiently. And antennas help with this. The whole point is that no matter how you look at it, adapters without external antennas still receive the signal worse. It's one thing if you are in the same room, but another thing if there are a couple of walls between you and the router.
The bottom line is that if you need to receive a signal confidently and over a long distance, choose models with external remote antennas. Otherwise, an ordinary flash drive will be enough.
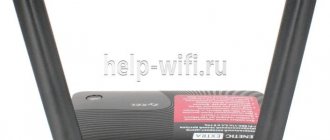
Internal
External
Antenna gain characteristics are often found in stores and on packaging. But for some reason many people don’t score it. For those who still need figures in the characteristics, the power of the model can be viewed precisely by this antenna gain. Normally the figure will be about 20 dBm. The second power parameter is the transmitter power. It won’t reach the neighboring house, but at home the range is enough to reach through the walls to the next room. For those who like something very powerful, look at external removable antennas.
External removable
Another thing about antennas is MIMO support. This is a functionality that ensures the simultaneous operation of several antennas (802.11n - up to 4, 802.11fs - up to 8). Of course, everything will affect both speed and quality. But here you need to understand that both the router and you must have several antennas.
Standards (802.11n and 802.11ac) and frequency
We are talking about the supported standards of Wi-Fi itself. The times of low speeds on Wi-Fi have already passed (we are talking about the “g” standard), and now everything is quite cheerful. Main standards for the current day:
- 11n – up to 300 Mbit/s. Although some routers and adapters here support only up to 150 Mbit/s - we are talking about the simultaneous use of several antennas, and some devices provide greater speed, so on my TiPilink it is possible to set the speed to 450 Mbit/s.
- 11ac – up to 6 Gbps. Relatively new standard.
Both standards are compatible with each other. The main thing to understand is that the final speed on the network will depend on the narrowest link. If your wireless adapter for your computer supports the 802.11ac standard, and your router runs on 802.11n, then the entire network will operate at N speed.
What to take? Of course, it’s better to buy a device now that supports 802.11ac so as not to worry in the future. Now they are quite accessible.
Interesting note. 802.11ac is faster than a USB 2.0 port and may result in lower than advertised speeds.
Another consequence of standards is frequency. Modern frequencies are 2.4 GHz and 5 GHz. Some models in dual-band mode can operate at both frequencies. But the main thing is not to bother your head with this. The standards are compatible, which means there will be no problems with frequencies. All current standards for self-study are in the following table:
Compatibility
No need to worry about network device compatibility these days!
In the old days, this was relevant - either there was no driver, or the hardware did not fit, and even the standards may not match. Around Windows 7, these problems disappeared. The manufacturer produces drivers for both Windows 7 and modern Windows 10. Some even try to please and release software for MacOS and Linux.
There is also no need to worry about the compatibility of the adapter and the router - all modern Wi-Fi standards are compatible with each other. And the maximum inconvenience that can happen is that the network will operate at the speed of the oldest standard.
There is also no need to match manufacturers to each other - all manufacturers produce equipment primarily to international standards. So you can take what you like best and not think about possible problems.
Manufacturers
Many people recommend not looking at the manufacturer. Yes, in general they all do the same thing now. And it’s better to pay attention to the price and characteristics. But do not forget that it is better to choose a model from the main manufacturers of network equipment - this way there will be fewer problems with reliability, drivers, interface and other hidden issues.
Here are the best Wi-Fi adapter manufacturers on the market right now:
- TP-Link
- D-Link
- ASUS
There are other excellent models, but these are truly the mastodons of network equipment. Choose something from them.
Price
The price tag is not very scattered here - after all, this is just a small receiver. Optimally, you can take a cool device in the range of 800-1500 rubles. Maybe someone will find something better. But you shouldn’t chase prices either, and a little “whistle” can serve you long and well.
So when choosing, it’s easier to turn to the necessary characteristics and REVIEWS of other people. Pay special attention to the second; for many, studying reviews becomes a turning point. For me, all models are about the same, so take the most popular model in the store and don't worry.
How to set up Wi-Fi in WIN XP?
In this guide, we will assume that your home “Access Point” and Internet distribution device are already configured.
So, to establish an “air” connection on a computer running Win XP, you need to do the following:
- Open the Start menu;
- Select “Network Neighborhood”;
- In the “Network Connections” window, find the “Wireless Network Connection” icon;
- Right-click on the icon and click “Properties” in the list;
- In the “General” tab, find the “Internet Protocol TCP/IP” item;
- Click the “Properties” button.
If the use of specific IP and DNS addresses is critical for your provider, then in the window that opens, select the “Use the following IP address” radio button. If these parameters are configured in automatic mode, then do not touch anything.
Manual IP setup
When manually setting up IP, you will need to fill in the following fields:
- IP address: 192.168.0.2 (You should check this parameter with your provider, the value may be different);
- Subnet mask: 255.255.255.0;
- In the “Default Gateway” line you should enter the address of your router or modem, usually 192.168.0.1 or 192.168.1.1. But to avoid mistakes, it is better to check the documentation of your device;
- Click on the “Use the following DNS server addresses” switch and fill in both fields: primary and secondary DNS server. Information about the DNS servers used by the provider can be found on the official website of the telecommunications company or by calling technical support;
- Without closing this window, select the “Wireless Networks” tab at the top and check the “Use windows to configure the network” checkbox. Next, click the “Wireless Networks” button. Here you will see a list of all available connections. Select the connection that is configured on your dispenser and click the “Connect” button. Now, in order to connect to the Internet, all you have to do is enter the username and password you know.
Popular models
I'm just offering a list of very popular models. But once again, look at the current models in your stores, read reviews. Well, remember - they are all about the same. Below is just what people really love:
- ASUS PCI N10
- ASUS PCE-N15
- ASUS USB-N14
- D-Link DWA 525
- D-Link DWA-131
- D-Link DWA-127
- Tenda W311MA
- Tenda W311M
- TP-LINK TL-WN725N
- TP-LINK TL-WN727N
- TP-LINK TL-WN722N
But no one forbids you to take a closer look at other devices.
The D-Link DWA-127 is a USB adapter with an external full-size antenna that operates on the 802.11n standard.
Among the built-in models, ASUS PCI-N10 is mentioned. Budget, standard N, minimum functions:
I don't want to rank devices. New devices appear on this market regularly. What was hot this year is unlikely to be top-notch next year. But I offer you something better - the ability to choose. You can make your own modern device rating using my exclusive algorithm below.
How to quickly choose a Wi-Fi adapter for a PC: step-by-step instructions
Above, I described to you the main characteristics and made an approximate selection of models. And now my exclusive algorithm that will help you choose a Wi-Fi adapter if you don’t want to choose for a long time:
- We go to any store.
- Select the category of Wi-Fi adapters.
- We set the price - up to 1500 rubles. (if you need less, feel free to choose).
- Manufacturers – ASUS, D-Link, TP-Link.
- Standard – 802.11ac
- We read reviews for each model and make our choice. If you need a rating, sort by rating or reviews. If you need to select special properties (such as an external antenna or an internal adapter), set this before selecting a standard.
How to connect?
Connecting the adapter is very simple:
- We simply insert it into any available USB port (the best and easiest option).
- We open the case and insert it into a special PCI expansion slot - in case your card is PCI.
In the first option everything is simple, for the second, watch this video and everything will fall into place:
All! Typically, a modern system itself successfully recognizes the model, but some manufacturers also include special drivers, just in case.
Settings
Now the hardest part is that there is a driver. Usually the manufacturer also provides a utility for setting up the device, where you can enter all the necessary parameters. Some provide access to the control panel via a web interface. It's best to read the basic instructions.
But usually all this is not necessary. If your operating system has already recognized the adapter, then you can immediately connect to an available network in the standard way:
- We chose a network.
- Entered your password.
- We rejoice.
If you need an adapter not for reception, but for distribution. This can be done by standard creation of an access point. The topic of the article is not about that; detailed instructions are on our website.
Installing Wi-Fi in Win7 OS automatically
When the operating system is loaded, you can see the “Wireless Network Connection” icon in the lower right corner of the screen. Click on it. This will open a list of air connections available to you. you need to select from the list the one that is configured in your modem or router.
Installing Wi-Fi on Windows 7 in automatic mode
Next, double-click on the desired connection. If it is password protected, you will need to enter it the first time you connect. Most likely, you will not need to enter the password again during subsequent connections.
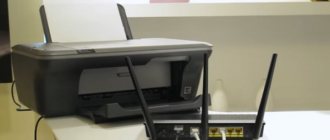
Wi-Fi modems for computers
Many telecom operators provide their Wi-Fi modems for users so that they can connect to their network via 3G/4G using a SIM card and distribute the Internet via Wi-Fi. These modems are known from Yota, Beeline, MTS, Megafon, Tele2.
Do not confuse Wi- Fi modems with Wi- Fi adapters - these are two different things. Adapters cannot create a connection via SIM cards.
That's all! I hope this article helped you dispel some myths and decide on the important conditions for choosing a Wi-Fi adapter. Write your comments and opinions in the comments! I will be very pleased, and it will be simply useful for the guests of our site to read practical situations and other people’s opinions. Thank you!