Today it is difficult to imagine a modern apartment, or even more so an office, that is not equipped with the appropriate set of office equipment: computers, laptops, tablets, mobile phones. And where all these devices are available, there should naturally be the Internet. He has firmly entered our lives, occupying one of the most prominent places there. On the Internet we study, work, have fun, relax, and communicate. Therefore, providing comfortable access to the World Wide Web for yourself and your loved ones is a problem that sooner or later every person has to solve. Fortunately, now we have a reliable assistant that allows us to carry out the most effective and simple solution to this issue without any additional intellectual and financial costs. We are, of course, talking about Wi-Fi technology.
Read more: How to turn on Wi-Fi
But in order to use the “over-the-air” Internet, you need to know where to find and how to turn on Wi-Fi on your computer. We tried to present the answers to these questions in this article.
What is WiFi?
Wireless Internet technology has become part of our everyday life. We habitually identify Wi-Fi with a convenient, reliable and fast Internet connection, which we encounter at home, at work, in public places - in airports, cafes, shopping centers.
Answer the question “what is Wi-Fi?” the simplest way is this: this is a network protocol, with the participation of which communication is carried out between an “access point” and a “client”, or an “access point” and several “clients”, packet data is exchanged on a local network or via the World Wide Web.
Currently, the abbreviation Wi-Fi means nothing and is not officially deciphered in any way, but when creating this protocol, the developers “gave it a name” by analogy with Hi-Fi (High Fidelity). It stood for “Wireless Fidelity” - wireless accuracy.
Benefits of use
Of course, the “over-the-air” Internet is not an ideal technology. You can give several examples of the difficulties that may arise when using it. One of the most widely known is the so-called “noisy” connection. Many household appliances (for example, microwave ovens) emit in the range used by this protocol, and alternative connection devices (for example, Bluetooth) operate. Interference can also be caused by walls and ceilings. All this negatively affects the speed and quality of access.
At the same time, there are no less positive aspects from using it at home and in the office. We list just a few and the most obvious of them:
- Low cost of wireless networks and installation of several access points that will provide stable coverage throughout the entire territory. At the same time, there are no cables, extension cords or adapters that constantly get tangled and clutter up the space. An “aerial” connection is indispensable in rooms of historical value, as well as in rooms with obstructive architectural features;
- This protocol provides full access to the Internet to any device - be it a mobile phone, tablet, laptop or desktop computer - without being tied to a specific location. Access to the global information space through this protocol is an opportunity to comfortably use the Internet while lying on your favorite sofa;
- Wi-Fi allows you to synchronously use a large number of active connections. Having established a wireless connection, you don’t have to worry about how many computers and mobile devices will be accessing the Internet at the same time.
Connection procedure
In Windows 7, the entire process is carried out through a special network icon located in the system tray. In the figure below it is clear that by the appearance of this icon you can immediately determine whether the laptop is connected to Wi-Fi or not.
To connect to WiFi, the user will only need to complete the following few sequential steps:
- Click on the above icon and in the menu that appears, click on the Wi-Fi network to which you plan to connect the laptop;
- If there is no requirement for an access code to enter the selected network, after completing the 2nd point of this instruction, you will be able to start working on the Internet;
- When the Wi-Fi signal is encrypted with the set access code, a window will appear with a field in which you will need to type it and then click “Ok”;
- All! Now you can start surfing the vastness of the worldwide information network.
What types of Wi-Fi modules are there for a computer?
All popular devices now come with adapters by default. They can be connected to the Internet out of the box, but what about those who have a desktop computer? The answer to this question is obvious - you need to purchase an additional Wi-Fi receiver, install, connect and configure it.
We will talk more about how to install Wi-Fi on a computer below. Now we propose to decide what types of receivers there are, what is their difference, specificity and advantages.
Air Wi-Fi adapter
“Air” adapters come in two types: external and internal. External ones are the most commonly used and easier to operate. The external receiver looks like a miniature USB drive (flash drive). It connects to a USB connector on the front or back of the computer, either directly or via a USB cable.
Internal Wi-Fi adapter
The internal adapter is slightly larger and you will need to open the computer case to install it. Therefore, buy an internal receiver only if you are confident that you can figure out how to install it on the motherboard yourself. When installing an internal module, you must first disconnect the antenna from it, insert the board into the corresponding port on the motherboard (the PCI interface is most often used for this) and return the antenna to its place.
Further manipulations for installing and turning on wireless adapters are the same and do not depend on the modification and method of connection to the computer.
Why do you need a wireless adapter?
Wi-Fi is a technology for working with computer networks using a wireless radio signal. To connect a PC to the Internet, you need a special device - a Wi-Fi adapter or module.
Want to know interesting facts about Wi-Fi? Watch the video:
There are the following types of Wi-Fi adapters:
- Built-in. It is clear that they are there by default, from the factory. They require installation of programs and drivers, after which you can connect to an available Wi-Fi network.
- External. Purchased and installed separately. In most cases, they look like a small flash drive and are connected to a computer using a USB connector. The user also needs to install all the necessary programs and drivers.
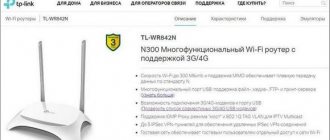
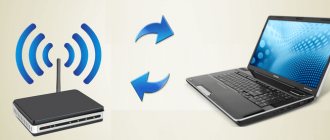
Wireless adapters (both external and internal) provide connection to a computer, laptop, or any gadget to a Wi-Fi signal source. In everyday life, combined routers (for example, TP-Link, Asus and other models) are usually used as such a source, which operate according to the following scheme:
- The router receives an external Internet signal via an Ethernet cable .
- converts it into a wireless Wi-Fi network.
- You and I use a wireless adapter to connect to the network via Wi-Fi.
Before setting up a wireless connection, it is recommended to make sure that your computer or laptop is equipped with a wireless adapter. If the module is not built-in, it must be purchased and installed separately.
How to install drivers?
Any Wi-Fi receiver is supplied with a disk from the manufacturer, which contains the drivers necessary for full operation of the device. In addition to drivers for a specific device, the disk may also contain drivers for other adapter models, so during installation you need to be careful and not miss choosing the device for which you are installing drivers.
Otherwise, the driver installation procedure is standardized and provided with an intuitive interface with detailed tips from the “Found New Hardware Wizard.” Just carefully read the messages that will appear on the screen and click the appropriate “Next”, “OK” and “Done” buttons.
Most adapters are automatically recognized by current computers and can work even without installing drivers from the bundled disk. Just connect the device to the desired connector and wait a few seconds. As a rule, after this a message will appear in the tray stating that new equipment has been found, identified and installed, which is ready for use. However, universal drivers cannot completely replace specialized software. Therefore, we advise you not to neglect installing drivers, even if everything seems to work flawlessly at first glance.
The driver disk for your Wi-Fi receiver model may also contain a special utility from the developers, which is designed to facilitate the process of setting up Internet access. Moreover, this utility will allow you to further control your Internet connection, monitor the speed and volume of data transfer.
How to turn on a Wi-Fi device on a laptop?
The method differs depending on the model and manufacturer of the laptop, so it is recommended that you read the documentation included with the PC. Usually there is a separate mechanical switch for the WiFi adapter on the laptop case. A characteristic icon indicating wireless communication must be drawn next to it. The user is only required to set this switch to the “On” position.
But if the computer owner, after carefully examining the device’s case, did not find such a switch, it means that the manufacturer has provided for activating the adapter using the keyboard, for example, the Wi-Fi sign will be displayed on one of the “F1 - F12” function buttons. To turn it on, you need to hold down the Fn key and click on the function key. The success of the procedure will be indicated by the activity of the WiFi indicator light, which is often located on the front panel of the laptop.
How to set up Wi-Fi in WIN XP?
In this guide, we will assume that your home “Access Point” and Internet distribution device are already configured.
So, to establish an “air” connection on a computer running Win XP, you need to do the following:
- Open the Start menu;
- Select “Network Neighborhood”;
- In the “Network Connections” window, find the “Wireless Network Connection” icon;
- Right-click on the icon and click “Properties” in the list;
- In the “General” tab, find the “Internet Protocol TCP/IP” item;
- Click the “Properties” button.
If the use of specific IP and DNS addresses is critical for your provider, then in the window that opens, select the “Use the following IP address” radio button. If these parameters are configured in automatic mode, then do not touch anything.
Manual IP setup
When manually setting up IP, you will need to fill in the following fields:
- IP address: 192.168.0.2 (You should check this parameter with your provider, the value may be different);
- Subnet mask: 255.255.255.0;
- In the “Default Gateway” line you should enter the address of your router or modem, usually 192.168.0.1 or 192.168.1.1. But to avoid mistakes, it is better to check the documentation of your device;
- Click on the “Use the following DNS server addresses” switch and fill in both fields: primary and secondary DNS server. Information about the DNS servers used by the provider can be found on the official website of the telecommunications company or by calling technical support;
- Without closing this window, select the “Wireless Networks” tab at the top and check the “Use windows to configure the network” checkbox. Next, click the “Wireless Networks” button. Here you will see a list of all available connections. Select the connection that is configured on your dispenser and click the “Connect” button. Now, in order to connect to the Internet, all you have to do is enter the username and password you know.
Installing the router
The router or router receives the incoming signal through the cable and transmits it to wireless devices within range. For initial setup, connect the router to the computer with a wire. Next, you will need the parameters specified in the router documentation or on the sticker on its back side: IP address, administrator login and password. Open your browser and enter the IP numbers in the address bar, the router’s web panel will open - log in with the administrator password.
How to connect and configure a Wi-Fi router: in the panel, write down the parameters for wireless networks indicated on your provider’s website. Come up with a name for the network - you will use it to choose it to connect. In the security settings, create a password to protect the connection. Without a password, neighbors within the router's coverage area will be able to use your channel. To complete the setup, reboot the router by selecting the Reboot function in the panel and disconnect the device from the computer.
Installing Wi-Fi in Win7 OS automatically
When the operating system is loaded, you can see the “Wireless Network Connection” icon in the lower right corner of the screen. Click on it. This will open a list of air connections available to you. you need to select from the list the one that is configured in your modem or router.
Installing Wi-Fi on Windows 7 in automatic mode
Next, double-click on the desired connection. If it is password protected, you will need to enter it the first time you connect. Most likely, you will not need to enter the password again during subsequent connections.
Possible problems and their solutions
If the search for a wireless network connection is unsuccessful, the reason may be:
- software disabling the adapter;
- uninstalled drivers – you need to look at the list of devices, where the adapter will be considered an unidentified device;
- lack of Wi-Fi adapter;
- Configuring the access point for the WPA2 security protocol in Windows SP2 - reconfiguration to WPA or installation of SP3 is required.
Setting up Wi-Fi on a computer for different versions of Windows differs slightly. Changes should be made carefully - do not complicate the process, since unnecessary additional settings can lead to unwanted failures.
Previous post Setting up Wi-Fi routers from Rostelecom
Next entry MikroTik hEX PoE Router (RB960PGS): characteristics, performance, price, reviews
Installing Wi-Fi in Win7 OS manually
To configure the connection manually, select “Network” in the system tray, then “Network and Sharing Center”. Click “Set up a new connection or network.” At the next stage, click the “Next” button.
In the next dialog, fill in all the appropriate fields: specify the network name, encryption type and security level. In most cases, the default settings can be left unchanged - use AES and WPA2. In the “Security Key” field, you must enter the connection password. For greater security, check the “Hide characters” checkbox so that the password cannot be read over your shoulder.
Installing Wi-Fi on Windows 7 manually
The final touch - if you plan to use this connection as the main one in the future, then o. Then click the "OK" button.
Enabling Wi-Fi in Windows 8 and 10
On Win 8 and Win 10, it’s a little easier to decide where to turn on WiFi on your computer (it doesn’t matter whether it’s a PC or a laptop). Wi-Fi is enabled by default. In Windows 10, all settings and drivers are updated automatically.
So, to set up WiFi on a computer with Windows 8 and 8.1, you need to search for the item “Turn on or off wireless devices.” Next, you can switch the “Airplane” mode, as well as Bluetooth and Wi-Fi itself.
For the “ten”, you can open Wi-Fi on your computer through “Settings” - section “Network” - “Internet”. There you can switch Wi-Fi, as well as connect to the desired network. Also check "Notification Center" in the corner. Right there you can switch the airplane mode or turn off wireless networks.
Installing a device in Windows 8
To connect a wireless connection in Win8, do the following:
- Click on the Wi-Fi icon in the system tree on the taskbar or call Settings Charm through the Charms Bar (similar to pressing the win+I combination). The Wi-Fi panel will appear on the right side of the screen;
- you will see the entire list of wireless networks available for connection. Select the one that is configured for you and click the “Connect” button;
- The next step is to check the network connection conditions. The system will check the requirements of the selected network and prompt you to enter the necessary data;
- After checking the network requirements, the system will prompt you to enter a password. Enter the security key you know and click the “Next” button;
- If the password is entered correctly, you will see the message “Connection complete”, which means that the connection to the Internet has been established.
How to connect Wi-Fi on a laptop (Windows 7)
Review and configuration of the D-Link Dir-320 modem
If the network adapter is working properly, then all that remains is to turn on Wi-Fi on the device itself. There are several options for how to enable Wi-Fi on Windows 7. The procedure is usually simple, but each brand of manufacturer has its own. For example, for ASUS, activation is carried out by pressing the key combination “Fn + F2”, for Acer and Packard Bell - “Fn + F3”, and for Samsung - “Fn + F9”.
Important! Sometimes some models have a separate button to turn on Wi-Fi, and it is not always located on the keyboard.
Also, setting up a Wi-Fi wireless network in Windows 7 can help you enable it - a standard service built into the system. Typically, you should look for the power button in the lower left corner of the taskbar in the form of a special indicator with a Wi-Fi icon.
How do I turn off my device?
To turn off Wi-Fi or edit previously entered data, you should select the wireless networks icon in the tray (relevant for Win7 and Win8) and in the drop-down list of all available connections, select the one that you configured earlier. To disable, use the “Disable” button, and to edit, right-click and select “Properties”. In the “Connection” and “Security” tabs, you can either disable the device or make changes to the password, encryption type, or security level.
Disabling Wi-Fi on your computer
For Win XP you need to do the following:
- Start Menu;
- Network Neighborhood icon;
- "Wireless connection";
- In the list that opens, select the established connection and click the “Disconnect” button.
Basic requirements for a successful connection to a wireless network
The first thing to do is make sure that the wireless network itself is in working order. To do this, you can simply try to connect to it using another device, for example, a smartphone. Then you should check the operation of the adapter in the device manager of the laptop itself.
To do this, go to the device manager and find the tab called “Network adapters”. If there are active devices in the open list, then the adapter is installed on the device. After checking both components, you can begin connecting the laptop to the Network.
Important! There are times when the PC sees network adapters, but there is an exclamation mark next to their icons. This means that the adapter is not working correctly. It is possible that the problem is with the installed drivers.