Deterioration in the functioning of the video camera is almost always accompanied by a number of specific symptoms. If you, dear friend, are interested in the signs of a video card malfunction, then you must be faced with the fact that this device has failed or is about to fail. However, in order for you to be confident in your conclusions, I advise you to read our post on this topic. After reading the material, you will understand what’s going on and maybe you’ll even be able to fix the problem yourself. This kind of problem can happen with a video card from any company - for example, from Nvidia or Radeon.
Signs of a broken computer video card
Well, a faulty computer video card can manifest itself like this:
You turn on your favorite computer and notice something unusual. You may hear beeps that were not there before, or flicker lights or other telltale signs. And the monitor at this moment remains dark, that is, it does not manifest itself in any way.
In this case, there is a high probability of failure of the video card, which is a rather complex chip and is responsible for processing and outputting the video signal to the monitor screen. At the moment, your computer is of no use and you should fix the problem as soon as possible. Thus, we begin to look for the reason.
Hidden and obvious signs of a video card failure
If your video card is not working correctly, then this can be judged by some signs. For example: the monitor works, but from time to time image distortions and stripes appear on the screen. These are so-called artifacts. And when you reinstall the drivers, the system may suddenly display a blue screen of death, and the BIOS informs you that your PC’s video card is broken, signaling with sound signals. To be 99% confident that the cause of your computer failure lies in the video card, you need to make sure that the other components are working properly. To do this, pay attention to the points below:
- The power supply works properly (after connecting all the hardware, the cooler spins when turned on);
- After turning on the computer, the usual sound signal is played (from the Speaker speaker), informing about the system loading and the usual information on starting the operating system is displayed on the screen;
- The monitor is working properly (you can connect it to another computer and check it);
- The cooler (cooling) on the processor rotates quickly. (It should not be clogged with a large amount of dust, a little is not critical. To check, you need to open the side cover of the system unit);
- RAM is good. (If there are several of them, check one at a time and turn on the computer with each stick. Usually the memory sticks are located to the right of the cooler; they can be easily removed from the motherboard. The memory can burn out. Take it out, blow out the slots, wipe the memory contacts and try turning on the computer).
Well, if all the components work, the operating system loads, but no information is displayed on the screen, then with a 99% probability we can say that the reason lies in the video card.
What to do with a video card malfunction?
What to do if the video card is covered?
If your PC is still under warranty and you have not opened it (the seals are intact), then the best option would be to contact the store where you purchased the computer. The guarantee allows you to shift your worries to the store, which is obliged to give you working hardware. True, such an appeal may take a month, but you won’t have to buy a new video card.
If your PC's warranty has expired or you have opened it, you can first inspect the video card in detail. You can do this yourself at home. For this:
- Unscrew the bolts on the system unit;
- The video card is located just below the middle on the motherboard. Pull out the wire coming from the monitor, pull out the latch from inside the system unit, which prevents the video card from dangling, and then pull the video card out of the slot;
- Having picked up the video camera, which is most likely faulty, inspect it thoroughly. There should be no traces of burning or other visually detectable defects on its surface. If one is found, the device is most likely faulty;
- You can use cotton wool (bandage, cloth, damp cloth) soaked in alcohol to wipe the contacts. If the video card is old, oxide may form on it, which will interfere with the proper operation of the device;
- Assemble the system unit by installing the video card, securing it and connecting the wire from the monitor. Try to run it.
If after these manipulations the image still does not appear on the screen, then the reason for the breakdown of the video device is clearly not the accumulation of oxide on the contacts. And a more serious approach will be required.
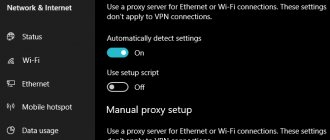
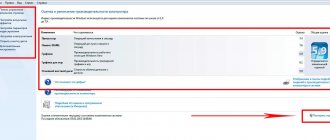
How to find out if a video card is working on a computer using Windows services
There is another way to check if your video card is working properly. It consists of using the built-in services of the Windows operating system (OS), but only if it is installed on the computer. To check the equipment, you need:
- Use the key combination “Win+R” and open a window to perform tasks that require administrator rights.
- In the pop-up list of the panel, select dxdiag or enter manually, and then click on the “Ok” button.
- Go to the “Screen” tab and view information about the device, downloaded drivers, and information about faults in the “Notes” field.
- Treatment of the pancreas for inflammation
- Recovery after caesarean section
- Why do girls and women menstruate twice a month? Reasons for repeated discharge
Reasons for video card failure and ways to restore its functionality
There are two main reasons why a video card may not work: hardware (technical) and software.
Software errors may be due to incorrect driver installation. To eliminate errors, you just need to reinstall the drivers. Another program may conflict with the video card software. This, of course, is rare, but nevertheless it can happen. In this case, you need to remove software that was recently installed and which you suspect conflicts with the video card software.
But hardware failures almost always happen. As a rule, they are associated with a violation of interaction between individual video modules. In principle, you can eliminate such malfunctions yourself, at least you can try. Below we will look at three ways to troubleshoot video card hardware problems.
Method 1 - warming up the video card in the oven
To warm up (fry) a video card in an ordinary gas or electric oven, you will need:
- Broken video card;
- Oven;
- Foil (as for baking).
Some argue that you need a special tester and a thermocouple (to monitor the temperature). But the average user will forget about this, so we do not list them as necessary things. We remove the radiator and coolers (and also, if the capacitors are old, unsolder them, otherwise they will swell). We wrap the video card in foil, leaving only the chipset open (you can cut a square in the foil for it), from which the layer of thermal paste has previously been cleaned. Place the vidyukha in foil in a preheated oven to ~200 degrees and heat it to 250 degrees Celsius. Like that:
- 200°C - 5 minutes;
- 225°C - 5 minutes;
- 250°C - 5 minutes;
I would like to draw your attention to the fact that some recommend frying for 15 minutes, and others for 5 minutes (for example, the author from the video that we have inserted a little lower). There is no exact time for warming up.
Turn off the oven and let the vidyukha cool inside. If you soldered the capacitors, we soldered them. You can immediately not apply thermal paste, but simply install a radiator with a cooler to quickly see if the system is working and, if successful, remove the video card and do everything thoroughly, i.e. apply thermal paste, install the radiator, coolers and screw everything down thoroughly.
Method 2 - warming up the video card with a hairdryer
To warm up the video camera using this method, you will need the following:
- Broken video card;
- Soldering or construction hair dryer or soldering station.
Since I do not have such equipment and am not familiar with it, I will not describe it. On various sites they write that the heating of the device should not exceed 280 degrees, and the hair dryer should not be pressed against the chip or brought close to the chip or other elements (1-3 cm). You can read about warming up a video card using this method on Pikabu at this link.
Method 3 - warming up the video card with an iron
To warm up your video card with an iron, you will need the following:
- Broken video card;
- Iron (turn off steam mode);
- Foil.
We install the video card board on the surface so that it does not slip. For example, a metal sheet for baking in the oven. We install an iron on it so that its “nose” covers the surface of the chip, but does not touch other elements of the board. The iron should not slip either. If necessary, place something under the iron handle where it does not get hot (depending on the iron).
Turn on the iron at 1/4 division from the maximum. Fry on each mark for 5-10 minutes. You can divide it by 1/3 and, for example, fry it for 10 minutes 3 times, it will be 30 minutes. In this way, I revived my GTX 460 ti at one time at 768 MB about 5 times, in total it worked for about a year after the first artifacts appeared. But keep in mind, functionality is restored in this way for a while. I consider this method to be of higher quality than baking it in the oven, where other elements may be covered. And I got by with the iron even without foil. It happened that the iron moved a little off the chip, however, the video card then began to work. If it didn’t work, it means it was undercooked and fried again. Turn off the iron either immediately or gradually. I don’t know which is more correct, I did it this way and that way. And then I bought a new GTX 750 ti with 2GB for 9+ thousand and after the 460 it’s like a helicopter and, by the way, without additional power. I'm happy, but I want something for 4-6 GB.
Check the video card for functionality using special programs
Device performance testing is carried out using special software products, which include:
- FurMark;
- 3DMark;
- Aida 64;
- OCCT;
- ATITool.
The FurMark application is an excellent way to test the performance of a graphics card, which uses a special animation - a “furry” torus. Thanks to this graphic element, the device is heavily loaded, which helps to obtain the maximum amount of information about the operation of the adapter. At the same time, due to heavy workload, the video card may be damaged. To carry out the test, you must perform the following steps:
- Go to the official website of the program, download the latest version of the application, and then install it on your computer.
- After opening the program, click on the Settings button and in the window that appears, “Burn-in”.
- In the main menu, click on “Burn -in test” and in the pop-up checkbox, agreeing to a possible emergency restart of the system, and then click the “Go” button.
- Test the performance of the video card for 20 minutes and complete the procedure. Increasing the duration of testing may lead to malfunction of the device.
The FurMark utility can be paired with the CPU-Z program, which is designed to monitor the processor. To use the utility, you need to run CPU-Z, select “Graphics Card” in the main menu, after that you can load the video card, and then check the stability of its operation, view the main functionality with the values of the main parameters.
3DMark
3DMark is a well-known program for diagnosing video adapters, used not only by gamers, but also by device manufacturers. The test results obtained using this program are considered reference results, and performance ratings are based on them. The application is available in a paid version, but you can also download a free version with a limit on the number of tests performed necessary to check the video card.
Using 3DMark, diagnostics can be performed on personal computers with any version of Windows, laptops, and testing the graphic functions of smartphones, tablets on Android and iOS. To start testing the device, you must:
- Run the program and watch the testing progress.
- Wait 15 minutes until the end of the diagnosis and compare the indicators with the data of other users on the website.
Aida 64
The Aida 64 program is designed to test the overall performance of a computer: parameters of the video adapter, processor (temperature, number of cores, etc.) and hard drive. To check the stability of the application, the functionality of the application includes the ability to conduct stress tests. To check the video card for serviceability you need to:
- Open the application and go to the “Tools” menu.
- Run “System stability test” and check the box next to “Stress GPU” to test the video device.
- Test the card for 10 minutes and monitor the temperature change.
- Fried cheese - recipes with photos. How to cook breaded or battered
- Tartar sauce - step-by-step recipe with photos. How to make tartar sauce at home
- Instant sauerkraut: recipes
OCCT
The OSST program is designed to assess the stability and possible damage to a video card from overloads, and is also used to overclock device parameters. The application displays the values of frequency, voltage, temperature indicators, and plots graphs of parameter changes. It is only compatible with DirectX 9 and 11. To check the functionality of the device, you need to open the program and go to the “GPU” tab, and then enter the settings:
- test duration – 14 minutes;
- permission;
- shader complexity;
- error checking.
ATITool
A simple and easy-to-use software product is the ATITool application, which conducts a comprehensive check of the device’s performance using the main tool - the “hairy cube”. This animation is very voluminous and difficult for the computer, so all processor malfunctions, including overheating of the contacts, will be found and the information will be displayed on the screen.
After downloading and installing the program, you need to enter the main menu and click on the “Show 3D view” button, which will launch a rotating cube. After this, testing will start, similar to the previous programs for checking the processor temperature. There are no time limits in this test, so you need to make sure that the processor does not overheat
Using the “cube”, in addition to overheating, you can view video card errors. The program displays them as yellow dots. If, after testing, up to three points were found, then the graphics card has normal functionality. A value of 10 points is also not very critical, it only shows minor power or power issues. More than 10 points indicate the presence of serious problems inside the device.
You can check the device memory using the “Video Memory stress” utility. This program is able to determine the amount of memory that is consumed when executing a particular process. In addition, the utility is capable of checking several cards at once. Managing the application is simple. To use the program, you just need to open it and click on the “Start” button. After startup, two screens and device data will appear on the monitor. Nuances:
- The top one will show the testing time, and the bottom one will show the total test time.
- Below the bottom screen there is a window with a list of errors that occurred during the test. If there are no errors in this window, then the video card is operating normally and its functions are not impaired.
- Additional information about the device can be found in the “Log” item, which is located below the error window.