What's going on and how to find out
It is not difficult to make sure that it is the system process that is loading the processor. But this task can be completed by a user with knowledge that slightly exceeds the basic ones. In order to check the processor load, you will need to launch Task Manager. There are several ways to launch it, but the easiest one is to left-click on the taskbar to bring up the menu.
The taskbar is a rectangular area, traditionally [by default] located at the bottom of the screen
In the menu that appears, you will need to select the line Task Manager, after which a small window will appear in which a list of running processes will be displayed on one of the tabs.
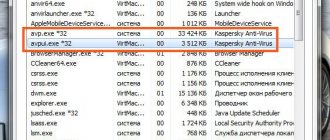
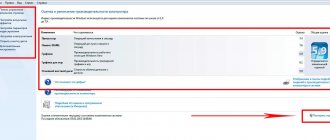
rice. 1 – appearance of the task manager in Windows 7
Its appearance may differ significantly depending on the version of the operating system, for example, but the essence remains the same. The higher the number in the CPU column, the more the process will load the hardware, which will ultimately impact performance.
In critical situations, this figure reaches 100% and it becomes impossible to fully work on a PC. There may be several reasons for such unusual activity of processes hidden from the user, and they can all be solved in different ways.
Automatic system update
A common reason for the System process to run excessively is automatic system updates, including downloading new drivers. This function, although useful, is not always convenient. Therefore, it makes sense to use it to free up processor resources, and, if necessary, enable the update manually.
This is easy to do, but it requires Computer Administrator rights. If they are, you will have access to the operating system administration.
To disable automatic updates, you will need to open Control Panel from the Start menu and select Administrative Tools. In the window that opens, you will need to select the Services section. Once loaded, it will display a list of all running and disabled operating system services running hidden on the PC. In this list, find Windows Update.
rice. 2 – dialog of the Services subsection of the Administration section
To disable this service, use the context menu. It is called by right-clicking on an object. In it you need to select the line Properties, and in the window that appears, on the [General] tab, click the Stop button, if it is active. This must be done in order for the process to complete correctly. After this, you can completely disable the update center. To do this, above the button in the drop-down list with the heading [Startup type], select Disabled. For the changes to take effect, you will need to click the [Apply] button, close the window and restart the PC.
How to disable Windows 10 automatic updates and system services
Microsoft has provided the ability to automatically update software in the Windows 10 operating system and earlier versions. Unfortunately, this function on some computers leads to the fact that when checking for available updates on Microsoft services, the System file loads the RAM or hard drive. In this case, the only solution is to disable automatic updates of Windows 10. Attention: If you have disabled automatic updates of Windows 10, we recommend that you check for new builds of the operating system yourself every few months (or weeks).
Disabling automatic updates in Windows 10 is quite simple; to do this you need to:
- Press the Windows + R key combination on your keyboard, and in the “Run” menu that opens, enter the command services.msc, and then click “OK.”
- The services.msc command will open a menu that displays all system services. We scroll through a considerable list until we find the “Windows Update (Local Computer)” service. Right-click on the detected element and select “Properties” from the drop-down menu.
- The properties of the selected service will open, and here you must first click the “Stop” button if it is active, and then change the “Startup Type” to “Disabled”.
By following the above instructions, the operating system will disable the service that automatically checks, in the background, whether the version of Windows running on the computer is up to date.
In addition to automatically updating Windows 10, so that the System process does not load the system, you need to disable some services. In the “Services” menu, which is opened with the command services.msc, you also need to stop and then disable the following local services:
- KtmRm for distributed transaction coordinator
- Snupchat
- Superfetch
- IPsec Policy Agent
- Changed Link Tracking Client
- Diagnostic Policy Service
Please note: Depending on the version of your Windows operating system and the number of drivers and codecs installed, some of the services listed above may not be available.
After disabling DrWeb antivirus, automatic Windows 10 updates and some services, you should restart your computer. By disabling a number of tasks that took up a lot of computer resources, system performance should generally improve, and in the Task Manager the problem with loading the hard drive and RAM will disappear.
File system over-indexing
Another popular reason for the indicated problem is the operation of another service. It is called and is responsible for indexing disks and files located on them. To disable it, you will need the same Control Panel and the Services item in its Administration section. The principle of turning it off is still the same.
The service from the Properties menu stops and then turns off. But there is one additional point that should not be forgotten. This option must also be disabled in the hard drive settings.
To do this, you will need to launch My Computer, and separately for each disk, call the context menu and its Properties item. At the bottom of the launched window, you will need to uncheck the [Allow indexing...] option.
rice. 3 – Disk Properties dialog in Windows 7
For the changes to take effect, you need to click the [Apply] button.
You may be interested in:
Removing Microsoft Store using Registry Editor
This method is the most difficult. He must manually create a setting by applying which we can turn off the Windows Store. So:
- Click on the Win+R buttons. In the window we will write regedit to open the registry. Click on OK;
- Go to the address: HKEY_LOCAL_MACHINE\Software\Policies\Microsoft . Next should be the WindowsStore . If it is not in this sequence, then you need to create it yourself. So, right-click on the Microsoft folder. A drop-down menu will open. Select “create”, then the “section” tab;
- Then, call the folder WindowsStore, and right-click on it to bring up the drop-down menu. In this case, we will use the function responsible for turning off Windows Store. Move the mouse to the “Create” tab, then to the “QWORD parameter”, for 64 bit OS, or to the “DWORD parameter”, for 32 bit OS;
- In this tab we will give the name RemoveWindowsStore. Click on the created line 2 times with the right mouse button. Select “Change” from the drop-down menu;
- A new window opens, where we need to replace 0 with 1.
Next, close the computer and reboot the system for the changes to take effect. After this, the store will be unavailable. If you need it again, we will return the number 0.
technical issues
Hardware problems that affect user interaction with the system are also a common occurrence that users encounter. There may be several reasons for this:
- Lack of appropriate drivers.
- The driver is not working correctly.
- Incompatibility of hardware and operating system.
- Late physical maintenance.
Each of these reasons requires more detailed consideration, since the way to solve them is not always the same.
In the first case, the System process may become excessively active when the user accesses a device that was physically connected to the PC, but its operation was not configured accordingly. Most often this happens with new components for which the manufacturer did not provide a driver disc in the packaging. In this case, you will need to install it manually. If you have an Internet connection, this is easy to do. The user must have administrator rights to make these changes, so if the account has restrictions, it will need to be changed to Administrator.
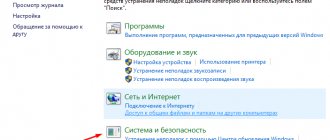
After this, you need to use the Start menu, from which you want to launch Control Panel. From it you need to launch the Device Manager section. In the manager dialog, a device without drivers will have a [?] sign. For it, you will need to right-click the Properties line and in the dialog that opens, on the Driver tab, use the buttons to install.
Tip: if you have problems with the wizard, download drivers manually from official sites
rice. 4 – Control Panel in Windows 7
Incorrect driver operation
In the second case, when the driver is installed, the same problems may occur only because the device driver version does not match. In this case, you will have to update it using the Device Manager mentioned above.
To do this, you will need to select the problematic component in the Manager window and, using the right mouse button, run the Update driver command. This operation, as in the previous option, will launch the setup wizard.
In the third case, processor overload will be associated with incompatibility between software and hardware. This situation may be caused by installing new, untested hardware or installing an operating system update.
In this case, correct operation of the equipment with the previous version of the software will be less problematic. Accordingly, you will have to take radical measures - either return, change or remove the modules that cause the error, for example, a network or video card, which is most often the case.
But such problems can also occur when the above-mentioned hardware components are simply not properly maintained. A temporary solution to the problem in this case is to turn off the power to the PC.
It allows you to remove static voltage from the device, but after a short period of use the problem returns. In this case, basic cleaning of dust from the internal components will help.
rice. 5 – Device Manager window in Windows 7
If, after working for a long time in Windows 10, you begin to notice that the system is overloaded, lags appear, and the reason for this is the NT Kernel System process, I will tell you how to deal with this. This process was added to the “seven”, and since then a situation may arise that the service heavily loads the system, the processor and RAM occupy 100% of the operating system’s resources, new programs open too slowly, and rebooting does not help at all. Next, I will tell you how to get rid of this scourge, what to do in this situation, and what kind of NT Kernel System this is.
As it usually happens, the first time everything works fine, there are no slowdowns, applications work efficiently and quickly, everything starts and works like a clock. But as the OS becomes cluttered, problems with this service begin to appear; you have to wait a long time for this or that program to start.
- There is only one reason for this - excessive clutter of the OS
. The first thing to do is to reinstall the drivers on the hardware, since it is the system libraries that are responsible for successful interaction with the hardware components of the system unit. It is better to install drivers on a clean system. You don’t have to completely remove the operating system, but just do . In this case, you will not have to reinstall any installed programs, and the matter will be limited only to global cleaning of garbage and unused DLL files. - Another reason why the presented service loads RAM is that the computer is overloaded with software
. Remove all unnecessary software, and after uninstalling, perform it using CCleaner, System Cleaner or a similar program. There have been cases when the service overloaded the system even with the Outpost Security Suite Pro firewall installed, so in some situations even a banal firewall replacement can help. - Finally, the last reason for this behavior of the NT Kernel System is insufficiently powerful hardware
. If you and weak hardware are running XP, then no problems should arise, since the hardware requirements of XP are several levels lower than “tens”. If you are trying to work on “ten” or even “seven” on the same hardware, don’t expect fast work. When in doubt, review the system requirements of the operating system you are using. After this, all doubts should be dispelled.
If you experience difficulties with the above service, do not rush to sound the alarm. It is likely that you will be able to solve the problem using the above methods, and even on your own, without resorting to the services of a computer technician, and keeping your family budget intact.
It is probably no secret for many PC users that, despite the stated minimum system requirements compared to its predecessors, it looks quite “gluttonous” in terms of resources used. How to reduce and reduce RAM consumption will now be discussed. This can be done in several ways, often independent of each other.
Windows 10: How to reduce CPU usage? General rules.
Before we begin the practical use of ready-made recommended solutions, we will consider the basic methods for deactivating unnecessary services and components.
You need to pay attention to the following fact: how to reduce processor load or reduce RAM usage can be done using the following sections:
- standard "Task Manager";
- system configuration;
- its components;
- services.
You can, of course, delve into the system registry. However, for the uninitiated user this will be quite problematic. Moreover, most of the settings can be made without resorting to this method.
How to disable Wsappx Windows 10?
You cannot disable this process in the Dispatcher itself or in other programs. If you actually disable it, it may cause a crash in the OS and the PC will become unstable because... this element is one of the main processes. That is, you can even remove it via the command line, but I won’t tell you how to do this, because... you may experience errors in Windows.
Also, if you stop this process, then after a certain time this element will most likely appear again in the list of active elements.
In addition, it is not advisable to ban the OS, and if necessary, launch the 2 services that we described above.
Which processes in Task Manager can be disabled?
As a rule, the first thing when there is an increased consumption of system resources, users usually begin to actively call the “Task Manager” (combination Ctrl + Alt + Del, Crel + Alt + Esc, taskmgr in the “Run” console).
Naturally, all currently active processes or applications, and services running in are displayed here. Let’s make the first remark right away. Windows 10 Task Manager in standard mode allows you to view or disable services and processes only once. This is typical for all Microsoft systems. In other words, if some process starts along with the system, when it is restarted it will be activated again.
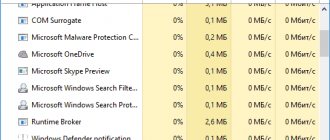
However, of all the things that Windows 10 Task Manager displays, the first thing you can safely do is deactivate exclusively user processes. If you pay attention, in the running process type column you can find three types of descriptions: Windows processes, background processes and applications. It goes without saying that when asking how to reduce CPU usage, you should assume that system services cannot be disabled. This can have unpredictable consequences. Anything marked with the Application type can be terminated (these are programs that run in windowed mode).
In the services and processes section you need to be extremely careful. What to disable? For example, if there is no printer installed on the system, you can deactivate the print service running in the background spoolsv.exe (Spooler - “Print Manager”). In general, you should first look at which process is causing the maximum processor load, and only then decide to disable it. But, again, the shutdown will be one-time. To prevent the process from starting again when the computer is restarted, first you need to at least deactivate startup items.
Is it possible to disable the wsappx process
You cannot disable these processes. However, they do not run automatically in the background. They start when needed and close when not needed.
For example, if you launch the store app, you will see ClipSVC appear. Launch the Windows Store and you will see appxsvc. Install or uninstall the application and you will see that AppX is using some system resources.
When you try to end the wsappx process in Task Manager, Windows will warn you that your system will become “unusable or shut down.”
Startup management
To disable services that start with Windows, there are two main options. In the first case, you can access the startup tab, which is available in the Task Manager itself; in the second, use the configuration setting.
In the "Task Manager" this is quite simple - you need to right-click to bring up the submenu and select the shutdown command. A little to the right there is a column in which there is a description of the degree of influence of the process on the system. By and large, in this section you can turn off absolutely everything, leaving only the Windows Defender service. If you have a high-quality antivirus installed, you can disable it too. To enter configuration settings, use the msconfig command. It is written in the corresponding “Run” menu line, after which the startup section is selected, but it again leads the user to the “Task Manager”.
It's better to go to the services tab. To avoid accidentally disabling something important, you can check the box next to Hide Microsoft services, and then look at what remains. In principle, you can only leave the stopped Adobe Flash Player plugin, since it is used in browsers. In both cases, you will need to restart your computer. This is a prerequisite for the changes to take effect.
WSAPPX - what is this process?
WSAPPX is a Windows 10 (and Windows 8.1) system process that is closely associated with the Windows App Store and the Universal Windows Platform (UWP).
As you can see in the task manager, the WSAPPX process in Window 10 includes two background system processes:
- AppX Deployment Service (AppXSVC) - Responsible for managing the deployment of UWP applications that are distributed in the .AppX format. The process actively works when installing, updating, and uninstalling store applications. In Task Manager, this process appears when you launch a Store application (or when performing automatic application updates);
- Client License Service (ClipSVC) – is responsible for providing licensing for paid and limited Windows Store applications. It is this process that processes the licenses of paid programs and will not allow the appx application to run on computers with another Microsoft account (even if it is possible to install the appx file of the universal application).
In the Windows Services Console (services.msc), these processes correspond to two system services.
Deactivating services
Many services can be deactivated from the corresponding management section. It can be called from the same “Task Manager” by clicking the show services button. Or open the editor manually through the services.msc command in the Run console.
At least three processes can be disabled here: geolocation, diagnostic tracking, and the dmwappushservice process. All these are spy functions of the system. Additionally, if you are using a netbook that does not have an optical drive, you may want to deactivate the CD burning service. In general, you can disable the firewall, secondary login, wireless configuration, the Windows Search indexing service, the server, portable device enumeration, the debugger, error logging, and the Application Compatibility Assistant. Deactivation is done by setting the appropriate launch parameter in the menu called up by double-clicking on the service.
Special utilities
Finally, if the user does not know what exactly can be disabled in the system, or simply does not want to deal with such things, you can always turn to optimizer programs for help. They will do all the work for him. Any such application contains not only a deep cleaning system, but also modules that control the same startup elements that are hidden from the user’s eyes by the system. Accordingly, deactivating everything unnecessary will be as safe as possible. True, the Windows components that were described just above will still have to be disabled manually. And here we did not consider deactivating visual effects, which can be done from the maintenance and security section or using the same optimizers.
Many Windows 10 users notice that the System and Compressed Memory process is loading the processor or using too much RAM. The reasons for this behavior can be different (and RAM consumption may even be the normal operation of the process), sometimes it’s a bug, more often it’s problems with drivers or hardware (in cases where the processor is loaded), but other options are also possible.
The System and compressed memory process in Windows 10 is one of the components of the new OS memory management system and performs the following function: reduces the number of accesses to the page file on disk by placing compressed data in RAM instead of writing it to disk (in theory, this should speed up the work). However, according to reviews, the feature does not always work as expected.
Note: If you have a large amount of RAM on your computer and use resource-intensive programs (or open 100 tabs in the browser), System and Compressed Memory uses a lot of RAM, but does not cause performance problems and does not loads the processor by tens of percent, then, as a rule, this is normal system operation and you have nothing to worry about.
What is Windows Store Service (WSService)
In Windows 8, the background WSService also performed "infrastructure support" for the storage. In fact, the ClipSVC service in Windows 10 and the WSService service in Windows 8 have identical descriptions in the services interface.
The WSService process basically does the same things as ClipSVC. It just has a different name. You won't see the WSService process on Windows 10.
What to do if the system and compressed memory are loading the processor or memory
Hardware Drivers
First of all, if the problem with CPU usage by the “System and Compressed Memory” process occurs after waking up from sleep (and everything works fine when rebooting), or after a recent reinstallation (or reset or update) of Windows 10, you should pay attention to the drivers of your motherboard or laptop.
The following points should be taken into account:
Pay special attention to your video card drivers. There may be a problem with the process, and they can be solved in different ways:
- Manually installing the latest official drivers from the AMD, NVIDIA, Intel website.
- On the contrary, removing the drivers using the Display Driver Uninstaller utility in safe mode and then installing older drivers. Often works for older graphics cards, for example a GTX 560 may run fine with driver version 362.00 and cause performance issues with newer versions. More details about this in the instructions (the same will happen for other video cards).
If manipulating the drivers does not help, we try other methods.
Paging File Options
In some cases, the problem (in this case, a bug) with the load on the processor or memory in the described situation can be solved in a simpler way:
Antiviruses
Another possible reason for a process loading compressed memory is that the antivirus does not work correctly when checking memory. In particular, this can happen if you install an antivirus without support for Windows 10 (that is, any outdated version, see).
It is also possible that you have several programs installed to protect your computer that conflict with each other (in most cases, more than 2 antiviruses, not counting the built-in Windows 10 Defender, cause certain problems that affect system performance).
Anecdotal feedback on the issue suggests that in some cases, firewall modules in the antivirus may be causing the load displayed for the System and Compressed Memory process. I recommend checking by temporarily disabling network protection (firewall) in your antivirus.
Google Chrome
Sometimes manipulating the Google Chrome browser can fix the problem. If you have this browser installed and, especially, it is running in the background (or the load appears after a short time of using the browser), try the following things:
After this, try to restart the computer (reboot) and pay attention to whether the “System and Compressed Memory” process manifests itself in the same way as before when working.
What to do if the System Idle process is slowing down your computer
But not everything is so rosy, if with such a line you also observe that the computer really freezes and slows down. This happens when a virus is disguised as a process of inaction. And this happens so often that in our personal top problems, this reason is one of the first places.
To check whether a process is a virus, you need to go to the Task Manager and find the process line. Take a metric like 98% and add it to the CPU Usage reading. If the total is exactly 100%, then in most cases everything is fine:
If this is not a real process, which, on the contrary, consumes resources and does not show free ones, then in all cases you will have more than 100%. For example, a load of 98% with a total CPU load of 100% will give a total of 198% - this means that the line about system inactivity is a virus.
Additional solutions to the problem
If none of the described methods helped solve problems with the load caused by the System and Compressed Memory process, here are a few more untested, but according to some reviews, sometimes working ways to fix the problem:
I hope one of the solutions will help you solve the problem. Don’t forget to also check your computer for viruses and malware; they can also cause Windows 10 to work abnormally.
In the list of Windows 10 Task Manager processes, you may see an entry called System and Compressed Memory. Unfortunately, as you may find, it puts quite a lot of stress on your computer, especially the processor and RAM? What to do in this case?
"System and Compressed Memory" is a system process that affects the RAM management mechanism and in particular performs the function of "compression storage". The function allows you to save (accommodate) more data in RAM memory due to compression, because the processor reads information from RAM much faster than from the “swap file” on the hard drive, which generally increases the speed of the computer.
In theory, even a slightly increased use of computer resources through this system process should not worry us.
But sometimes the process can really seriously load the processor and RAM. Then it becomes a significant problem. How to deal with this? While there is no single, proven method to solve the problem of excessive load on the computer caused by this process, we have collected some solutions from the Internet that have helped other users.
It turns out that the “excessive load” can be associated with missing drivers, and also caused by certain features of the Windows 10 system. We offer several ways to solve this problem:
Why does the wsappx process load the system heavily?
So, as you understand, the wsappx process can generally create a load on your computer when installing, updating or uninstalling universal applications. If you install or update an application from the Windows Store, then it is the wsappx process that performs all the actions (unlike classic applications, which are installed by their own installers or through the Windows Installer). Those. high system load by the wsappx process in this case is quite acceptable. You just need to wait until the application is installed/uninstalled.
If you did not install or uninstall appx applications, and the wsappx process actively uses the CPU and disk, then most likely the issue is the automatic update of UWP applications, which is enabled by default. Open the Windows Store and check to see if there are any automatic app update jobs running.
Method 1: Restart your computer
“System and compressed memory” can temporarily load the Windows 10 system and the simplest solution is to restart your computer. There is a high probability that after restarting the computer, the excessive load on the RAM will disappear. Therefore, before moving on to the next instructions, restart your computer and check the activity of the process.
One option that increases the use of computer resources through this process is the system tips feature in Windows 10. Most likely, there are bugs in the operation of this system that have not yet been resolved by Microsoft. Even though the two systems don't seem to be related, many Reddit users have reported that the following method helped them solve the problem of high CPU and RAM usage caused by the "System and Memory Compression" process.
Open the Start menu, and then go to the “Settings” section.
In the window that opens, go to the system settings (“System”) and select the “Notifications and actions” item.
In the list of options, find the item “Display tips for working with Windows” and disable it.
What is the WSAPPX process
The WSAPPX process runs system services (specified when we expand the process in Task Manager) that are responsible for installing, updating, and maintaining Windows 10 Store apps.
Accordingly, during normal operation, the corresponding elements in the task manager may appear while applications are running (including background), installed or uninstalled.
Typically, the elements in question do not cause any significant load on the processor: it may increase briefly during installation or update processes, in other cases it fluctuates around zero during background operation. Unfortunately, this is not always the case.
Method 3: Install the Intel Rapid Storage Technology Driver
The Intel Rapid Storage Technology Driver is designed to support hard drives running in AHCI or RAID mode. AHCI is a standard interface that is most likely installed on your computer. Many users reported that after installing this driver, the problem with this process went away. There may be some connection - when a process begins to load the computer heavily while indexing files on the hard drive, the Intel RST driver may actually affect its operation.
If you have a laptop, then it is best to download the driver from the official website of your equipment manufacturer. In the case of a desktop computer, you can download the Intel RST driver from the Intel website.
Method 4: Turn off SuperFetch technology in Windows 10
Another option to solve a problem related to the hard drive is to disable the Superfetch function. To speed up Windows 10 and running programs, this feature shows an increased “appetite” for system resources. As a result, it can lead to heavy load on the system, processor and hard drive, which in turn will affect the activity of the system process.
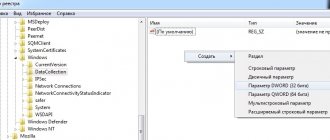
To disable SuperFetch, use the Windows 10 registry editor. To do this, press the Windows + R key combination and enter the regedit command in the field. In the left pane of the editor window, navigate to the following entry: HKEY_LOCAL_MACHINE > SYSTEM > CurrentControlSet > Control > Session Manager > Memory Management > PrefetchParameters
After opening the PrefetchParameters section, find the EnableSuperfetch parameter in the right section of the window. Double click on it and change its value to “0”.
If there is no EnableSuperfetch parameter in this section, create it yourself and assign the value “0”. To do this, right-click on the PrefetchParameters entry, select New > DWORD Value (32-bit). Name the new parameter EnableSuperfetch, double-click on it and assign the value “0”.
How to fix high memory and CPU usage of ntoskrnl.exe in Windows 10?
There are cases of very high CPU or memory usage, and the most common method to fix this is to close or update the programs that are causing the problem.
Run System File Checker
For an issue like high resource consumption due to ntoskrnl.exe in Windows 10, corrupted or missing system files could be the main reason. Running the SFC tool will help in this situation.
- Open a command prompt as an administrator and enter the command sfc /scannow .
- Scanning and restoring system files may take a long time, you can drink a cup of coffee, after the process is completed, restart your computer.
Check the faulty driver and update it
A faulty driver is the root cause of this problem, so check carefully and update if necessary.
- Press Win + R and enter devmgmt.msc to open Device Manager.
- Click the View and select Show hidden devices .
- Expand your devices and check them for the yellow exclamation mark. If there is one, then right-click on it and click Update .
Automatically clear virtual memory on every startup
I recommend: Create a system restore point before using this method.
- Press Win + R and type regedit to open Registry Editor.
- In the registry, go to the path (you can copy and paste into the line) indicated below. On the right, find ClearPageFileAtShutDown, double-click on it and set the value to 1 . Restart your computer or laptop.
HKEY_LOCAL_MACHINE\SYSTEM\CurrentControlSet\Control\Session Manager\Memory Management
Tweaking Windows for Better Performance
- Press Win + R and enter sysdm.cpl
- In the Visual Effects tab, select Provide the best performance .
See also:
- Node Service: State Repository Service is hogging CPU in Windows 10
- How to calibrate your monitor in Windows 10
- How to reinstall Edge Browser on Windows 10
- Can't connect to WiFi or Local Network in Windows 10
- How to fix Critical Process Died error on Windows 10
comments powered by HyperComments