Introduction to Raspberry Pi
Using Raspberry Pi, you can make a smart robot that recognizes its owner or a smart home server transmitting via WiFi or Ethernet. You can connect sensors, motors, relays and more to the microcomputer. Thus, the areas of application of Raspberry and Arduino in DIY projects overlap greatly.
What are single board microcomputers?
A microcomputer is a device that has the architecture of a full-fledged computer, but differs in its size. Today, there are hundreds (!) of different models on the market (including Raspberry clones) from dozens of manufacturers, and this makes the single-board market significantly different from the market for conventional computers, in which all market shares have long been distributed among the leaders.
Microcomputers are most often created for specific tasks; they cannot compete with conventional computers, being inferior to them in power and convenience. But they are cheaper, simpler, compact in size and consume less energy. This makes the microcomputer an important element of mobile automated systems.
The Raspberry Pi is today the most famous member of the family of single-board microcomputers. This is a fairly cheap and affordable entry-level board that can be purchased from many online stores. Asian manufacturers have created a large number of clones (Orange Pi, Banana Pi and others) that can be used in their projects. And another very important advantage of “raspberry” is the huge community of developers involved in the development of architecture and software. Many books, tutorials, operating systems and convenient tools have been published that make it much easier for beginners to get started with the system. Therefore, it is recommended to start working with this microcontroller for those who have already become “small” with Arduino.
What is Raspberry Pi?
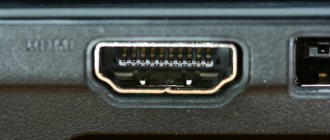
The Raspberry Pi is an inexpensive, credit card-sized computer that attaches to a PC monitor or TV and uses a standard keyboard and mouse. Externally, the computer is a small four-layer printed circuit board with USB, HDMI and other connectors, a Micro SD slot, and a GPIO pin strip. The case, memory card, keyboard, mouse, monitor, power supply must be purchased additionally.
With the help of “raspberry” you can learn to program in Scratch and Python. Initially, the microcomputer was developed for use in teaching in schools and universities, so there are many software packages for it and even a special operating system for children.
A key feature of Raspberry is the ability to connect external devices to it and control them using various software packages (the most popular is Python). All kinds of sensors, LEDs, motors, relays and other electronic components can be connected via GPIO pins in the same way as with Arduino. Therefore, we can significantly expand the functionality of a microcomputer by creating workstations from it for each specific project.
But even without external devices, this microcomputer performs all the functions of a regular desktop PC, even if it is not very fast. Use it to surf the Internet, play video and audio files, process texts, and create tables. Naturally, a microcomputer cannot compete on equal terms with a conventional PC - it always works slower. But the microcomputer copes well with certain not too heavy applications. Linux is used as the base operating system for the Raspberry Pi; there are many clones adapted specifically for this microcontroller. On our website you can find an article with an overview of operating systems for the Raspberry Pi.
The history of Raspberry
The developer of the device is the British company Raspberry Pi Foundation. The first sample was presented by David Braben in May 2011. The start of production of the first batch of model B dates back to January 2012. Since then, the computer has been upgraded every year, and more advanced computers have gone on sale.
Model release history:
- February 29, 2012 – start of sales of Model B.
- December 14, 2012 – production of the Raspberry Pi “A” model begins.
- July 14, 2014 – release of the third version of Raspberry Pi “B+”.
- February 2, 2020 – Raspberry Pi “2B” released.
- November 26, 2020 – release of a new Raspberry Pi Zero microcomputer equipped with an unmounted GPIO connector.
- February 29, 2020 – release of the Raspberry Pi 3 model, featuring a 64-bit processor, WI-FI and Bluetooth.
- February 28, 2020 – upgraded version of Raspberry Pi Zero W with WI-FI and Bluetooth.
Principle of operation
A smart home based on Raspberry Pi 3 is popular due to its ease of assembly, including for people without special experience. The basis of the entire system is a small motherboard, in which the manufacturer has built enormous potential.
Initially, the company sold two configurations of the device - models A and B. The first was distinguished by a memory capacity of 256 MB, and the second was twice as large.
Model A was on sale for some time, thanks to the availability of access to the global network, but after updating to version “B” the first option was no longer necessary. The new version was compact and had four USB ports.
Building a smart home based on Raspberry Pi 3 depends on the preferences of the owner. Regardless of this, the operating principle remains the same:
- The main function is performed by the server. This is a central device that collects information and makes the necessary calculations. The role of the main server is played by the Raspberry Pi motherboard, on which the WEB interface is installed. Its peculiarity is the ability to communicate with a tablet, laptop or phone.
- The server is interconnected with the modules surrounding it. Contact is made using RS-485. To ensure smooth functioning of the system, a special controller is installed in each room. Its task is to receive and analyze incoming information and then send commands to execution devices (household appliances).
- The Raspberry Pi module communicates with the controllers using a UART port. A special conductor is connected to the latter to the RS-485 interface. It is worth considering that the latest device models already provide such an interface (it is already included in the database).
- Raspberry acts as the operating system. One of the available extensions, for example, Pimatic, works in conjunction with it.
If desired, the smart home system can be assembled on an “open” type platform, for example, Fhem, openHAB, SHC. An equally popular option is the use of the wiBulter platform.
Raspberry Pi model A+ board pinout
Model A+ is a budget version of the Raspberry Pi board. The device was released in 2014 to replace the original Model A. The board is shown in the figure below.
Unlike the previous model, A+ has the following characteristics:
- A large number of GPIO outputs - now there are 40 of them.
- Micro SD connector.
- Reduced Energy Consumption - Linear voltage regulators have been replaced with switching regulators, saving energy.
- Improved audio system – the board has a separate power supply with a reduced noise level.
- Reduced form factor - composite audio output, built-in 3.5 mm audio output, mounting holes, USB connector located on the edge of the board.
The pinout is shown in the figure
1, 17 contacts – power supply 3.3 V.
2, 4 pins – supply voltage 5 V. Connected directly to the input voltage of the board.
3 – SDA output (one of the I2C pins on the board).
5 – SCl (also one of the I2C outputs on the board).
6, 9, 14, 20, 25,30, 34, 39 – Earth. All ground contacts are connected, you can use any output that is closer to the remaining elements.
7 – GPCLK0.
8 – TXD, one of 2 UART outputs, responsible for data transfer. UART pins are usually used to interconnect Arduino and Raspberry Pi. It is important to connect the boards correctly since the Pi is powered at 3.3V and the Arduino at 5V.
10 – RXD, output for UART, responsible for receiving data.
11, 13, 15, 16, 18, 22, 29, 3, 32, 33, 36, 37 – reserved contacts.
12 – PCM_C pin, which is used in conjunction with a special PWM method. Provides direct memory access.
19, 38 – MOSI contacts.
21, 35 – MISO contacts.
23, 40 – SCLK contacts.
24, 26 – CS0 and CS1 outputs.
27,28 – ID_SD, reserved for I2C communication with non-volatile memory.
The Raspberry Pi Model A+ board is used in projects where low power consumption is important and where an Ethernet interface is not required.
Supply part and dimensions
The product is supplied with a voltage of 5 V, supplied from a special adapter through the power pins or microUSB connector. For reliability, it is better to use a source with an I of 2 amperes or more. In this case, it becomes possible to connect more powerful products to USB ports.
POPULAR WITH READERS: Heating cables for pipelines
There is no hardware switch providing voltage supply on the board. The mini PC is activated by plugging the cord into a power outlet, and to turn it off, the basic OS functions are used.
The dimensions of the board are only 8.5 * 5.4 cm. It contains the necessary ports, some of which slightly protrude beyond the overall dimensions (by several millimeters).
Raspberry Pi 3 model B board
Raspberry Pi model B is the most common board. Compared to its predecessor, the Pi 2 Model B features a 64-bit ARM Cortex-A53 processor and built-in Wi-Fi and Bluetooth. The board has 1 GB of RAM, which is shared with the graphics system. There are many ways to use the board - they can be used to create game consoles, security systems, tablets and other electronic devices.
There is a 3.5 mm jack for connecting headphones and speakers. There are also 4 USB outputs to which you can connect peripherals. Connection of various modules is carried out through 15-pin slots:
- DSI – intended for connecting a display;
- CSI-2 – connecting a camera via the MIPI interface.
The following outputs are used for low-level interfaces:
- General purpose – 40 I/O ports;
- UART;
- I2C;
- SPI;
- Power and ground inputs.
Ethernet, Wi-Fi 802.11n and Bluetooth 4.1 interfaces are used for communication. The board uses a microSD card with the operating system installed on it as a hard drive. It is better to use a memory card with a capacity of 8 GB. Raspberry Pi model B uses the Linux operating system.
The device is powered by a 5 V adapter via a USB connector or power outputs. There is no dedicated power switch on the Raspberry Pi; you just need to plug in the power cable to turn on the device.
Media center
The Raspberry Pi is great for creating your own media center. You will need any TV that supports HDMI. Moreover, it is not necessary that the TV be new or “smart”.
Install any Linux distribution of your choice on your Raspberry Pi. Then download and install Kodi on it. This is an excellent program for a media server, with a convenient and stylish interface, a lot of features, plugins and themes. And besides, it's free.
And if you buy another remote control that connects via Bluetooth, you can conveniently control the program right from the sofa.
Kodi brings a lot of features to the Raspberry Pi. With it you can watch any movies and TV series, listen to music and admire photos, connect to almost any streaming services, download torrents, and surf the net.
And if you are missing something, take a look at the Kodi extensions repository - you will find a lot of other interesting things there.
Raspberry Pi model Zero board
The model Zero series of boards differs from its predecessors in its smaller size. There are 2 types of boards of this type - model Zero and the new version Zero W. The second differs only in the presence of Wi-fi and Bluetooth on board.
Raspberry Zero Specifications:
- 512 MB RAM;
- Single-core ARMv6Z ARM1176JZF-S processor with a clock frequency of 1 GHz;
- Mini HDMI port;
- 2 micro USB ports, one for connecting to a computer;
- Wi-Fi 802.11n;
- Bluetooth 4.1
The location of the outputs and pinouts are shown in the figure. The board features 40 general purpose I/O ports, UART, I2C, SPI, 3.3V and 5V power outputs, and ground. It is important to note that the connector is not soldered and requires DIY installation.
The new Zero W model uses microSD, unlike the older model, which uses miniSD for operation. A flash card is used as a storage medium; its volume must be at least 2 GB. The board is powered using a 5-volt adapter via the power pins or micro-USB input.
Among the disadvantages, we can note the low execution speed compared to Raspberry Pi 3 model B. But compared to B, Zero is smaller in size, which allows it to be used in miniature developments. The Raspberry Pi model Zero is used in the same areas as other computers in this family. The board can be equipped with peripheral devices, a power supply, and a screen. With the help of these microcomputers, video surveillance systems, gaming systems, and household appliances are created. The presence of Wi-Fi and Bluetooth allows you to expand the range of applications. Along with the release of the Raspberry Pi model Zero W, the company introduced a line of computer cases. The cases are equipped with a hole for the GPIO connector and camera installation.
Router
The Rasbperry Pi can be turned into something like a router that will block ads on all devices on your home network. Install a special application called Pi-Hole on your single board computer, configure it, then put the Raspberry Pi into Wi-Fi sharing mode. You may need to purchase an external Wi-Fi module for the Pi if the signal quality seems unsatisfactory.
When all your gadgets connect to the Internet through Pi-Hole, they will no longer display ads. Banners in browsers, pop-up windows in applications on smartphones or smart TVs - all this will be carefully cut out.
In addition, Pi-Hole can block sites that you do not want and show detailed statistics on Internet traffic costs.
And if you fiddle a little with the settings, then with the Raspberry Pi you can pass all your traffic through VPN or TOR. Then you will forget about constant blocking.
Comparison of Raspberry Pi models
RAM
Model A and Model A+ boards have the smallest amount of memory - only 256 MB. Model B, until October 2012, also had a capacity of 256 MB, after which the volume was increased to 512 MB, like the Model B+. The Raspberry Pi 3 board has the largest memory size, 1 GB.
USB ports
The Model A and Model A+ boards are equipped with one USB 2.0 port, in the Model B version the number of ports is increased to two, and in the Model B+ and Pi 3 to four. The most noticeable changes in the Raspberry Pi Zero are that it now has one Micro USB OTG connector.
Audio outputs
The Raspberry Pi Zero model also differs in this parameter - this board has a 3.5 mm jack, HDMI is replaced with multi-channel HD audio via HDMI.
Memory card format
Models A and B used SD/MMC/SDIO memory cards. All subsequent models use a MicroSD card.
Number of ports
Models A and B are equipped with a 26-pin GPIO connector, in subsequent models this number is increased to 40.
Power consumption
The most energy efficient device is the Raspberry Pi Zero - it uses only 160 mA. The highest energy consumption is for the Raspberry Pi 3 board (800 mA-2.5 mA, 4 W). The first model A consumes 300 mA (1.5 W), models B, A+, B+ require about 600-700 mA.
Dimensions
The smallest device is Raspberry Pi Zero, its dimensions are 65.0 x 30.0 mm x 5 mm. The A+ model is slightly larger, with dimensions of 65.0 x 56.0 mm x 12 mm. The remaining boards have approximately the same size: 85.0 x 56.0 mm x 17 mm.
Web server
Do you have your own website, blog or something like that, and are you tired of constantly paying for hosting? Why not host your creation on the Raspberry Pi? Of course, a single-plate device is unlikely to handle a huge resource with millions of visitors, but if your site is small, the device can handle it.
You can install Apache, PHP, MySQL, WordPress on your Raspberry Pi - any tools you need, and the miniature computer will become a pretty good web server. All that remains is to purchase a static IP from your Internet provider. Or even do without it by using the No-IP.com service.
Where to buy Raspberry Pi
Due to the huge popularity of Raspberry Pi microcomputers, they can be purchased anywhere in the world in any store. But only 2 European ones and “Element 14” are considered official sellers. Both companies supply minicomputers in different packaging designs, but the products from both suppliers are made in England.
Over time, Chinese analogues appeared that can be bought on AliExpress. The question immediately arises about the authenticity of these gadgets. An analysis of the Chinese and English versions can be carried out by comparing their performance characteristics, processor performance, and memory.
The processor in the original English version works a little faster than the Chinese counterpart, the same goes for RAM. The differences in operation are minimal, from which we can conclude that the Chinese version of the Raspberry Pi is no worse in its operating parameters.
Own cloud
So, you have your own network storage. Why not go further and create your own personal cloud? Why depend on Google and Dropbox, which ask for money for every extra megabyte?
To deploy your own cloud server on Raspberry Pi, you will need a distribution like Raspbian or Debian and a special application called ownCloud or its equivalent Nextcloud. They have desktop clients for all platforms and mobile applications.
By creating a cloud on the Raspberry Pi, you will have a huge scope for action. Automatic file syncing across all platforms, highly customizable and extremely fast. Storage for contacts and mail (goodbye Gmail). Storage for notes (goodbye, greedy Evernote). You can even deploy your own task management service and work on the Raspberry Pi as a team, like in some Trello.
Examples of projects with Raspberry Pi
Controlling a portable weather station. Using Raspberry Pi, you can implement a device that will record all weather data - wind speed, temperature, precipitation. You can program your device to automatically update a website with weather conditions.
Digital photo frame. With Raspberry P you can make your own photo frame and save about half the cost. A photo frame is a media panel that is controlled by a Raspberry P. The frame can be upgraded - it will show not only photographs, but also the date and time, play audio recordings, and show the weather forecast.
Home automation system. If you combine Raspberry Pi with Arduino and Node.js, you can create an effective way to control all the electronic devices in your home. There are many options for operation - automatically turning on and off the light using a light sensor, turning on/off the TV, regulating the temperature in the house.
Using the Raspberry Pi board, you can implement a variety of projects - from musical instruments to cameras and tablets. Moreover, the use of this board can significantly reduce the cost of a homemade device.
Torrent downloader
Those who like to download different things from trackers can turn the Raspberry Pi into a universal torrent downloader. To do this, you will need, in fact, a single-board computer itself, and one or more hard drives connected via USB or SATA.
Install the system and torrent client on the Raspberry Pi. For example, lightweight Transmission or functional qBittorrent. They can be controlled from any computer on your home network via a web interface in your browser.
Or you can configure the client so that it automatically retrieves torrent files from a folder in a cloud storage service like Dropbox. Drop a torrent file from any device into a folder, and the device will automatically start downloading.
In addition, the Raspberry Pi can be taught to monitor changes in RSS feeds. So, when a new episode of a Game of Thrones is released, the device will download it on its own, without waiting for your command.
First settings and preparation for work
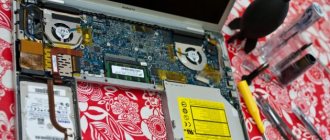
First, you should read the instructions and manufacturer’s recommendations regarding the use of the device. It is worth making sure that the necessary sensors are available and planning their connection. The board is installed in a special box that protects the product from mechanical influences. The device does not play and looks very solid.
After removing the top cover, you can access the board. The only difficulty is connecting the side connector. For convenience, it is recommended to buy a corner cable.
Additionally, two radiators are purchased to cool the Ethernet controller and the main chip.
There are other solutions.
For the first start, you will need a memory card with the operating system installed on it. The minimum size of a flash drive must be 4 GB or more. The OS image is available online (download link below). You will also need Win32 Disc Imager.
After downloading the image to your laptop, you need to unpack it from the archive, and then insert the memory card into the card reader. Next, the already installed Win32 Disc Imager program is launched.
Once the work is completed, the program selects an image and writes it to a flash drive.
Next, a memory card with the image is taken out and inserted into the Raspberry Pi 3 Model B device. After this, the keyboard, display and mouse are connected. If desired, you can use a wireless keyboard.