Create and insert a handwritten signature
You will need a scanner to complete the steps below.
Sign on a piece of paper.
Scan the page and save it to your computer in a popular format such as BMP, GIF, JPG or PNG.
For instructions on using your scanner, see the manual that came with your scanner or the manufacturer's website.
Open the image file.
To crop an image, click it to open the Picture Tools | Format
, click the
Crop
, and then crop the image.
Right-click the image and select Save as Picture
to save it as a separate file.
To add a signature to a document, on the Insert
Click the
Pictures
.
Create a handwritten signature
To add a handwritten signature to a document, you must first create one. To do this, you will need a white sheet of paper, a pen and a scanner connected to your computer and configured.
Inserting a handwritten signature
1. Take a pen and sign on a piece of paper.
2. Scan the page with your signature using a scanner and save it to your computer in one of the common graphic formats (JPG, BMP, PNG).
Note: If you have difficulty using your scanner, refer to the manual that came with it or visit the manufacturer's website for detailed instructions on setting up and using the equipment.
- Tip: If you don’t have a scanner, a smartphone or tablet camera can replace it, but in this case, you may have to work hard to ensure that the page with the signature in the photo is snow-white and does not stand out in comparison with the page of the Word electronic document.
3. Add an image with a signature to the document. If you don't know how to do this, use our instructions.
4. Most likely, the scanned image needs to be cropped, leaving only the area in which the signature is located. Also, you can change the image size. Our instructions will help you with this.
5. Move the scanned, cropped and sized image with signature to the desired location in the document.
If you need to add typescript to your handwritten signature, read the next section of this article.
Adding text to a signature
Quite often, in documents that require a signature, in addition to the signature itself, you need to indicate your position, contact details or some other information. To do this, you must save the text information along with the scanned signature as AutoText.
1. Below or to the left of the inserted image, enter the text you want.
2. Using the mouse, select the entered text along with the signature image.
3. Go to the “Insert” and click the “Express Blocks” located in the “Text” .
4. In the drop-down menu, select “Save the selected fragment to the collection of express blocks” .
5. In the dialog box that opens, enter the required information:
- Name;
- Collection - select “AutoText” .
- Leave the remaining points unchanged.
6. Click “OK” to close the dialog box.
7. The handwritten signature you create with accompanying text will be saved as AutoText, ready for further use and insertion into a document.
Inserting a handwritten signature with typewritten text
“AutoText” express block you saved to the document .
1. Click in the place in the document where the signature should be located and go to the “Insert” .
2. Click the “Express Blocks” .
3. Select “Autotext” .
4. Select the desired block from the list that appears and insert it into the document.
5. A handwritten signature with accompanying text will appear in the location you specified in the document.
Adding typescript to a signature
If you want to include your job title, phone number, email address, or other information as part of your signature, save it along with the image as AutoText.
Enter the text you want below the inserted image.
Select the image and the text you entered.
On the Insert
Click the
Express Blocks
.
Select the Save selected fragment to the Quick Blocks collection
.
The Create a new building block
window opens .
In the Name
enter a name for the signature block.
In the Collection
select
AutoText
.
Click OK
.
When you need to use a signature, position the insertion point where you want to insert the signature block.
On the Insert
Click the
Express Blocks
, select
AutoText
, and click the name of the signature block you want.
Inserting a signature line
To add a signature line to a document with an X to indicate where you want to sign, use the Signature Line
.
Click where you want to place the signature line.
On the Insert
Click
Signature Line
Microsoft Office Signature Line
.
In the Signature Settings
you can enter a name in the
Suggested for Signing
.
You can also add a job title to the Proposed Signer Job Title
.
Click OK
. The signature line appears in the document.
A handwritten signature adds personality to your document. You can scan your signature, save it as a drawing, and then paste it into Word documents.
Scan and insert a drawing of a handwritten signature
You will need a scanner to complete the steps below.
Sign on a piece of paper.
Scan the page and save it to your computer in a standard format, such as BMP, GIF, JPG, or PNG.
Advice:
For instructions on using your scanner, see the manual that came with your scanner or the manufacturer's website.
On the Insert
Click
Pictures
>
Picture from File
.
Find the picture you want to insert, select it and click Insert
.
Click a picture to open the Picture Format
.
On the Picture Format
Click
Crop
and crop the signature image.
Right-click the image and select Save as Picture
to save it as a separate file that can be used in other documents.
Shapes Tool
Another simple method is to manually draw a line where it is needed. Using the Shapes tool, you can add an underline to already printed text, or create a template for further filling. You can use it like this:
- Go to the "Insert" tab.
- Under Shapes, select a straight line.
- Place the cursor at the beginning of the line and hold down LMB. Draw a line to the side. To keep it straight, perform the operation while holding down the Shift key.
To keep the line static, use the parameters to fix its position on the sheet. You can also select other element behavior models that will be used when typing.
To change the color, select the line and open the Format tab. Switch to one of the preset shape styles. In most situations, black will do.
Adding text to a reusable signature
If you want to include your job title, phone number, email address, or other information in your signature, save it along with the image as AutoText.
Enter the text you want below the inserted image.
Select the image and the text you entered.
In the Insert
Select
AutoText
>
New
.
"Create"."
/> The Create AutoText dialog box opens
.
In the Name
Enter a name for the signature block and click
OK
.
When you need to use a signature, position the insertion point where you want to insert the signature block.
On the Insert
Select
AutoText
>
AutoText
and click the name of your signature block.
Inserting a signature in Microsoft Word
Electronic document management has come into conflict with the principle that a contract or other important piece of text must be verified by a legible and uniquely identifiable autograph. For a long time there was no solution to this problem. Gradually, the technology of digital signature, electronic digital signature, has become popular and even necessary in some areas. And although not all ordinary users know and use it, Microsoft has built support for this technology into its applications for working with documents.
Official documents must be autographed
In addition to ratifying contracts, digital signature is also used as a tool for verifying the authenticity of email letters, macros, etc. The verification mechanism is implemented through private key encryption technologies, which adds security and crypto-resistance points. Its use guarantees unambiguous identification of the person who used it. Also, the received file is “sealed” because it is impossible to make changes to the text without re-signing. And “non-repudiation”. The point of the latter is that the author of the document cannot deny involvement in it. This is important in a corporate (and not only) environment.
Electronic signature in Word
Working in Microsoft Word with files that need to be confirmed, approved, signed, you know that they need to be printed and taken to a specific person for review. Or you give an electronic version for review, and then hear that everything is fine, and you need to print it out and bring it again. But such actions can be avoided.
In this article, we will figure out how you can sign a document created in Word with an electronic digital signature or digital signature. Let's look at its various options: create it on a visible line, or simply add it to the file.
Inserting into a document
You can certify the contents of a document with your digital signature if it is not expired and its certificate or owner is not compromised. Then there is no obstacle to using this tool. Applications from the Office suite that support this technology, namely Word and Excel, check the inserted signature for all these signs. Only if the result is positive can the text file be verified using it. Such verification serves as proof of the validity of the autograph not only for the author of the document, but also for the person to whom it is intended. The principle of mutual security is what made this technology in demand.
Before inserting your digital signature into Word, make sure that it meets all the stated requirements. To insert a special area intended for inserting digital signatures, open a document in Word, place the cursor in the desired location and go to the “Insert” tab in the Settings Ribbon. There you need the “Text” group, it will just have the “Signature Line” button. By clicking on it, you will open a drop-down menu in which you should select “Microsoft Office Signature Line”. The area will be inserted at the location where the cursor was placed. At the same time, a settings dialog will appear on the screen, in which you can, if necessary, specify the person’s name. This person must verify the text file, job title, and email address. Also, if you have any comments or instructions for the person signing, they should be entered in the “Instructions” field in the same dialogue. The moment he clicks on the signature line, the comments you have entered will be displayed in a pop-up window. This is very convenient when you don’t want to mess up the formatting in a document by typing additional text into it, or create another file or note with explanations. If you need the signer to leave you a response to them, in the same dialog box, check the appropriate permission box. The moment he inserts his autograph into the document, Word will give him the opportunity to write his own next to your comment. Thus, Microsoft is expanding the capabilities of its word processor for batch processing of files.
All in the same window, you can add a date; it will be displayed in the signature line. If there should be several such areas, then you will need to repeat this procedure the required number of times, each time filling in the required fields if necessary.
Now let's approach this issue from the signer's side. To insert your digital signature into the signature area, after opening the document, click on it with the left mouse button. This click will highlight the line and give you an autograph input field. Now you can either type your name to insert a printed version of the digital signature, or indicate in the selection dialog an autographed drawing on your hard drive. Both will start the process of checking the specified signature, as we mentioned at the beginning of the article, and if the result is positive, a confirmation button will appear right in the Word window. By clicking on it, you sign the document. There is another option for tablet owners. Using the advantages of the touch screen, put an electronic signature, as usual, with the stroke of a pen, only in this case it will be replaced by a stylus. However, you need to take into account that the painting in this case should not differ from the one you specified during registration, which can be difficult. Modern fingerprint authorization technology is also gradually beginning to be used in the digital signature mechanism, but Word has not yet received the corresponding update.
How to sign a Word document
The problem of certifying a document created in Word more often arises when working on the road, when it is not possible to sign a paper version or have the application notarized. The owner of the digital signature only has a text editor and the created document. The problem can be solved relatively simply if the employee is sufficiently qualified and has access to the Internet. There is a wide range of possibilities on how to insert a digital signature into a text document.
In CryptoPro CSP
To sign a Word document with an electronic signature through “CryptoPRO CSP”, you must have the installed “CryptoPRO” package, CA certificates and the owner of the digital signature.
CryptoPro CSP is a line of encryption programs.
You may need to configure your computer in terms of allocating user rights. If you successfully install the application and configure rights to sign a document, you will need:
- open the file, go to “Information”, click “Add digital signature”;
- select the required digital signature file, enter a comment if necessary and click “Sign”.
If there are no errors, Microsoft Windows will report success.
In CryptoPRO Office Signature
This method uses the pre-installed “CryptoPRO Office Signature”:
- Using this plugin, you should run the file, select “Add digital signature”;
- using the digital signature file, as in the method above, comment if necessary and give the “Sign” command.
CryptoPro Office Signature - this product is designed to verify and create an electronic digital signature.
If there are no errors, the Windows operating system will notify you that the operation is complete.
In CryptoARM
The signature certificate can be provided by the CryptoARM software package. Its feature is the ability to encrypt with new formats and work with archives. To embed an electronic signature into a Word file using the CryptoARM package, you need to:
- open the “CryptoARM” program and indicate “Sign”;
- study the instructions of the digital signature creation wizard, go “Next”;
- make “Select file” and go “Next”;
- open the file to sign and move to “Next”;
- specify the file type by selecting “Output format”, leave the encoding unchanged, and for transmission by mail, compress the file into ZIP format or change the saving location;
- attach your own comments in the “Parameters” section, check the box there, selecting the type of electronic signature, attached (to the original file) or detached (will be saved separately), fill in the other fields, and then click “Next”;
- click on the “Select” item and specify a signing certificate, completing the step by clicking the “Next” button;
- In the window that opens with a brief description of the entered parameters, click “Finish”. When repeating multiple times, it is convenient to write down the parameters in your profile.
CryptoARM is a program for electronic signature and encryption of files and documents.
If there are no errors, the operating system will notify you that the operation completed successfully.
Via CryptoContour
The online service provides many services, incl. simple certification of documents. No software installation is required on your computer. The provider of the free service is “Kontur.Crypto”. The program creates and verifies a digital signature, file encryption and decryption. Through the service, packages of files or archives are signed, and documents can be certified with the electronic signatures of several people. To work with the software, you only need to register on the site. Encryption requires additional installation of appropriate software.
A clear interface allows you to start working right away:
- upload any type of file for signature to the service; size limited to 100 MB;
- select the electronic signature on your desktop with which we will certify the document;
- click “Sign” - as a result, a directory with the source and a signature with the same name, but with a .sig extension are created. Both are on the server and available for downloading back to your computer;
- if necessary, we send the document to the recipient directly from the web application. A link to the files stored in “Kontour.Crypto” will be sent to the recipient’s mailbox. If desired, all files can be downloaded to your local computer and sent with your own email program.
CryptoContour – free signing of digital signature documents, verification of electronic signatures.
Restrictions imposed by the “Kontur.Crypto” service:
- the maximum size of a sent file that requires a signature does not exceed 100 MB;
- only the detached signature is generated;
- works only in Windows OS;
- The electronic signature is verified by any software that works with disconnected electronic signatures.
Invisible signature
If the task of putting an explicit signature is not worth it, but at the same time you want to protect the document from edits by unauthorized persons, then you can again put an electronic signature in it, but without adding an area. Word has such a function. The confirmed signature will not be visible in the content, but there will be a corresponding icon in the status bar at the bottom of the document window. Only the author of the document can make changes to it. To add such a digital signature, click the main menu button in the document window (with the Microsoft Office icon) and select “Preparation”, then “Add a digital signature” and agree in the dialog box.
Method 1. How to insert a signature into a Word document
- So, if you want to put an electronic digital signature on a document, agreement or statement (printed in Word 2007), you need to go to the “Insert” tab.
- The Quick Access Toolbar for that tab will open. In the panel, you must select the “Insert signature” icon.
- After which, a system window will open in front of you with a description of the “Signature” function.
- Just below, there will be two buttons. We need to click on “Ok”.
- Then the “Signature Setup” window will open, in which you need to enter your initials, position, email and last name.
- Click “Ok” and the digital signature appears on your document.
What does an electronic signature provide on a document?
The CPU is created thanks to cryptographic protection tools and replaces manual ones in EDI. Only a qualified electronic signature gives digital information legal significance without prior agreements with the addressee. We will talk about this attribute further. What does an electronic signature on a document provide:
- allows you to identify the author of the letter;
- guarantees the accuracy and relevance of information;
- protects the data packet from forgery;
- confirms there are no amendments after signing the digital form;
- prevents access to information by unauthorized persons - thanks to encryption, the file can only be opened by the recipient to whom the letter was intended.
Areas of application of CEP:
- corporate and industry EDI;
- filing appeals to the arbitration court;
- remote submission of reports to government agencies, for example, to the Federal Tax Service of the Russian Federation or the Pension Fund;
- sending information to state systems: EGAIS, UAIS, ESIA, etc.;
- participation in online auctions.
Electronic signature simplifies and speeds up the process of data exchange, increases the level of information security, reduces costs for paper, courier services and postal delivery. To use EPC in different types of document flow, contact an accredited CA and purchase an EPC certificate, which will confirm your authorship on certified online forms. An electronic digital identifier can be created in tables, text and graphic files.
Next, we’ll look at how to prepare a PC to sign a Word document with an electronic signature.
- CryptoPro EDS SDK
1 000 ₽
1000
https://online-kassa.ru/kupit/kriptopro-etsp-sdk/
OrderMore detailsIn stock
- Digital signature setup
1 000 ₽
1000
https://online-kassa.ru/kupit/nastrojka-etsp/
OrderMore detailsIn stock
- Electronic signature
10 reviews
2 900 ₽
2900
https://online-kassa.ru/kupit/elektronnaya-podpis/
OrderMore detailsIn stock
Method 2. How to insert a signature in a Word document
- Go to the “Office” menu and select the “Prepare” option.
- Next, click “Add a digital signature.”
- A Word window will open, in which you need to click “Ok”.
- After which, another “Signing” window will appear, in which you need to enter your electronic signature (this can be both initials and surname).
- Click “Ok” and you’re done.
This process is shown more clearly in this video:
Making a signature in Microsoft Word 2010
- Now, regarding Microsoft Office
- Select the “File” option, then click on “Information”.
- ABOUT.
- After this, you need to select a signing certificate and confirm your choice.
- That's it, the signature will appear on the Word 2010 document.
There is a second option to make a signature in Word 2010
- Go to the “Insert” tab, then in the Quick Access toolbar select the “Microsoft Office Signature Line” icon.
- After that, the signature settings window will open. You must enter your initials, position and email address.
- Next, click “Ok” and the digital signature appears on the document.
You can see this process in detail in this video:
Electronic signature of a Word document
2020-07-24 12:47:42 • Posted in: Word • Verified solutions
Compared to other processes, a question such as how to electronically sign a Word document has a complex answer and therefore most users do not know about it. If you want to know how to electronically sign a Word document, it is highly recommended to do the work by following this guide. To electronically sign a Word document, it is recommended to ensure that the entire process is followed. This ensures that you get the result according to your requirements. This process will also become simple and clear for you. The steps are fully explained.
How to sign a Word document using an electronic signature
Obviously, this process is easy if you have a helping hand. This will also allow you to get the best result for your document.
- Click the Insert tab to continue the process and make sure you open its contents.
- Click the Signature Line option. This is the first step you take to add a signature to a Word document.
- In the “Signature Setup” window that appears, you need to make sure that all its fields are filled in completely. When finished, click “OK”. You will now see the signature line that has been added to the Word document.
- Right-click the signature line to open a menu. In the menu that appears, select the “Sign” option.
- Select an image of your sign in the system by clicking the “Select Image” button.
- Select a commitment type to assign a role to the sign holder. This will also show the role of the signature holder and validate the document.
- Add any additional information by clicking "Details > Additional Signature Information."
- Add the token to the signature you added. Enter your password to ensure the token is fully added.
- You will now see that the signature has been added to the Word document. Right-click to ensure the signature is verified.
Advantages of the PDF format
The PDF format will allow you to ensure maximum security for your documents. The best thing about this format is that it is universal in nature. Readers that can be used to read PDF files are completely free and can be easily downloaded. The PDF format will also allow you to use and perform all the functions that the Word format does. The format has excellent readability, which means you can easily read it with the same visibility on all devices, which is simply amazing. PDF format is the only presentable format when it comes to court.
PDFelement is a program that will allow you to achieve the best results when editing PDF. There is no other program that is as easy to install as this one. The program has a very simple interface which means you can easily use it without any problems. The PDFelement developers have made sure that you get a result that fully meets your requirements. Due to its ease of use, users have rated this program highly. PDFelement is a program that completely solves all problems associated with editing PDF files.
- The program is known for basic PDF editing. It can be used to open, save, print and mark up PDF files.
- You can also manage PDF graphic elements and use it to add, remove, move, resize and rotate any graphic element in your PDF.
- PDF security has been taken to a new level. You can opt out of sensitive content to prevent others from seeing your most sensitive information.
- The text recognition technique in the program is the best. It is used for partial text recognition in user-defined fields of scanned PDF files.
How to sign PDF documents with PDFelement
The process you need to apply is outlined below.
Step 1: Open the PDF file.
Click the "Open File" button to import the PDF file into the program.
Step 2. Electronic signature of the PDF document
Click the "Protect" tab to make sure the content is revealed. Complete the "Sign Document" that appears when you draw a square in the PDF document.
“Add Digital ID” if this is your first time using the program for this purpose. You need to ensure that the ID is created. This is a one-time process that you need to submit. You will then be redirected to the process described above. You can create an ID using your personal or professional ID to get the job done. View instructions for signing a PDF document here.
Download or buy PDFelement for free right now!
Download or buy PDFelement for free right now!
Buy PDFelement now!
Buy PDFelement now!
,
How to sign in Word (Word)
How to sign in Word? Electronic documents are becoming increasingly popular these days. A large percentage of these documents have a state appearance. Such documents have their own special design. One of the requirements for this design is the presence of a signature. In this article we will look at the process of creating a signature in Microsoft Word documents. The processes for creating both a handwritten signature and simply creating a signature line in a document will be described.
To create a handwritten signature, you can use a graphics tablet and any graphics editor. Open the editor, sign on the graphics tablet and save the image. If you don't have a tablet, use a scanner. Take a piece of paper and a good black or blue pen. Preferably with a rich color. Sign on the sheet and use a scanner to scan the sheet. Open the image and view the result, it is desirable that the color is saturated. This contributes to good printing results:
Here is an example of a good signature, using good ink. Now you will need to open your document. In the example I will use the invitation template:
To download it, open Word then “File” → “New” → “Home” → “Invitations”. After downloading. Let's remove a couple of lines to make room for the signature. Now go to the “Insert” tab and select “Picture”. In the window that opens, select your drawing with a caption:
The example shows that the result is at odds with expectations. Half of the signature is hidden because it extends beyond the text block. The signature itself is in a frame. To correct this situation, click on the picture and go to the “Format” tab. Remove the borders of the picture by choosing Picture Borders → No Outline. Also crop the design if your image is larger than the size of the caption. Tip: move the drawing outside the text block and frame. This way you can have full access to edit it. To do this, drag it outside the outer graphic frame:
After editing the picture, I added a current date field as an example. However, it should not be in a document of this type:
The end result doesn't look bad. Now let's move on to creating the signature line.
To begin with, let’s remove the image with the signature from our previous document. Simply select an image and click the Delete button.
How to insert a regular signature
In addition to using a special utility, you can use basic tools that are already available in all Microsoft Office programs. In Word, you can insert a handwritten signature or a special column to place a seal there.
Inserting a handwritten signature
Having a handwritten signature always looks respectable and official. In addition, such a symbol has legal force, which means such a document will also be protected at the legislative level. It’s easy to sign a Word document, but to do this you need to follow the following rules:
- You need to take a blank sheet of paper and sign on it. The signature must be correct and clearly recognizable so that it can be deciphered and be valid.
- Next, you need a scanner on which to scan . The correct image format is: GIF, PNG, JPG or BMP.
- After this, you need to open the file and crop the entire image before printing.
All you have to do is insert a hand-drawn picture in the right place, and now the document has an individual handwritten signature. When printed, the scanned image will look very natural, as if it were a photocopy of the original contract, which already had an individual mark.
Adding text
In order for other text to be present on the document, such as initials, position, contact information, and so on, you should use the “ Express Blocks ” tool. And this is done in the following order:
How to sign in Word (Word)
How to sign in Word? Electronic documents are becoming increasingly popular these days. A large percentage of these documents have a state appearance. Such documents have their own special design. One of the requirements for this design is the presence of a signature. In this article we will look at the process of creating a signature in Microsoft Word documents. The processes for creating both a handwritten signature and simply creating a signature line in a document will be described.
To create a handwritten signature, you can use a graphics tablet and any graphics editor. Open the editor, sign on the graphics tablet and save the image. If you don't have a tablet, use a scanner. Take a piece of paper and a good black or blue pen. Preferably with a rich color. Sign on the sheet and use a scanner to scan the sheet. Open the image and view the result, it is desirable that the color is saturated. This contributes to good printing results:
Here is an example of a good signature, using good ink. Now you will need to open your document. In the example I will use the invitation template:
To download it, open Word then “File” → “New” → “Home” → “Invitations”. After downloading. Let's remove a couple of lines to make room for the signature. Now go to the “Insert” tab and select “Picture”. In the window that opens, select your drawing with a caption:
The example shows that the result is at odds with expectations. Half of the signature is hidden because it extends beyond the text block. The signature itself is in a frame. To correct this situation, click on the picture and go to the “Format” tab. Remove the borders of the picture by choosing Picture Borders → No Outline. Also crop the design if your image is larger than the size of the caption. Tip: move the drawing outside the text block and frame. This way you can have full access to edit it. To do this, drag it outside the outer graphic frame:
After editing the picture, I added a current date field as an example. However, it should not be in a document of this type:
The end result doesn't look bad. Now let's move on to creating the signature line.
To begin with, let’s remove the image with the signature from our previous document. Simply select an image and click the Delete button.
Place the cursor in the place where the drawing was and go to the “Insert” tab and in the “Text” section select “Signature line”. Select "Microsoft Office Signature Line" from the drop-down list. Next, the “Signature Setup” window will open in which you must fill in the fields you need. If you know who will sign this document, you can indicate his full name (last name, middle name) in the first field. Next, you can specify it and your email address. In the “Instructions for Signer” field, you can delete the proposed option and write your own instructions. Check the boxes next to the required parameters and press the “OK” button.
After which, a special signature line with a cross will appear on the page. To be able to move this window normally, give it a wraparound with the text “Around the frame” and move it to the desired location:
The resulting result looks pretty good. But again, I’ll add that the date and signature fields are not appropriate in this type of document. In conclusion, I would like to add that the use of this type of document signatures is not reliable and legislation in some countries prohibits the use of digital signatures.
Handwritten signature
To make such an autograph you need to do the preparatory work:
- Sign on a sheet of white paper.
- Take a photo of the sheet on your mobile phone or tablet and transfer it to your computer.
Of course, to complete point 2, you can use a scanner, but not everyone at home or at work has such office equipment. Therefore, preference is given to smartphones, because these devices are always at hand.
- Insert the photo into the document (Insert section) and crop the picture to the required size (select the picture and open the Format tab)
After all the operations we get something like this:
Electronic digital signature (EDS)
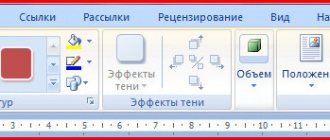
To make an electronic signature at the bottom of the text in Word there are two ways:
First:
- In the Insert tab, in the Text block, look for Signature Line and click
- Agree with the information in the dialog box.
- Enter the required information and click OK.
- As a result, you get this autograph place where you can sign a document:
Apply your signature above the line accordingly. You can add a picture from Method No. 1, having first saved it on your computer using the settings. And then it will turn out like this:
Second way:
- In the upper left corner, click on the characteristic button, look for the Prepare line and select Add digital signature from the drop-down list
- Agree with the information in the dialog box.
- In the next window, select the second item and confirm
- Next, click Sign
- If everything is done correctly, a window will appear on the right that displays information about document signatures.
Creating a place for signature
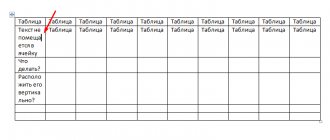
Using a table
- Insert a table with one cell.
- In the Borders and Shading menu, remove all borders except the bottom one
- And you get this line: ____________
- By removing the upper or lower border, you can put a signature under or above the line. If you need to add text, then create a table with the required number of cells and remove unnecessary borders in a known way.
Using the keyboard
You can also add a signature line using the keyboard and tabs. On the keyboard, simultaneously hold down Shift and the minus sign in the number pad and get the following: ____________
Use the Tab key to add tab characters and move the line to the desired location.
- Font settings
- Add tab characters, press the “p” button in the paragraph block, select the desired place, press the Ctrl+U key combination and remove the visibility of hidden characters.
As you can see, Microsoft Word allows you to make both digital and handwritten signatures of documents. The digital signature function allows for electronic document flow and speeds up the approval of important documents. And a place for such purposes can be made in several ways without any difficulties.
Share with your friends!
Source: https://mir-tehnologiy.ru/kak-sdelat-podpis-v-vorde/