Preparing the computer for installing a new OS
The simplest way to install Windows XP is from an installation disk. If, instead of reading data from it, the system starts loading the old OS or a black screen appears that does not respond to button presses, then you just need to go into the BIOS and make the appropriate settings:
- Open the Advansed BIOS Features or BIOS/Boot Device Priority section;
- Select First Boot Devise;
- In the list that opens, select CDROM or the name of your drive;
- Save the result by pressing the F10 key and restart your PC.
Note that there are a lot of BIOS versions for laptops today, so the described steps when installing the OS on a laptop may be slightly different.
Let's proceed directly to the installation
The first window is a blue screen. It is at this stage that a step-by-step installation of software is carried out to install Windows XP on a SCSI (high-speed disk) or on a RAID array. To do this, press F6, after which the installation of the appropriate drivers will begin. But in most cases, users install the system on a regular hard drive, which does not require any intervention during the installation at this stage, you just need to wait for the next welcome screen.
Next, users have the opportunity to choose one of the following action options:
- Install Windows XP. The standard choice in most cases is to install the system from scratch or restore the old one. A convenient graphical interface is used.
- System recovery using the console. This is the choice of professional users and craftsmen - recovery is performed from the command line using DOS commands. In this case, a complete reinstallation of the system is not performed.
Next, the system proceeds to search for previously installed OS versions. If any were found, the list will be displayed on this screen below, and the menu will offer options for subsequent actions:
- restore old Windows XP;
- install a new copy of the OS.
In the first case, you will be able to use previously installed applications. Only system files will be replaced, but the installation will be completed completely. The second option involves a complete reshuffle of the system.
No list will appear not only if Windows XP is installed on an “empty” computer, but also if the previously installed system has a different edition or service pack.
Preparation
If you don’t have a boot disk, you can easily create one using a special utility. Install Rufus, a program for burning ISO images to a USB memory stick. You should first download the installation image; to do this, you need to go to any tracker and enter the name of this operating system there. Next, download a program to automatically install drivers, DriverGenius is suitable. In fact, why look for all this manually if you can completely safely entrust this task to a special application.
We launch Rufus, select in it the USB card on which you want to install Windows XP and the image you want to burn. Click on the Start button and wait for the recording to finish.
If you need to burn a physical disc, you can use the ImgBurn program. For this:
- Insert a blank DVD disc, either one-time or multi-recordable, into the drive.
- Click Burn image to disk.
- Select the virtual image of Windows XP.
- Set the recording speed to the slowest and start.
- We are waiting for the recording to finish.
All preliminary procedures have been completed. The reinstallation of Windows XP begins.
The most crucial moment of installation
The next installation point is perhaps the most important, and should be performed thoughtfully and carefully. You will need to identify the system partition and allocate disk space so that the virtual disk allocated for the system has enough space for its functioning.
Of course, you can use the same partition equal to the entire hard drive space for both the system and your personal data, but such an organization is guaranteed to create many problems in the future.
We split the disk into partitions
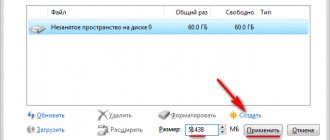
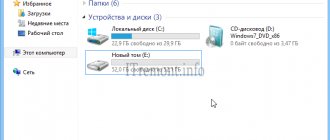
If you install Windows XP on a completely new disk, then you will have to distribute the partitions yourself, since this step-by-step procedure has never been performed before. The window that appears will indicate the size of the unallocated area - it will coincide with the size of the entire hard drive.
Here you need to create a so-called The system partition is the one where the OS will be installed. To do this, you need to indicate its size in megabytes (1 GB is equal to 1024 MB) and press “Enter” on the keyboard. After this, you will again return to the window in which the hard drive is partitioned. The created section will already be displayed in a separate line with a Latin letter assigned to it (usually C).
You should not skimp on the size of the system partition - the stability of the system will depend on it. The minimum space for installing Windows XP is 20 GB, but it is better to allocate not 20, but 40, or even all 60 GB.
Similarly, from the remaining unallocated area, we create other sections for personal data, however, you should not get carried away with the quantity - in this case, large files and folders will be distributed less efficiently, and navigation through the sections will become more confusing.
Format the system partition
Next, you will need to select the partition to install the system (in our case, drive C) and press the “Enter” key. A window will open asking you to format the partition.
Choose quick formatting using the NFTS system (FAT is obsolete). After formatting is completed, the process of installing system files will begin.
The most difficult stage of installation has been completed.
By the way, if the disk that you partitioned is not formatted, then you can carry out this procedure with each of the created partitions for personal data even after completing the installation of Windows XP using standard means.
If you are rearranging the system and the disk is already partitioned, then you should simply select the partition with the system to be reinstalled, format it and start the installation process. If you decide to format the remaining partitions, then all information on them will be lost.
Part 1: Creating a boot disk
What you will need.
- Blank CD-RW or DVD-RW disc.
- UltraISO program. You can download it from the official website using this link – https://ultraiso-ezb.ru
- Windows XP SP3 image. You can download it from this link – https://old-dos.ru/index.php?page=files&mode=files&do=show&id=4404
Let's start burning the image to disk.
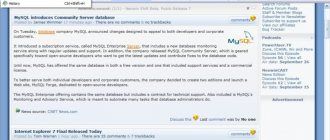
After you have installed UltrISO on your computer and launched it, the following window will open in front of you:
After that, in the directory located in the lower left corner of the program window, select the file with the .iso extension, which is located in the folder with downloaded Windows.
After this, the system files will appear in the upper right window.
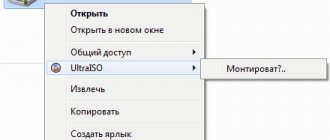
Now you need to insert the disc and click on the “Burn image” button, which is located on the top panel (disc icon with a flame). After clicking, the following window will open in front of us:
Select the drive into which you inserted the disc and select the speed. In no case do we choose the maximum speed, choose the average speed. And click “Record”.
After this, the recording process will be shown:
After the process is completed, the disk drive will open on its own. Remove the disc and click the “Back” button in the window.
Finishing the installation
Once the system files have been copied, the computer will restart and the installation will continue.
We determine the initial parameters:
- In the graphic window that has already opened, you can change the language and regional settings;
- The next window will ask you to enter your username;
- By clicking “Next” you will be taken to a window with a form for entering a license key;
- Successfully completing this step will send you to a window where you will need to enter the computer name and network administrator password (optional);
- Next, enter the time and date, after which a window will open with a choice of parameters for your network card, if, of course, the distribution contains the required driver;
- After you click “Next” again, the final stage of installation will begin, after which the computer will reboot again.
Next, several dialog boxes will be displayed to configure screen settings, auto-update, etc. On average, the Windows XP installation process takes no more than 15-20 minutes for a trained user.