One of the most popular photo editing apps is VSCO. And popular hashtags #vsco #vscocam are used when they are processed in VSCO.
Better processing can be done if you first edit the photo with manual settings and apply VSCO filters on top. But the settings often seem too complicated, and processing with a filter is simple and quick, so let’s start with filters.
How to start using the VSCO app
First you need to upload your photo. At the bottom of the screen, click “Studio”, then the blue plus sign. A gallery will open with all your photos (if the application asks for access to the photos, allow it). Select the one you need (or several) and click “Import” at the bottom of the screen.
VSCO Filters: how to use
Alina Zaitseva talks about her favorite VSCO filters and how to use them
VSCO filters - what are they?
VSCO filters (A5, A7, B1, B5, C1...) give cool effects and transform your photo. Therefore, I advise you to test all the free and paid VSCO filters and choose the ones that suit your Instagram style. Please note that filters do not have to be set to 100%. How to use them? Click on the selected VSCO filter and you will have a slider at the bottom of the screen. Move it left or right to decrease or increase the filter effect.
Very often, it is the filter that makes the Instagram gallery uniform and stylish. Therefore, to ensure that your photos are in the same style, use the same or similar VSCO filters when processing photos.
Filter VSCO A4
Filter VSCO A5
Filter VSCO A6
Filter VSCO C1
Filter VSCO HB1
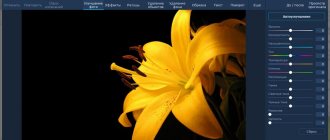
VSCO: how to use settings
VSCO: Exposure
The first setting is shutter speed (exposure). Drag the slider to the right - the photo is lighter, to the left - the photo is darker.
VSCO: Contrast
Contrast is a tool that will make light areas lighter and dark areas darker. As a result, you increase the contrast between light and dark in the photo. As a rule, the contrast needs to be increased a little. But if you reduce it, you will get a “softer” photo.
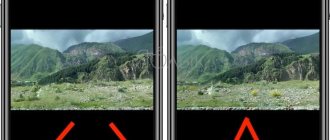
VSCO: Straighten
Using “align” you can rotate the photo and get rid of the blocked horizon, and also make the direction of the boards parallel to the edge of the photo (the direction of the boards should always be parallel to the edge of the photo or at an angle of 45 degrees).
VSCO: Horizontal/Vertical Tilt
The horizontal/vertical tilt tool helps to stretch the cluttered sides of a photo up or down.
Suitable for architectural shots where you shot buildings from below.
VSCO: Sharpness
It is better to add sharpness to every photo, except portraits. After compression on Instagram, large photos look blurry, so sharpening will not hurt.
VSCO: Saturation
To make the sky bluer, the grass greener, etc. — pull the slider to the right. If you want a monochrome photo (calm colors), drag the slider to the left.
VSCO: Highlights and Darks (Highlights, Shadows)
It happens that the white areas in a photograph look too white, so much so that it hurts the eye. Drag the slider of the “highlights” tool to the right and the white will become softer.
“Dark Areas” removes deep shadows in the photo. But if you drag the slider too far to the right, you can lose the saturation of the black color and it will turn gray. Therefore, use this setting carefully.
VSCO: Temperature
Sometimes the colors in the photo are too warm and you want to make them neutral. Then drag the slider to the left. And vice versa, for photos with cold colors, pull the slider to the right and they will become warmer (redder and yellower). By increasing the temperature, you can take a more “cozy” photo. And you can reduce the temperature for photos of urban architecture (business districts), the sea, and shooting from an airplane window (especially over the sea).
Hue
Pull to the left to add a green tint, to the right to add a purple tint. Useful for correcting shade (sometimes caused by artificial lighting). Or just to make the photo unattractive.
flesh color
Flesh color is a tool for correcting skin tone. Ideal for portraits. To the right - add a green tint (if the face is too red), to the left - red (if the face is too yellow in the photo)
Vignette
Darkens the edges of the photo. Helps draw attention to the central part.
Grain
A useful feature if you need to add a little “imperfection” to a photo so that it doesn’t look too “magazine-y.” Life hack for edited selfies: to prevent the photo from looking clearly blurred (smoothed skin), add a little grain on top.
Discoloration
Brightens shadows and gives photos a vintage look.
Light shadows
With this VSCO tool you can add any shade to the shadows in your photo. Click a second time on the selected color and you can adjust the intensity.
Light highlight
The same thing, but you apply the tint to the light areas of the photo.
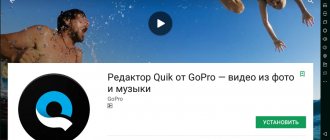
For Android ⇒ VSCO - Photo & Video Editor v183
| Rate the news/program! 3 out of 5, total ratings - 2 |
|
VSCO
is the perfect space for self-expression. We give you creative photo and video editing tools, inspiration, and a platform where everyone can be themselves.
Photo editor
Take your photos to the next level with 10 free VSCO filters. Easily import and edit raw photos. Use tools like Contrast and Saturation to brighten your photo, or Grain and Desaturate to add texture and create a film-like effect. Play with perspective with the Crop and Skew tools. Save and recreate your favorite settings in the Recipes tab.
Advanced Tools
Become a member of the VSCO community to gain access to the complete VSCO collection of over 200 filters. Recreate the feel of vintage film footage from Kodak, Fuji, Agfa and more with the Film X filter collection. Use advanced editing tools - HSL and Split Toning. Place images in colored frames with the Borders tool.
Video editor
Edit videos on mobile using the same premium VSCO filters and advanced tools from our photo editor. Change white balance and experiment with color using HSL.
VSCO installation
Tell video stories and create a moving collage by layering videos, images, and shapes. Create memories, communicate your mood, or experiment with photos from videos from your studio. Adjust the transparency of each element, creating vibrant color combinations and adding double exposure.
Creator community
See inspiring photos, videos and articles in the Recommendations section. Look for people you know and follow friends who are already using VSCO. Try new things with weekly exclusive photo challenges for members of the VSCO community.
What's new:
Thank you for your creativity in VSCO! We regularly release updates to improve your experience. Get the latest version of the app to get the latest filters, editing tools, and inspiration.
OS:
Android™ 5.0 and higher
Interface language:
Russian/multilingual
About fashion:
subscription activated, analytics and all services disabled
Download VSCO - Photo & Video Editor v183 for ARM (53.4 MB):
from Turbo.cc
|
Nitroflare.com
|
Katfile.com
|
Oxy.cloud
|
Direct download link is available only for the group: VIP-diakov.net
Download VSCO - Photo & Video Editor v183 for ARM64 (53.9 MB):
from Turbo.cc
|
Nitroflare.com
|
Katfile.com
|
Oxy.cloud
|
Direct download link is available only for the group: VIP-diakov.net
Download VSCO - Photo & Video Editor v183 for X86 (53.9 MB):
from Turbo.cc
|
Nitroflare.com
|
Katfile.com
|
Oxy.cloud
|
Direct download link is available only for the group: VIP-diakov.net
Download VSCO - Photo & Video Editor v183 for X86-X64 (53.9 MB):
from Turbo.cc
|
Nitroflare.com
|
Katfile.com
|
Oxy.cloud
|
Direct download link is available only for the group: VIP-diakov.net
Subscribe to the news VSCO - Photo & Video Editor v183
When the news changes, you will receive a notification by E-mail.
Subscribe
Already subscribed: 3
Said thank you: 10
Stas159, TheSemenchik, inconnu, kn853, rm1508
, vikatschka, Alley, NaumVlad19881980, clone,
workerrx580
How to use VSCO settings correctly
With VSCO's settings and filters, you can achieve almost any effect in your photo. The best way to learn is to experiment as much as possible. With each filter/tool, drag the intensity slider left and right and see what effect you get. This way you will begin to understand how to create the effect you want.
But do not forget that with processing - the less, the better. There is no need to apply a filter, turn up the brightness and contrast to 100%, and then apply a tint. It’s like with makeup - you need to emphasize your advantages, perhaps add some unusual element, and not use all the cosmetics at the same time.
The VSCO app is free. But to get additional filters or presets (a group of settings for different effects), you need to buy them in the AppStore or Google Play.
Who are VSCO Girls
The wording VSCO Girl was first used by YouTuber Greer Jones. On January 30, 2020, she published a video “becoming the ultimate VSCO girl.” The video received just over 200 thousand views.
On June 14, 2020, the first VSCO Girl entry appeared in the Urban Dictionary. Here is the definition the author gave:
VSCO Girl is a very aesthetically pleasing (extremely cute) girl who edits all her Instagram photos using the vsco app with the C1 filter. As a rule, she always has a hydroflask, any type of choker, a Fjällräven backpack and a Polaroid.
Since then, Urban Dictionary has added a dozen other definitions, but they all agree on the general understanding of VSCO Girl as “the new Tumblr Girl,” rich and positive, emotional girls.
The VSCO Girl subculture began to actively spread in the summer of 2019. Dozens of guides on how to become a VSCO Girl have appeared on YouTube. These commercials usually contained a set of brands that Wisco Girl should carry with her. If we summarize and highlight the main features of VSCO Girl, we get the following list of things:
- Water bottle (HydroFlask is best)
- Vans sneakers or Birkenstocks
- Crocs
- Choker (best with shells)
- Backpack Fjallraven Kanken
- Polaroid
- Bandeau top
- High Waist Mini Shorts
- T-shirts a couple of sizes larger
- Cosmetics Mario Badescu
- Glossier Lip Balm
- Large fabric elastic bands instead of a bracelet