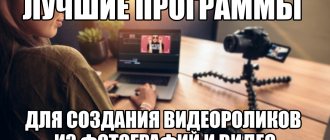
In this article I will talk about what programs there are for processing photos and videos on mobile platforms.
You'll learn about the features and what to do next with your videos.
Free apps have many features. You can trim, edit, add music and text to them. And after finalization, there is a way to share the result on social networks. The iPhone is best suited for this.
Users know that Instagram itself does not have built-in tools for normal editing.
There are third-party applications for the iOS platform for this.
So, what is included in the main functions of such applications:
- Cropping, rotation, reflection of the image horizontally/vertically;
- Working with color temperature, white balance, frame saturation;
- Adding text blocks and masks/animating images to the source;
- Draw using brushes with various effects;
- Elimination of defects (red eyes, lack of sharpness) of shooting;
- Creating videos with added music and titles.
You can work with videos in them, and then upload them, for example, to stories.
How to trim a video (change length) on iPhone or iPad
1. Open a video in the Photos app and tap the Edit button in the top right corner.
2. At the bottom of the screen, tap the camera icon (this tool is called Video). Drag the sliders on the left and right to adjust the length of the video. Click Finish.
3. Select Save as new video if you want to save the original version of the file and the edited new video, or Save video if you want to make changes to the original video.
We talked about this in more detail in this material.
♥ ON TOPIC: How to arrange icons on the iPhone and iPad desktop anywhere on the screen: 2 ways.
Adding music to a video for Instagram
Despite the fact that a video created in Add Music to Video can be uploaded to Instagram directly , the social network for photographers itself is unlikely to allow a video prepared using this utility to be published. The fact is that Instagram has a requirement for the duration of videos - from 3 to 15 seconds . trim a video to the desired length in Add Music to Video , but doing this is very problematic - you will have to spend a lot of time.
Another free utility will help you create videos for Instagram Clipper , which you can download here. Let us immediately note that Clipper places a watermark on the video, which costs 249 rubles to remove . The watermark, however, is barely noticeable and does not interfere much.
to create a video for Instagram using Clipper like this:
Step 1 . Select the desired video from those present in your Camera Roll and click on the checkmark in the upper right corner.
You will find yourself in the main window of the Clipper .
Step 2 . Click on the video to go to the “Edit Clip” section.
In this section, you need to set the duration of the video and the area of the image that will be visible in the final version of the video.
Clipper produces videos with only one resolution: 640 by 360 (width - height). If your video is taller than it is wide (that is, you held your iPhone vertically while filming the video), you will have to trim it.
We are dealing with just such a video that needs to be trimmed.
Step 3 . Change the length of a clip by plucking with two fingers anywhere in the timeline.
By default, the video duration is set to 3 seconds. You can increase it to 10 seconds - that's the limit.
Step 4 . By moving the frame up and down, set the area of the image that will be visible in the final video.
The application will stretch the selected area to 640 by 360 resolution, so image quality may drop.
Having decided on the duration of the video and the image area, click on the checkmark in the upper right corner. You will be returned to the main video editor window.
Step 5 . Choose a suitable background music for your video. Options include pop, folk, dubstep and other styles.
You can add music from your library to a video only after purchasing the full version of Clipper , which, as already mentioned, costs 249 rubles.
Step 6 . The music has been added - all that remains is to output the video from Clipper . Click on the “Share” icon in the upper right corner and select the “Save to Library” option.
The process of exporting video to Camera Roll will start.
upload the video directly to Instagram - you can only send it by mail or MMS message.
Therefore, at the final stage, you have to find the converted video in the “Camera Roll” and post it on a social network for photographers through “Share”.
How to Adjust Brightness, Contrast, Exposure and Other Settings on Video on iPhone or iPad
The Correction tool allows you to adjust the basic video parameters: lighting, contrast, exposure, shades and others. Everything here is very similar to photo processing. Using such a tool, you can, for example, turn a bright sunny day into a cloudy one or vice versa. This processing will allow you to set a particular mood for the video.
1. Open a video in the Photos app and tap the Edit button in the top right corner.
2. At the bottom of the screen, tap the knob icon.
3. Select the required option (there are 15 of them) and move the scale left or right to change the video editing. When finished, click Finish to save the results.
♥ BY TOPIC: Translator on iPhone: How to use the built-in Translation program in iOS.
What do you need to create a clip?
Preparing for video shooting takes much more time than the filming process itself. There are a few basic things you need to take care of when preparing to create a music video.
Camcorder
First of all, make sure that you have the necessary equipment, without which the video shooting will not take place. In fact, you can shoot a music video using any device that has a video recording function, even a mobile phone, but this will also affect the quality of your video. Find a tripod - shooting video handheld will guarantee you an ugly, shaky picture.
Song and video idea
Since we are interested in how to make a video, and not just any video, we should first familiarize ourselves with the title song. Listen to it as many times as necessary so that a picture of what you can shoot with it begins to form in your head. Get yourself a notepad and as you listen, write down everything that comes to your mind - perhaps one of the ideas will actually be worthwhile.
When filming a music video for a singer who is the author of a song, find out from him the background story of the composition, the meaning that he himself puts into it - this will help you quickly decide on the plot.
Scenario
Once you have an idea in mind, start writing the script. You should write it almost the same way as if you were writing a script for a film: think over the structure, describe the actions of the characters, if necessary, think through lines or a whole dialogue that the actors in the video will have to act out against the background of music.
After the script, you definitely need to make an approximate storyboard: describe at what point in the song this or that action will relate, what each frame should look like. You can sketch out the storyboard schematically, or you can even present it all in the form of a comic book - the main thing is that you understand what and when you have to shoot and how to organize the singer and/or actors.
The shoot place
We move on to searching for a location, which we choose according to the plot of the script and the concept of our video clip. There may be several places. If you need to find or create some decorations yourself, take care of them at this stage. Non-professional video shooting can be done on the street, outside the city, in a park and other public places where photo and video shooting is not prohibited. You can shoot a video somewhere at home, or in a rented film studio.
Lighting
And finally, another important point in preparing for shooting a video is setting up the light. It is good lighting that will allow your video to look good and “expensive,” while a lack of light, on the contrary, will make the music video look like a hastily shot home video. If you have the opportunity to additionally purchase artificial light sources, then take advantage of it. Otherwise, try to shoot the clip during daylight hours so you can enjoy natural light.
Clothes and makeup
If the performer of the song or the actors in the story appear in the video in unusual images, then try to take a responsible approach to the selection of outfits so that the music video looks decent, do not forget about makeup and hairstyle.
How to Apply Filters to Videos on iPhone or iPad
The third button is responsible for filters. They are applied to the entire video at once. It is possible to use 9 filters, including the most famous ones: sepia, noir, black and white, enhance cold or warm shades, etc. At the same time, the tool also allows you to adjust the intensity of each mask on a scale from 0 to 100 units. Filters can significantly change the style of an entire video.
1. Open a video in the Photos app and tap the Edit button in the top right corner.
2. At the bottom of the screen, tap the Filters icon.
3. Select the desired filter and move the scale left or right to change the intensity of the effect applied. When finished, click Finish to save the results.
♥ ON TOPIC: How to use a compact dialer in iOS 14 on iPhone.
How to cut (crop) video on iPhone
The fourth option is the crop tool. This is a pretty useful feature that allows you to trim your video to the required aspect ratio. A clip shot rectangular can become square, and from a large picture you can leave only an interesting element and observe it exclusively. This function may be in demand, because it often happens that there is something clearly unnecessary in the frame.
1. Open a video in the Photos app and tap the Edit button in the top right corner.
2. At the bottom of the screen, tap the Crop icon.
3. To crop the video (cut a fragment from the frame), pull the sides or corners of the frame that appears. If necessary, click the Reset button at the top of the screen to discard your changes. Click Finish to apply the changes.
♥ BY TOPIC: .
Learning to make high-quality videos
To learn how to do something, you first need to practice. Try to come up with ideas for new videos every day, record and post. Don’t immediately strive for perfect performance; believe me, not a single blogger started by posting a bomb video to which millions of users responded. Besides, no one knows exactly how to make video content on TikTok correctly. Trends are constantly changing, and perhaps you will come up with one of them.
To achieve a certain style and skill, to look beautiful and impressive on camera, you need to practice regularly.
Film and share your creativity, collect first responses, take into account shortcomings and get down to business again.
Helpful Tips:
- Make dynamic videos, every second of recording is movement.
- Change your angle while shooting.
- Stop recording and start it again, create beautiful transitions by turning the camera, making the same movements with different backgrounds, changing body position.
- Add effects.
- Team up with other tiktokers and make joint videos.
- Create original duets, this way you will attract new viewers to your channel.
- Add bright details to your image: hair, makeup, body art, something that will make you stand out from the general background.
Do whatever you can to look bright. Just be careful, don’t risk your and others’ health.
How to remove sound from video on iPhone or iPad
iOS and iPadOS have a built-in tool that allows you to remove sound from videos. Sometimes this turns out to be in demand if only a picture is required, and at the time of shooting the background sounds stand out too much. Few people want to listen to the operator chewing or the conversations of strangers.
1. Open a video in the Photos app and tap the Edit button in the top right corner.
2. At the bottom of the screen, tap the camera icon (this tool is called Video).
3. In the upper left corner, click on the speaker icon. Click Finish to apply the changes.
♥ BY TOPIC: Picture-in-picture mode on iPhone: how to enable and use.
How to flip, mirror, or adjust perspective and format on iPhone video
Tools that allow you to flip the video, as well as change the perspective, are located in the Trimming (crop) section. Here you can also rotate the video 90 or 180 degrees (change the orientation of the video from vertical to horizontal and vice versa), align the picture relative to the planes: vertical, horizontal or diagonal, mirror the video, and also change the image format.
1. Open a video in the Photos app and tap the Edit button in the top right corner.
2. At the bottom of the screen, tap the Crop icon.
3.
— In order to flip the video 90 (180) degrees, use the button with the image of a square with an arrow, it is located at the top left of the screen.
— To flip the video to a more precise angle, use the Straighten slider, which is located under the video.
— In order to mirror the video, use the button with the image of two triangles with arrows, it is located in the upper left corner of the screen.
— To change the video format (aspect ratio), for example, to 16:9, 9:16, square or custom, select the corresponding icon in the upper right corner of the screen.
— In order to correct the perspective of the video, use the Horizontal or Vertical sliders, which are located under the video.
♥ ON TOPIC: Slow-motion video on iPhone: how to shoot and adjust quality, which iPhones are supported.
How to Add Music to a Video on iPhone
The easiest way to add sound to a video is to use the iMovie app. The only caveat is that you will need to save the tracks on the device, since in this case Apple Music and audio files with DRM protection will not work.
1. Open the Photos app and find the video you want to add music to.
2. Click the Edit button in the top right corner, and then click the ellipsis icon at the top of the screen.
3. Select the iMovie application (if it is not installed, you can download it for free using this link) and wait until it downloads. If iMovie doesn't appear, click More and make sure the editor is activated.
4. Click the sheet music icon and select the song you want to use. Tracks from the Soundtracks section are free to use.
5. To mute the sound on the original video track, click on the button with a picture of a speaker.
6. Click "Done" to save the video.
The original video will be replaced with a new version. If you want to undo the changes, go to Photos → Edit → Revert.
♥ ON TOPIC: Time lapse (Interval) in the iPhone and iPad camera: what is it and how to shoot such videos?
How to shoot a video for Instagram with music at once?
Of course, you can always add an audio track during processing. But this requires additional time and effort. It’s much easier to shoot directly with audio. And there are ways to do this.
- Play the track in the background. This can significantly impact sound quality. Even if you run it on the device from which you are filming, the result may turn out worse than you expected.
- Sticker. Yes, this is not exactly shooting with music. However, this method is available without third-party software or any post-processing. True, such a sticker is only available abroad, but they promise to introduce it here too. Therefore, I would recommend you either point No. 1 or post-processing, which we will talk about below.
How to Add Text to Video on iPhone
iMovie is perfect for this task. With it, you can add animated text to your video.
1. Open the Photos app and select the video you want to add text to.
2. Click the Edit button in the top right corner, then click the ellipses at the top of the screen.
3. Select the iMovie application (if it is not installed, you can download it for free using this link) and wait until it downloads. If iMovie doesn't appear, click More and make sure the editor is activated.
4. Click the T icon and select the desired effect from the menu.
5. Click on the text to edit it and add any text. Click "Done" to save the video.
6. Click on the icon in the upper right corner of the screen to change the position of the titles.
As in previous cases, the original video will be replaced by a new version with text. To undo changes, go to Photos → Edit → Revert.
♥ ON TOPIC: Reverse filming on iPhone, or how to shoot video “backwards”.
The best video editors for iPhone and iPad: editing videos on the go
The iPhone is great for shooting video: the latest models can record 4K video at 60 frames per second and automatically stabilize the footage.
But to achieve the best results, you can't do without a video editing app. Such applications allow you to combine multiple clips, add titles and effects, get rid of unnecessary frames and turn the footage into the perfect picture.
The App Store has a variety of video editors for iPhone, ranging from simple apps designed for use on social media, to high-end apps that let you easily create entire movies, to specialized apps for specific tasks. Some are cheap, some are cheerful, and some are both.
iMovie
Pros:
- 4K support
- Compatible with AirDrop and Final Cut Pro
- Availability of themes and filters
- Export video to YouTube
Apple iMovie is perhaps the best video editor for iPhone, designed for regular, casual users. It's powerful enough to deliver impressive results, easy enough for beginners, and doesn't cost any money.
Like all iOS video editors, it's a little clunky on the iPhone, but excels on the iPad's larger screen - here you can connect a keyboard to use keyboard shortcuts for easier editing.
As you'd expect, iMovie integrates very well with other Apple apps and features like Photos, iCloud Drive, Mail, and Messages. Additionally, you can stream videos via AirPlay to Apple TV. 4K resolution is supported on iPhone 6 and above (iPad Air 2 and above).
LumaFusion
Pros:
- Support 4K and 360-degree video
- Export video to YouTube
- Availability of advanced features such as chroma key
If you find that iMovie is not powerful enough, LumaFusion gives you many of the high-end features without losing simplicity. This video editor for iPhone supports three audio/video tracks and three additional audio tracks for recording voiceovers and effects, and in addition to built-in effects and transitions, it also supports chroma key for green and blue screens.
In addition to local and cloud storage, it also supports WD Wireless Pro drives, and if you sign up for the optional Storyblocks service, you'll get access to thousands of free images, videos, and sounds.
Adobe Premiere Rush CC
Pros:
- 4K support
- Auto-sync to the cloud
- Ability to record video from the application itself
Minus:
- Limitation on video export for the free version
As a video editor for iPhone, Premiere Rush CC is very good indeed, with four video, three audio tracks and a user-friendly interface. If you've already used Adobe graphics apps for iOS, you'll quickly get the hang of Premiere Rush CC.
Its audio tools are especially good at balancing, reducing, or muting sound, making it very convenient to record a story or plot with. The app allows you to easily export videos to social networks such as Instagram, Facebook and YouTube. Projects from this application can be opened on your computer in Premiere Pro CC.
Like other Adobe apps, its free use is limited: you can only export videos from it three times. To get unlimited exports and sharing, as well as 100GB of cloud storage, you'll need a monthly subscription.
Filmmaker Pro
Pros:
- 4K support
- Availability of chroma key
- Wide range of filters
- Convenient mechanisms for voiceover and text overlay
Filmmaker Pro is a slightly more advanced alternative to iMovie, with a good selection of colors, filters, and green screen support. This iPhone video editor includes video grading, something iMovie doesn't have, and also lets you choose between nearly 200 different fonts for text overlays.
Filmmaker Pro can shoot video, but unfortunately not in the free version, and the full feature set requires in-app purchases. When unlocked, watermarks are removed. Like iMovie, it supports 4K video for iPhone and iPad.
Clips
Pros:
- Easy to use
- Working with TrueDepth camera
- Export video to YouTube
Minus:
- No serious editing tools
It hardly makes sense to use Clips to create a serious video project on your iPhone, but for quick video messaging and sharing short videos on social networks, this application is suitable.
It's extremely easy to use and comes with tons of Star Wars and Pixar movie stickers. Here you can easily add a soundtrack from the supplied library or from your own music collection. Voice control of titles is also an extremely convenient feature, and basic filters are present here and work correctly.
If your device has a TrueDepth camera for FaceID, you can also use the Selfie Scenes feature to place your animated avatar in front of a moving background.
Magisto
Pros:
- Automatic Editing Tools
- Ability to create collages and slideshows
- Direct export to YouTube
Minus:
- Dear subscription
Magisto is another video editor designed for use on social media, and it was created for users who have no video editing experience.
It can turn static photos into animated slideshows, automatically apply features like video stabilization and cropping, and easily share created videos via Facebook, Instagram or WhatsApp.
Basic features are free; the paid premium version provides the ability to process longer videos, but you can edit and rearrange scenes only in the Professional package, which costs a lot of money.
Quik - GoPro Video Editor
Pros:
- Face and smile detection
- Auto-sync of clip and music
- Direct video export to YouTube
Minus:
- Doesn't support 4K
Quik - GoPro Video Editor isn't just for GoPro users, although it does integrate with GoPro Plus and can detect faces, smiles, and other GoPro features. This editor is capable of working with your photo library and Live Photos.
As the name suggests, it's designed for quick video editing: all you have to do is select the photos and video clips you want to use.
You can change the order of frames in clips, change formatting, speed up or slow down video recording, add stickers and text. Unfortunately, Quik doesn't support 4K: it only works with 1080p or 720p videos.
VideoGrade
Pros:
- 4K support
- Real-time previews and histograms
- One subscription for all devices
If you want to turn a ton of clips into a cohesive whole or add emoji to your videos, VideoGrade is not the editor for you. It is designed to perform only one task: color grading.
Color grading is the process of changing or enhancing colors and tones that can be used in photos, Live Photos, and videos. With this app, you can make changes that range from incredibly subtle to incredibly dramatic, depending on what you want to achieve. There are over 40 different settings, you can save presets for quick use later, plus VideoGrade supports 4K video.