ADB Basics
To start working with ADB, you should activate it on your device and install the adb utility and drivers on your computer. The first task is performed by enabling “USB Debugging” in the “For Developers” settings item (if this item is hidden, click seven times on the build number in the “About Phone” menu).
To install ADB on your computer, download Adb Kit and unpack it into any folder (I recommend using folder names without Russian characters). We also download and install ADB drivers.
You need to work with adb from the command line. Press Win + R and enter cmd, then go to the folder in which adb is located. For my folder the command would be:
cd\android
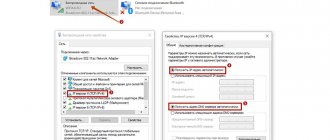
In order not to do all these manipulations every time, you can add the desired folder to the Path variable. To do this, go to “Control Panel -> System -> Advanced system settings -> Environment variables”, find the Path variable and add the path to the adb folder to the end of the line, separated by a semicolon. Now, after starting the console, you can immediately enter the necessary commands.
Adding adb to the Path variable
Other articles in the issue:
Xakep #208. Attack on the signal
- Contents of the issue
- Subscription to "Hacker"
Let's check our connection to the phone using the following command (it should display a list of connected devices):
adb devices
You can work with ADB via Wi-Fi. To do this, you need root rights and the WiFi ADB application. We launch the application, press the switch and connect to the smartphone using the connect command and the IP address shown by the application:
adb connect IP address
Further work with ADB is no different.
Basic Commands
Working with ADB is done through the command line: in the address bar of the folder with ADB installed, enter cmd and press Enter.
After connecting the Android device, you need to enter adb devices . If the PC has detected a smartphone, the serial number of the connected device will appear in the window. The sign Online signals his readiness to accept directives.
Installation of applications via .apk occurs through the adb install ; after writing it in the same line, you need to specify the path from the root directory to the installation file. To do this, you can open it through Explorer and copy the path.
We recommend: Recovering contacts on Android via Google Account
Programs can be uninstalled in the same way using adb uninstall . After the command you need to specify the name of the application package. For example, com.piriform.ccleaner to remove CCleaner from your phone. It is important that the deletion is carried out completely; no cache remains on the device. If it is important to save it, you should add the -k .
adb push is designed to transfer files on Android: after the command itself, you need to write the path to the file on the PC and the destination (via a slash or slash).
adb pull is the reverse side; it is used to copy data to a computer from a smartphone.
adb reboot command will help out in case of problems with phone management - it will reboot the gadget. If you have problems turning your Android device into bootloader , entering adb reboot-bootloader . Adb reboot recovery enters recovery mode , but it is only available on some PCs.
A few more useful directives (all available commands can be seen after entering adb help into the command line):
- adb connect – connect your smartphone to Wi-Fi, you will have to specify the IP address and port of the smartphone.
- adb shell – opens access to all files on the phone.
- adb fastboot devices – prohibits the smartphone from accepting any commands, fastboot oem unlock – unlocks the bootloader.
- adb logcat – output the contents of the log file, the text must be saved to a text file.
- adb backup and adb restore create a backup and restore data from it.
Thus, using adb commands you can solve a lot of issues that would take much longer to do manually. It is important not to forget to install the Android SDK, otherwise it will not work.
Installing programs
ADB can be used to install applications without having to copy them to your smartphone. All you need to do is run the following command:
adb install d:/downloads/filename.apk
You can also add additional keys to the command. Useful ones would be -e - reinstall the application while saving the data and -d - install a version less than the current one.
Programs can be removed, but to do this you need to know the name of the package (I’ll tell you how to find out a little later). Using the game Angry Birds Seasons as an example, the command would look like this:
adb uninstall com.rovio.angrybirdsseasons
Application backup
Android has built-in backup functions that can also be launched using the command line. To do this, use the adb backup command and a set of options:
adb backup [options] <
- indicates the name of the file being created and its location on the computer. If the key is missing, the backup.ab file will be created in the current directory;
- -apk|-noapk specifies whether to include only application data in the backup or the .apk itself too (by default it does not include);
- -obb|-noobb specifies whether to include .obb extensions for applications in the backup (not included by default);
- -shared|-noshared specifies whether to include the contents of the application on the SD card in the backup (not included by default);
- -all indicates the need to backup all installed applications;
- -system|-nosystem specifies whether to include system applications in the backup (includes by default);
- — list of packages for backup.
If we want to create a backup of all non-system programs, including the .apk themselves, to a specific location, then the command will look like this:
adb backup -fc:\android\backup.ab -apk -all -nosystem
After entering, you must confirm the start of the backup on the device itself. To restore the resulting backup, you need to run the appropriate command:
adb restore c:\android\backup.ab
Backup process
Possibilities
To get a full picture of what Adb Run is, you need to take a closer look at the capabilities of this utility:
- Checking the device connection. The “Divice attached” item is the first in the list of capabilities of this software. This tool is used to check the connection of your Android smartphone or tablet to your computer.
- Moving files. The Move tool provides users with the ability to move files from PC to connected gadgets and back.
- Installing applications. Using the utility, you can install games and programs on your phone. During the installation process, you are given the opportunity to select a location to save the application: device memory or memory card.
- Reboot. Using the Reboot Device tool, you can reboot your smartphone. There are three options for rebooting: in the Recovery menu, a normal reboot, and going to the Bootloader.
- Flashing. The “Fastboot” function allows you to flash the gadget. All the basic data necessary to perform this action is entered into Adb Run by default.
- Unlocking keys. One of the most useful features of this software. With its help, you can unlock the pattern key, PIN code and “hack” the facial recognition system.
- Change animation when the device is turned on. The Install Bootanimation tool allows you to change the animation that is used when you turn on your smartphone or tablet.
- Running scripts. If necessary, you can run your own scripts through the console to perform the actions you need.
- Backups. To save personal data, you can use the “Backup” function, which allows you to create backup copies of personal information.
- Screenshots and videos. An equally useful feature is the ability to take screenshots and record videos from the screen of your smartphone.
Console within a console
Along with the mentioned console, which is a DOS console for Windows, Android also has its own. It is called via adb shell and is essentially a standard Linux console, but with an incomplete set of commands, which can be expanded by installing BusyBox from the market. There are two ways to use this console. In interactive mode it is launched with the command
adb shell
The $ sign appears in the console (hereinafter in the text this sign will mean the need to enter the preliminary adb shell command), and after that you can enter a series of commands, receiving a response after each. The second method is if you need to enter only one command, you can write it in a row using the adb shell.
The shell uses standard commands for copying, moving and deleting files: cp, mv and rm. You can change directories (cd) and view their contents (ls). In addition to standard Linux commands, which you can learn about from any reference book, Android has several of its own specialized tools, but to use some of them, you will have to gain root rights on your smartphone, and after launching the console, run the su command:
adb shell su
This needs to be done if, in response to any command, you see a line similar to “access denied” or “are you root?”. If successful, the $ sign will change to #.
Displaying free space on the device using the adb shell df command
An example of the ls command to display information about partitions
Xiaomi ADB Fastboot Tools - what kind of program is it?
ADB Fastboot Tools is a utility application with advanced features. The functionality will be most appreciated by owners of phones with an active bootloader and root rights. If you do not have root and the bootloader is locked, the program’s capabilities will be quite limited.
When you connect a smartphone, the utility displays detailed information about the model: serial number, code name and bootloader status.
Please note that Xiaomi ABD/Fastboot Tools is a program exclusively for advanced users . You carry out all actions in it at your own peril and risk. Make sure you have the necessary skills and knowledge.
Functions and Features
The program is mainly used to remove system applications on Android. But there are other functions:
- Putting your smartphone into Fastboot, Recovery or EDL mode.
- Clearing the cache or completely deleting data (resetting to factory settings).
- Locking/unlocking the bootloader - only for models from the Android One series .
- Enabling Google Camera (using TWRP Recovery).
- Firmware via Fastboot.
Where to download the program
There is no official website for Xiaomi ADB Fastboot Tools. But the program can be downloaded from the 4pda forum without any problems. There is both a Windows-only utility and a universal version of java, which is designed for Windows, Linux and Mac .
A file with the .jar has advanced functionality and is updated more often. But if you are not familiar with java software, we recommend downloading the standard version, which is suitable for Windows 10 and earlier builds.
So, go to the required 4pda branch, select the type of program and click on the archive to download it. Or click on the link attached to this article. You can also download the latest versions from here. We wait for the archive to download and move on to the next point .
Unfortunately, ADB Fastboot Tools cannot be downloaded in Russian. The tool is presented only in English localization, but the interface is clear and minimalistic.
Taking a screenshot
Done in one line:
adb shell screencap /sdcard/screen.png
After this, you need to pull the picture out of the device using the adb pull command:
adb pull /sdcard/screen.png
In recovery, you can take a screenshot with the following command:
adb pull /dev/graphics/fb0
Then you need to convert the fb0 file into a normal image using FFmpeg, which you need to download and put in the adb folder. The extension must be installed on your device:
ffmpeg -f rawvideo -pix_fmt rgb32 -s 1080×1920 -i fb0 fb0.png
Instructions: How to apply a patch to a system text file using ADB Run
Many people know that the Android operating system is the most flexible in terms of settings, customization and modding, which allows professionals and amateurs not only to create their own firmware based on the official ones, but also to create patches that, to one degree or another, affect the operation of the system/ individual components of your device.
Today we will look at an example of how you can copy a system text file using build.prop as an example from the Android OS to your computer, edit it and then create a patch that you can safely apply to your device, and, if necessary, roll back the actions taken.
What do we need for work?
- PC or laptop on Windows OS
- USB cable for your device (preferably branded)
- Downloaded and installed the ADB Run program on your computer
- Enabled USB Debugging on Android
- Availability of Root rights
- Installed BusyBox program on Android
The process of creating and applying a patch
First we must connect the device to the PC via a USB cable, then launch the ADB Run program and go to the Manual Command and Unlock Bootloader->ADB menu, detailed instructions on how to use ADB Run can be found at the very beginning of the program review.
Now we need to copy the build.prop file, for which we enter the following command in the program window that opens:
adb pull /system/build.prop %USERPROFILE%\Desktop
Once done, the build.prop file will be copied to your PC's desktop, from where you can open it and edit it, but don't forget to change the file name. Once the file is edited and saved, you will need to copy it back to the device, for which we will use the following command.
adb push %USERPROFILE%\Desktop\android_build.prop /sdcard/
This command allowed us to move the text file to the device's memory card, and the next step is to move it to the system folder, but before you start doing this, you need to give the file write permissions. To do this, you need to enter the following commands in the system section:
adb shell su mount -o rw,remount,rw /system
After these steps, you can safely send the file we created to the system partition by entering the following command:
cp /storage/emulated/0/android_build.prop /system
Now we just have to create the patch itself. To do this, go to the system partition with the command:
cd /system
And use the following command to create the match itself:
diff -u android_build.prop build.prop > ptch.diff
At this moment, a file named ptch.diff will be created in which our changes will be made.
The last thing to do is to apply the patch we just created, and this is done with a very simple command:
patch -R < ptch.diff
At this point, the process of creating and applying a patch to a text system file can be considered complete.
Application management
To manage applications, two commands are used: pm (package manager) - package manager and am (activity manager) - activity manager. These teams have many keys that can be viewed on the developer portal. Let's look at a few.
To begin with, we will get a list of applications installed on the device in the form of package names that will be useful later:
$ pm list packages
By adding -s to the end, you will see only system applications, -3 - only third-party ones, -f will show package installation paths, and -d - disabled applications. Further, knowing the names of the packages, you can perform various violent actions on them :). For example, disable an unnecessary calendar:
$ pm disable com.google.android.calendar
Clear data:
$ pm clear com.dropbox.android
Well, you can completely remove it like this:
$ pm uninstall com.dropbox.android
To use the activity manager, you will need a deeper knowledge of the Android structure and an understanding of what Avtivity and Intent are. This will allow you to launch various applications, such as the browser or settings:
$ am start -n com.android.browser/.BrowserActivity $ am start -n com.android.settings/.Settings
You can shut down the application using the opposite command:
$ am kill com.android.browser
Well, kill all running applications with the following command:
$ am kill-all
The same activity manager will help you make a call to the desired phone number:
$ am start -a android.intent.action.CALL tel:123
And this is how you can open the page in the browser:
$ am start -a android.intent.action.VIEW 'http:/xakep.ru'
Launching the browser from the console
And using a variation of the previous command, you can send an SMS:
$ am start -a android.intent.action.SENDTO -d sms:PHONE_NUMBER —es sms_body “SMS_TEXT” —ez exit_on_sent true $ input keyevent 22 $ input keyevent 66
In this command, input keyevent emulates pressing buttons and can be used for both hardware and buttons inside the application. In our example, 22 corresponds to moving focus to the right (joystick to the right - dpad right), and 66 - Enter.
Using the input command, you can, for example, unlock your phone. To do this you need to enter:
$input keyevent 82
The keyevent 26 screen will turn off, which corresponds to pressing the Power button. You can also experiment with the numbers 3 - Home, 4 - Back, 24 - Volume Up, 25 - Volume Down, 27 - physical Camera button. The last button can also be transmitted via broadcast messages (you can find the full list of broadcast messages here):
$ am broadcast -a android.intent.action.CAMERA_BUTTON
Another broadcast message will put the phone into airplane mode:
$ am broadcast -a android.intent.action.AIRPLANE_MODE —ez state true
But this command will not work on the latest versions of Android. It uses the svc utility to manage power and wireless communications. For example, you can enable data transfer via a mobile network or control Wi-Fi using commands
$svc data enable $svc wifi disable
You can also force your smartphone to remain on when connected to a USB port/charging/Wi-Fi network or always:
$ svc power stayon usb $ svc power stayon ac $ svc power stayon wireless $ svc power stayon true
Returning to the input command, it's worth highlighting one more command to insert text into the current field. Some may find this a more attractive way of typing from a computer than pressing buttons on a small area of the screen. The command looks like this:
$ input text "Text to insert"
In addition to the text option, the input command has others. The full form of the command is:
$input[] […]
You can specify trackball, joystick, touchnavigation, mouse, keyboard, gamepad, touchpad, dpad, stylus, touchscreen as the source. The commands will be:
- text (Default: touchscreen) [delay]
- keyevent [–longpress] … (Default: keyboard)
- tap (Default: touchscreen)
- swipe [duration(ms)] (Default: touchscreen)
- press (Default: trackball)
- roll (Default: trackball)
As you can see from the commands, it is possible, although with difficulty, to control the device via the input touch and input swipe commands with a broken screen, if mouse operation via USB-OTG is not supported. For example, to pull out the curtain with notifications it will look like this (coordinates are counted from the upper left corner):
$ input swipe 10 10 10 1000
And this is how you can find out the screen resolution:
$ dumpsys window | \sed -n '/mUnrestrictedScreen/ s/^.*) \([0-9][0-9]*\)x\([0-9][0-9]*\)/\1 \2 /p'
For Nexus 5, the resolution will be 1080 x 1920. Then click on the “Applications Menu” button of the standard Google launcher, which is located above the “Home” button, like this:
$ input touchscreen tap 500 1775
Scripts
The execution of all series of commands described in this article can be automated.
To do this, we paste them into a text file (the lines following adb shell), which has the line #!/system/bin/sh at the beginning, save it with the sh extension and upload it to the device. After this, you can run the script through the same adb: adb shell sh /sdcard/file_name.sh
Download and install ADB, drivers and Fastboot
The ADB and Fastboot utilities are part of the Android SDK (not to be confused with Android Studio, much less download its cumbersome installation file, unless, of course, you are going to develop for Android). ADB is a debugging tool that allows you to access the Android console from a computer (more details →) by connecting the gadget to the PC via USB. Debugging must be enabled. Fastboot is designed to work with the device when it is loaded in the mode of the same name (if one is available on the device).
Using ADB, you can manage your smartphone/tablet from your computer: make a backup of applications, reset your graphic password, record a screencast, put your smartphone in Recovery mode, and much more. In addition, you can work with ADB via Wi-Fi. To do this, the device must have root rights, and you will also need a special application that can be used to connect to a PC over the network. For example, ADB Wireless or WiFi ADB. But this is material for a separate article.
Using Fastboot, you can install firmware, custom Recovery (TWRP or CWM), unlock Bootloader (on HTC, Motorola, Sony, Nexus, Pixel, Huawei phones, the latest LG it is blocked), clean system partitions.
How to install ADB and Fastboot: instructions
1. Go to the official website where you can download the Android SDK: https://developer.android.com/studio/index.html. Scroll down to the “Command line tools only” section and select the archive for Windows.
2. Check the “I have read and agree with the above terms and conditions” checkbox and click the “Download Android Command Line Tools for Windows” button. The archive will begin downloading.
3. Download it and unzip it to the root of Drive “C:”.
4. You also need to download the Java Development Kit from the official page. Go to the site, agree to the terms of the license agreement, and download the version of the JDK that matches the bitness of your computer's operating system.
After that, install the downloaded package. Below are several options for installing Fastboot and ADB - use the one that seems easier.
First way
Go back to the Android SDK tools folder, open “tools” and run the “android” batch file.
O (and also “Google USB driver” if you have a Google Nexus or Pixel device) and click “Install Packages”.
Read below about installing USB drivers for phones and tablets from other manufacturers.
Select "Accept License" and click "Install".
Although the log showed that an error occurred, the process completed successfully.
Upon completion of the above steps, the “platform-tools” folder will appear in the “sdk-tools-windows-version” directory, and it will contain the “ADB” and “Fastboot” utilities of interest.
Second way
Go to the folder “sdk-tools-windows-version” → “tools” → “bin” and, holding down the “Shift” key, right-click on an empty area. Select "Open a command window" or "Open a PowerShell window here" if you have one of the latest builds of Windows 10 installed on your PC or laptop.
Paste the command into PowerShell or the command line (in PowerShell, add .\ or ./ first):
sdkmanager platform-tools
Click "Enter" to execute the command. The files will download and you will be asked to install:
Accept? (y/N)
To grant permission, type y for yes and press Enter, which will begin installing the platform-tools components.
At the end, a message will be displayed on the command line that the procedure completed successfully. The “platform-tools” folder with the ADB and Fastboot utilities will be unzipped inside the “sdk-tools-windows-version” directory.
(!) If for some reason you cannot install ADB and Fastboot using the previous methods, use the third option - simply download the “platform-tools” archive and unzip it on the “C:” drive.
Installing ADB and Fastboot drivers for Windows
In order for the computer to correctly recognize a smartphone or tablet, you need to load the USB drivers:
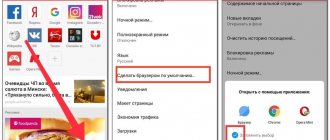
- Samsung - drivers are integrated into Kies utilities: https://www.samsung.com/ru/support/app/kies/ and Samsung Smart Switch: https://www.samsung.com/ru/support/app/smartswitch/. Or they can be downloaded separately by selecting the desired model on the website: https://www.samsung.com/us/support/downloads/.
- HTC - they are included in HTC Sync Manager: https://www.htc.com/ru/support/software/htc-sync-manager/.
- Nexus and Pixel - Android drivers are installed along with the Android SDK Platform-Tools, as described above. Separately, Google USB Drivers are available at: https://developer.android.com/studio/run/win-usb?hl=ru.
- Huawei - they come bundled with the HiSuite utility: https://consumer.huawei.com/ru/support/hisuite/.
- LG - just install the LG PC Suite program: https://www.lg.com/ru/support/software-firmware.
- Motorola - drivers can be downloaded from the link: https://motorola-global-portal.custhelp.com/app/answers/detail/a_id/88481.
- Sony Xperia - FastBoot drivers for all models are available on this page: https://developer.sonymobile.com/downloads/drivers/.
- Xiaomi – install Mi PC Suite: https://pcsuite.mi.com.
- MTK – for Chinese devices on MediaTek chips: https://online.mediatek.com/Public%20Documents/MTK_Android_USB_Driver.zip.
- Lenovo – select your smartphone or tablet model and download ADB drivers: https://support.lenovo.com/ru/ru/.
- Look for solutions for devices from other manufacturers on their official websites.
There are various universal ADB driver installers (for example, this one: https://adbdriver.com/downloads/) - they can also be used, for example, when for some reason it was not possible to install the official solution.
If drivers without an installer are available for your model, you will have to follow these steps:
1. Go to “Control Panel” → “Device Manager”. In Windows 10, just right-click on the Start menu and select Device Manager.
2. Find in the list the device for which you need to install drivers. Right-click and click Update Drivers.
As you can see, the computer correctly recognizes the tested Nexus 7 tablet. If your PC detects the smartphone incorrectly or a yellow triangle with an exclamation mark inside is displayed next to the device, “manual” installation of Android drivers is required for you.
3. Select “Browse this computer for driver software.”
4. Specify the location of the driver folder on your hard drive.
Wait until the installation is complete and then reconnect the gadget to your computer via USB.
How to get started with Fastboot and ADB
User interaction with ADB and Fastboot is carried out through the command line; the utilities are launched in two ways:
1: Right-click on “Start” and select “Command Prompt (Admin)” or “Windows PowerShell (Admin)”.
Next, using the commands, specify the path to the folder with ADB and Fastboot (after entering each, press “Enter”).
To return to the root of the "C:\" drive, use:
cd/
This command navigates to the required directory:
CD
In the specific example, the command containing the folder path looks like this:
cd C:\sdk-tools-windows-version\platform-tools
The path to Fastboot and ADB is specified, now the utilities are worked from the console.
To avoid having to do this every time, add the path to "platform-tools" to the "Path" variable. First, go to the folder, in the navigation bar, right-click on “platform-tools” and select “Copy Address”.
Go to "Control Panel". To do this, press “Win” + “R” and insert control in the “Open:” field. Click OK.
Select System → Advanced System Settings → Environment Variables....
Find the "Path" variable, highlight it and select "Edit...".
Click New, paste the path to the "platform-tools" folder and click OK.
2: Go to “sdk-tools-windows-version” → “platform-tools”, then hold Shift, right-click on an empty space and select “Open Command Window” or “Open PowerShell Window Here”.
Type the following command to test how the PC sees the Android device (in Windows PowerShell, insert ./ or .\ before the command):
adb devices
Don't forget that USB debugging must be enabled to work with ADB. You will find more useful commands in the previous article, the link to which is posted at the beginning of this post.
Author of the article:
System utilities
I will briefly highlight several useful commands (the functionality of some, however, may depend on the firmware version and phone model).
Change DPI . Does not require root and runs on Android 5.0+. The standard value for Nexus 5 is 480. With a value of 420, the stock launcher desktop displays five icons in a row instead of four:
$ wm density 420 && adb reboot
Connect /system in recording mode . For some commands that change system files, you must first remount the /system partition to write. This is also necessary when uninstalling system applications. Remounting is done with the following command:
$ su # mount -o rw,remount /system
Soft reboot:
$ setprop ctl.restart zygote
Putting your smartphone into Doze power saving mode (Android M+):
$ dumpsys battery unplug $ dumpsys deviceidle step
...we repeat the steps until we see idle.
Battery percentage (Android 4.4+):
$ content insert —uri content://settings/system —bind name:s:status_bar_show_battery_percent —bind value:i:1
Uninstalling system applications on Android without root using ADB
Share
This guide describes and demonstrates in detail how to remove system applications on Android using ADB (Android Debug Bridge), without using superuser rights (root).
Android Debug Bridge (Android Debug Bridge, abbr. ADB) is a multifunctional utility for working with Android devices via the command line. ADB is part of the Android SDK.
Using ADB, you can debug Android devices, both physical and emulators. The program is based on the client-server principle. During the first launch, ADB using any command creates a so-called server as a system service (daemon). This service will “listen” to all commands that are sent to port number 5037. Using ADB, you can perform actions such as: viewing connected devices and whether they can work with ADB; viewing system logs; copying files to and from an Android device; installing and uninstalling applications; deleting, clearing or overwriting the data partition on an Android device; execution of scripts to control an Android mobile device; Manage some network parameters of an Android device.
All actions are performed on Windows 10 x64, but this guide is fully suitable for working with other Windows operating systems.
.
To remove system applications on Android using ADB you will need:
1. A computer with the Windows 7/8/8.1/10 operating system installed;
2. USB cable (preferably original) to connect your smartphone and PC;
3. Smartphone with the App Inspector application installed;
4. Driver for the ADB utility (Universal ADB Driver);
5. ADB utility
.
I. Installing the driver for the ADB utility
1. Unpack (approx. using WinRAR or WinZIP) the downloaded Android and UniversalAdbDriverSetup (Fig. 1).
Fig. 1.
2. Run the unpacked installer Universal Adb Driver Setup , then click Next (Fig. 2).
Fig.2.
3. Select the installation location for Unuversal Adb Driver (by default this is: C:\Program Files (x86)\ClockworkMod\Universal Adb Driver\), then click Next (Fig. 3).
Fig.3.
4. To begin installation, click Next (Fig. 4).
Fig.4.
5. After installation is complete, click Close (Fig. 5).
Fig.5.
II. Preparing your smartphone to work with ADB
1. To get “Developer Mode”, go to the About device and tap (click) several times on the build number of your device (approx. in some devices you need to select “Firmware Version” ) until the message “Now you are a developer or you already a developer (Fig. 6).
Fig.6.
2. Go to the section that appears Section for Developers (note in some devices this section is called Developer Options ) and activate it, then select USB Debugging / USB Debugging and activate it (Fig. 7).
Fig.7.
3. Confirm permission to debug by clicking OK / Allow (Fig. 8).
Fig.8.
4. Connect your smartphone to the computer using a USB cable, in the window that appears, select Charge / Charge via USB only (Fig. 9).
Fig.9.
5. When asked to allow debugging, select (check) the box next to Always allow debugging through this computer and click OK (Fig. 10).
Fig. 10.
III. Uninstalling system apps on Android using ADB
1. Copy the unpacked Android to the root of your local drive (C:) (Fig. 11).
Fig. 11.
2. Click on the search icon , then enter in the query field: cmd . Right-click on Command Prompt and select Run as administrator (Fig. 12).
Fig. 12.
3. In the command prompt window that appears, enter cd/ (and press Enter), and then cd android (and press Enter) (Fig. 13).
Fig. 13.
4. Type adb devices (and press Enter), your device will be displayed in the command line window (Fig. 14).
Fig. 14.
5. Enter adb shell (and press Enter), the line will look like: [email protected] :/ $ (note further, do not close the command line window and do not disconnect the smartphone from the computer) (Fig. 15).
Fig. 15.
6. Launch the App Inspector and select the application that you need to remove (in this example, this is the Flipboard application) (Fig. 16.)
IMPORTANT! Do not remove applications that may negatively affect the performance of the system! If you are unfamiliar with any application that you are going to delete, first find out about its functionality (for example, by entering the name in the Google search engine).
Fig. 16.
7. In the Package name , pay attention and remember/write down the name (in this example it is flipboard.app) (Fig. 17).
Fig. 17.
8. Enter in the command line: pm uninstall -k —user 0 flipboard.app Success will appear (Fig. 18).
Fig. 18.
9. After deleting the first application, in order not to type a long command again, you can press the up arrow , thereby calling the last entered command and correcting the ending in it for the next program to be deleted (Fig. 19).
Fig. 19.
10. After you finish uninstalling programs, close the command line window, disconnect the USB cable from the computer and restart your smartphone. .
We hope this guide helped you!
Share link:
Similar
Removing logs
Very often, when a user goes to the device forum to solve a problem, they are asked to send logs of the phone or application. Two utilities are responsible for this: logcat and dmesg . The first allows you to see system messages in real time, and the second will show the operation of the kernel after the fact, including I/O error messages, loading drivers, connecting USB devices, and so on. The full log can be output directly to a file with the following command:
adb logcat > logcat.txt
All events will be recorded continuously as the device operates. You can stop recording using the standard combination Ctrl + C. However, all the information gets into the log, which makes it very difficult to find what you need. Therefore, for work they usually use a set of keys and filters suitable for a specific situation. There are seven message priorities in increasing order: V - Verbose, D - Debug, I - Info, W - Warning, E - Error, F - Fatal, S - Silent. For example, to display all messages with priority E and higher, enter:
adb logcat *:E
After this, you can run the problematic application and see what exactly is causing the error. Output of information from alternative buffers is also supported. In this way you can see what applications are doing in the background and, for example, what events occur after the screen turns on:
adb logcat -b events
Output of adb logcat -b events command
Advanced level
In one of my articles, I showed how you can get information from databases of various applications. Well, now let's see how to do this directly from the console, without downloading the databases to your computer or installing database viewers on the device. sqlite3 command is used for this . Let's display the history of the Chrome browser:
$ cd /data/data/com.android.chrome $ su # sqlite3 app_chrome/Default/History > .schema urls > select * from urls where url like "%android%";
In order for the database to be read, you need to unload the browser from running applications. You can interrupt the execution of the sqlite script by pressing Ctrl + Z, and exit with the .quit command. If in response to the command you receive the error /system/bin/sh: sqlite3: not found, it means that sqlite3 is not on your smartphone and you will have to download it, put it in /system/bin and give the file all rights. I use sqlite3, which I once pulled out of Titanium Backup.
Chrome Browser History
Also, using sqlite3 you can pull out all contacts from your phone. To do this, the console on your computer must use the Lucida Console font and before starting to execute commands, you must convert the encoding to UTF-8. Otherwise, strange symbols will be displayed instead of Russian letters. The commands themselves look like this:
chcp 65001 adb shell $ su # cd /data/data/com.android.providers.contacts/databases # sqlite3 contacts2.db > select t1.raw_contact_id,t1.normalized_number,t2.display_name from phone_lookup as t1, raw_contacts as t2 where t1 .raw_contact_id=t2._id Order by display_name;
If everything is done correctly, then in the console you will see a table with the serial number of the record, phone number and contacts, sorted by name. For contacts from more than one number there will be several entries in a row.
Outputting contacts from the contacts2.db database
You can output the data not to the screen, but directly to a text file. To do this, the commands need to be changed:
adb shell $ su # cd /data/data/com.android.providers.contacts/databases # sqlite3 contacts2.db "select t1.raw_contact_id,t1.normalized_number,t2.display_name from phone_lookup as t1, raw_contacts as t2 where t1.raw_contact_id =t2._id;" > /sdcard/contacts.txt
An alternative way to output contacts to a file is with a command that requires BusyBox installed:
content query —uri content://contacts/phones —projection number:name —sort “name ASC”| awk -F= '{gsub(/[-() name]/,"",$2);print $2″ "$3}'| sed 's/,//g' >/sdcard/contacts.txt
Removing a pattern key, PIN, facelock
Let's say you forgot your PIN or you set a pattern key when you weren't completely sober, or your friends joked and set up facial recognition... So, if the device is blocked for some reason, then the blocking can be removed (provided USB debugging is enabled) through the same console:
adb shell $ su # cd /data/system # rm *.key
The command will remove all passwords and patterns. The files themselves, depending on the firmware and model of the device, can be: gesture.key, password.key, cm_gesture.key, personalpattern.key, personalbackuppin.key. The files locksettings.db, locksettings.db-shm, locksettings.db-wal are also responsible for blocking.
After this, just reboot the device and enter any key or password. If this doesn't help, you can try the following:
adb shell $ cd /data/data/com.android.providers.settings/databases $ sqlite3 settings.db > update system set value=0 where name='lock_pattern_autolock'; > update system set value=0 where name='lockscreen.lockedoutpermanently';
Where can I download ADB?
You can download ADB from the official Android resource.
Or use a special program Adb Run , which makes it easier to interact with ADB.
Make sure that the drivers are installed on the PC, that USB debugging is enabled on Android, and that the computer is authorized.
We also recommend installing the Android Terminal application on your phone.
QR Code
Terminal Emulator for Android
Developer: Jack Palevich
Price: Free