Hello, dear readers of the blog site. If you have landed on this page, it means that you often work with documents and, in particular, encounter some task in Microsoft Word. In this article, let's look at some not-so-complex page formatting tasks - how to create a page break in Word, what a non-breaking space is, and how to remove a forced page break.
When typing documents, the Word program automatically inserts a page break based on the specified print margin width parameters. As soon as you go beyond these parameters, Word inserts a special page break character. But very often, for normal formatting and giving the document a readable appearance, it is necessary to manually insert a break exactly in the place where it is logically justified.
There is nothing complicated about this operation and in all versions it is done almost the same way. Place the cursor in the place after which you need to start a new page (insert a forced break). I'm using the 2013 version of Microsoft Word, but by analogy you can do this in any previous and subsequent versions.
- Place the cursor in the place where you want to force the page to break.
- In the tabs (or menu if you are using earlier versions) click on the "INSERT" tab
- Click on PAGES if you have a narrow screen and this menu area is collapsed for better display.
- Select Page Break.
The location where the cursor was will now be the beginning of the next page.
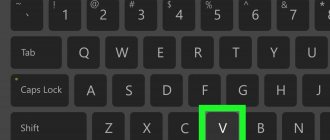
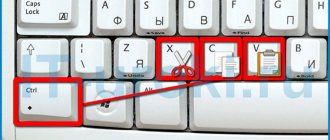
If you paid attention to the image below or read the annotation when inserting, you may have noticed a keyboard shortcut for this operation. If you use the break frequently, I recommend remembering it and using it for faster typing. You placed the cursor in the right place or while typing you simply pressed Ctrl+Enter and got a gap.
Inserting a break between paragraphs
In addition to inserting a break, you can use the function to prevent inserting a page break for a specific paragraph. This option tells Word not to wrap the lines of a given paragraph to another page when editing a document. The program will move the entire paragraph to the next page rather than just one or more lines.
To prevent inserting a paragraph break:
- Select the required paragraph or simply place the cursor inside this paragraph.
- Go to the “PAGE LAYOUT” tab.
- Click on the “Paragraph Options” link
It will open the parameters of this selected paragraph. Go to the “Page Position” tab and check the “do not break paragraph” checkbox. Click OK.
ABOUT
In the same way, you can prevent the program from separating certain paragraphs that follow each other. In this case, the program, just like with one paragraph, will transfer the entire group to the next page. To set this property:
- Select the necessary paragraphs, or if you need to link one paragraph to the next one, just select one.
- Go to the PAGE LAYOUT tab
- Click on the Paragraph Options link
In the “Page Position” tab o and Ok.
How to remove a forced break
Please note that deletion is only possible by “Forced Break”, i.e. the one that was installed by you or another user of the document.
To remove a forced partition:
- On the “HOME” tab, click on “Display all signs”.
- The program will display all hidden and service symbols.
- Select o and delete it.
A non-breaking space allows you to avoid a situation where there are two words in the text that, when they get to the end of the page, are broken line by line. A non-breaking space tells the program not to wrap one of the words, but to move both words to the next line.
First, turn on the display of all characters (try to get used to typing this way in the future, it will greatly simplify the process). In order to add a non-breaking space, while typing, instead of simply pressing the space bar, press the key combination Ctrl+Shift+Space. If you look at the image below, you will see that a normal space is represented by a simple dot, and a non-breaking space is represented by a circle. In the same image in the first paragraph, I put a regular space between the words “put” and “your” and the program moved the second word to the next line. In the second paragraph, between the same two words, I put a non-breaking space and both words were moved to the next line.
Difference between a simple space and a non-breaking space
Typing mathematical equations or functions in Word is not difficult. As soon as the cursor reaches the end of the line and moves to the next line, a problem appears, since a certain integral structure breaks, which cannot be allowed. Making a non-breaking space in Word will take a little time. Below are several ways you can use a non-separated space character.
Gaps when aligned to width
The most common reason for the appearance of long spaces is the alignment applied to the text on both edges. In this case, the words are stretched and large spaces are formed between them. Certain fragments may look completely ugly.
The way out of this situation is to change the alignment method. Select a piece of text that you want to format in a new way, and in the “Paragraph” on the “Home” , click, for example, “Align Left” ( Ctrl+L ). The words will shift, and the distance between them will decrease to the standard one familiar to the eye.
If the width alignment is determined by the document design requirements, you will have to look for another way to remove large spaces between words. Alternatively, you can play around with inter-character intervals, but it will still be difficult to achieve an acceptable result with such manipulations. Therefore, there is nothing left to do but set up transfers. Open the "Layout" , click the "Hyphenation" and select the "Auto" .
That's it, now the program will automatically make hyphens where possible, and the spaces between words after such editing will become smaller.
Non-breaking space using a keyboard shortcut
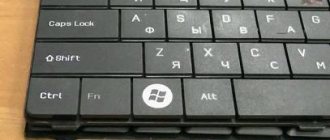
To make a non-breaking space, you need to use the following key combination “Shift + Ctrl + Space”, where “space” is a space on the keyboard.
It is necessary to press the key combination “Shift + Ctrl + Space” after each character, then the desired function will be written and moved to the next line and will be a complete composition. For an example, look at the picture below.
The picture below shows an option; if you use the usual “space” sign, the text fragment will lose its integrity and stretch to the second line, which is very unsightly and incorrect.
AutoCorrect
You can remove large spaces using AutoCorrect. To do this, activate the function using the Ctrl + H keys. Copy the large space into the first field, and the one created by pressing Shift + Ctrl + Space into the second. Click the “Replace All” button.
To remove a large space when aligning text in width, you need to: • select the paragraph section in the “home” menu bar on the toolbar; • find and click the “show signs” icon (similar to the letter P only in the opposite direction with a filled semicircle); • with a quick double click we delete icons that look like an input sign (an arrow going down and turning to the left) and we get normal spaces.
How do you know if there is a non-separated space character?
Go to the “Home” tab in the “Paragraph” subsection and turn on the “Hidden Characters” button. Refer to the picture below.
This icon will appear throughout the text, in places where there is a space. Knowing this trick, you can remove or put a non-breaking space in the right place. The text where there is an unbroken gap is very neat. The main thing is that the non-breaking space performs the main task.
With a simple space, there will be dots between words; in the case of a non-breaking space, circles in the form of a degree sign will be indicated. If suddenly the phrase does not fit into one line, then use the “Hidden Symbols” button to check, which will show whether non-separated spaces are included everywhere.
Word 2020: Line and Paragraph Spacing
Lesson 9: Spacing Between Lines and Paragraphs
/ru/word2016/indents-and-tabs/content/
Introduction
When designing a document and making formatting decisions, you need to consider lines and paragraph spacing . You can increase the spacing to improve readability and decrease it to fit more text on the page.
Optional: Download our practice document.
Watch the video below to learn how to adjust line spacing and paragraph spacing in documents.
About line spacing
Line spacing is the space between each line of a paragraph. Word allows you to customize the line spacing: single-spaced (one line high), double-spaced (two lines high), or any other amount you want. The default spacing in Word is 1.08 lines , which is slightly larger than single spacing.
In the images below you can compare different types of line spacing. From left to right, these images show default, single and double spacing.
Line spacing is also known as leading (pronounced to rhyme with wedding ).
To format line spacing
- Select the text you want to format.
- On the Home , click Line and Paragraph Spacing , and then select the line spacing you want.
- The line spacing in the document will change.
Fine-tuning line spacing
Your line spacing options are not limited to the options in the Line and Paragraph Spacing . To adjust spacing more precisely, select Line Spacing Options from the menu to open the Paragraph . You will then have several additional options that you can use to adjust the interval.
- Exact : When you select this option, the line spacing is in points , the same as the font size. For example, if you use 12 point text , you can use 15 point spacing.
- At least : Like the Exact , here you can choose how many interval points you want. However, if you have text of different sizes on the same line, the spacing will increase to accommodate the larger text.
- Multiple : This option allows you to enter as many rows as you want at intervals. For example, selecting Multiple and changing the spacing to 1.2 will make the text slightly wider than single-spaced text. If you want the lines to be closer together, you can choose a lower value, such as 0.9 .
Spacing between paragraphs
Just as you can format the spacing between lines in a document, you can adjust the spacing before and after paragraphs. This is useful for separating paragraphs, headings, and subheadings.
To format spacing between paragraphs:
In our example, we'll increase the space before each paragraph to separate them a little more. This will make it easier to read.
- Select the paragraph or paragraphs you want to format.
- On the Home , click Line and Paragraph Spacing . From the drop-down menu, select Add Space Before Paragraph or Remove Space After Paragraph . In our example, we'll select Add a space before paragraph .
- The spacing between paragraphs in your document will change.
You can also select Line Spacing Options to open the Paragraph dialog box. From here, you can control how much space there should be before and after the paragraph.
You can use Word's handy Set as Default feature to save all the formatting and you've made and automatically apply them to new documents. To learn how to do this, read our article on changing default settings in Word.
Challenge!
- Open our practice document.
- Select a date and address block. This starts with April 13, 2016 and ends with Trenton, NJ 08601 .
- Change the distance
.
Non-breaking space using the More Characters feature
You can add a non-breaking space using:
You can also remember the sign code “202F” for the future; it will work when you press the key combination Alt+X (x - in English).
Hello, dear readers of the blog site. A little earlier, we already managed to talk about that, and also learned about the design in it. Today we have in turn the concept of white space in HTML, as well as the associated code formatting when writing it (for the convenience of its subsequent reading and perception).
Well, due to the fact that we will touch on the topic of non-breaking space and soft hyphenation, we will have to focus our attention on the so-called special characters or mnemonics used in the Html language, which will allow you to add many additional characters to the web document code, like those already mentioned above . But first things first.
Changing the spacing between words
So, the only correct decision that can be made if it is necessary to increase or decrease the distance between words is to replace regular spaces with long or short spaces, as well as ¼ space. We will tell you how to do this below.
Add a long or short space
1. Click on an empty space (preferably an empty line) in the document to place the cursor there.
2. Open the “Insert” and in the “Symbol” , select “Other symbols” .
3. Go to the “Special Characters” and find “Long Space” , “Short Space” or “¼ Space” , depending on what you need to add to the document.
4. Click on this special character and click the “Insert” .
5. A long (short or quarter) space will be inserted into an empty space in the document. Close the “Symbol” .
Replace regular spaces with double spaces
As you probably understand, manually replacing all regular spaces with long or short spaces in the text or a separate fragment of it does not make the slightest sense. Fortunately, instead of the lengthy “copy-paste” process, this can be done using the “Replace” tool, which we previously wrote about.
1. Select the added long (short) space with the mouse and copy it ( CTRL+C ). Make sure you copied one character and that there were no spaces or indents previously on that line.
2. Select all the text in the document ( CTRL+A ) or use the mouse to select a fragment of text in which standard spaces need to be replaced with long or short ones.
3. Click on the “Replace” , which is located in the “Editing” in the “Home” .
“Find and Replace” dialog box that opens, “Find” line, put a regular space, and in the “Replace with” , paste the previously copied space ( CTRL+V “Character” window .
5. Click on the “Replace All” , then wait for a message about the number of replacements completed.
6. Close the notification, close the Find and Replace . All normal spaces in the text or selection you made will be replaced with large or small spaces, depending on what you needed to do. If necessary, repeat the above steps for another piece of text.
Note: Visually, with an average font size (11, 12), short spaces and even ¼-spaces are almost impossible to distinguish from standard spaces that are set using a key on the keyboard.
We could have finished here already, if not for one “but”: in addition to increasing or decreasing the spacing between words in Word, you can also change the distance between letters, making it smaller or larger compared to the default values. How to do it? Just follow these steps:
1. Select a piece of text in which you need to increase or decrease the space between letters in words.
2. Open the “Font” by clicking on the arrow in the lower right corner of the group. You can also use the “CTRL+D” .
3. Go to the “Advanced” .
4. In the “Intercharacter spacing” “Spacing” menu, select “Sparse” or “Dense” (increased or decreased, respectively), and in the line on the right ( “On” ) set the required value for the indents between letters.
5. After you set the required values, click “OK” to close the “Font” .
6. The spacing between letters will change, which, paired with long spaces between words, will look quite appropriate.
But in the case of reducing the indents between words (the second paragraph of text in the screenshot), everything didn’t look the best, the text turned out to be unreadable and merged, so I had to increase the font from 12 to 16.
That's all, from this article you learned how to change the distance between words in a MS Word document. Good luck to you in exploring other features of this multifunctional program, with detailed instructions for working with which we will delight you in the future.
Thank the author and share the article on social networks.
Space in Word is empty spaces between words. Spaces appear when you press the key of the same name; it is the longest on the keyboard. The size of these spaces can in some cases vary greatly within the same text, and it can feel like multiple spaces have been inserted between words. Compared to such spacing between words, ordinary spaces seem absurdly small. In other words, text with different spaces looks ugly.
Spaces and whitespace characters in HTML
Before moving on to the issue of formatting text using tags specially designed for this (paragraph, headings, etc.), I want to dwell on how spaces, line breaks (Enter) and tabulation are interpreted in the HTML language, and how breaking is carried out text in the browser window when it is resized.
True, for this kind of visual formatting (which will not be visible on the web page), most often it is not the spaces themselves that are used, but rather the tab and line break characters. There is a rule - when you start writing a nested Html tag, indent it using tabs
(Tab key on the keyboard), and when you close this tag, remove the indentation (key combination Shift+Tab on the keyboard).
This must be done so that the opening and closing tags are at the same vertical level (at the same number of tabs from the right edge of the page in your Html editor, for example, Notepad++, which I wrote about). In addition, I advise you to immediately after writing the opening element make several line breaks and immediately write the closing one at the same level (number of tabs), so that you don’t forget to do this later.
Those. the opening and closing elements should be at the same level vertically, and the internal tags should be shifted by one tab character and the closing and opening elements should be placed again on the same level.
For simple web documents this may seem like overkill, but when creating more or less complex ones, their code will become much more clear.
and readable due to the abundance of spaces, and it will also be much easier to spot errors due to the symmetrical arrangement of tags.
Special characters or mnemonics in HTML code
So, now let's talk about the so-called special characters, the ease of use of which I announced at the beginning of this article. Special characters are also sometimes called mnemonics or substitutions. They are intended to solve a problem that has arisen in hypertext markup language for a long time, related to the encodings used.
When you type text on the keyboard, the characters of your language are encoded according to a predetermined algorithm, and then they are displayed on the site using the fonts you use (where to find and how to install for the site) due to decoding.
There are a lot of encodings, but for the Html language the extended version of encodings was adopted by default.
In this text encoding it was possible to write only 256 characters - 128 from ASCII and another 128 for Russian letters. As a result, a problem arose with the use on sites of characters that are not included in ASCII and are not Russian letters that are part of the Windows encoding 1251 (CP1251). Well, you decided to use a tilde or an apostrophe, but such a possibility was not initially included in the encoding used by the Html language.
It is for such cases that substitutions or, in other words, mnemonics were invented. Initially, special characters had a digital form
, but then for the most common ones their letter counterparts were added to make them easier to remember.
In general terms, a mnemonic is a character that begins with an ampersand “&” and ends with a semicolon “;”. It is based on these characteristics that the browser, when parsing HTML code, extracts special characters from it. The ampersand in the numeric wildcard code must be immediately followed by a pound sign "#", sometimes called a hash. And only then follows the digital code of the desired character in Unicode encoding.
More than 60,000 characters can be written in Unicode - the main thing is that the mnemonic symbol you need is supported by the font used on your site. There are fonts that support almost all Unicode characters, and there are options only with a certain set of characters.
The full list of special characters will be simply huge, but the most commonly used mnemonics
you can borrow for example from this table:
| Symbol | HTML code | Decimal code | Description |
| non-breaking space | |||
| narrow space (en-width as letter n) | |||
| wide space (em-width as letter m) | |||
| – | — | – | en dash (en-dash) |
| — | — | — | em dash (em dash) |
| | — | | soft transfer |
| A | ́ | stress is placed after the “stress” letter | |
| © | © | copyright | |
| ® | ® | ® | registered trademark mark |
| ™ | ™ | ™ | trademark sign |
| º | º | º | spear of Mars |
| ª | ª | ª | mirror of Venus |
| ‰ | ‰ | ‰ | ppm |
| π | π | π | pi (use Times New Roman) |
| ¦ | ¦ | ¦ | vertical dotted line |
| § | § | § | paragraph |
| ° | ° | ° | degree |
| µ | µ | µ | micro sign |
| ¶ | ¶ | ¶ | paragraph mark |
| … | … | … | ellipses |
| ‾ | ‾ | ‾ | overlining |
| ´ | ´ | ´ | accent mark |
| № | № | number sign | |