Usage
Easy Tune should be used to overclock the CPU and RAM. However, in order to achieve what you want, several conditions must be met. First, your device must have a motherboard from Gigabyte. Secondly, when installing the program, you must have an Internet connection. If there are no problems with these two points, then the software will install on your PC without any problems, and you can start overclocking.
The utility has several operating modes – “Easy” and “Advanced.” In the first option, all settings are adjusted automatically, which is useful for inexperienced users, while the second option is suitable for professionals who want to get the most out of their computer.
Functional
Before you get to the most important thing, why you downloaded this software, you can familiarize yourself with the information that EasyTune reads - manufacturer, voltage, frequency, type and other characteristics of components. The overclocking itself, as we have already said, is performed in two clicks. After this, it is very important to control all parameters and monitor their impact on the computer. Gigabyte EasyTune allows you to monitor all this data.
With its help, you can monitor the performance of temperature sensors, voltage sensors and fan speed. The user can control not only the state of the motherboard, but also the central processor, memory, graphics adapter, and also change the frequencies of AGP, PCI and DRAM.
In order not to worry once again about exceeding the permissible norm, it is rational to set limits for each of the values. As soon as the indicators exceed the norm, the utility will signal this, and you will be able to respond to “violations” in a timely manner.
Key Features
- overclocks the central processor;
- Works exclusively with motherboards from Gigabyte;
- monitors memory, motherboard, and CPU indicators;
- does not require the use of BIOS, however, it requests access to the network;
- offers several modes for users of different experience levels.
Program interface:
English
Platform:XP/7/Vista
EasyTune
- one of the most interesting and practical utilities, intended for use by overlockers, especially those who decided, as they say, to “conjure” overclocking motherboards manufactured by Gigabyte. Although, I think, the program may be useful for less advanced users in terms of learning the basics of overclocking.
Download
The download of the installer will begin after you click on the button provided.
| Version: | B19.1021.1 |
| Developer: | GIGABYTE |
| Release year: | 2020 |
| Name: | GIGABYTE APP Center |
| Platform: | Microsoft Windows XP, Vista, 7, 8.1, 10 |
| Language: | Russian English |
| License: | For free |
| Archive password: | bestsoft.club |
Along with this, look: ASIO driver for Windows 10 64 Bit
Basic features of EasyTune
First of all, let's say right away that the application has clear restrictions on all characteristics of motherboards and will not allow overclocking, which can lead to complete inoperability of the equipment. So, in this regard, you don't have to worry. It’s just that when you specify a parameter that goes beyond the permissible value, the program will immediately display a message about the inapplicability of such actions and will not set the specified parameter to execution.
If we talk about the characteristics that can be changed, then the choice is quite wide. For example, you can delve into the AGP, PCI and DRAM frequency settings, experiment with the multiplier or system bus. The most interesting thing is that the application has its own module, similar to the CPU-Z program, which provides complete characteristics for all parameters, including voltage on individual elements, temperature, fan speed and much more. Here, as mentioned above, there is also a module for setting threshold values, which does not allow the use of parameters above or below critical ones.
⇡#Overclocking and stability
The table below shows a list of all components that were used during testing of the GIGABYTE B450 AORUS PRO. In particular, different sets of RAM and processors were used.
| Test bench configuration | |
| CPU | AMD Ryzen 7 1700, 3.0 (3.7) GHz |
| AMD Ryzen 5 2600X, 3.6 (4.2) GHz | |
| Motherboard | GIGABYTE B450 AORUS PRO (BIOS F2) |
| RAM | Corsair Vengeance LPX CMK16GX4M2D3200C16, DDR4-3200, 2 × 8 GB |
| Crucial BLT2C8G4D30BET4K, DDR4-3000, 2 × 8 GB | |
| Storage device | Samsung 850 PRO |
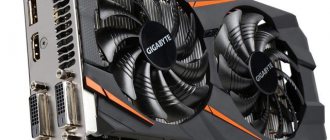
| Video card | NVIDIA GeForce GTX 1080, 8 GB GDDR5X |
| power unit | Corsair HX850i, 850 W |
| CPU cooler | Noctua NH-D15 |
| NZXT Kraken X62 | |
| Frame | Open test bench |
| Monitor | Acer S277HK, 27″, Ultra HD |
| operating system | Windows 10 Pro x64 14393 |
| Software for video cards | |
| NVIDIA | GeForce Game Ready Driver 398.82 |
| Additional software | |
| Removing drivers | Display Driver Uninstaller 17.0.6.1 |
| FPS measurement | Fraps 3.5.99 |
| FRAFS Bench Viewer | |
| Action! 2.3.0 | |
| Overclocking and monitoring | GPU-Z 1.19.0 |
| MSI Afterburner 4.3.0 | |
| Optional equipment | |
| Thermal imager | Fluke Ti400 |
| Sound level meter | Mastech MS6708 |
| Wattmeter | watts up? PRO |
To more clearly demonstrate the positive effect of overclocking the central processor and RAM, the following benchmarks and games were launched on the test bench:
- 3DMark Professional Edition 2.2.3509. Time Spy test, DirectX 12.
- "The Witcher 3: Wild Hunt." Full HD resolution, maximum quality, HBAO+, AA, NVIDIA HairWorks off.
- CINEBENCH R15. Measuring the performance of photorealistic 3D rendering in the CINEMA 4D animation package, CPU test.
- x265 HD Benchmark. Testing the speed of video transcoding into the promising H.265/HEVC format.
- Blender 2.79. Determining the final rendering speed in one of the popular free 3D graphics packages. The duration of building the final model from Blender Cycles Benchmark rev4 is measured.
| Overclocking the Ryzen 7 1700 processor |
In our review of the Ryzen 5 2600X processor, we were convinced that there is no particular point in overclocking this chip. With proper cooling in the same Prime95 program, the frequency of all six cores is kept at around 3.95 GHz, and this is true. At the same time, the Ryzen 5 2600X behaves stably at 4.15 GHz - the proof is presented in the screenshot above. Any further attempts to increase the frequency of the AMD six-core processor led to unstable operation in the Prime95 program. The maximum power consumption of the entire system has increased from 176 to 188 W.
With the Ryzen 7 1700, which is capable of running stably at 3.95 GHz when all eight cores are loaded, a more interesting situation has developed. As I already said, the maximum Vcore voltage can be increased relative to the nominal value by only 0.204 V. Testing has shown that for my 8-core instance, such an increase in volts is not enough - the test bench with the test Ryzen 7 1700 could not work stably in Prime95 even at a frequency of 3 .95 GHz, nor at 3.9 GHz. The 3.8 GHz indicator was completely stable for all eight CPU cores. The maximum power consumption of the entire system has increased from 124 to 212 W.
Based on the results obtained, I draw two conclusions. Firstly, the GIGABYTE B450 AORUS PRO is not suitable for serious overclocking of Ryzen chips - the board is equipped with a scant set of settings and voltages in the MIT menu. Secondly, processors that simply do not need overclocking will look optimal with the GIGABYTE B450 AORUS PRO. In this case we are talking about the Ryzen 5 2600X and Ryzen 7 2700X models. The heroine of the review has everything in order with the element base - the board can ensure the stability of these chips for a long time without any problems.
It’s nice that both sets of high-frequency RAM work with the GIGABYTE B450 AORUS PRO. Corsair modules are based on Samsung chips - they were additionally overclocked to an effective frequency of 3333 MHz. The Crucial kit is based on Micron chips - it did not lend itself to additional overclocking.
How to use Gigabyte EasyTune?
One of the features of the Gigabyte EasyTune program is its simple and intuitive user interface. The main window contains tabs that reflect all the functionality of the application - all settings are made in them, the user no longer needs to go anywhere.
Smart Quick Boost
This tab allows you to quickly configure key parameters of the system and PC computing components. The user only needs to select one of the 6 operating modes offered by the program, and it will be immediately applied without the need to restart the PC. For example:
- When you turn on the “Energy Saving” mode, the system and computer go into maximum energy saving mode, and the machine’s performance decreases.
- If you use the “Extreme” mode, you can get the maximum possible increase in computer performance.
Advanced CPU OS
From this tab you can manually configure various parameters of the central processor:
- Frequency (clock frequency). Using sliders, the user can increase or, conversely, decrease the clock frequency of each individual processor core, depending on whether the user requires high performance or energy saving.
- Voltage. Also, using the sliders, you can easily increase or decrease the supplied voltage to various components of the central processor, and also, conversely, set voltage limits to protect them: individual cores, built-in memory components, interfaces, buses, and others.
- Graphic. This parameter is responsible for adjusting the operating frequency of the graphics core built into the CPU. Only relevant for Gigabyte motherboards with an integrated video card.
Advanced DDR OC
This tab contains settings for the main storage devices (RAM) of the computer:
- Frequency (clock frequency). Adjusting the overall clock frequency of memory devices.
- Memory (memory). Here are settings for a wide range of RAM operating parameters, including the so-called. timings.
3D Power
In some models of Gigabyte motherboards, using the EasyTune utility, you can fine-tune the pulse width modulation (PWM) parameters. If the existing board supports reconfiguring PWM parameters, the program will display the “3D Power” tab, from where you can make the appropriate settings.
Setting up BIOS for Gigabyte motherboards
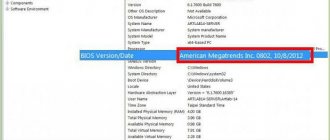
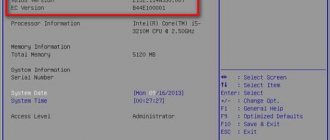
To enter the BIOS of Gigabyte boards, press the Del key when booting the computer. On the main page ( M.I.T. Current Status ) we will see the current BIOS version, system bus frequency multiplier, CPU and RAM frequencies, memory size, temperature and voltage of the central processor .
RAM
At the beginning of 2020, the most common type of RAM for PCs is DDR4, the frequency of which reaches 4266 MHz, which is much higher than DDR3. By default, RAM memory runs at 2133 MHz. Therefore, it is necessary to transfer it to a frequency that meets the specification. The frequency value is hardwired into the XMP profile. To activate it, find the Advanced Memory Settings , then Extreme Memory Profile (XMP) and set the value to Profile1.
For enthusiasts, memory overclocking is available by changing timings ( Channel A/B Memory Sub Timings ) and voltage ( DRAM Voltage Control ).
Video adapter settings
At the next stage of setup, we focus on the graphics adapter. Peripherals tab will help us with this . If the configuration of the system unit does not require the use of a discrete video card, then we activate the graphics core built into the CPU: Initial Display Output - select IGFX. This adapter uses a certain amount of the computer's total RAM. To change its volume, in the Chipset , click on DVMT Pre-Allocated and stop at the maximum possible value. And in DVMT Total Gfx Mem we make the MAX size active.
If you have an external video card Initial Display Output to PCIe 1 slot (PCIEX16 slot) or PCIe 2 slot (PCIEX4 slot), and the Internal Graphics in the Chipset to Disabled. This is done to reduce the load on the CPU. If you have two monitors, you can use two graphics adapters at once - external and built-in - the choice is up to the user.
Fan control
What is most important – maintaining the lowest possible temperature inside the case or silence? The answer lies in the type of video adapter used. If it generates a lot of heat (from 150 watts), then the hot exhaust air must be removed from the housing as quickly as possible. This is done by coolers located in front, behind and at the top of the system unit. They are connected to the corresponding connectors on the motherboard. But for undemanding tasks, a modern graphics adapter consumes little energy. Therefore, in the large MITPC Health Status in the submenu 1 st System Fan Speed Control , 2 nd System Fan Speed Control and 3 rd System Fan Speed Control, set the Normal parameter, which will automatically change the rotation speed of the blades based on the temperature in the system. You can also activate your own graph of this dependence by selecting Manual. These values are set in the Fan Speed Control for each cooler. If the adapter built into the CPU core is responsible for video graphics, then to reduce noise we use the silent mode – Silent.
In the same section, the CPU Fan Speed Control (CPU_FAN Connector) is responsible for regulating the rotation speed of the processor cooler. The following options are available: Normal (automatic operation depending on the temperature of the CPU cores), Silent (fan runs at reduced speeds), Manual (manual control), Full Speed (maximum possible degree of rotation).
Alarms
The specifications of central processors imply their operation up to 100 ºС. But the lower the temperature inside the CPU, the longer it will work. Therefore, the BIOS suggests setting a threshold value for this parameter, upon reaching which an alarm is triggered. the line CPU/System Temperature Warning in the MITPC Health Status . By default it is set to Disabled. For processors with low heat generation, it is recommended to change it to 70 ºC/158 ºF, and for “hot” ones – 90 ºC/194 ºF. This parameter depends on how effectively the cooler removes heat from the processor cover. This setting is also applicable for case cooling fans.
An alarm will also sound if any of the fans malfunction and are incorrectly connected to the connectors on the system board. To enable this function, in the same section, look for CPU/CPU OPT/System Fan Fail Warning and change it to Enabled. Recently, coolers with a semi-passive operating mode have begun to appear on the market. When the load on the central processor is light, they do not rotate. In this case, it is advisable to leave the default value - Disabled.
Optimizing the performance of peripheral devices
To install the operating system, it is necessary that the computer, when starting, access the disk where the operating system distribution is located. You can set these parameters in BIOS Features by going to Boot Option Priorities , where we select HDD, SSD, USB or DVD as the first boot disk.
The system is now usually installed on a solid state drive, which works best in AHCI mode. You can activate it in the Peripherals - SATA Configuration and its subsection SATA Mode Selection . Here, but in the External SATA , we include external devices with a SATA interface.
Any motherboard has a built-in audio controller. If the user is not satisfied with the sound quality, he adds an external sound card to the PCI or USB port. Then you need to disable the integrated sound in the Chipset – Audio Controller .
The final stage
Confirmation or cancellation of BIOS changes is done in the Save & Exit :
- Save & Exit Setup – saving corrections and exiting;
- Exit Without Saving – exit without making amendments;
- Load Optimized Defaults – loads the optimal default settings that are required after updating the BIOS or clearing CMOS parameters.