Install GIMP
First you need to install the program on your computer. The program is cross-platform and can work not only on Linux, but also on Windows and MacOS. You can find installation packages on the official website or install gimp from the repositories on Linux. To install on Ubuntu, just run the command:
sudo apt install gimp
After installing the program, you can launch it from the main menu of your system.
Advantages and disadvantages
Like any product, Gimp has advantages and disadvantages. The advantages of this program include the following:
- Absolutely 100% free product.
- There are versions for Windows, Linux and OS X.
- Official Russian language in the interface.
- Intuitive and familiar interface for graphic editors.
- Supports a large number of image formats.
- Professional level editing capabilities.
There are also a lot of disadvantages, especially considering that the program is free:
- New versions are rarely released, and there is practically no funding for development.
- Sometimes there may be bugs.
- Sometimes the program may be slow.
Similar articles:
- Resource Hacker for Windows Free and easy-to-use Resource Hacker is designed to view, edit...
- How to use Recuva to recover and permanently delete files Recuva is a program that can be used to recover computer files that have been deleted from…
- Resource Hacker for Windows Free and easy-to-use Resource Hacker is designed to view, edit...
Customize window layout
When you launch the program for the first time, you will notice that it is a little different from most other programs. By default, the interface consists of three windows: the toolbar, the working window, and the layers panel. You can move them and position them the way you need. To get a more familiar look, you can open the Windows and select Single Window Mode :
What is GIMP
GIMP is a free graphics processing program, and once again, free. The project was founded in 1995 by two students, Spencer Kimbell and Peter Mattis, as a thesis project. The first public release took place in 1996, and in 1997 Gimp became part of the GNU project. And then it gets its proud name GNU Image Manipulation Program, which it still bears.
Gimp was initially developed for users of UNIX systems, then it was gradually ported to many other operating systems, including Microsoft Windows and Mac OS X.
Gimp is very easy to install. It installs like most Windows applications. Just download the distribution and install it like a regular program. And as part of UNIX operating systems, this program is enabled by default (for example, Ubuntu, Debian, OpenSUSE, Fedora, Mandriva)
So what's good about GIMP? This program has great functionality for editing and creating images. Here is a brief overview of the main functions and capabilities:
Color correction
The GIMP editor can be used to create digital images from scratch, and it has a wide range of tools for drawing original works. But most likely, you will want to use a photo editing program. You can tweak the colors and optimize them.
Open the image and then use the Colors menu. There are no automated tools like in less powerful editors. Instead, you have access to a huge range of options, such as adjusting color, saturation, contrast, balancing, and so on:
How to Open RAW Photos in GIMP
Most modern cameras allow you to take photos using the RAW image format. You can open these RAW files using Photoshop's built-in Camera Raw program, which is actually a third-party plugin that integrates directly with Photoshop. Likewise, GIMP can integrate with third-party RAW editors like Darktable and RawTherapee so you can easily open and edit RAW file types using GIMP. See how to set up your GIMP to open RAW photos!
Correction of deficiencies
The GIMP healing brush can be very useful for photographers, since editing in Gimp is one of the important aspects of the work. It looks like a piece of Band-Aid on the toolbar and can be used to remove various unwanted objects from an image, such as blemishes, blemishes on faces, pieces of leaves, and anything else that needs to be removed.
You can set the scale to select the size of the area to be corrected. Select the tool, then hold Ctrl and select the area of the image with which you are going to paint. Then left-click on the elements that need to be deleted, they will disappear.
How to work in the Gimp graphics editor
Let's say we need to edit a photo that we downloaded from the Internet. What are we doing? Open the Gimp program on your computer and wait for it to launch. The first launch of the utility lasts 1-4 minutes.
Next, the program will open with a toolbar (Screen 6).
To add a photo to this program and edit it, click the “File” button in it, then “Open”.
In the window that opens, open the “All images” section, select the picture format and select a picture from your computer (Screen 7).
A
It will quickly load into the program. After which you can edit it. For example, you need to add text to it (Screen 8).
Place the mouse cursor over the image of the text symbol “A” in the program panel and click on it. Then click the mouse button anywhere on the photo to write text - for example, Nature. In the text control panel, you can set the text size, for example, to 180 or the font.
To keep the text on the picture, just select another photo editing tool. For example, an eraser, a brush, scissors (if you need to cut out an object in a picture) and others.
After you change the picture, you need to save it to your computer. It's easy to do. Click the “File” button at the top, then “Export as”. Select the format for the picture in the “All Images” section. Then set it to a location on your computer on the left side of the program.
Click the “Export” button and the changed image will be saved in a different form on your computer.
Applying filters
One of the fastest and easiest ways to improve the appearance of an image is to use the many filters that are built into GIMP. In the Filters you will find everything you need, from adding a flash or lens effect, to various blurs and corrections.
You can experiment, if something doesn’t work out, you can always use cancel. It should also be noted that effects can be applied to multiple images.
How to use
Next, in 2 steps, we’ll look at how to download this application for free for a PC or laptop running Windows 10, and we’ll also briefly talk about how to use the program.
Download and Install
The first thing we will do is install GIMP. It is very simple and comes down to a few steps:
- First we download the archive with the application, and then unpack its contents. Run the executable file by double left clicking the mouse.
Also watching: iCloud for PC on Windows 10
- If necessary, you can change the installation language. We leave everything as is and move on.
- An application installation window will open, in which we can proceed to the next step by clicking on the button labeled Install.
- The GIMP installation will begin. We are waiting for it to be finished.
If the program does not open, try running it as an administrator.
Now that you know why GIMP won't launch, let's move on to analyzing the instructions for using the software.
Operating instructions
First, we recommend going to the application settings, and then making all the necessary changes to make the program as convenient to use as possible. The application is completely translated into Russian; moreover, all the options for easy searching are sorted into categories.
When you are done with the settings, you can move on to image processing. Naturally, here you can create a new picture. The image correction process itself boils down to the following:
- Using the import function, we load some image into the program.
- Next, using various tools, we transform the image into the desired form.
- We export the finished result using the main menu.
To ensure that your image is readable on any device, we recommend using the JPG format.
Cancel setting
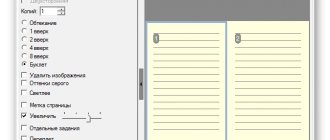
If you do a lot of experimentation with your image, you may notice that you don't have enough undo memory. To solve this problem, you can configure the amount of memory that will be used for undoing actions.
Open the Edit , then Options , here in the Environment section, set the required values for the Minimum number of undo levels and Maximum memory for undo items. Here you can change other program settings. Configure the program so that editing gimp photos is most convenient:
Positioning GIMP [edit | edit code]
For a long time, GIMP was created taking into account the wishes of users, but mainly according to the preferences of the developers and without the involvement of ergonomic experts. There was no holistic vision of the project. To solve the problems that have accumulated as a result, a number of measures have been taken.
In 2005, the GIMP project was registered as a participant in the OpenUsability program. At the Libre Graphics Meeting in March 2006, the first meeting between OpenUsability and the GIMP development team took place, during which the vision for GIMP as a product for end users was defined [42]:
- GIMP is free software;
- GIMP is a high-quality photo retouching application that allows you to create original images;
- GIMP is a high-quality application for creating screen and web graphics;
- GIMP is a platform for scientists and designers to create powerful and advanced graphics processing algorithms;
- GIMP allows you to automate repetitive actions;
- GIMP is easily extendable by simply installing add-ons.
These theses determine the further development of GIMP.
In the fall of 2006, a study was conducted within the framework of the OpenUsability project, the results of which are gradually formalized in the form of recommendations and specifications and are being implemented.
Image Transformation
Another very powerful feature of GIMP is image transformation. You will find all possible transformations in the Tools -> Transform , and some of them will be available in the left panel. You can change the perspective, rotate the image in different directions, rotate it, bend it and much more.
What features does Gimp have?
So, we figured out how to use the Gimp editor. Let's look at the list of the main features of this graphic editor. There are not so few of them for a free program, and there is everything that most specialists need.
- You can perform basic operations with the image - edit size, color, contrast, clarity, and perform rotations.
- Combine multiple images or overlay text.
- Convert images to different formats. All popular formats are supported.
- Pencil tools, brushes, and stamps allow you to create full-fledged drawings and logos.
- Working with layers, each of which can be edited and moved individually and independently.
- You can select different areas of any shape and work with them individually from the entire image.
- Can work in conjunction with drawing tablets and scanners.
- There are a large number of built-in filters.
- All actions performed in the editor are saved in history, and you can roll back changes if necessary.
8. Layers in GIMP
If you have already used other complex editors, then you have probably already encountered layers. This is one of the most important things in GIMP. This is a very important point in the question of how to use Gimp 2. Work with the image is performed only on a specific layer. There can be several such layers and each of them contains its own part of the picture, and when combined together they create the whole image.
To change a specific layer, you must first make it active; if the layer is not active, you will not be able to change anything on it. You can switch active layers in the right layer panel or using the PageUP and PageDown . The layer can be made invisible or deleted. For example, you can add new photo elements on new layers, so that you can easily remove them later if you change your mind.
Photo processing
Numerous photographs can be easily modified in GIMP. Perspective distortion caused by optical properties can be easily corrected with conversion tools.
You can easily straighten photos and create vignettes using powerful filters with a simple interface. The channel mixer will give you the opportunity to get the image of the desired quality.
The photo editor has a huge number of color tools, with their help you can adjust the gamma of the photo and its color depth.
If, on the contrary, you want to remove color from a photo, GIMP will help here too. GIMP's ability to work with color in photographs is limited only by the user's imagination.
You can see other examples of photo processing in a special section of our gallery.
conclusions
In this article, we looked at the use of Gimp, as well as the main features of working with the program. How much serious work you can do in Gimp depends only on you. The program has all the necessary tools. Do you use Gimp? Or do you prefer another graphics editor? Write in the comments!
Related posts:
- Installing Gimp on Ubuntu
July 9, 2015
- How to Use Blender for Beginners
January 28, 2017
- How to use Inkscape
March 21, 2017
- How to use Krita
April 2, 2017
GIMP graphics editor 2.10.20.1
GIMP
is an editor that allows you to work with layers, apply various effects, use gradient filters, successfully use custom templates and much, much more. If you need something else to perform complex professional work, you can significantly expand the capabilities of the program using more than a hundred plugins. It allows you to work simultaneously with several open images, is also endowed with a basically unlimited number of “forward” and “backward”, supports transparency (alpha channels), and can be expanded with external applications and Script-Fu. Ability to use Python scripting, Scheme, Perl and other skills including animation.
System requirements:
Windows XP - Windows 10 (x86 / x64)
Torrent GIMP graphic editor 2.10.20.1 in detail:
GIMP has a fairly good set of color correction tools:
• curves; • levels; • channel mixer; • posterization; • hue-saturation; • color balance; • brightness-contrast; • discoloration.
Using filters, tools, masks and layers with different types of overlay (22 in total), you can:
• level the littered horizon; • remove distortions introduced by optics; • adjust perspective; • perform object cloning taking into account perspective; • crop photographs; • remove defects such as dust on the matrix (stamp, healing brush); • simulate the use of various color filters; • “pull out” lost detail in the shadows; • much more.
Drawing:
• several drawing tools; • freely scalable brushes; • support for graphics tablets;
Additional options for image correction throughout the work are implemented in the form of screen filters.
• imitation of different types of color blindness (protanopia, deuteronopia, tritanopia); • gamma correction; • contrast correction; • color management.
Customizable interface:
• floating palettes are easy to group and regroup; • it is possible to completely reconfigure keyboard shortcuts, mouse actions, as well as input devices like the Griffin Powermate; • any menu can be turned into a freely movable window.
A quick overview of GIMP's features and functions:
·Full set of tools including brushes, pencil, sprayer, stamp, etc. ·Reasonable use of memory, in which the image size is limited only by the free space on the hard drive. ·Subpixel sampling for all drawing tools, giving high-quality anti-aliasing. ·Full alpha channel support for working with transparency. ·Layers and channels. ·PostScript support ·Python automation ·Procedural database for calling internal GIMP functions from external applications such as "Script-Fu" ·Advanced scripting capabilities. ·Multiple undo and redo actions, limited only by free space on your hard drive. ·Transform tools including rotate, scale, warp and flip. ·Supported file formats include GIF, JPEG, PNG, XPM, TIFF, TGA, MPEG, PS, PDF, PCX, BMP and many more. · Selection tools including rectangular, elliptical and freehand selections, magic wand, Bezier curves and smart selection · Add-ons that make it easy to add support for new formats and filters.
Russian-language help:
The kit includes Russian-language local help (gimp-help-2.10.0-ru-setup.exe).
Installation and use.
After installation, go to GIMP -> Edit (Options) -> Help System -> Use local copy.
What's new >>>
Screenshots of GIMP graphic editor 2.10.20.1 torrent:
Download GIMP graphic editor 2.10.20.1 via torrent:
Where can I download GIMP?
You only need to download software online from official sites, so we will download GIMP from the official site. To do this, go to the download page, here it is - https://www.gimp.org/downloads/
Then we select the download method using a browser or via torrent, in this case I choose the method using a browser, so I click on the following link.
After which the download will begin, and eventually the file gimp-2.8.22-setup.exe , approximately 85 megabytes in size.
GIMP 2.10 Tutorial: Printable Business Card Design
Whether you're an entrepreneur or a graphic designer, knowing how to create your own business cards is essential to success. This GIMP 2.10 tutorial for beginners will show you how to create an attractive business card, as well as get it ready for printing. Although this is a fairly simple tutorial aimed at beginners, the end result is super professional and is sure to turn into another networking event.