Note : It is important to understand that after performing a disk cleanup using this wizard, it will be impossible to uninstall the updates that replaced the removed updates.
Windows 7 Service Pack 1
You can download Windows 7 Service Pack 1 from the Microsoft website (Windows 7 SP 1 download page)
You can also download Windows 7 Service Pack 1 using the direct link:
1) For 32-bit Windows 7, you can download SP1 here (515 MB)
2) For 64-bit Windows 7, you can download SP1 here (866 MB)
3) It is possible to download a universal (x86, x64) and ISO image of Service Pack 1 for Windows 7 (1.9 GB)
It is worth noting that the Windows 7 Service Pack 1 distribution, which can be downloaded from the links provided, contains 36 languages, including Russian and English.
Cleaning the disk from temporary files SP1
And now the best part: we clean the HDD from temporary files that are created during the OS update process. These files can take up to 0.5 GB of space.
Why are these files needed? They are intended for the event that you want to remove SP1 from the system. But, most likely, you are not going to do this, and therefore, we do not need these files - that’s why we are getting rid of them.
Note : If you follow the steps below, you will not be able to remove SP1. otherwise than by reinstalling the system. It is also not recommended to perform the following steps if you have a beta version of SP1 or Windows 7 installed
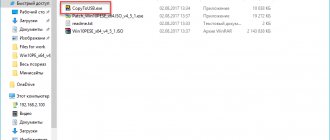
- Open the command line as Administrator – Start -> All Programs -> Accessories -> Command Prompt or Win+R -> cmd.exe -> Enter
Enter the command:
dism /online /cleanup-image /spsuperseded /hidesp and press Enter:
The file deletion process will begin. Wait for it to finish:
How to clear space on drive C by clearing the winsxs folder? Windows 7
Hello reader! Today we’ll talk a little about cleaning up the C drive (system drive) in the Windows 7 operating system. Few people know about the existence of the winsxs
and what kind of folder this is in general.
The winsxs folder is located in the path C:Windowswinsxs. Old backup copies of updates that are downloaded and installed through Windows Update
(in this case, Windows Update 7), and some important system files are stored in this folder.
When you update your Windows 7, over time a lot of “garbage” accumulates in this folder, which can be safely deleted. You should not go into this folder yourself and try to empty it manually
! If you clean it manually, you may disrupt the system's performance.
To automatically clean up backup copies of updates from this folder (and some other garbage), there is a small utility built into the Windows 7 operating system itself, it’s called Disk Cleanup
.
But the fact is that initially this utility could not clean up backup copies of updates. The situation changed in October 2013, when Microsoft released a small update KB2852386
, which expands the capabilities of the Disk Cleanup utility.
So, in order to clear the winsxs folder of garbage (and at the same time clean out other garbage), you must have the KB2852386 update installed. If you don’t know whether you have it installed, then try downloading it manually and installing it. Here are direct links to it: For 32-bit systems
– https://download.microsoft.com/download/8/E/1/8E19C5F1-6331-4982-87C2-B714DF8A083A/Windows6.1-KB2852386-x86.msu
Attention! Your Windows 7 must be with SP1 (service pack), otherwise this update will not install.
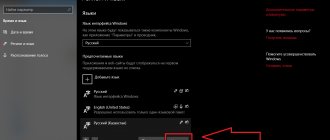
After making sure that you have already installed the update, go to “My Computer” through the desktop, then right-click on the system drive (in most cases this is drive C, but it happens that the system is installed on another drive) and select Properties at the bottom
. When you get to the “Properties” of the disk, in the lower right corner go to the “Disk Cleanup” menu. See screenshot below. Another way to get to “Disk Cleanup” is to simply click on the Start button and type the word “cleanup” in the search; in the search results you will immediately see this utility, click on it.
| Disk Cleanup in Disk Properties. |
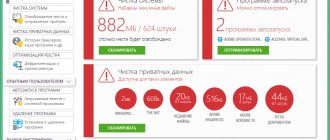
Disk analysis will start, which will last about 10-15 seconds, on slow computers - maybe a little longer. During this analysis, the utility scans the disk and checks which files can be cleaned on the disk. A window will open in front of you in which you will be asked to check the boxes for what exactly you want to clear. Uncheck all the boxes and check the “Clean up Windows updates” box. See screenshot. You can also check the box “Temporary files” and, for example, “Sketches”. I don’t recommend touching the remaining items. Click OK and wait for the cleaning results. SSD Kingston UV300
Depending on how much garbage you have accumulated due to frequent Windows updates, you can clean from 100 MB to 5 GB (or even more). But, if you have Windows Update disabled altogether, or you have installed very few updates, then the “Clean Windows Updates” item may not appear at all. After cleaning is completed, restart your computer and see how much space has been cleared on the system disk.
That's all, I hope that the article is useful to you