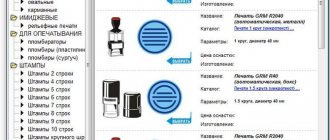
In the CloudShop store program, you can create price tag templates and print online price tags of any size and content on a regular printer or label printer. This can help you Price tag designer. This is a free program for creating price tags that allows you to visually create price tags for your products for subsequent printing on a price tag printer or on a regular printer. Our program cannot be downloaded for free; it does not require downloading and installation on your computer. All actions can be done in the browser using the free CloudShop program plan.
What are the requirements for price tags?
Indeed, before making them, the seller needs to know what legal requirements are established for price tags - so that they do not have to redo them (even if the tools for creating tags are free - there are printing costs, there are labor costs for responsible employees).
The main regulatory act establishing such requirements is Russian Government Decree No. 55 dated January 19, 1998 (LINK). It says there that:
- The price tag must contain the following information:
- Name of product;
- type of product (if there are separate varieties);
- weight or capacity of the product (if it relates to food products);
- composition (similarly for food products);
- name of the country of origin.
The list of necessary data about the product depends on its type and packaging method. So, if the product is presented in printed materials, then it is necessary to reflect on its price tag the date the price was set. Requirements for individual food and non-food products may also vary. In particular, if a non-food product is represented by any type of household appliance, then it is necessary, along with data on the price itself (and other generally obligatory ones), to provide its key consumer characteristics (for example, the diagonal of a TV monitor, the main indicators for brightness, contrast, recommended resolution).
The price tag can be made manually, printed on a printer, presented in electronic form or produced in another way - the legislator does not establish any restrictions here. But there are many of these restrictions in other aspects of the use of price tags. So, the store should keep in mind that:
- Price tags must be present under each product.
Exceptions are cases when the product is sold within the framework of mobile commerce, on the market. Price tags here are replaced by price lists (which must be presented upon the buyer’s first request).
- Price tags should be “uniform”.
The legislator does not specify what is meant by “uniformity” in this case. Law enforcement practice shows that inspection authorities and courts believe that price tags with the same will be “uniform”:
- size;
- color;
- creation method (manually, on a computer);
- form.
That is, it is assumed that the price tags will differ only in content. It turns out that the common practice among Russian stores, in which, relatively speaking, “regular” white price tags and “promotional” price tags are set in yellow or red, reflects the incorrect approach of a business entity to the interpretation of legal norms. But judging by how widespread this practice is, courts and inspection authorities may be tolerant of such schemes.
In any case, before starting to print price tags of different types (or having other essentially non-critical non-compliance with the requirements of the law), it makes sense for the store to request additional advice on this issue from the local office of Rospotrebnadzor. If this authority allows “atypical” price tags (and, as an option, the need for their use is explained), then during subsequent inspections this permission can be referred to.
- Do not include more than one price in the price tag.
Thus, the widespread scheme, in which the current price is shown in large font on the price tag, and the previous price in smaller font (often crossed out), is also formally a violation of the law (and, again, the inspection authorities will most likely turn a blind eye to this - but the seller you need to be absolutely sure of this).
The price tag must correspond to the actual characteristics of the product, the amount on the receipt must correspond to the price tag. Automating the creation of price tags will help minimize the risks of such inconsistencies (as well as ensure better compliance with the requirements of Resolution No. 55). They can be formed:
- using free online services;
- using special options available to users of a number of popular commodity accounting programs;
- using special programs that are installed on the computer.
Let's take a closer look at examples of popular solutions for creating price tags related to these categories.
Free program for creating and printing price tags “Tochka. Documentation. Price tags"
Program “Point. Documentation. Price tags” allows you to create unique layouts that include design elements. Before you begin the process of creating price tags, you need to create a list of goods. When the product catalog is created, you need to indicate the name of the outlet. Open the [Texts] tab and select the [Store name] line.
To work with a standard template, you need to link it to a product item or product group and then create it, or open the template from a document. It is more convenient to link a template to a group, then if edited, the data will change immediately for each product item.
In order to create a template immediately for a product group, you must:
- open the list of product groups;
- select the desired group and specify [Add template];
- go to the [Designer] section and adjust the size and appearance of the template;
- open product properties and edit the base cost;
- indicate the properties of the product;
- indicate the country and organization of the manufacturer;
To correct the resulting layout, use the tools located on the right side.
Printing price tags:
- a product catalog is created using the [Create] button;
- open the list of product groups, select [Other products];
- to download a standard template, click [Load template from file]→[Template other products 59x59];
- open [List of Products] and select a product item, then [Create Product];
- fill out the description and click [Save];
- The added item will appear at the very bottom of the product catalog. Select it and select [Preview]→[Print]→[Add] from the tools.
You can download this program for free and without viruses from the official website.
How and where you can print price tags online for free
Let's start with sites where anyone can create and print online price tags for retail goods for free. The most popular resources where this functionality is implemented include:
- Online Price Tags service (LINK).
There, using more than 20 ready-made price tag templates and a special form, a store representative can print price tags online for free with editing. It is possible even without registration (but registration is required to save the entered data and reuse it).
The service user can create price tags:
- both with and without a barcode;
- color and black and white.
You can also upload an Excel file with current registers of goods and prices - the system will recognize them and automatically fill out forms for subsequent creation of price tags. You should use this and other functions in accordance with the video instructions - LINK.
If necessary, you can use a special price tag editor - allowing the seller to create their own document templates - LINK.
In addition, price tags can be separately configured:
- price format (for example, in numbers without delimiters or with delimiters, with kopecks or without kopecks);
- printing product names in capital letters;
- background color;
- intervals between individual price tags that are printed (horizontal, vertical), margins - distances between the outer price tags and the edges of the paper;
- the size of the paper on which the price tag will be printed (for example, A4 - if on a regular printer, or a size optimized for a thermal printer);
- paper orientation;
- Separate printing of color and black and white price tags.
- Service on Tamali.net (LINK).
A very simple and, at the same time, sufficiently functional service that allows sellers to create price tags that comply with legal requirements. Like the previous service, it allows users, subject to registration, to save the entered data on price tags and use them in the future.
The service user can set the optimal size of the price tag, add a barcode to the price tag (or not add it).
- Service on FORMZ.RU (LINK).
Perhaps the simplest (and perhaps for this reason preferred by many sellers) online tool for creating and printing price tags.
Allows you to reflect the basic (and, at the same time, fully ensure the “legality” of price tags) data for “tags” and send ready documents for printing (or save for later use - provided, as in the case of previous services, the seller has previously registered with system).
Review of programs that allow you to print price tags online
Nowadays, there is a variety of software that provides the opportunity to systematize the process of manufacturing and issuing price tags. Developers make a large number of such programs available to the public free of charge or provide the opportunity to test use (with limited functionality or time) of paid products. Also becoming quite popular are online programs for generating price tags that do not require downloading and installation on a personal computer. Below we will talk about the most popular resources of this kind.
Service-Online.su
A very popular program is “Service-Online.su”. It is a cloud storage in which you can create a variety of forms. In order to use this application, you need to go through a simple registration→enter the main menu→select [online forms]→open the [price tags] tab. After this, you will have access to standard templates designed for creating various price tags. They can be with or without a barcode, color or black and white. There is also a function to save selected settings. The program is quite simple and involves intuitive operation, without undergoing any special training. To create a price tag that suits you, you need to perform the following steps. From the proposed options, select a template of the desired type and size. In the window that appears, enter the required parameters and select [Print]. To save the finished sample in the program, click the [Save] button. To set additional parameters, open [Advanced price label printing settings] and specify:
- appearance of the cost of the product (show the designation of kopecks or not);
- label color;
- spacing between characters;
- font size and style;
- presence of fields;
- limiting the printing of items from the product catalog (issue of all price tags at once or only promotional items).
The program also has the ability to create a template according to specified settings; to do this, go to the main page and open the [Online Price Lists] tab, then select [Create your own template]→[Price Tag Editor].
You can set the following parameters yourself:
- size of price tags;
- text parameters (font, italics, size, etc.).
If you have an electronic product catalog, you can create a new value without changing the names. To do this, you need to transfer the list into an Excel spreadsheet and make sure that each product has a unique number or barcode.
Business.Ru
Another program is “Business.Ru” - it is also a cloud service designed to optimize business processes. But in addition to the standard set of tools for such programs and the ability to issue price tags online, there is an automated recalculation of cost taking into account trade margins or promotional discounts. It is also possible to indicate several prices on one price tag, designed for different categories of customers. For example, one simple price, and another for discount card holders, or a designation of price changes when purchasing several products. The program provides for adding items one at a time, or at once as a product group. The price list indicating prices can be downloaded in PDF and Excel format.
You can create a price tag in any of two ways:
- Open [Products and Services], then select [Print]. Go to [Print price tags and labels], then fill in the required data (organization name, sample price, product type, etc.).
- Open the [Purchases] tab, go to [Receipts]. Then open the required item and click on [Actions]→[Print price tags].
My Warehouse
The My Warehouse program involves the use of ready-made templates and tools designed to help you create your own template, on which you can even place your organization’s logo.
You can use the application directly through a browser, but it is more convenient through an application downloaded to a personal computer.
To print a price tag using a standard layout, you must select the product card, and then click [Print]→[Price Tag]→[Print].
To create your own price tag layout, or adjust an existing one, you need to open the product card and select [Print], go to the [Customize] section, and select [Add template] in the window that appears.
After this, you need to set the necessary parameters:
- Price tag size (A4, standard, or set the numeric parameters of the tape);
- The text part of the price tag (name, description, price);
- Additional information (image of the organization’s logo, quality standard, etc.) and others.
In “My Warehouse” it is possible to download standard or user-created layouts to a personal computer.
There are also applications designed to be downloaded and installed directly on your computer. Most often, they have wider functionality and ease of use. It is better to download such software from official websites, especially since most of them are absolutely free.
Printing price tags in the Business Pack program
The Business Pack program is designed for creating different types of documents, for example:
- accounting documentation;
- product price lists;
- price tags;
- trade agreements and others.
This program is completely free.
To generate price tags, you need to register, select [Open] → [Price tags] in the main menu. After this, a dialog box will appear in which you must enter the following information:
- in the [Organization] line, enter the name of your LLC;
- indicate the number of creation of the price tag;
- select a currency symbol (rubles, dollars, etc.);
- Fill out the product table (name, unit of measurement, cost, grade).
- You can also fill out the table automatically by transferring data from the supplier agreement, delivery note or other pricing document.
- You can also fill out the product table manually; to do this, hover over the desired line in the catalog and right-click on [Add].
You can create a price tag using an existing price list as a basis. Select [Fill in price list], a price list is created for each product.
You can generate a price tag using a ready-made layout or by specifying your own settings. To create your own layout, select →[View] and select the [Edit page] line.
What special programs are there for printing price tags?
The most popular installed applications for printing price tags include:
- Dot. Documentation. Price tags (LINK).
This program is positioned as a tool for creating selling price tags - which are designed to stimulate demand for those goods to which price tags formed with its help are attached.
The program is available in two versions - free and paid. The second differs from the first in that it gives the user the opportunity to use group templates, ready-made price tags, access video tutorials, and directly contact the developer’s representatives for advice.
To generate price tags using the Tochka program. Documentation. Price tags (TDC) needed:
a) Open the program, click on the “Create” button on the Toolbar to create a new product catalog.
b) Set up a new directory - initially empty, so that it is automatically written to disk.
To do this you need:
- select “Service”, then “Settings”;
- check the boxes next to each option;
- click on “Save”.
Next, you should save the directory itself to disk. To do this, click on the “Save” button in the Toolbar, then enter the name of the directory and burn it to disk. For any subsequent changes to the data in the directory, it will be saved to disk automatically.
c) Upload the price tag template to the catalog.
Necessary:
- select the “List of product groups” tab;
- select “Other products”;
- click on the “Load template from file” button;
- select one of the available templates, then click on “Open”.
d) Create a list of goods.
For these purposes it is necessary:
- select the “Product List” tab;
- click on the “Create product” button;
- fill out the product card, click “Save”.
A price tag will appear on the screen - generated according to the template that was downloaded earlier. A list of price tags ready for printing will appear in the lower right part of the window. Each of them can be printed using the corresponding button (as an option, preview it). Also, each line can be duplicated the required number of times - which will correspond to the number of price tags on a sheet of paper (you can also visually see how they will be located).
If necessary, using the program you can use combinations:
- “one product - one template”;
- “one product - several templates”;
- “several products - one template”;
- “several products - several templates.”
One should not, of course, forget about the desirability of uniform price tags.
Video - instructions for printing price tags in the TDC program:
- Price tag 1.5 (LINK).
Information about the products for which price tags will be generated is loaded into the program:
- using Excel files;
- using invoices.
Sheets with price tags are generated automatically by the program (one price tag for each item). Using the built-in editor, the user can create price tags without using a table - that is, manually.
The program has its own template designer, which allows you to create a price tag that is unique in terms of style - either entirely independently or based on the available source files.
The peculiarity of the Price Tag 1.5 program is that its user does not have to prepare a price tag for printing for each individual product. You can create a common price tag type for several items.
As soon as the price tag data for the selected products is entered - automatically or manually (the necessary information will be reflected in the table - which will be the main part of the program window), you can immediately print the price tags (if it is possible to preview them). The user can also save the generated sheets with price tags into separate files on the computer.
- PriceLabel (formerly PricePrint) - LINK.
Like the first program on the list, it is available in paid and free editions. The second, publicly available, works only for 30 days, and, in general, has no restrictions on functionality.
As part of the practical printing of price tags using the program, the following typical actions are assumed (available, as a rule, in both the free and paid versions of the program):
a) Selecting a product - for which price tags will be printed.
If they are not there, download them first from the catalog.
b) Selecting the desired template.
Using a special editor, not only custom templates can be created, but also existing ones can be modified.
c) Making print settings (for example, during this stage you can reflect the desired size of sheets, margins, offsets).
A separate sheet can be configured for each document, if necessary.
The program allows you to maintain a catalog of goods - in which you can quickly find the desired item to create a price tag (including subject to preliminary price adjustment using the program itself).
The developers of the PriceLabel program have developed a detailed user manual - which reveals a large number of nuances of using the solution in question - LINK.
How to choose the sizes of price tags for printing
One of the most important characteristics of the price tag is size. Any tag can easily be called the business card of a product. When choosing a product item, the buyer will first of all be interested in the price. If you have to spend more than 10-15 seconds searching for a label with its designation, or the inscriptions are too small and difficult to make out the first time, the client may lose the desire to make a purchase.
Before you start designing the template, decide on the dimensions of the future label. Consider the following points:
- Dimensions of the product item. Obviously, small labels will get lost on large-sized products. The miniature label is only suitable for small items.
- Information content. If the text is relatively large, try to optimize the placement of lines on the surface of the label so that they correspond to its size and are easy to read.
- Font size. Readability of the text is important to the buyer. Do not force the client to peer at the printed symbols on the label in an attempt to make out their meaning. Label data should be striking, bright, clear, understandable and easy to visually understand.
- If you are going to glue price tags using a gun, when printing, choose sizes specifically designed for your device. The optimal length and width of the tag can usually be found in the instruction manual for your specific gun model.
At the design stage, also take into account the above factors.
- Self-adhesive labels Multi Label 105x74mm
785 ₽
785
https://online-kassa.ru/kupit/samokleyushhiesya-etiketki-multi-label-105h74mm/
OrderMore detailsIn stock
- Thermal transfer label 58x60x450
96 ₽
119
https://online-kassa.ru/kupit/termotransfernaya-etiketka-58x60x450/
OrderMore detailsIn stock
- Thermal label 58x40
1 review
82 ₽
82
https://online-kassa.ru/kupit/termoetiketka-58h40/
OrderMore detailsIn stock
Conventionally, there are five popular price tag formats. The first four depend on the location of the product, the last - the fifth - including the printing method. So, let's start with the assortment display.
Display behind display cases or on distant shelves. In this case, large size tags will be required, for example, 80x60 mm. The inscriptions on such labels can be easily read from a distance of two meters.
Note. If you do not use stickers, when designing the price tag, make millimeter indents on each side. Such a label can be inserted into the price tag holder. Increase the font size of the product item name so that it is easy to read from afar.
Dense placement of goods or narrow food containers (bottles, cans, oblong vertical cardboard bags). In this situation, medium-sized labels, for example, 60x65 mm, are suitable. The client will be able to read the information from one and a half to two meters, but at the same time, the format of such price tags will allow you to place a larger number of product items on the shelf. Labels can be secured with tape, laid out or displayed next to the goods. When developing a template, the inscription containing the product name can also be enlarged. Information will be equally readable from labels regardless of the location of the goods to which they are attached - both from the upper shelves and from the lower ones.
Placing products on shelves or in self-service stores. In this case, price tags are usually attached to the ends of the shelves. The optimal size is medium, for example, 40x60m. If you are not going to use stickers, when designing the layout, make millimeter indentations on each side - then you can insert the labels into the shelf price tag holders. Also increase the price size for better data readability.
Selling products of miniature sizes or placing products at the checkout. Choose a small price tag size - for example, 27x30 mm.
Now let's look at the last, fifth option. Small price tags measuring 38x21 mm can be printed using a regular office printer on special sheets for adhesive labels in A4 format. They are very suitable for labeling product items without a bar code or home-made products , for example, baked goods: desserts, cookies, cakes, etc. Such labels are also used for weighted goods. They are also indispensable for dense display of products, if there is not enough space for separate placement of price tags.
1. Ask our specialist a question at the end of the article. 2. Get detailed advice and a full description of the nuances! 3. Or find a ready-made answer in the comments of our readers.
Labels: macro for creating and printing labels in Excel
VBA macro developer Igor Vakhnenko has created a simple and convenient Excel add-in. It is intended for processing tabular information for the purpose of designing and printing labels, price tags, tags, “receipts”, shortcuts and other stickers based on them.
What can Labels do? A functional set of macro options for creating and printing labels and price tags based on tabular information from Excel includes:
- the ability to print product price tags by borrowing information from the price list;
- designing labels for the positions marked in the table;
- preparation of receipts for payment of housing and communal services.
To perform any of the above tasks, you only need to press one button.
With the Labels software add-on, you can:
- set the required number of stickers for one printed sheet;
- prepare for printing both simple and technically complex templates, including pictures, inscriptions, symbols, text comments;
- fill out the lines of labels and receipts using the entire set of options of the Excel software package;
- apply formulas, use the conditional formatting tool;
- select the required table records - for example, you can generate only price tags for products with a specific cost;
- substitute into layouts both the positions of the current row and selected sheet cells - any predefined fields, for example, the current date and others.
The macro developer has added options for flexible debugging of the template, editing and modifying the page layout, and filling rows with tabular information.
A video teaching how to use Labels can be found here.
